
Popular categories
Looking for a yarn?








































Comments / Questions (20)
 Me wrote:
I do not know how to read diagrams. I am struggling to understand the beginning of the pattern. Can someone help me in more simple terms?
21.10.2026 - 04:49DROPS Design answered:
Hi Me, If you click on "Lessons" under the title at the top of the page, we have a video showing you how to read our diagrams. Regards, Drops Team
21.10.2026 - 05:56
 Sara wrote:
Jag får inte minskningen i armhålan att gå ihop. Enligt mönstret ska jag i storlek M minska av 3 maskor för ärmhål vid markör när arbetet mäter 44 cm, men instruktionen i ”MINSKNINGSTIPS-2 (gäller mitt under ärmarna)” avmaskar endast 2 maskor. Är det fel i mönstret?
17.10.2026 - 10:40DROPS Design answered:
Hei Sara. Når du feller av 3 masker til ärmhål strikker du etter forklaringen under FRAM- OCH BAKSTYCKE, men instruktionen i ”MINSKNINGSTIPS-2 (gäller mitt under ärmarna, altså når du strikker under forklaringen til ÄRMAR). Det minskes 3 maskene til ärmhål = det blir en åpning under ärm, der det senere skal stikkes masker i når man strikker ärmar. Når man skal strikke selve ärmar, skal det felles 2 masker (MINSKNINGSTIPS-2), først 2 masker 2 ganger på hver 2. omgang, deretter felles det 2 masker 9 ganger på hver 5. cm = 63 masker på pinnen. mvh DROPS Design
19.10.2026 - 11:59
 Beutel Mireille wrote:
Bonjour, Je suis actuellement aux manches. Quand vous dites de mettre un marqueur entre la jointure des épaules et ensuite qu’on relève les mailles en commençant par la maille avec le marqueur sur le côté du gilet, au milieu sous la manche…..y a t’il un autre marqueur à positionner sous la manche aux jointures des aisselles. Et donc on relève les mailles à partir des aisselles ! ? Merci pour votre réponse Mireille
10.09.2026 - 13:11DROPS Design answered:
Bonjour Mireille, on commence à relever les mailles à partir de la maille avec un marqueur sur le côté du gilet (la maille avec un marqueur qui a servi de repère lorsque vous avez rabattu les mailles des emmanchures, à la division dos/devants); autrement dit, au milieu sous la manche, et vous devez ensuite relever autant de mailles de chaque côté, entre ce marqueur et celui du haut de l'épaule. Bon tricot!
11.09.2026 - 09:04
Tristan wrote:
I have a question about the sizing as listed on the English version of the pattern. Unless I misunderstand, the listed sizes and diagram don’t seem to match. Should I use the sizing on the diagram over the listed chest measurements? I’m a 48”/122cm chest which is XS in the listed measurements and L if I’m reading the diagram correctly
20.07.2026 - 19:11
Mireille wrote:
Bonjour, J’ai encore une question les boutonnières ?tous les combien de rang ou centimètres on les fait ? Merci d’avance pour votre aide
06.07.2026 - 10:32DROPS Design answered:
Bonjour Mireille, la hauteur des boutonnières est indiquée pour chaque taille sous BOUTONNIÈRES au tout début des explications. Bon tricot!
06.07.2026 - 15:59
Mireille wrote:
Bonjour, Je viens de commencer le pull oldfriendcardigan taille M Le dos et devant 290 mailles et 4,5 centimètres et après le 5ème rang je devrais avoir 256 mailles ? Comment je me retrouve avec 256 mailles ? Merci d’avance pour votre aide .
05.07.2026 - 18:51DROPS Design answered:
Bonjour Mireille, vous tricotez l'avant-dernier rang des diagrammes sur l'endroit et vous diminuez ainsi 1 m dans chaque A.1 (soit 33m car on répète 33 x A.1) et 1 m dans A.2 (on diminue ainsi 34 m au total), vous aurez ainsi: 10 m de bordure devant, 33 x 7 m de A.1 + 5 m de A.2 et 10 m de bordure devant = 256 m. Bon tricot!
06.07.2026 - 07:49
Jackie Swol wrote:
I am knitting the Old Friend Cardigan. I’m just starting the body, working the bottom band. It says to decrease 38 stitches at the end of the band but I always thought you increased for the main body. am I wrong in this case? Thanks for your help.
14.06.2026 - 20:18DROPS Design answered:
Dear Jackie, you decrease 38 sts to account for the difference in gauge after working the rib pattern in A.1/A.2 in the bottom band. So the new number of stitches is the correct number of stitches to get the desired measurements with the indicated gauge.
15.06.2026 - 01:24
Carita wrote:
Stickar mönster 260-37 och har kommit till ärmar . Där tar det stopp, har aldrig stickat en ärm så. Förstår inte mönstret, går det att sticka ärmen separat och sy i den?
08.06.2026 - 10:03DROPS Design answered:
Hei Carita. Jo, du kan tilpasse oppskriften og sy ermet i etterpå. Men for å slippe monteringen og tilpassningene anbefales det å prøve det som står i oppskriften, og vi hjelper deg underveis om du står fast :) Bare oppgi nøyaktig hvor i oppskriften du er og hvilken str. du strikker. Ta gjerne en titt på våre hjelpevideo for å få en oversikt, klikk på TIPS & HJELP - Instruktionsvideor - Sticka - Ok - Isydda / Uppstickade ärmar. mvh DROPS Design
08.06.2026 - 11:43
Karin wrote:
När man ska minska för v-hals så står det att man på vänster ska minska de sista varven vart 4 varv och på höger står det varje varv,detta måste väl vara fel skrivet?? Det blir inte lika på sidorna. Tacksam för snabbt svar om jag ska repa upp samt att ändra i mönstret. Med vänlig hälsning, karin
30.05.2026 - 21:54DROPS Design answered:
Hei Karin. Jo, her er det blitt feil med oversettelsen på den svenske oppskriften. Det skal være var 4e varv, så vartannat varv og tilslutt var 4e varv . Vi skal få ordnet dette asap. mvh DROPS Design
01.06.2026 - 09:34
 Lone Marrup wrote:
Jeg skal til at strikke ovennævnte herre trøje. Jeg kan ikke forstå, at jeg IKKE skal starte med at strikke en rib kant forneden af trøjen? Der står ikke noget om ribkanten i opskriften, som man kan se på fotoet?
23.05.2026 - 16:54DROPS Design answered:
Hej Lone, jo du strikker A.1 som er en ribkant og afslutter med A.2 :)
25.05.2026 - 10:59
|
||||||||||||||||
Old Friend Cardigan#oldfriendcardigan |
||||||||||||||||
 |
 |
|||||||||||||||
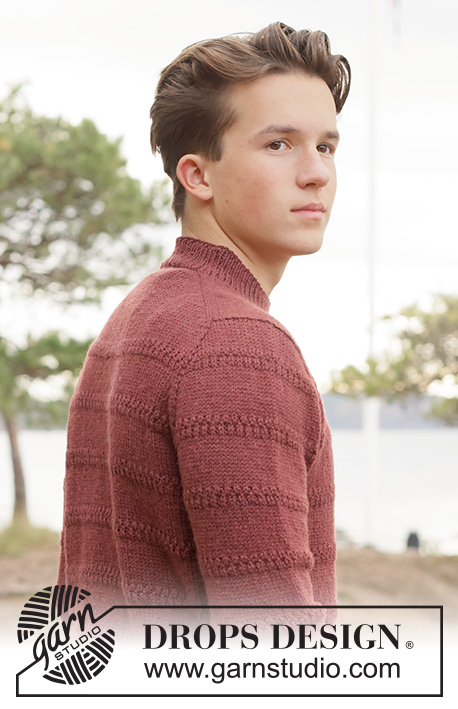
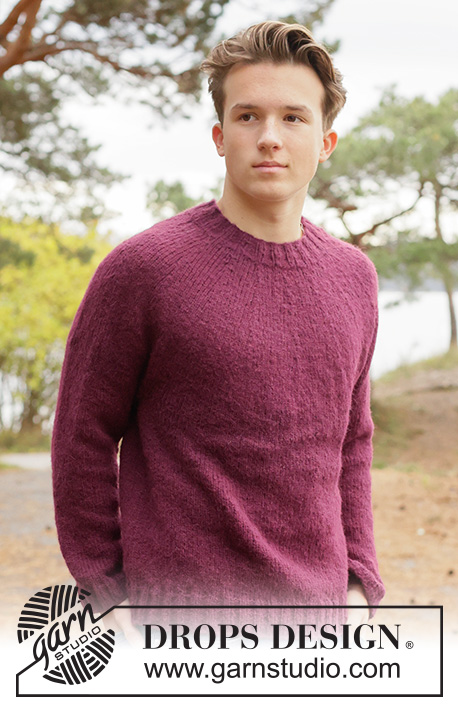
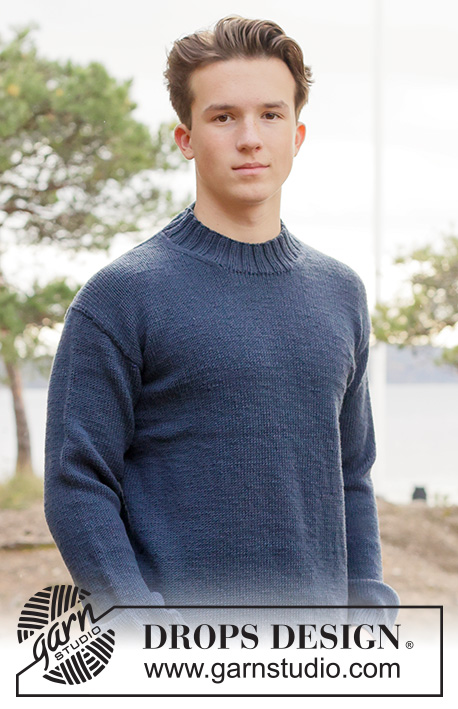
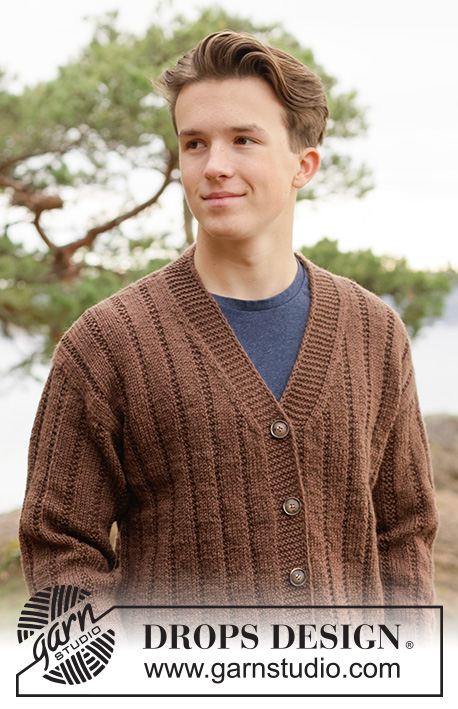
Knitted jacket for men in DROPS Karisma or DROPS Saga. The piece is worked bottom up, with relief-pattern and V-neck. Sizes XS - XXXL.
DROPS 260-37 |
||||||||||||||||
|
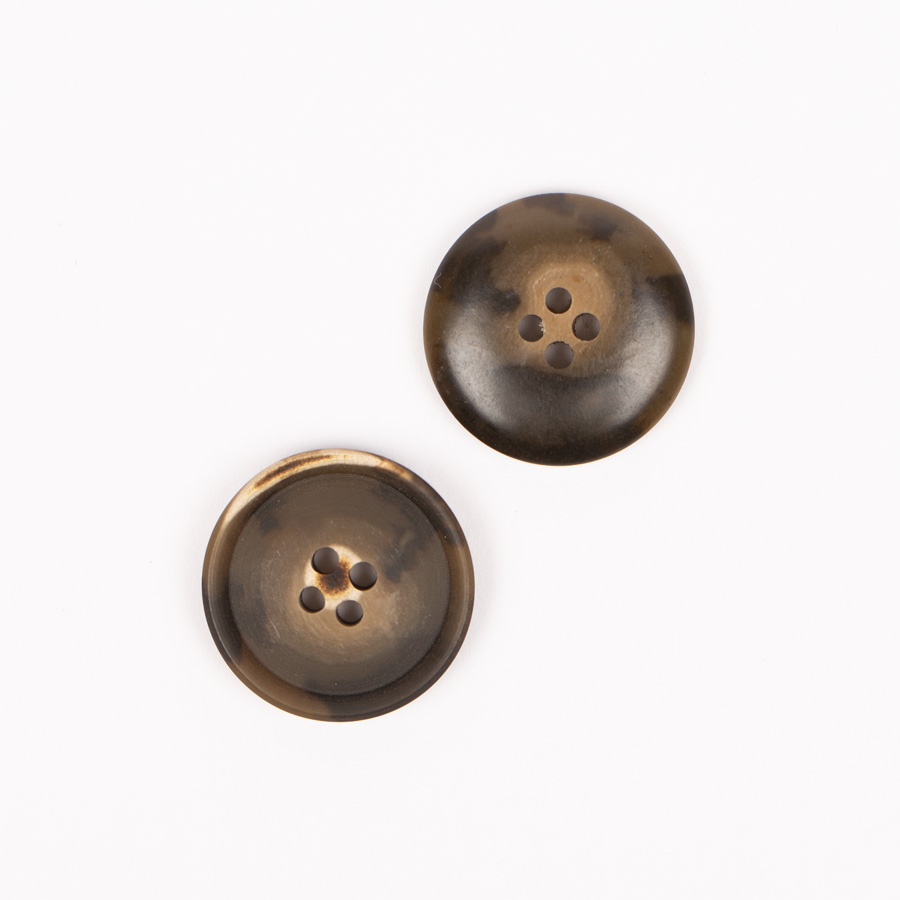
------------------------------------------------------- EXPLANATIONS FOR THE PATTERN: ------------------------------------------------------- GARTER STITCH (worked back and forth): Knit all rows, from both the right and wrong side. 1 ridge in height = knit 2 rows. BANDS WITH I-CORD: BEGINNING OF ROW: Work the band as follows (10 stitches): Slip 1 stitch purl-wise with yarn in front, knit 1, work 8 garter stitches. END OF ROW: Work the band as follows (10 stitches): Work until there are 10 stitches left on the row, work 8 garter stitches, slip 1 stitch purl-wise with yarn in front, knit 1. Continue like this from both the right and wrong side. PATTERN: See diagrams A.1 to A.5. The diagrams are read from right to left when working from the right side and left to right when working from the wrong side. BUTTONHOLES: Work the buttonholes on the right band from the right side (band = 10 stitches): ROW 1 (right side): Knit together the 5th and 6th stitch from the edge, make 1 yarn over, continue the front piece as before. ROW 2 (wrong side): Work the band as before, knit the yarn over to leave a hole. The first buttonhole is worked when the piece measures 4-4-3-4-5-6-4½ cm, then the other buttonholes when the piece measures: XS: 13-22-31 and 41 cm. S: 13½-23-32½ and 42 cm. M: 13-23-33 and 43 cm. L: 14-24-34 and 44 cm. XL: 13-21-29-37 and 45 cm. XXL: 14-22-30-38 and 46 cm. XXXL: 13-21½-30-38½ and 47 cm. DECREASE TIP-1 (for V-neck): DECREASE AFTER MARKER: Slip 1 stitch knit-wise, knit 1, pass the slipped stitch over the knitted stitch (1 stitch decreased). DECREASE BEFORE MARKER: Work until there are 2 stitches left before the marker, knit 2 together (1 stitch decreased). DECREASE TIP-2 (for sleeves): Decrease 1 stitch on each side of the marker as follows: Work until there are 3 stitches left before the marker, knit 2 together, knit 3 (marker sits in the middle stitch), slip 1 stitch knit-wise, knit 1 and pass the slipped stitch over the knitted stitch (2 stitches decreased). KNITTING TIP: When working short rows, there will be a small hole after each turn. This hole can be closed by tightening the strand or using the technique German Short Rows as follows: Slip the first stitch purl-wise, take the strand over the right needle and tighten well from the back (2 loops on the needle). These loops are worked together on the next row. ------------------------------------------------------- START THE PIECE HERE: ------------------------------------------------------- JACKET – SHORT OVERVIEW OF THE PIECE. The pattern uses both long and short needles; start with the length which fits the number of stitches and change when necessary. The piece is worked back and forth, bottom up. The front and back pieces are worked as one piece as far as the armholes, then divided and finished separately. The shoulder seams are sewn. Stitches are knitted up around the armholes for the sleeves, which are begun back and forth for the sleeve cap, then finished in the round. The 2 bands are continued upwards on each side, sewn together mid-back and sewn to the neckline. If there is a «0» in your chosen size, skip the information and go straight to the next instruction. BODY: Cast on 258-290-290-322-354-386-418 stitches with circular needle size 3 mm and DROPS Karisma or DROPS Saga. Purl 1 row from the wrong side. Work the next row as follows from the right side: 10 stitches according to BANDS WITH I-CORD – read explanation above, work A.1 until there are 16 stitches left, work A.2, then 10 stitches according to bands with I-cord. Continue this pattern back and forth, repeating the first 4 rows in A.1/A.2. Remember to work BUTTONHOLES on the right band – read explanation above. Work until the piece measures 4½-4½-4½-5½-5½-5½-5½ cm. Work the next row as follows from the right side: 10 band-stitches as before, work row 5 in A.1 until there are 16 stitches left, work row 5 in A.2 and 10 band-stitches as before = 228-256-256-284-312-340-368 stitches. Work the last row in A.2/A.1 from the wrong side, with 10 band-stitches on each side as before. The piece measures approx. 5-5-5-6-6-6-6 cm. Insert 1 marker each side, in the 62nd-69th-69th-76th-83rd-90th-97th stitch from each edge (= 104-118-118-132-146-160-174 stitches between the markers on the back piece). Allow the markers to follow your work onwards. Change to circular needle size 4 mm and work the next row as follows from the right side: 10 band-stitches as before, work A.3 until there are 15 stitches left, work A.4 and 10 band-stitches as before. Continue this pattern back and forth. The markers sit in the middle stitch of the 5 stocking stitches in each side. Remember to maintain the knitting tension! When the piece measures 42-43-44-45-46-47-48 cm from the cast-on edge, with the next row from the right side, cast off for the armholes as follows: Work until there is/are 1-1-1-2-3-4-4 stitches left before the first marker-stitch, cast off 3-3-3-5-7-9-9 stitches for the armhole (= marker-stitch + 1-1-1-2-3-4-4 stitches on each side), work until there is/are 1-1-1-2-3-4-4 stitches left before the next marker-stitch, cast off 3-3-3-5-7-9-9 stitches for the armhole, work to end of row. The front and back pieces are finished separately. LEFT FRONT PIECE: = 60-67-67-73-79-85-92 stitches. Insert 1 marker inside the outermost 11 stitches mid-front (= 10 band-stitches + 1 stocking stitch). Start from the wrong side and continue the pattern back and forth. AT THE SAME TIME decrease for the armhole and V-neck as described below. Read both the next 2 sections before continuing. ARMHOLE: Cast off 2 stitches for the armhole every 2nd row 0-2-0-2-3-3-3 times, then 1 stitch 2-5-2-4-8-7-7 times. V-NECK: On the first row from the right side after dividing, decrease 1 stitch for the V-neck BEFORE the marker, read DECREASE TIP-1. Decrease like this every 4th row 2-2-3-3-3-3-3 times, then every 2nd row 5-5-6-6-6-10-10 times and finally every 4th row 6-6-7-7-7-7-7 times. A total of 13-13-16-16-16-20-20 stitches decreased for the V-neck. After all the decreases for the armhole and V-neck there are 45-45-49-49-49-52-59 stitches. Continue working until the piece measures 62-64-66-68-70-72-74 cm from the cast-on edge. On the next row from the right side, cast off the first 35-35-39-39-39-42-49 stitches for the shoulder: 10 band-stitches left on the needle. Continue the band as before for a further 8-8-9-9-9-11-11 cm. Cast off. RIGHT FRONT PIECE: = 60-67-67-73-79-85-92 stitches. Insert 1 marker inside the outermost 11 stitches mid-front (= 10 band-stitches + 1 stocking stitch). Start from the wrong side and continue the pattern back and forth. AT THE SAME TIME decrease for the armhole and V-neck as described below. Read both the next 2 sections before continuing. ARMHOLE: Cast off 2 stitches for the armhole every 2nd row 0-2-0-2-3-3-3 times, then 1 stitch 2-5-2-4-8-7-7 times. V-NECK: On the first row from the right side after dividing, decrease 1 stitch for the V-neck AFTER the marker, read DECREASE TIP-1. Decrease like this every 4th row 2-2-3-3-3-3-3 times, then every 2nd row 5-5-6-6-6-10-10 times and finally every 4th row 6-6-7-7-7-7-7 times. A total of 13-13-16-16-16-20-20 stitches decreased for the V-neck. After all the decreases for the armhole and V-neck there are 45-45-49-49-49-52-59 stitches. Continue working until the piece measures 62-64-66-68-70-72-74 cm from the cast-on edge. On the next row from the wrong side, cast off the first 35-35-39-39-39-42-49 stitches for the shoulder: 10 band-stitches left on the needle. Continue the band as before for a further 8-8-9-9-9-11-11 cm. Cast off. BACK PIECE: = 102-116-116-128-140-152-166 stitches. Start from the wrong side and continue the pattern back and forth. Now cast off 2 stitches for the armholes on each side every 2nd row 0-2-0-2-3-3-3 times, then 1 stitch on each side 2-5-2-4-8-7-7 times = 98-98-112-112-112-126-140 stitches. Continue working until the piece measures 60-62-64-66-68-70-72 cm from the cast-on edge. Cast off the middle 24-24-30-30-30-38-38 stitches for the neckline and finish each shoulder separately. SHOULDERS: = 37-37-41-41-41-44-51 stitches. Cast off 2 stitches on the next row from the neck = 35-35-39-39-39-42-49 shoulder-stitches. Cast off when the piece measures 62-64-66-68-70-72-74 cm. ASSEMBLY: Sew the shoulder seams. Sew the bands together mid-back, with the seam on the inside. Sew the bands to the neckline. Sew the buttons onto the left band. SLEEVES: The sleeves are worked top down. Insert 1 marker at the top of the armhole/mid-top of shoulder. Use circular needle size 4 mm and knit up stitches tightly as follows: Start in the marker-stitch from the body, mid-under the sleeve. Knit up 74-80-85-91-95-100-104 stitches around the armhole, with equal numbers of stitches on each side of the shoulder marker. In sizes XS, S, XXL and XXXL, move the marker so it sits in the middle stitch mid-top of shoulder, in sizes M, L and XL so it sits between the 2 middle stitches mid-top of shoulder. On the first row, start mid-under the sleeve and work 12-15-14-17-19-18-20 stocking stitches, work A.5, 7-7-8-8-8-9-9 times, work the first 2 stitches in A.5 (so the pattern is symmetrical) work the last 11-14-13-16-18-17-19 stitches in stocking stitch. SLEEVE CAP: For a better fit, continue the pattern with short rows back and forth for the sleeve cap, starting mid-under the sleeve: ROW 1 (right side): Continue the pattern to 9-9-13-13-13-14-16 stitches past the marker-stitch/marker on top of the shoulder, turn – read KNITTING TIP. ROW 2 (wrong side): Work 19-19-26-26-26-29-33 stitches, turn. ROW 3 (right side): Work to 3-2-3-2-2-2-2 stitches past the previous turn, turn. ROW 4 (wrong side): Work to 3-2-3-2-2-2-2 stitches past the previous turn, turn. Repeat ROWS 3 and 4 until you have turned a total of 16-22-14-22-30-28-28 times (8-11-7-11-15-14-14 times on each side, with the last row from the wrong side). AFTER THE FINAL TURN: After the last time you work row 4, turn and work back to the beginning of the round (mid-under the sleeve) from the right side. Insert 1 marker here which is used when decreasing under the sleeve. Allow the marker to follow your work onwards. SLEEVE CONTINUED IN THE ROUND: Continue the pattern in the round, with A.5 across the middle 51-51-58-58-58-65-65 stitches and stocking stitch across the other stitches. AT THE SAME TIME, when the sleeve measures 1 cm from the join, read DECREASE TIP-2 and decrease 2 stitches under the sleeve every 2nd round 2-2-2-3-3-3-3 times then decrease 2 stitches every 6-4-5-3½-3-3-2 cm, 7-10-9-11-13-12-14 times = 56-56-63-63-63-70-70 stitches. After the last decrease, A.5 will fit on the round. Continue working until the sleeve measures 51-52-50-50-51-49-46 cm from the shoulder. Change to double pointed needles size 3 mm. Work rib (knit 2, purl 2), AT THE SAME TIME increase 8-8-9-9-9-10-10 stitches evenly on the first round by increasing 1 stitch in the middle of each knitted section (the rib should match the pattern with 2 purled stitches above 2 garter stitches in A.5) = 64-64-72-72-72-80-80 stitches. When the rib measures 6-6-6-7-7-7-7 cm, cast off slightly loosely with rib. The sleeve measures approx. 57-58-56-57-58-56-53 cm from the shoulder. |
||||||||||||||||
Diagram explanations |
||||||||||||||||
|
||||||||||||||||
 |
||||||||||||||||
 |
||||||||||||||||
Have you finished this pattern?Tag your pictures with #dropspattern #oldfriendcardigan or submit them to the #dropsfan gallery. Do you need help with this pattern?You'll find 26 tutorial videos, a Comments/Questions area and more by visiting the pattern on garnstudio.com. © 1982-2026 DROPS Design A/S. We reserve all rights. This document, including all its sub-sections, has copyrights. Read more about what you can do with our patterns at the bottom of each pattern on our site. |
||||||||||||||||






With over 40 years in knitting and crochet design, DROPS Design offers one of the most extensive collections of free patterns on the internet - translated to 17 languages. As of today we count 333 catalogues and 12525 patterns translated into English (UK/cm). 12525
We work hard to bring you the best knitting and crochet have to offer, inspiration and advice as well as great quality yarns at incredible prices! Would you like to use our patterns for other than personal use? You can read what you are allowed to do in the Copyright text at the bottom of all our patterns. Happy crafting!
Post a comment to pattern DROPS 260-37
We would love to hear what you have to say about this pattern!
If you want to leave a question, please make sure you select the correct category in the form below, to speed up the answering process. Required fields are marked *.