
Popular categories
Looking for a yarn?


Comments / Questions (6)
![]() Helen wrote:
Helen wrote:
I am making size M. I am about to divide for body and sleeves. Total number of stitches is 232. Number of stitches for front is 36, 50 for sleeve and 60 for back. Pattern says 39 for fronts, 44 for sleeves and 66 for back. I believe there is an error in the pattern. Front starts with 8 stitches, v-neck increases add 8 stitches, raglan increases add 20 stitches. 8+8+20=36. Sleeves start with 10 stitches, raglan increases add 20 stitches each side. 10+20+20=50. Back: 20+20+20=60. Thank you.
03.12.2025 - 20:08DROPS Design answered:
Dear Helen, there is no mistake in the pattern, the division is just not worked at the raglan stitches, this means the first and last stitches on sleeves are incorporated to the front/back pieces. Happy knitting!
04.12.2025 - 08:59
![]() Nicole wrote:
Nicole wrote:
I am not understanding how there are 2 raglan stitches. If I count 8, put a marker then count 10, how do you get 2 raglan stitches without the stitch count being off. Please explain better how to put the marker so there are 2 raglan stitches. Like the 10 stitches for the sleeve is there really 10 or would in be 8??
03.11.2025 - 04:39DROPS Design answered:
Hi Nicole, The raglan markers are inserted between 2 stitches, so the stitches on each side of each marker are the 2 raglan stitches. This means you have 8 stitches on the front piece (7 stitches + 1 raglan stitch), 10 stitches on the sleeve (1 raglan stitch on each side + 8 stitches in between), etc.. Hope this helps. Regards, Drops Team.
03.11.2025 - 06:12
![]() Wendy wrote:
Wendy wrote:
Please explain how the bands are sewn together and then to the neckline. I don’t understand how each band is 16cms, then how can that fit the back neck which is only 44 sts wide ?
05.12.2024 - 13:48DROPS Design answered:
Dear Wendy, here is a video on how to assemble the neck bands: https://www.garnstudio.com/video.php?id=1800&lang=en. Happy knitting!
08.12.2024 - 12:49
![]() Marieka wrote:
Marieka wrote:
Welches Garn könnte ich mit Fabel kombinieren, wenn ich keine langfaserige Wolle wie silk nehmen möchte? Also lieber glattes Garn. Was könnte man mit Fabel kombinieren für dieses Modell?
02.10.2024 - 21:55DROPS Design answered:
Liebe Marieka, benutzen Sie den Garnumrechner um alle Alternative zu Kid-Silk (1 Faden = Garngruppe A oder 2 Fäden = 1 Faden Garngruppe C) sowie die passende neue Garnmenge zu finden. Gerne kann Ihnen auch Ihr DROPS Händler die besten passenden Garne/Farben (auch per Telefon oder per E-Mail) empfehlen. Viel Spaß beim Stricken!
03.10.2024 - 09:43
![]() Tine wrote:
Tine wrote:
Mangler selve opskriften ikke? :)
06.09.2024 - 12:03DROPS Design answered:
Hej Tine, så er opskriften lagt ud - tak for info :)
06.09.2024 - 12:20
![]() B Boop wrote:
B Boop wrote:
Best friend
11.08.2024 - 15:52
|
|
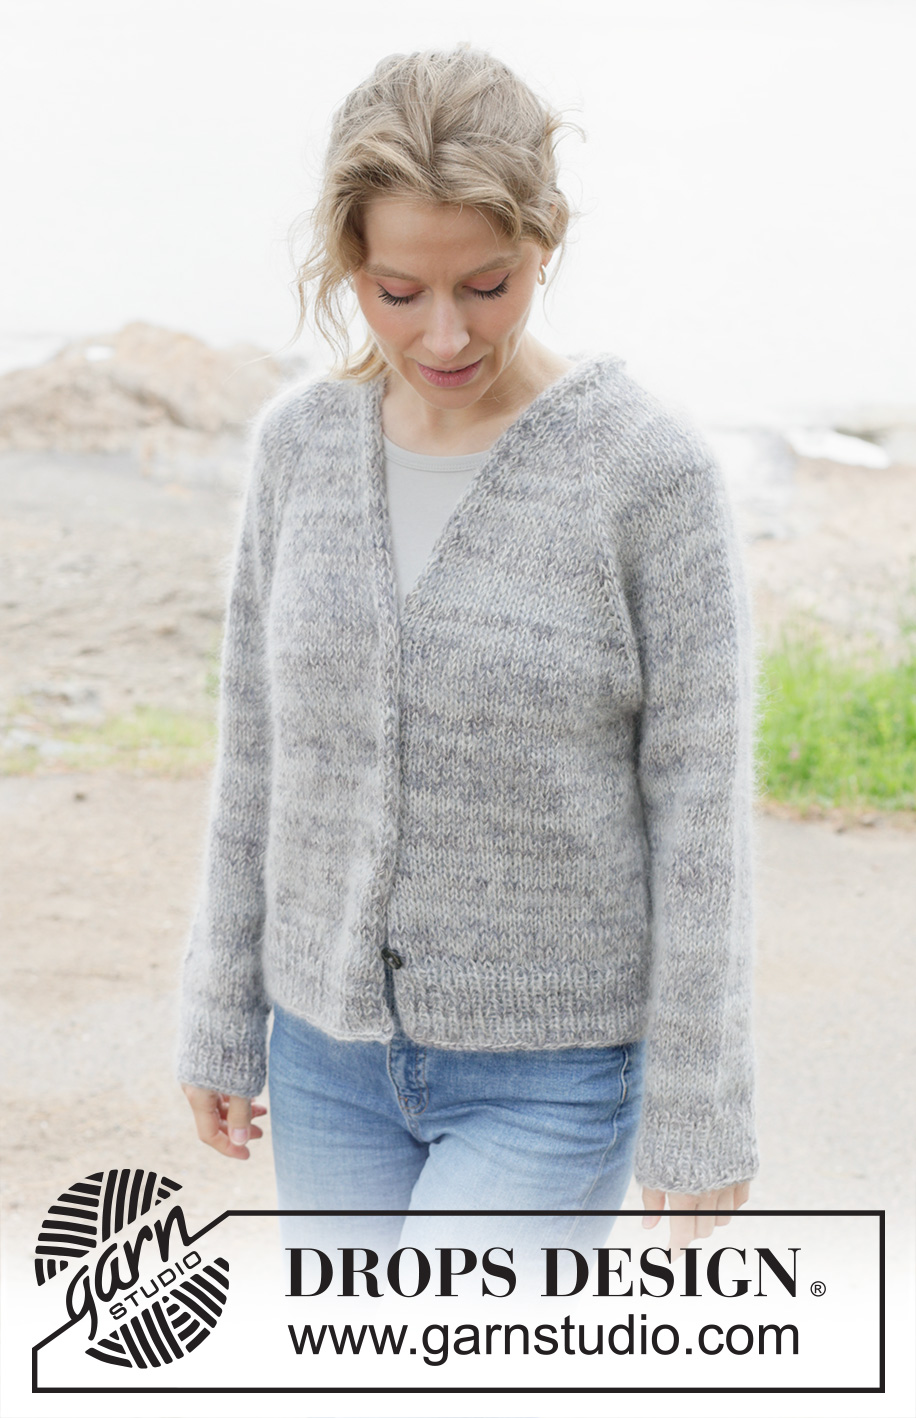
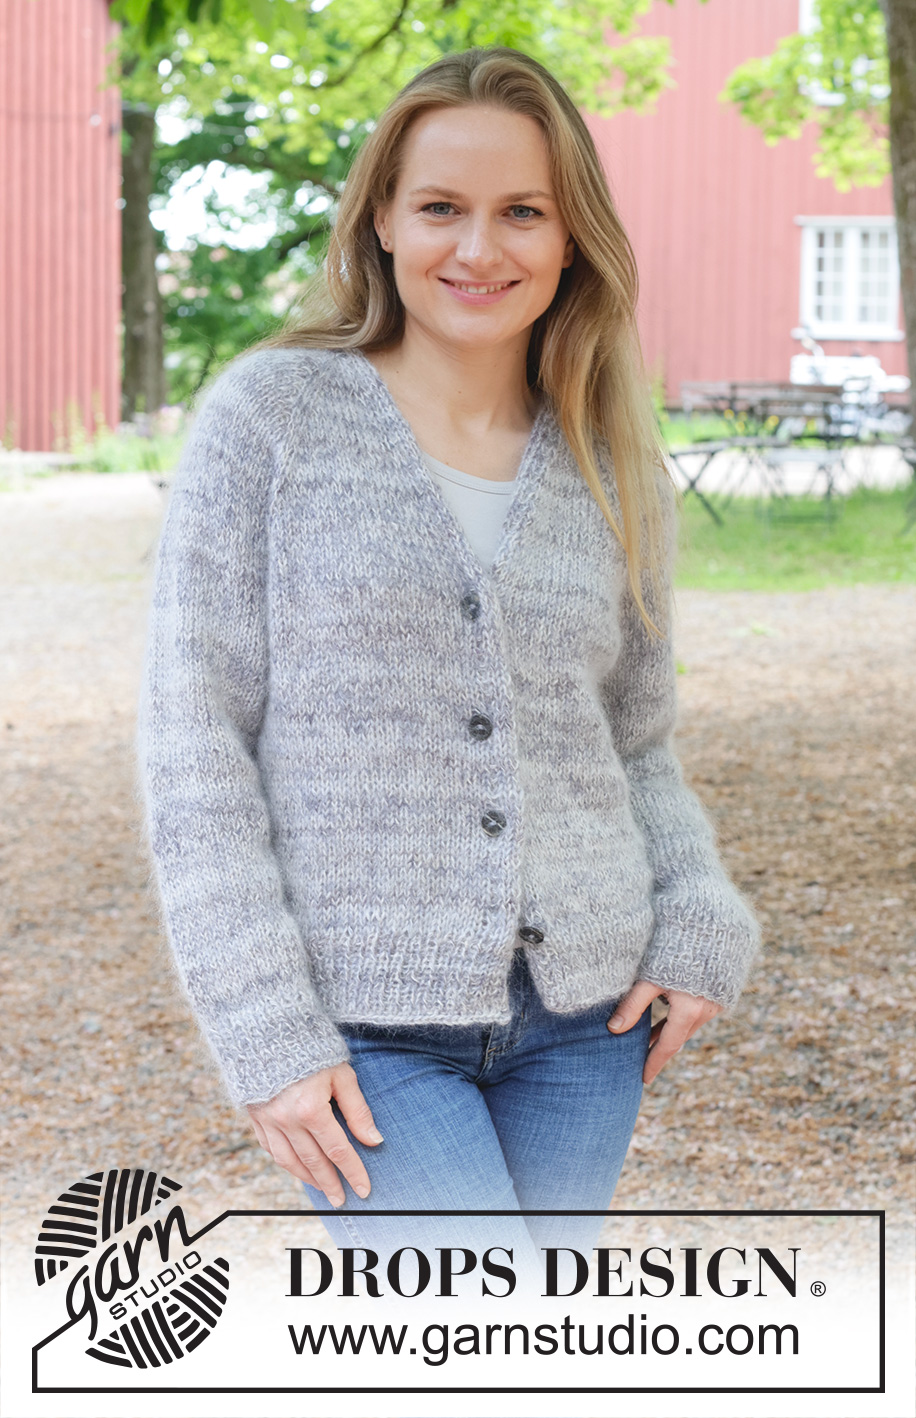
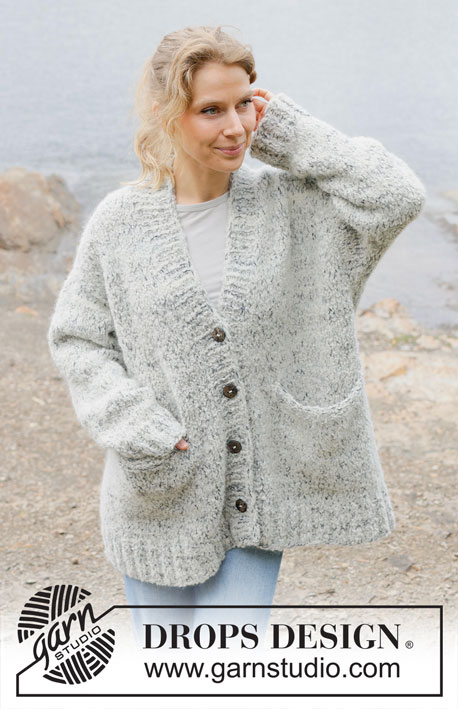
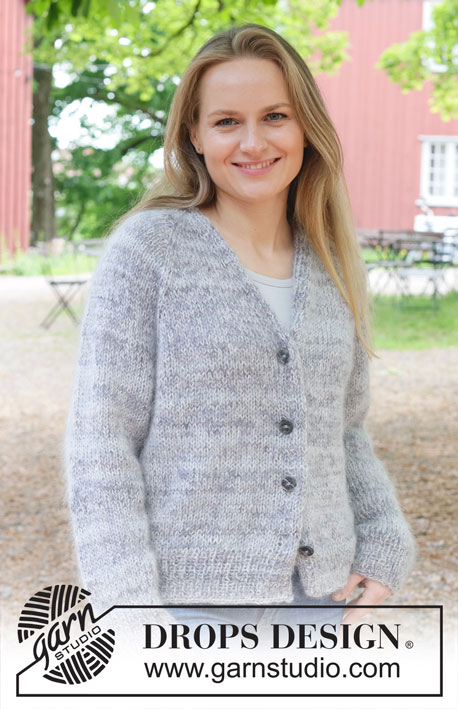
Lost in Mist Cardigan#lostinmistcardigan |
|
 |
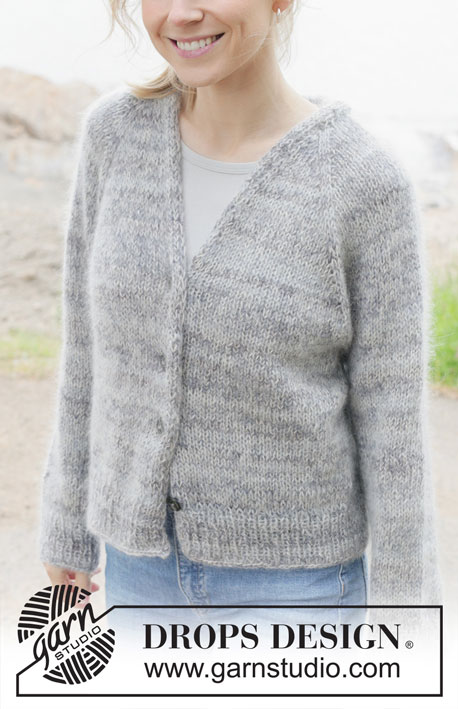 |
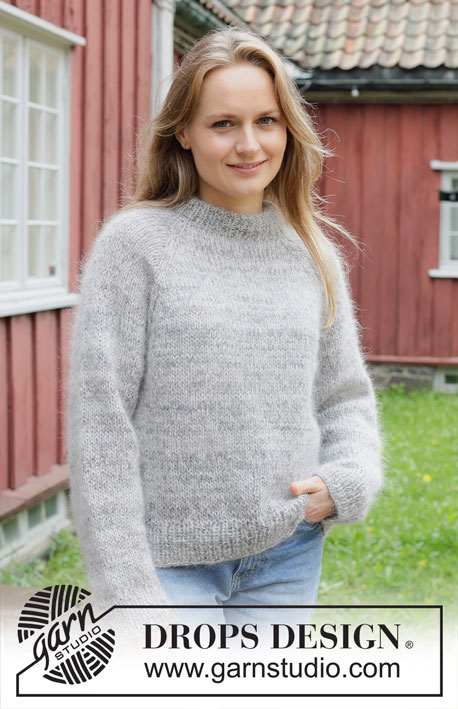
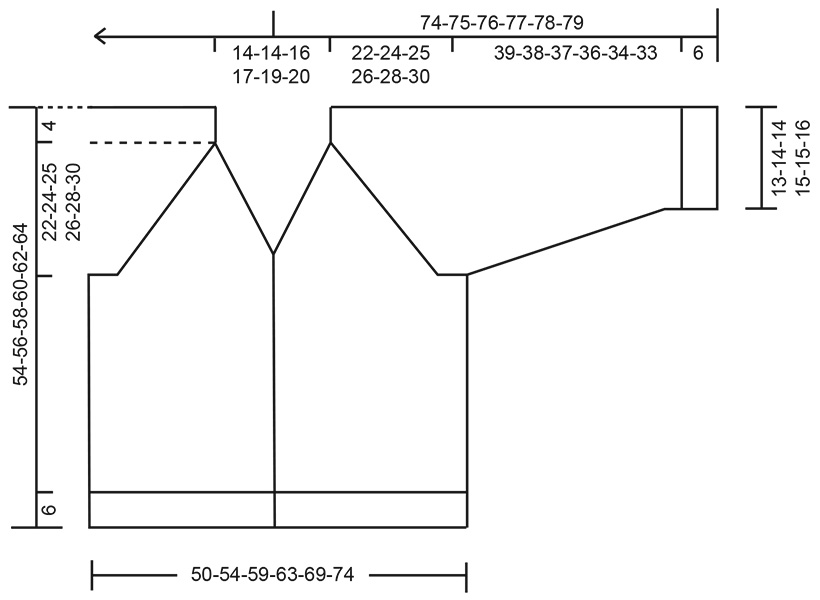
Knitted jacket in 1 strand DROPS Fabel and 2 strands DROPS Kid-Silk. The piece is worked top down with raglan, V-neck and bands. Sizes S - XXXL.
DROPS 252-37 |
|
|
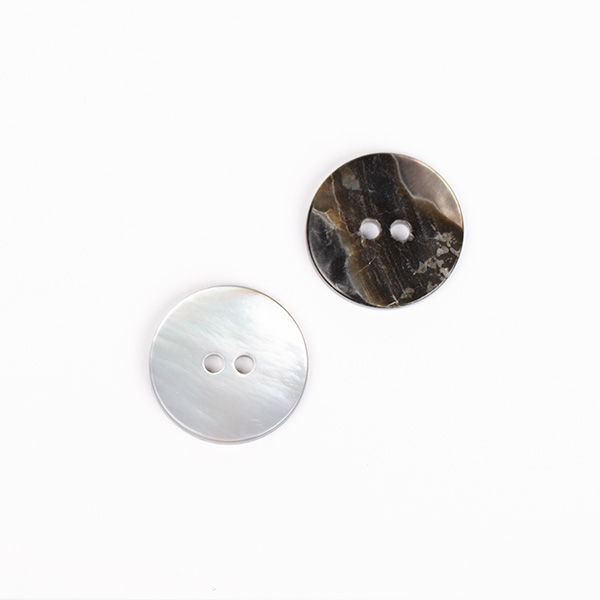
------------------------------------------------------- EXPLANATIONS FOR THE PATTERN: ------------------------------------------------------- GARTER STITCH: Knit on all rows, i.e. knit from right side and knit from wrong side. 1 ridge vertically = knit 2 rows. RAGLAN: All increases are worked from the right side! Increase 1 stitch by making 1 yarn over, which is worked as follows on the next row: BEFORE MARKER-THREAD: Purl through the back loop to avoid a hole. Then work the new stitch in stocking stitch. AFTER MARKER-THREAD: Slip the yarn over off the left needle and replace it twisted (insert the left needle through the back when replacing it). Purl the front loop to avoid a hole. Then work the new stitch in stocking stitch. V-NECK: All increases are worked from the right side! Increase 1 stitch inside 1 knitted stitch + 6 band-stitches as follows: LEFT FRONT PIECE: Work the band as before, knit 1, make 1 yarn over. On the next row (= wrong side) work the yarn over as follows: Purl through the back loop to avoid a hole. Then work the new stitch in stocking stitch. RIGHT FRONT PIECE: Work until there are 7 stitches left on the row, make 1 yarn over, knit 1 and work the band as before. On the next row (= wrong side) work the yarn over as follows: Slip the yarn over off the left needle and replace it twisted (insert the left needle through the back when replacing it). Purl the front loop to avoid a hole. Then work the new stitch in stocking stitch. BUTTONHOLES: Work the buttonholes on the right front band from the right side, when there are 6 stitches left on the row. ROW 1 (right side): Make 1 yarn over, knit 2 together, knit 2, slip 1 purl-wise with strand in front, knit 1. ROW 2 (wrong side): Work the band as before, knit the yarn over to leave a hole. The first buttonhole is worked 1 cm after the final increase for the V-neck. Then work the other 3 buttonholes with 8-8½-8½-8-8-8 cm between each one. The bottom buttonhole is worked in the transition between the stocking stitch and rib. DECREASE TIP: Decrease 1 stitch on each side of the marker-thread as follows: Work until there are 3 stitches left before the marker-thread, knit 2 together, knit 2 (marker-thread sits between these 2 stitches), slip 1 stitch knit-wise, knit 1 and pass the slipped stitch over the knitted stitch (2 stitches decreased). ------------------------------------------------------- START THE PIECE HERE: ------------------------------------------------------- JACKET – SHORT OVERVIEW OF THE PIECE. The pattern uses both long and short needles; start with the length which fits the number of stitches and change when necessary. The bands are worked first, then stitches are cast on between them for the yoke. The yoke is worked back and forth with circular needle, from mid front and top down. When the yoke is finished, it is divided for body and sleeves and the body continued back and forth, while the sleeves wait. The sleeves are worked in the round, top down. The bands are sewn together at the back of the neck, then sewn to the neckline. If there is a «0» in your chosen size, skip the information and go straight to the next instruction. RIGHT BAND: Cast on 6 stitches with double pointed needles size 6 mm, 1 strand colour silver fox DROPS Fabel, 1 strand colour off white DROPS Kid-Silk and 1 strand colour marzipan DROPS Kid-Silk (= 3 strands). RIGHT SIDE: Work 1 GARTER STITCH – read description above, knit 3, slip 1 stitch purl-wise with strand in front, knit 1. WRONG SIDE: Slip 1 stitch purl-wise with strand in front, knit 1, purl 3, work 1 garter stitch. Repeat these 2 rows back and forth for 15-15-16-17-18-18 cm, with the last row from the wrong side. Cut the strand. LEFT BAND: Cast on 6 stitches with double pointed needles size 6 mm, 1 strand colour silver fox DROPS Fabel, 1 strand colour off white DROPS Kid-Silk and 1 strand colour marzipan DROPS Kid-Silk (= 3 strands). RIGHT SIDE: Slip 1 stitch purl-wise with strand in front, knit 1, knit 3, work 1 garter stitch. WRONG SIDE: Work 1 garter stitch, purl 3, slip 1 stitch purl-wise with strand in front, knit 1. Repeat these 2 rows back and forth for 15-15-16-17-18-18 cm, with the last row from the wrong side. Do not cut the strand. Work the yoke as follows: YOKE: Cast on stitches for the yoke as follows: Use circular needle size 6 mm, work the left band as before from the right side, cast on 44-44-46-48-50-52 stitches, work the right band as before from the right side = 56-56-58-60-62-64 stitches. Insert 4 marker-threads as follows without working the stitches and inserting the threads between 2 stitches (called raglan-stitches). Count 8 stitches (= front piece), Insert 1 marker-thread before the next stitch, count 10 stitches (= sleeve), Insert 1 marker-thread before the next stitch, count 20-20-22-24-26-28 stitches (= back piece), Insert 1 marker-thread before the next stitch, count 10 stitches (= sleeve), Insert 1 marker-thread before the next stitch, there are 8 stitches left on the row (= front piece). Insert 1 marker in the middle of the cast-on stitches (= mid-back), the piece is measured from here. Work stocking stitch with the bands as before on each side. AT THE SAME TIME, increase for both raglan and V-neck as follows. Remember to maintain the knitting tension. RAGLAN: Increase for RAGLAN– read description above, on each side of the 2 raglan-stitches by each marker-thread (= 8 increased stitches). Increase for raglan every 2nd row a total of 18-20-21-22-23-25 times = 144-160-168-176-184-200 increased stitches. V-NECK: Increase for V-NECK– read description above, every 4th row (i.e., every 2nd row from the right side) 8-8-9-10-11-12 times on each side = 16-16-18-20-22-24 increased stitches. When the increases for the V-neck are finished, remember to work the first BUTTONHOLE – read description above. When all the increases for both raglan and V-neck are finished, there are 216-232-244-256-268-288 stitches. Continue with stocking stitch and bands as before but without further increases until the yoke measures 22-24-25-26-28-30 cm from the marker mid-back. Now divide for the body and sleeves. DIVIDE FOR BODY AND SLEEVES: Work the next row as follows: 36-39-41-43-46-49 stitches as before (= front piece), place the next 42-44-46-48-48-52 stitches on a thread for the sleeve, cast on 10-10-12-14-16-18 stitches (in side mid-under sleeve), work 60-66-70-74-80-86 stitches (= back piece), place the next 42-44-46-48-48-52 stitches on a thread for the sleeve, cast on 10-10-12-14-16-18 stitches (in side mid-under sleeve), work the last 36-39-41-43-46-49 stitches as before (= front piece). The body and sleeves are finished separately. BODY: = 152-164-176-188-204-220 stitches. Continue with stocking stitch and the bands as before until the piece measures 44-46-48-50-52-54 cm from the marker mid-back. On the next row from the right side, begin the rib. AT THE SAME TIME increase 21-21-21-25-29-29 stitches evenly on the first row (do not increase across the bands) as follows = 173-185-197-213-233-249 stitches: Change to circular needle size 5 mm, work the band as before, work rib (knit 1, purl 1 – remember to increase) until there are 7 stitches left, knit 1 and work the band as before. When the rib measures 6 cm, cast off a little loosely. The jacket measures approx. 50-52-54-56-58-60 cm from the marker mid-back and 54-56-58-60-62-64 cm from top of shoulder. SLEEVES: Place the 42-44-46-48-48-52 sleeve-stitches from the thread on one side of the piece on circular needle size 6 mm and knit up 1 stitch in each of the 10-10-12-14-16-18 stitches cast on under the sleeve = 52-54-58-62-64-70 stitches. Insert a marker-thread in the middle of the 10-10-12-14-16-18 stitches under the sleeve. Start at the marker-thread and work stocking stitch in the round. When the sleeve measures 2 cm, decrease 2 stitches under the sleeve – read DECREASE TIP. Decrease like this every 5-4½-4-3½-3-2½ cm a total of 8-8-9-10-11-13 times = 36-38-40-42-42-44 stitches. Continue working until the sleeve measures 39-38-37-36-34-33 cm from the division. Change to double pointed needles size 5 mm. Work rib (knit 1, purl 1), AT THE SAME TIME increase 6 stitches evenly on the first round = 42-44-46-48-48-50 stitches. When the rib measures 6 cm, cast off a little loosely. The sleeve measures approx. 45-44-43-42-40-39 cm. ASSEMBLY: Sew the buttons onto the left band. Sew the bands together mid-back of neck, then sew them to the neckline. |
|
 |
|
Have you finished this pattern?Tag your pictures with #dropspattern #lostinmistcardigan or submit them to the #dropsfan gallery. Do you need help with this pattern?You'll find 32 tutorial videos, a Comments/Questions area and more by visiting the pattern on garnstudio.com. © 1982-2026 DROPS Design A/S. We reserve all rights. This document, including all its sub-sections, has copyrights. Read more about what you can do with our patterns at the bottom of each pattern on our site. |
|


With over 40 years in knitting and crochet design, DROPS Design offers one of the most extensive collections of free patterns on the internet - translated to 17 languages. As of today we count 324 catalogues and 12290 patterns translated into English (UK/cm). 12290
We work hard to bring you the best knitting and crochet have to offer, inspiration and advice as well as great quality yarns at incredible prices! Would you like to use our patterns for other than personal use? You can read what you are allowed to do in the Copyright text at the bottom of all our patterns. Happy crafting!
Post a comment to pattern DROPS 252-37
We would love to hear what you have to say about this pattern!
If you want to leave a question, please make sure you select the correct category in the form below, to speed up the answering process. Required fields are marked *.