
Popular categories
Looking for a yarn?


Comments / Questions (33)
![]() Lioba wrote:
Lioba wrote:
Werden die Umschläge im Muster in der nächsten Runde verschränkt gestrickt oder sollen Löcher entstehen?
31.03.2026 - 11:41DROPS Design answered:
Liebe Lioba, nur die Umschläge als Zunahmen werden verschränkt gestrickt, die Umschläge im Diagram sollen Löcher bilden. Viel Spaß beim Stricken!
07.04.2026 - 14:49
![]() Marion wrote:
Marion wrote:
Bij de mouwen staat dat ik bij 5cm moet gaan minderen. Er staat niet hoeveel. Kunt u laten weten hoeveel steken dat moeten zijn a.u.b.? Alvast bedankt.
02.03.2026 - 21:57DROPS Design answered:
Dag Marion,
Je mindert 2 steken iedere 6-4½-3-2½-2-2 cm 6-7-10-14-15-16.
04.03.2026 - 14:26
![]() Delia wrote:
Delia wrote:
Il diagramma A3a quando si lavora? Nelle spiegazioni non è mai menzionato, si parla solo di diagramma A3...grazie.
14.07.2025 - 15:24DROPS Design answered:
Buonasera Delia, grazie per la segnalazione: abbiamo aggiornato il modello, deve lavorare A.3a prima della divisione del lavoro per il corpo e le maniche. Buon lavoro!
14.07.2025 - 22:35
![]() Cathy wrote:
Cathy wrote:
Do you have any tips for sewing down the fold-over neck band on this sweater?
20.05.2025 - 15:28
![]() Anne wrote:
Anne wrote:
Alemman reikäkuvion ylimmäisen kuvion ohje puuttuu kokonaan, miten se tehdään?
13.03.2025 - 13:00DROPS Design answered:
Hei, alin reikäkuvio ja sen yläpuolella oleva kuvio neulotaan piirroksen A.4 mukaisesti (etu-/takakappaleessa).
14.03.2025 - 18:37
![]() Vibeke wrote:
Vibeke wrote:
Hej Kan man strikke denne model som kjole. Hvilken kjole model skal jeg så vælge at strikke videre efter, når mønsteret på blusen slutter. Mvh Vibeke
11.03.2025 - 20:15DROPS Design answered:
Hej Vibeke, ja alle disse kjoler strikket på samme strikkefasthed: Kjoler - oppefra og ned - 21 masker
14.03.2025 - 13:31
![]() Solange Lefebvre wrote:
Solange Lefebvre wrote:
How come it is impossible to print your patterns anymore?
27.01.2025 - 00:19DROPS Design answered:
Dear Solange, you CAN print our patterns, just click on the printer icon, right next to the name of the pattern. Happy Crafting!
27.01.2025 - 02:34
![]() Francine Bicherel wrote:
Francine Bicherel wrote:
Bonjours comment montez vous vos mailles pour le col du pull soit souple? Je ne tricot pas serré pourtant . Je suis entrain de faire une taille S début par le col mais je trouve que sa fait petit. Bien amicalement en attente de votre réponse.
18.10.2024 - 18:05DROPS Design answered:
Bonjour Mme Bicherel, on monte ici les mailles avec l'aiguille 4 avant de continuer avec l'aiguille 3 pour que le montage soit plus souple, si votre montage est toujours trop serré, vous pouvez tenter avec une autre méthode de montage - cf vidéos. Bon tricot!
21.10.2024 - 07:23
![]() FLORENCE LENGLET wrote:
FLORENCE LENGLET wrote:
Bonjour, Dans vos explications, pour la division Dos/Devant/manches, vous commencez à séparer au niveau de la manche, alors que nous avons mis un marqueurs milieu devant. Mes tours commencent donc au niveau milieu.... me suis-je trompé en démarrant les tours au milieu ?
30.09.2024 - 11:00DROPS Design answered:
Bonjour Mme Lenglet, le marqueur placé au milieu du devant n'est pas le repère du début des tours mais celui pour mesurer l'ouvrage; autrement dit, les tours commencent à la transition entre la manche et le dos; mais si vous avez tricoté comme indiqué, rien ne va changer pour vous, votre début de tour est juste ailleurs que là où vous le pensiez; les premières mailles sont celles de la manche gauche, et les mailles suivantes celles du devant, etc. Bon tricot!
30.09.2024 - 15:50
![]() Monika Kluge wrote:
Monika Kluge wrote:
Sehr schönes Model für sehr schöne Wolle
30.09.2024 - 07:24
|
|||||||||||||||||||||||||
Wicker Island#wickerislandsweater |
|||||||||||||||||||||||||
 |
 |
||||||||||||||||||||||||
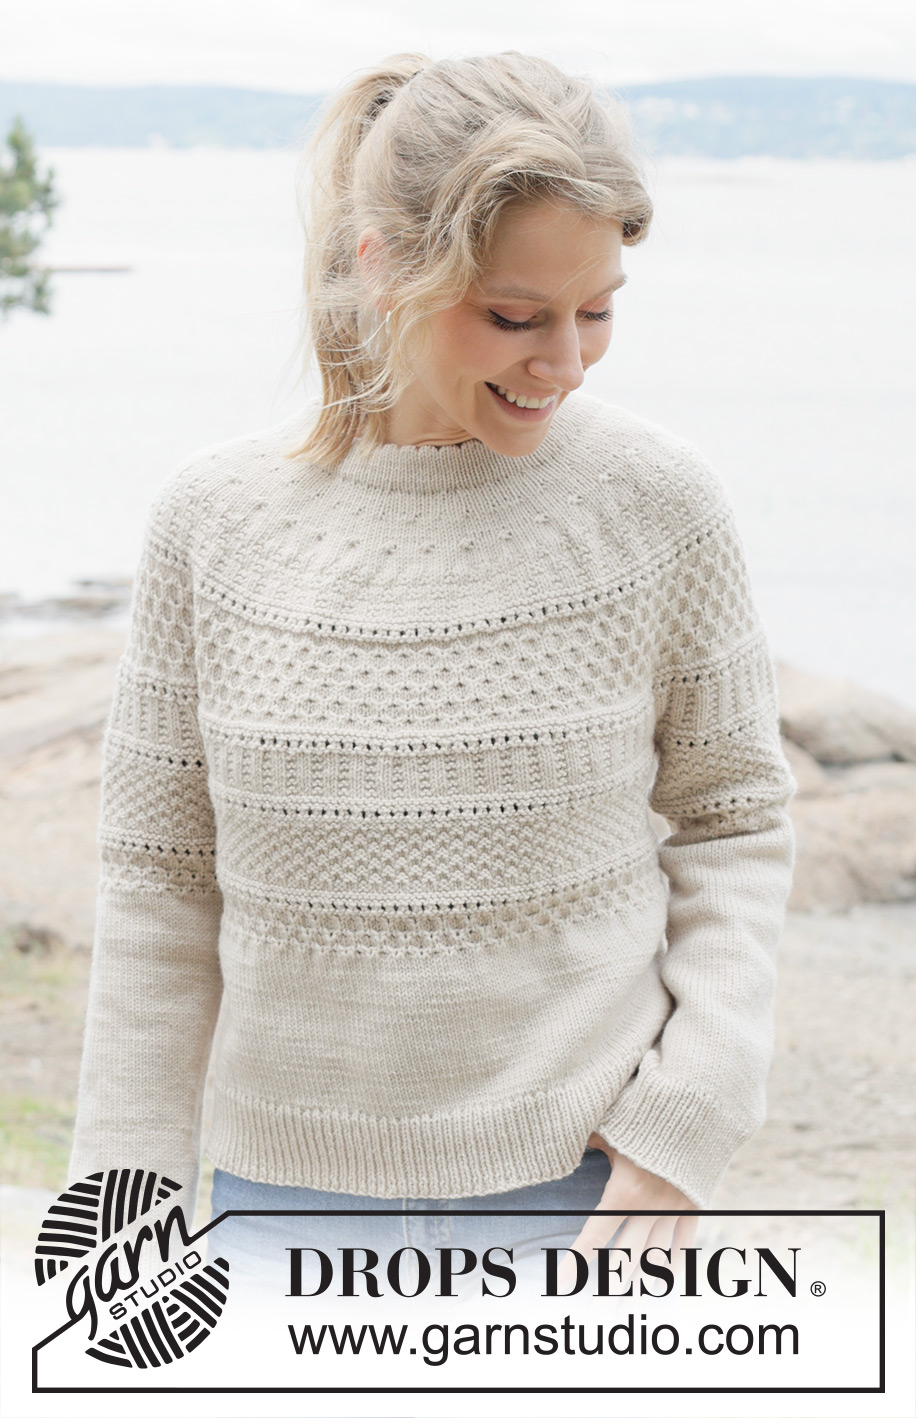
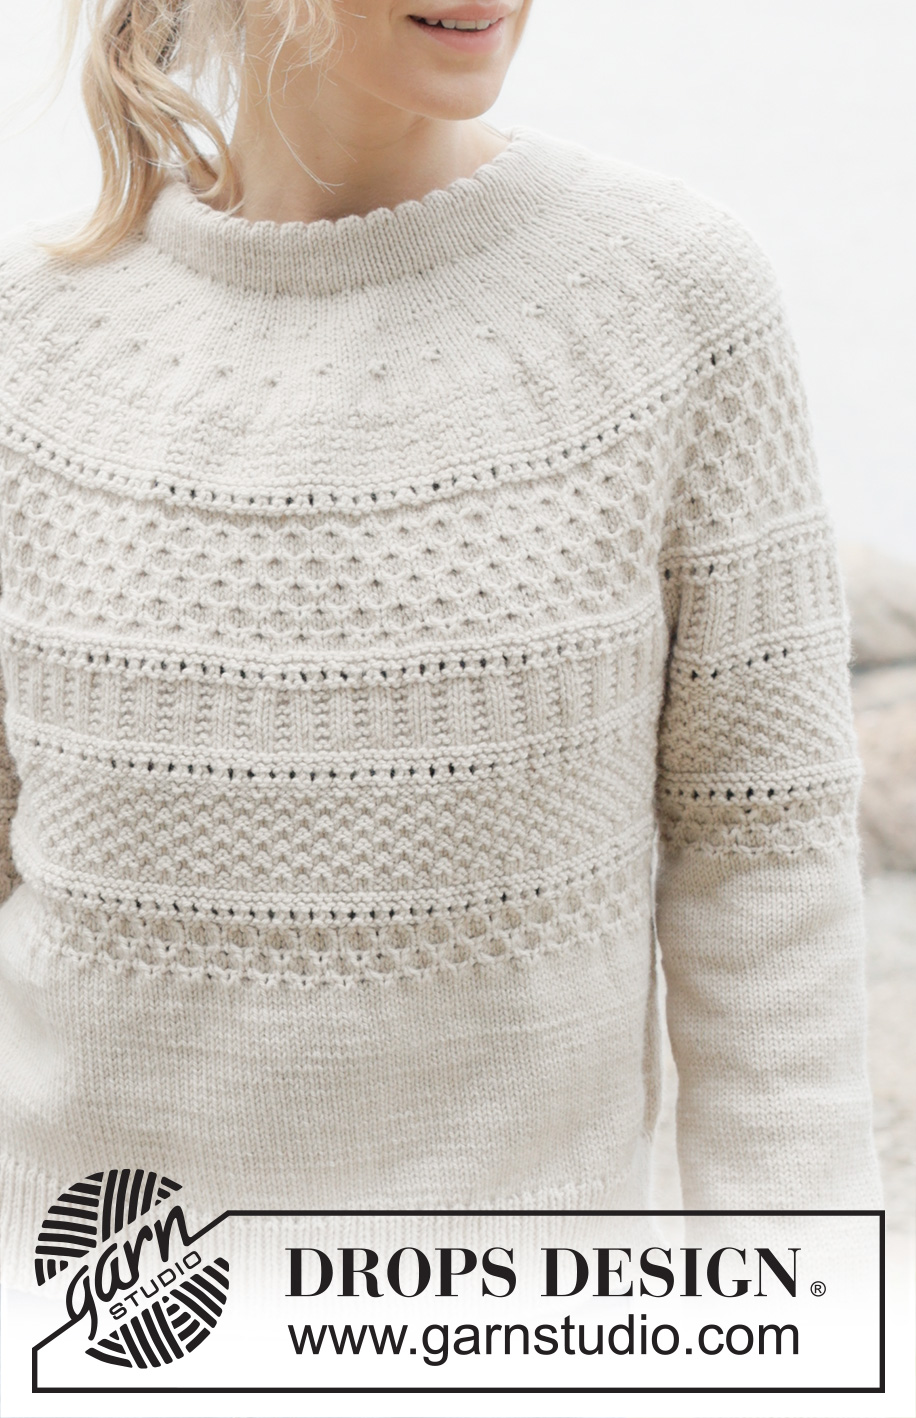
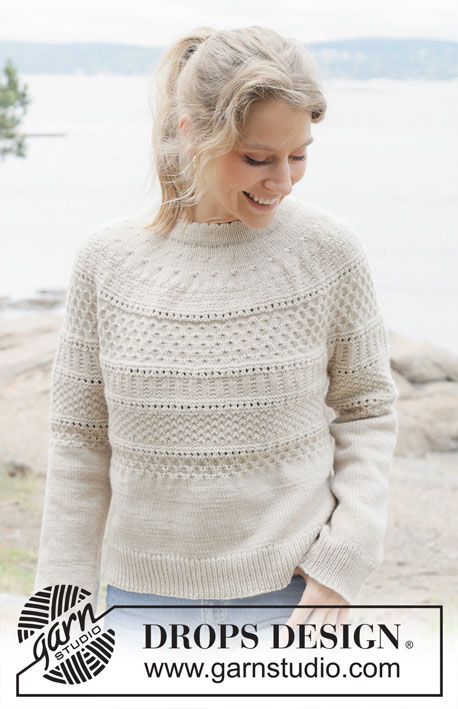
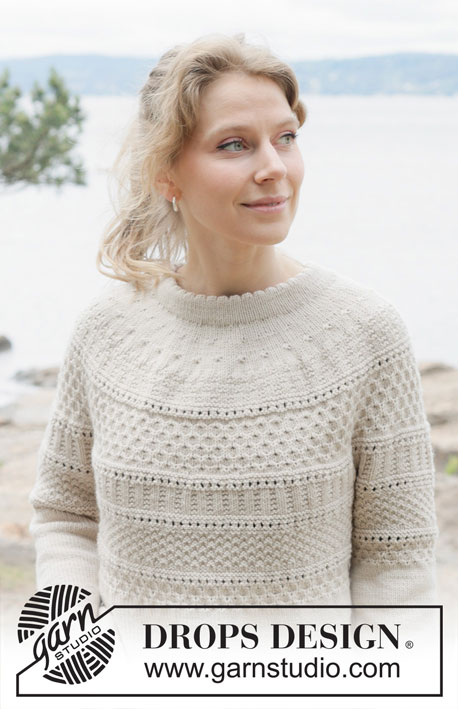
Knitted jumper in DROPS Daisy or DROPS Puna. Piece is knitted top down with round yoke, relief pattern, honeycomb pattern and double neck edge. Size: S - XXXL
DROPS 255-3 |
|||||||||||||||||||||||||
|
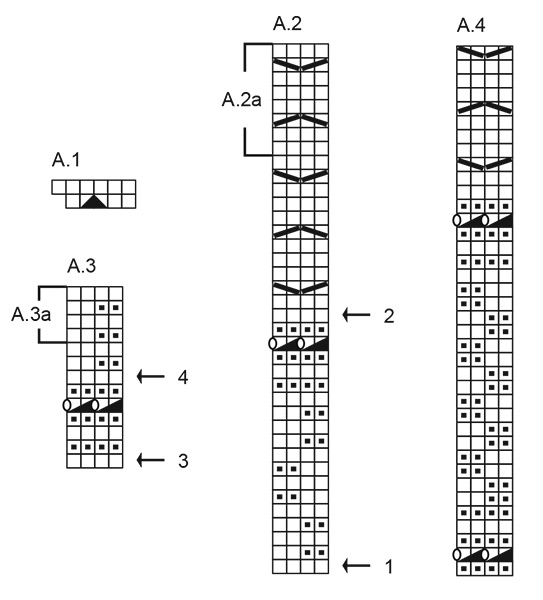
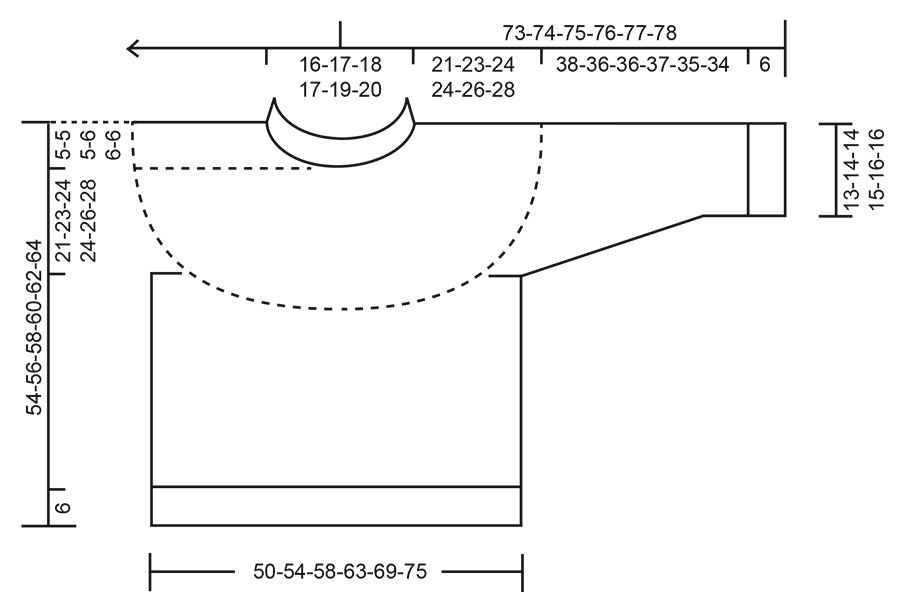
---------------------------------------------------------- EXPLANATION FOR THE PATTERN: ---------------------------------------------------------- PATTERN: See diagrams A.1 to A.4. INCREASE TIP (evenly): To calculate how to increase evenly, use the total number of stitches on row (e.g. 108 stitches) and divide stitches by number of increases to be done (e.g. 8) = 13.5. In this example increase by making 1 yarn over after alternately every 13th and 14th stitch. On next round work yarn overs twisted to avoid holes. DECREASE TIP: Decrease 1 stitch on each side of marker thread as follows: Work until 2 stitches remain before marker thread, knit 2 together (marker thread is here), slip 1 stitch knitwise, knit 1, pass slipped stitch over stitch worked (= 2 stitches decreased). Adjust pattern when decreasing - pattern will not always fit mid under sleeve. ---------------------------------------------------------- START THE PIECE HERE: ---------------------------------------------------------- JUMPER - SHORT OVERVIEW OF THE PIECE: In this pattern needles of different length have been used, begin with fitting length for number of stitches and switch as needed. Work neck edge and yoke in the round on circular needle from right shoulder back, and work top down. When yoke is done, divide piece for body and sleeves. Work body down wards in the round on circular needle while putting the sleeves aside. Then work sleeves downwards in the round on needle. Fold the neck edge double against the wrong side and fasten. If 0 is given for the chosen size, it means that you skip the information until next information. NECK EDGE: Cast on 108-114-117-123-129-135 stitches on circular needle size 4 mm with DROPS Daisy or DROPS Puna. Switch to circular needle size 3 mm (cast on on a larger needle to get an elastic cast-on edge). Work in stocking stitch for 11-11-11-13-13-13 rounds. Work next round as follows: * Knit 2 together, make 1 yarn over , knit 1 *, work from *-* rest of round. Work 12-12-12-14-14-14 rounds in stocking stitch. Later the neck edge is folded in towards wrong side and assembled to form a neck edge of approx. 4-4-4-5-5-5 cm. Beginning of round is at right shoulder at the back. Insert 1 marker after the first 36-38-39-41-43-45 stitches on round (= approx. mid front), measures piece from this marker. YOKE: Switch to circular needle size 4 mm, work 1 round in stocking stitch while increasing 8-8-9-11-13-13 stitches evenly - read INCREASE TIP = 116-122-126-134-142-148 stitches. Then work in stocking stitch. Remember to follow the knitting tension! When yoke measures 1½-2-2-2-2-2 cm from marker, increase 39-38-39-41-43-47 stitches evenly – remember INCREASE TIP = 155-160-165-175-185-195 stitches. Continue in stocking stitch until piece measures 3-4-4-4-4-5 cm from marker. Now work as explained below - work pattern while AT THE SAME TIME increasing - read PATTERN in explanation above. A.1: Work A.1 31-32-33-35-37-39 times in total in the round on yoke = 186-192-198-210-222-234 stitches. Continue in stocking stitch until piece measures 5-6-6-6-6-7 cm from marker. A.2: Work A.2 - AT THE SAME TIME on rounds marked with arrow increase as follows: Arrow 1: Increase 30-36-42-46-54-58 stitches evenly = 216-228-240-256-276-292 stitches. Arrow 2: Increase 56-60-68-76-80-84 stitches evenly = 272-288-308-332-356-376 stitches. When A.2 has been worked vertically, work A.2a 0-0-0-0-1-1 more time. A.3: Work A.3 - AT THE SAME TIME on rounds marked with arrow increase as follows: Arrow 3: Increase 24-24-28-32-32-32 stitches evenly = 296-312-336-364-388-408 stitches. Arrow 4: Increase 16-20-20-28-28-28 stitches evenly = 312-332-356-392-416-436 stitches. Continue to repeat A.3a vertically until piece measures 21-23-24-24-26-28 cm from marker. Purl 1 round. Now divide piece for body and sleeves. DIVIDING FOR BODY AND SLEEVES: AT THE SAME TIME as next round is worked divide yoke for body and sleeves as follows: Slip the first 60-62-68-78-80-80 stitches on a thread for sleeve, cast on 8-10-12-14-16-20 new stitches on needle (= in the side mid under sleeve), knit 96-104-110-118-128-138 stitches (= front piece), slip the next 60-62-68-78-80-80 stitches on a thread for sleeve, cast on 8-10-12-14-16-20 new stitches on needle (= in the side mid under sleeve), and work in stocking stitch over the last 96-104-110-118-128-138 stitches (= back piece). Finish body and sleeves separately. BODY: = 208-228-244-264-288-316 stitches. Insert 1 marker in one side of piece (= in the middle of the 8-10-12-14-16-20 stitches that were cast on under sleeve). Work until marker, round begins here and work in the round. Work A.4 in the round over all stitches. Work stocking stitch until piece measures 43-45-47-48-50-52 cm from marker mid front. Switch to circular needles size 3 mm, work rib (= knit 1/purl 1) while AT THE SAME TIME increasing 46-46-50-54-62-64 stitches evenly on 1st round = 254-274-294-318-350-380 stitches. When rib measures 6 cm, cast off with knit over knit and purl over purl. Jumper measures 49-51-53-54-56-58 cm from marker mid front and approx. 54-56-58-60-62-64 cm from the top of shoulder. SLEEVES: Slip 60-62-68-78-80-80 sleeve stitches from one thread on to circular needle size 4 mm and pick in addition up 1 stitch in each of the 8-10-12-14-16-20 stitches cast on under sleeve = 68-72-80-92-96-100 stitches. Insert 1 marker thread in the middle of the 8-10-12-14-16-20 new stitches under sleeve - round begins at the marker thread. Work A.4 in the round on needle, then work the rest of sleeve in in stocking stitch - AT THE SAME TIME when sleeve measures 5-5-5-3-5-2 cm from division, decrease mid under sleeve – read DECREASE TIP and decrease as follows: Decrease 2 stitches every 6-4½-3-2½-2-2 cm 6-7-10-14-15-16 times in total = 56-58-60-64-66-68 stitches. A.4 will not always fit mid under sleeve; adjust the pattern when decreasing. Work until sleeve measures 38-36-36-37-35-34 cm from division. Switch to double pointed needles size 3 mm and work rib (= knit 1/purl 1) while AT THE SAME TIME increasing 12-12-12-12-12-12 stitches evenly on 1st round = 68-70-72-76-78-80 stitches. When rib measures 6 cm, cast off with knit over knit and purl over purl. Sleeve measures approx. 44-42-42-43-41-40 cm from division. ASSEMBLY: Fold the neck edge down on the inside of garment. Fasten neck edge to get a double neck edge. To avoid a tight neck edge that sticks out it is important to keep the seam elastic. |
|||||||||||||||||||||||||
Diagram explanations |
|||||||||||||||||||||||||
|
|||||||||||||||||||||||||
 |
|||||||||||||||||||||||||
 |
|||||||||||||||||||||||||
Have you finished this pattern?Tag your pictures with #dropspattern #wickerislandsweater or submit them to the #dropsfan gallery. Do you need help with this pattern?You'll find 32 tutorial videos, a Comments/Questions area and more by visiting the pattern on garnstudio.com. © 1982-2026 DROPS Design A/S. We reserve all rights. This document, including all its sub-sections, has copyrights. Read more about what you can do with our patterns at the bottom of each pattern on our site. |
|||||||||||||||||||||||||


With over 40 years in knitting and crochet design, DROPS Design offers one of the most extensive collections of free patterns on the internet - translated to 17 languages. As of today we count 324 catalogues and 12290 patterns translated into English (UK/cm). 12290
We work hard to bring you the best knitting and crochet have to offer, inspiration and advice as well as great quality yarns at incredible prices! Would you like to use our patterns for other than personal use? You can read what you are allowed to do in the Copyright text at the bottom of all our patterns. Happy crafting!
Post a comment to pattern DROPS 255-3
We would love to hear what you have to say about this pattern!
If you want to leave a question, please make sure you select the correct category in the form below, to speed up the answering process. Required fields are marked *.