
Popular categories
Looking for a yarn?


Comments / Questions (105)
![]() Tinka wrote:
Tinka wrote:
Liebes Drops-Team! Ich habe meine Marker wie unter „doppelte Halsblende“ beschrieben, gesetzt. Nun möchte ich den Halsausschnitt mit den verkürzten Reihen beginnen. Laut Anleitung beginne ich hier kurz vor dem 3.Markierer, dies soll die linke Halsausschnittseite im angezogenen Zustand sein. Wenn ich die Reihenfolge der Markierer aus dem vorangegangenen Absatz beibehalte, ist es bei mir nicht die linke, sondern die rechte Halsausschnittseite. Wo ist denn hier mein Denkfehler?
05.06.2025 - 16:31DROPS Design answered:
Liebe Tinka, die 3. Markierung ist die 3. die eingesetzt wurde, und wenn mann den Pullover trägt wird dieser Markierer zwischen Vorderteil und linke Ärmel sein. In diesem Video können Sie schauen, wie man solche verkürzten Reihen strickt. Viel Spaß beim Stricken!
06.06.2025 - 07:59
![]() Lena wrote:
Lena wrote:
Dort steht, dass man bei den verkürzten Reihen Jede Reihe zunehmen muss. Es wird nirgendwo erklärt, wie das geht. Immer nur, wie man jede 2. Reihe zunimmt. Ich hab es versucht mit Umschlägen, aber das ergibt große Löcher. Hab es nochmal aufgemacht und mit Zunahmen aus dem Querfaden gearbeitet. Die Anleitung sollte dort dringend überarbeitet werden. Ich habe mich sehr geärgert.
14.04.2025 - 13:33DROPS Design answered:
Liebe Lena, die Zunahmen sind ganz am Anfang der Anleitung erklärt und zwar unten RAGLANZUNAHMEN: so wird es erklärt wie man für Rumpfteil/Ärmel zunimmt und wie diese Maschen vor/nach dem Markierer bei den Rück- sowie bein den Hin-Reihen gestrickt werden. Viel Spaßb eim Stricken!
23.04.2025 - 10:12
![]() Angela wrote:
Angela wrote:
Hallo, ich habe den Pullover in XL bis zur Aufteilung in Rumpf und Ärmel nach der Anleitung gestrickt. Nun sind die 95 Maschen für jeweils Vorder- und Rückenteil = 190 M und die jeweils 8 neu angeschlagenen Maschen an der Seite unter dem Arm = 206 Maschen. Die Ärmel haben die stillgelegten 65 M und dann werden nochmals 8 M dazu genommen? Das steht nicht so in der Anleitung, aber man kommt sonst nicht auf die angegebenen 73 M für den Ärmel. Ich bitte um eure Erklärung, Danke.
25.03.2025 - 22:03DROPS Design answered:
Liebe Angela, nach der Aufteilung wird zuerst den Rumpfteil in Runden über diese 206 Maschen gestrickt, dann stricken Sie danach die Ärmel über die 65 stillgelegten Maschen dann fassen Sie 1 Masche in jeder der 8 neuen Maschen auf = 73 Maschen. Schauen Sie mal diese Lektion, ab Bild 9 zeigen wir die Aufteilung - Ärmel sehen Sie ab Bild 18. Viel Spaß beim Stricken!
26.03.2025 - 08:14
![]() Chris Jackson wrote:
Chris Jackson wrote:
I am writing about the sleeve length which appears to become shorter the larger the size - is this correct?
17.03.2025 - 22:14DROPS Design answered:
Dear Mrs Jackson, yes that's correct, sleeves are shorter in the larger size because yoke is longer in these size. Remember you can always first try the jumper on and adjust length for sleeve before starting rib. Happy knitting!
18.03.2025 - 10:07
![]() Linda wrote:
Linda wrote:
This is a question: Why do you cut the strand in the first row increasing your stitches from 96 to 100, when you are working with circular needles?
29.01.2025 - 23:58DROPS Design answered:
Dear Linda, after neck edge has been worked and the markers inserted, you will now work the neckline, ie work short rows back and forth to make the neck on back piece higher. As you should start 2 sts before the 3rd marker (left side of front piece), you need to cut the yarn, then you will cut the yarn at the end of last short row to start yoke again from mid back, and in the round. See this video where we show how to work this kind of elevation. Happy knitting!
30.01.2025 - 10:32
![]() Lotta wrote:
Lotta wrote:
Hei, Teen kokoa S ja teen kauluksen lisäyksiä, minulle tuli oikea määrä silmukoita eli 92, mutta osien silmukka määrät eivät täsmää. Hihoissa on se 21, etukappaleessa 23 ja takakappalessa 27? Onko tämä oikein vai mikä meni vikaan? Mielestäni 21+21+23+27 on 92 . Mutta jos teen ohjeen mukaan takakappaleessakin olisi 23 mutta tästä ei tule 92 silmukkaa.
28.01.2025 - 22:33DROPS Design answered:
Hei, oletko muistanut laskea merkityt silmukat mukaan silmukkalukuihin? Etukappaleessa neulotaan aluksi 10 silmukkaa + 1 lisätty silmukka + merkitty silmukka, hihassa neulotaan 21 silmukkaa, takakappaleessa neulotaan 21 silmukkaa + 2 lisättyä silmukkaa + 2 merkittyä silmukkaa jne.
30.01.2025 - 19:20
![]() Sylvie wrote:
Sylvie wrote:
Bonjour, les rangs raccourcis après le col sont fait pour l’arrondi de l’encolure du devant ou pour une rehausse du dos? Merci pour votre réponse
22.01.2025 - 13:00DROPS Design answered:
Bonjour Sylvie, les rangs raccourcis de l'encolure donnent de la hauteur au côté dos du pull, ainsi l'encolure dos sera plus haute que l'encolure devant. Bon tricot!
22.01.2025 - 16:21
![]() Odile wrote:
Odile wrote:
Bonjour J'arrive au niveau de l'empiècement où on doit augmenter 1 fois sur 2 pour le dos et le devant et 1 fois sur 4 pour les manches. Est ce que quand on dit augmenter pour les manches ça revient à augmenter au niveau des 2 marqueurs centraux (ou les 2 repères devants) et donc, augmenter au niveau des repères dos/devant veut dire les 2 marqueurs extérieurs (ou arrières)? Je ne sais pas si vous comprenez ma question 😩.
21.01.2025 - 17:41DROPS Design answered:
Bonjour Odile, les tours commencent au milieu dos, ainsi, quand on ne doit augmenter que pour le dos/le devant et pas pour les manches, vous allez augmenter avant le 1er marqueur (fin du dos), après le 2ème marqueur (début du devant), avant le 3ème marqueur (fin du devant) et après le 4ème marqueur (début du dos). Bon tricot!
22.01.2025 - 09:44
![]() Odile wrote:
Odile wrote:
Pour l\'encolure, on travaille 4 rangs raccourcis entre /autour des marqueurs 2 et 3, comment alors sur ces mêmes rangs, augmenter avant et après les marqueurs 1 et 4 ? Merci
12.01.2025 - 15:01DROPS Design answered:
Bonjour Odile, après le col, coupez le fil et reprenez-le 2 mailles avant le marqueur 3 puis tricotez en allers et retours, en augmentant tous les rangs (sur l'endroit mais aussi sur l'envers) à chaque marqueur - tricotez le nombre de mailles indiqué, autrement dit 2 m avant le 2ème marqueur jusqu'à 2 m après le 3ème marqueur (dans le sens où ils ont été mis), puis tricotez toujours 2 mailles en plus à la fin de chaque rang. Dans cette vidéo, nous montrons comment tricoter ce type de rangs raccourcis. Bon tricot!
13.01.2025 - 09:21
![]() Gabriella wrote:
Gabriella wrote:
Grazie, riparto dal marcapunti con con un terzo ferro? Grazie
03.01.2025 - 18:55DROPS Design answered:
Buongiorno Gabriella, deve lavorare a maglia rasata e ferri accorciati come indicato. Buon lavoro!
04.01.2025 - 11:05
|
|
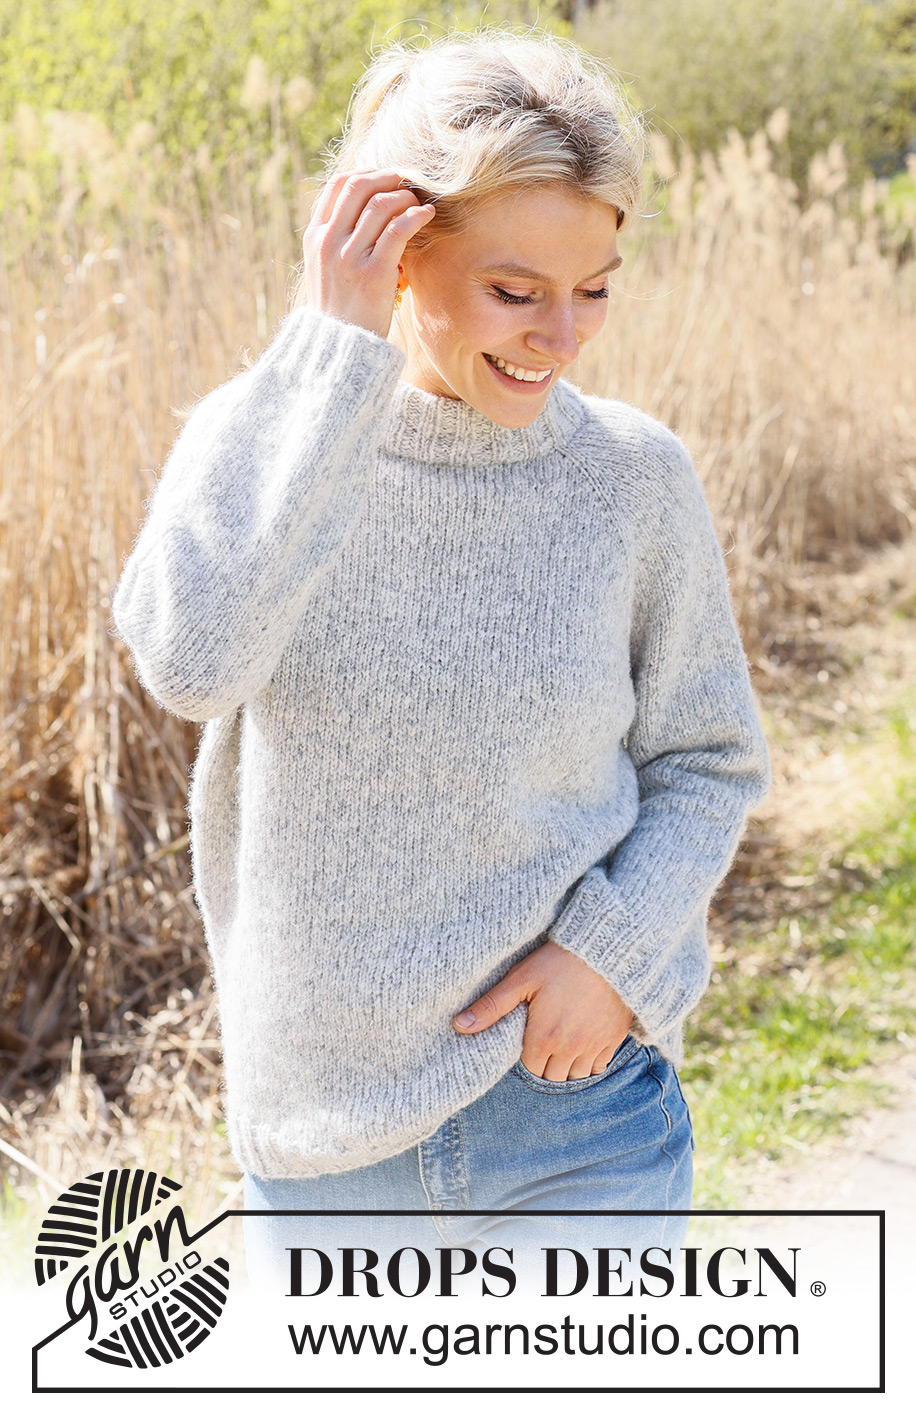
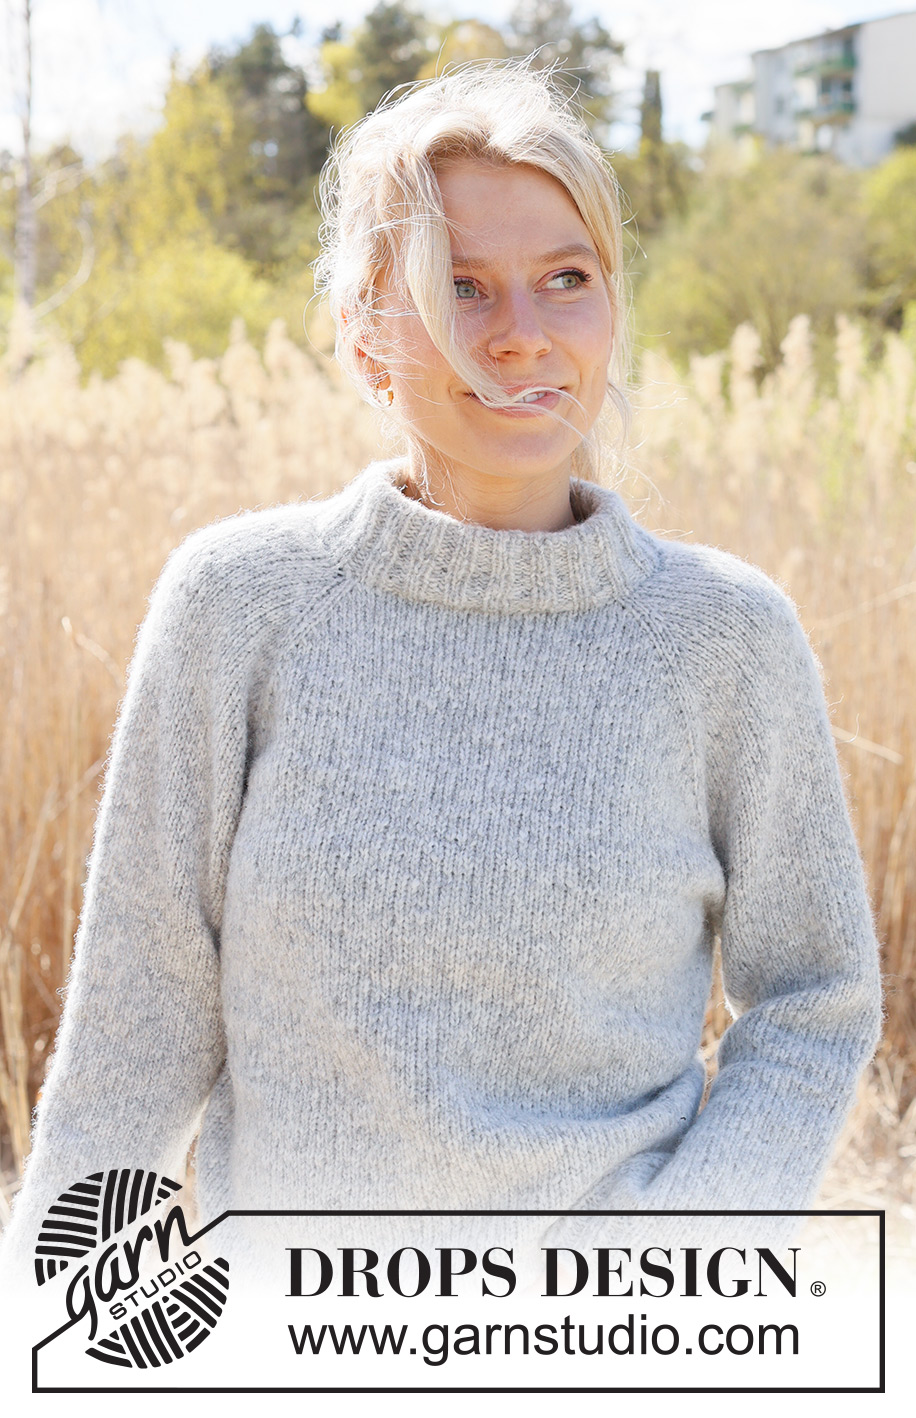
Early Moorning Mist#earlymoorningmistsweater |
|
 |
 |
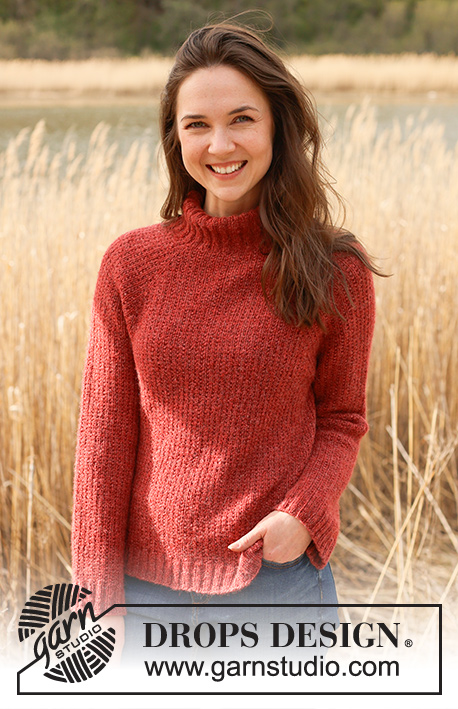
Knitted jumper in DROPS Air. The piece is worked top down with stocking stitch, double neck and raglan. Sizes S - XXXL.
DROPS 236-16 |
|
|
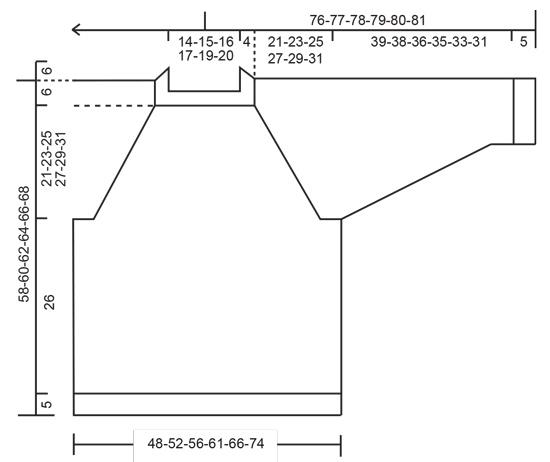
------------------------------------------------------- EXPLANATIONS FOR THE PATTERN: ------------------------------------------------------- RAGLAN: All increases before/after 1 stitch in stocking stitch (the stitch with the marker). Increase for the body before markers 1 and 3 and after markers 2 and 4 when working from the right side/after markers 1 and 3 and before markers 2 and 4 when working from the wrong side. Increase for the sleeves after markers 1 and 3 and before markers 2 and 4 when working from right side / before marker 1 and 3 and after marker 2 and 4 when working from wrong side. Increase 1 stitch by making 1 yarn over. The yarn overs are worked as follows from the wrong side: BEFORE MARKER: Purl the back loop. No hole. AFTER MARKER: Slip the yarn over off the left needle and place it back twisted (insert the left needle from the back when replacing it). Purl the front loop. No hole. The yarn overs are worked as follows from the right side: BEFORE MARKER: Slip the yarn over off the left needle and place it back twisted (insert the left needle from the back when replacing it). Knit the front loop; the stitch twists to the right. No hole. AFTER MARKER: Knit the back loop (the stitch twists to the left). No hole. DECREASE TIP (for sleeves): Start 3 stitches before the marker, knit 2 together, knit 2 (marker sits between these 2 stitches), slip 1 stitch as if to knit, knit 1 and pass the slipped stitch over the knitted stitch. ------------------------------------------------------- START THE PIECE HERE: ------------------------------------------------------- JUMPER – SHORT OVERVIEW OF THE PIECE: The neck and yoke are worked in the round with circular needle, from mid back and top down. The yoke is divided for body and sleeves and the body is continued in the round with circular needle. The sleeves are worked with short circular needle/double pointed needles. DOUBLE NECK: Cast on 88-92-96-100-104-108 stitches with short circular needle size 5 mm and DROPS Air. Change to circular needle size 4 mm. Work rib in the round (knit 2, purl 2) for 13 cm. On the next round insert 4 markers at the same time as you increase 4 stitches on the round as follows – the markers are used when increasing for raglan: Knit 10-12-12-14-14-16 and increase 1 stitch (half back piece), insert marker-1 in the next stitch, knit 21 (sleeve), insert marker-2 in the next stitch, knit 21-23-25-27-29-31 and increase 2 stitches evenly spaced (front piece), insert marker-3 in the next stitch, knit 21 (sleeve), insert marker-4 in the next stitch, knit the last 11-11-13-13-15-15 stitches and increase 1 stitch (half back piece) = 92-96-100-104-108-112 stitches. Cut the strand. NECKLINE: Change to circular needle size 5 mm and work the neckline with short rows AT THE SAME TIME as increasing to raglan as follows: Start from the right side, 2 stitches before marker-3 (left front of neck when the garment is worn). Work stocking stitch, increase to RAGLAN – read description above, on each side of the 4 marker-stitches and until you have worked 2 stitches past marker-2 (right front of neck – 8 stitches increased for raglan). Turn, tighten the strand, work back from the wrong side, increase for raglan to 2 stitches past the beginning of the short rows by marker-3 (8 stitches increased for raglan). Turn, tighten the strand, work back from the right side, increase for raglan to 2 stitches past where you turned last time by marker-2 (8 stitches increased for raglan). Turn, tighten the strand, work back from the wrong side, increase for raglan to 2 stitches past marker-3 (8 stitches increased for raglan). Cut the strand. YOKE: = 124-128-132-136-140-144 stitches. Now work in the round as follows: SIZES S, M, L and XL: Start mid-back, work stocking stitch and increase for raglan on the body and sleeves (on each side of all 4 marker-stitches) every 2nd round 2-8-10-11 times = 140-192-212-224 stitches. Continue to increase but now every 2nd increase is only on the body (4 stitches increased); you are now increasing every 2nd round on the body and every 4th round on the sleeves. Increase like this 18-15-14-16 times on the body (9-7-7-8 times on the sleeves). A total of 24-27-28-31 times on the body and 15-19-21-23 times on the sleeves = 248-280-296-320 stitches. Go to ALL SIZES. SIZES XXL and XXXL: Start mid-back, work stocking stitch and increase for raglan every round on the body 2-6 times and every 2nd round on the sleeves 1-3 times = 152-180 stitches. Then increase on both the body and sleeves every 2nd round (on each side of all 4 marker-stitches) 10-7 times = 232-236 stitches. Continue to increase, but now every 2nd increase is only on the body (4 stitches increased); you are now increasing every 2nd round on the body and every 4th round on the sleeves. Increase like this 18-22 times on the body (9-11 times on the sleeves). A total of 34-39 times on the body and 24-25 times on the sleeves = 340-368 stitches. Go to ALL SIZES. ALL SIZES. = 248-280-296-320-340-368 stitches. Continue working without further increases until the yoke measures 21-23-25-27-29-31 cm measured mid-front after the rib on the neck. Divide for the body and sleeves as follows: Work 37-42-43-48-51-58 stitches (half back piece), place the next 49-57-61-65-67-69 stitches on a thread for the sleeve, cast on 6-6-8-8-10-10 stitches (in side under sleeve), work 75-83-87-95-103-115 stitches (front piece), place the next 49-57-61-65-67-69 stitches on a thread for the sleeve, cast on 6-6-8-8-10-10 stitches (in side under sleeve), work 38-41-44-47-52-57 stitches (half back piece). The body and sleeves are finished separately. The piece is now measured from here! BODY: = 162-178-190-206-226-250 stitches. Continue with stocking stitch in the round for a further 26 cm. Knit 1 round and increase 18-22-22-26-26-34 stitches evenly spaced = 180-200-212-232-252-284 stitches. Change to circular needle size 4 mm. Work rib (knit 2, purl 2) for 5 cm. Cast off a little loosely with knit over knit and purl over purl. The jumper measures approx. 58-60-62-64-66-68 cm from the shoulder down. SLEEVES: Place the 49-57-61-65-67-69 stitches from the thread on the one side of the piece on short circular needle/double pointed needles size 5 mm and knit up 1 stitch in each of the new stitches cast on under the sleeve = 55-63-69-73-77-79 stitches. Insert a marker in the middle of the new stitches under the sleeve; allow the marker to follow your work onwards, it is used when decreasing under the sleeve. Continue with stocking stitch in the round for 4 cm. Now decrease 2 stitches mid-under the sleeve – read DECREASE TIP. Decrease like this every 7-4-3-2½-2-2 cm a total of 5-8-10-11-12-12 times = 45-47-49-51-53-55 stitches. Continue working until the sleeve measures 39-38-36-35-33-31 cm from the division (or to desired length. There is approx. 5 cm left). Knit 1 round and increase 7-5-7-5-7-5 stitches evenly spaced = 52-52-56-56-60-60 stitches. Change to double pointed needles size 4 mm and work rib (knit 2, purl 2) for 5 cm. Loosely cast off with knit over knit and purl over purl. The sleeve measures approx. 44-43-41-40-38-36 cm from the division. Work the other sleeve in the same way. . ASSEMBLY: Fold the neck double to the inside and fasten with a stitch in each raglan-line. |
|
 |
|
Have you finished this pattern?Tag your pictures with #dropspattern #earlymoorningmistsweater or submit them to the #dropsfan gallery. Do you need help with this pattern?You'll find 32 tutorial videos, a Comments/Questions area and more by visiting the pattern on garnstudio.com. © 1982-2026 DROPS Design A/S. We reserve all rights. This document, including all its sub-sections, has copyrights. Read more about what you can do with our patterns at the bottom of each pattern on our site. |
|


With over 40 years in knitting and crochet design, DROPS Design offers one of the most extensive collections of free patterns on the internet - translated to 17 languages. As of today we count 324 catalogues and 12290 patterns translated into English (UK/cm). 12290
We work hard to bring you the best knitting and crochet have to offer, inspiration and advice as well as great quality yarns at incredible prices! Would you like to use our patterns for other than personal use? You can read what you are allowed to do in the Copyright text at the bottom of all our patterns. Happy crafting!
Post a comment to pattern DROPS 236-16
We would love to hear what you have to say about this pattern!
If you want to leave a question, please make sure you select the correct category in the form below, to speed up the answering process. Required fields are marked *.