
Popular categories
Looking for a yarn?


Comments / Questions (77)
![]() DEBORAH wrote:
DEBORAH wrote:
It’s me again! Do I just do the first row of A 1A or all 8 rows? And. Is the increase just at one end or should there be an increase both ends where the markers are placed. Thank you Thanks. D
24.06.2024 - 22:11DROPS Design answered:
Dear Deborah, work each row each diagram the one afer the other, see this lesson under Several different diagrams worked consecutively on the row/round:. Happy knittng!
25.06.2024 - 09:16
![]() Deborah wrote:
Deborah wrote:
In A.1A, in row 7 is it a purl stitch every 4th stitch? And in A.1C,, A.1D and A.1E is it also a purl stitch in rows 3 and 7? Thank you
23.06.2024 - 23:27DROPS Design answered:
Dear Debra, yes, basically it is. Happy Knitting!
24.06.2024 - 03:42
![]() Joelsson Catharina wrote:
Joelsson Catharina wrote:
Hur kan jag läsa frågor och svar som är på andra språk än t.ex. svenska eller engelska? Jag behärskar inte holländska eller franska.
23.04.2024 - 15:58DROPS Design answered:
Hej. Vi har dessvärre ingen översättnings funktion för frågor, men du kan alltid klistra in de i google translate. Mvh DROPS Design
24.04.2024 - 11:43
![]() Paulien wrote:
Paulien wrote:
Goedemorgen, Het antwoord dat is gegeven schept geen duidelijkheid voor mij. Moet ik dan verder met A1.a, A1.b of A1.D Alvast bedankt
15.03.2024 - 07:59DROPS Design answered:
Dag Paulien,
Het gaat erom dat je het gecreëerde patroon voortzet, zoals te zien is in de laatste foto en omdat je steeds, dus dat kom neer op A.1B.
15.03.2024 - 10:32
![]() Paulien wrote:
Paulien wrote:
Goedendag, Ik ben gekomen tot ik de twee delen van de voorkant moet samenvoegen. Het patroon zegt dat ik dan verder A1 moet herhalen maar ik begrijp die logica niet. Welke A1 moet ik herhalen? Alvast bedankt voor de reactie! Groetjes Paulien
13.03.2024 - 22:36DROPS Design answered:
Dag Paulien,
Je zet het patroon van A.1 voort met om de 4 naalden averechte steken aan de goede kant.
14.03.2024 - 21:55
![]() Tineke Van Rijn-Smits wrote:
Tineke Van Rijn-Smits wrote:
Ik heb het voor- en achterpand samengevoegd en vraag me af of ik nu direct in de rondte moet gaan breien of pas als ik A.4 ga breien? En als het restant van A.3 in de rondte moet worden gebreid, brei ik dan de omslagen op dezelfde manier als wanneer ik heen en weer op de naald zou breien?
06.02.2024 - 23:40DROPS Design answered:
Dag Tineke,
Zodra je het voor- en achterpand samen op de naald hebt gezet brei je het lijf verder in de rondte. Als het goed is heb je bij het heen en weer breien de omslagen steeds aan de goede kant gehad en heb je op de verkeerde kant steeds averecht gebreid (even naalden in de telpatronen). Nu brei je de even naalden steeds recht en de omslagen doe je inderdaad op dezelfde manier als hiervoor.
07.02.2024 - 19:14
![]() Elke wrote:
Elke wrote:
Hallo, wenn ich das Bündchen nicht so weit haben möchte, sollte ich dann auf die Maschenzunahmen vor dem Beginn des Bündchens verzichten? Danke für eine Antwort.
03.02.2024 - 23:09DROPS Design answered:
Liebe Elke, dann sollen Sie die Maschenanzahl so anpassen, damit sie den gewünschten Umfang passt. Viel Spaß beim stricken!
05.02.2024 - 08:43
![]() Monica Martinsson wrote:
Monica Martinsson wrote:
Hej! Jag har en fråga gällande bakstycket stil M. Efter ökningarna ska man sticka tills arbetet mäter 10 cm ytterst längs ärmhålen, ( ca 24 cm från uppläggningskanten) stämmer detta? storlek S ska vara 8 respekt 20 cm Storlek L ska vara 8 respekt 22 cm Storlek XL ska vara 9 respekt. 25 cm Tacksam för svar då jag känner mig väldigt konfunderad över detta 8 respekt. 20 cm
22.01.2024 - 20:13DROPS Design answered:
Hej Monica, ja det stemmer str M 14+10=24 cm :)
02.02.2024 - 13:34
![]() Saskia S wrote:
Saskia S wrote:
Voor de nekrand staat er in het patroon dat deze aan de binnenkant vastgezet wordt met 1 steek aan elke schouder. In het filmpje wordt deze echter rondom vastgezet. Welke optie is het beste? Maakt dit nog verschil in het eindresultaat? P.S. Het is natuurlijk logisch maar in het patroon staat niet genoemd dat je de nekrand (héél losjes voor de elasticiteit) moet afhechten. (P.P.S. Het kan zijn dat mijn vraag dubbel is geplaatst, er ging iets niet helemaal goed bij het versturen)
16.01.2024 - 17:44DROPS Design answered:
Dag Saskia,
Je zou de hals eerst aan beide kanten bij de schouder vast kunnen zetten. Als dat niet bevalt kun je de hals alsnog op meerdere plekken vast zetten of helemaal rondom. Je hebt inderdaad gelijk dat de halsrand losjes (elastisch) vastgenaaid moet worden.
21.01.2024 - 12:17
![]() Saskia S wrote:
Saskia S wrote:
Voor de nekrand staat er in het patroon dat deze aan de binnenkant vastgezet wordt met 1 steek aan elke schouder. In het filmpje wordt deze echter rondom vastgezet. Welke optie is het beste? Maakt dit nog verschil in het eindresultaat? P.S. Het is natuurlijk logisch maar in het patroon staat niet genoemd dat je de nekrand (héél losjes voor de elasticiteit) moet afhechten.
16.01.2024 - 17:41
|
||||||||||||||||||||||||||||||||||
Variety#varietysweater |
||||||||||||||||||||||||||||||||||
 |
 |
|||||||||||||||||||||||||||||||||
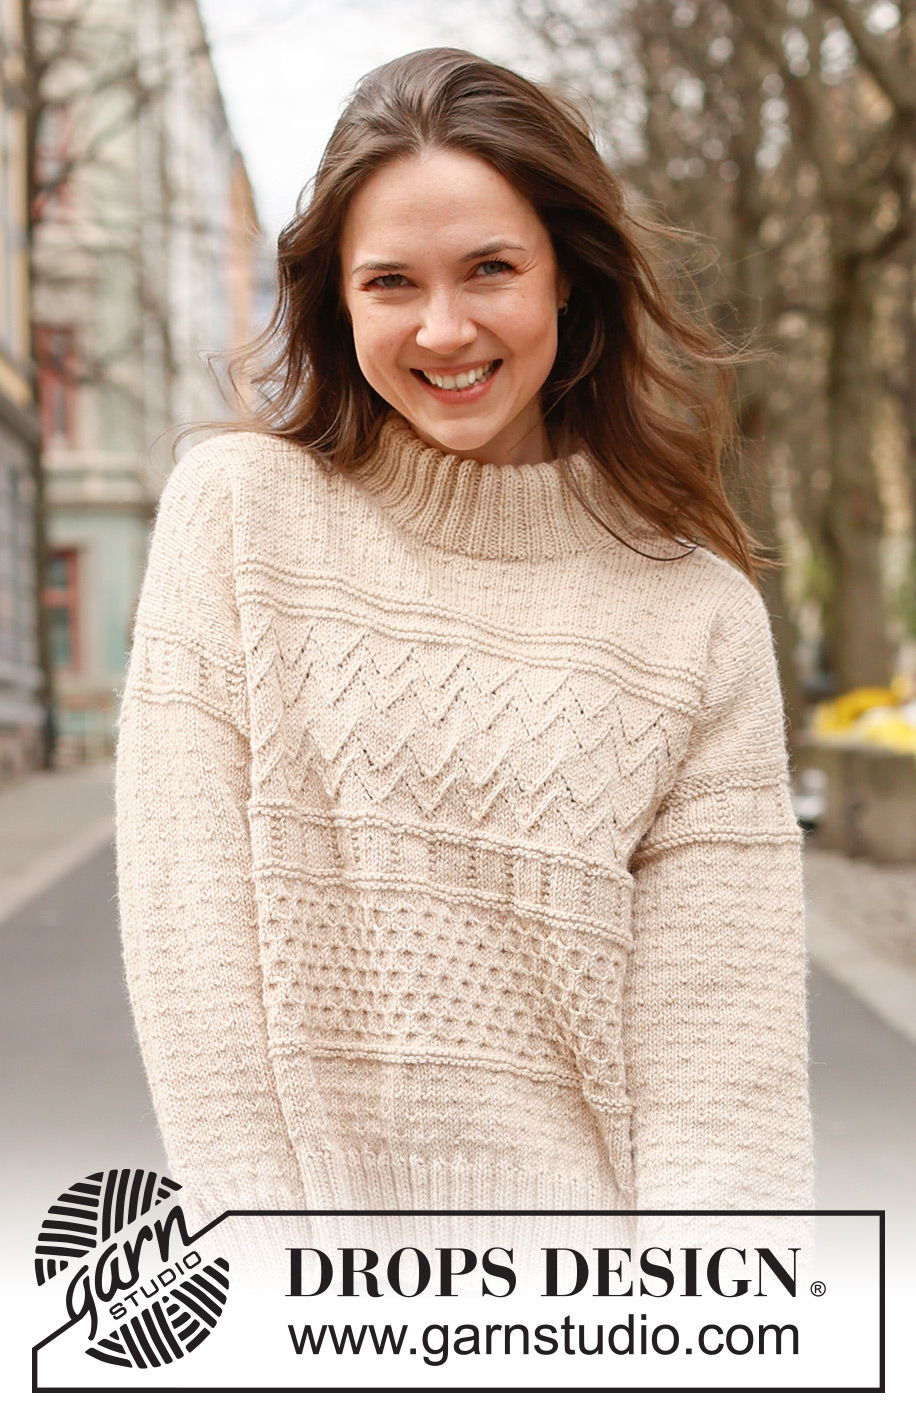
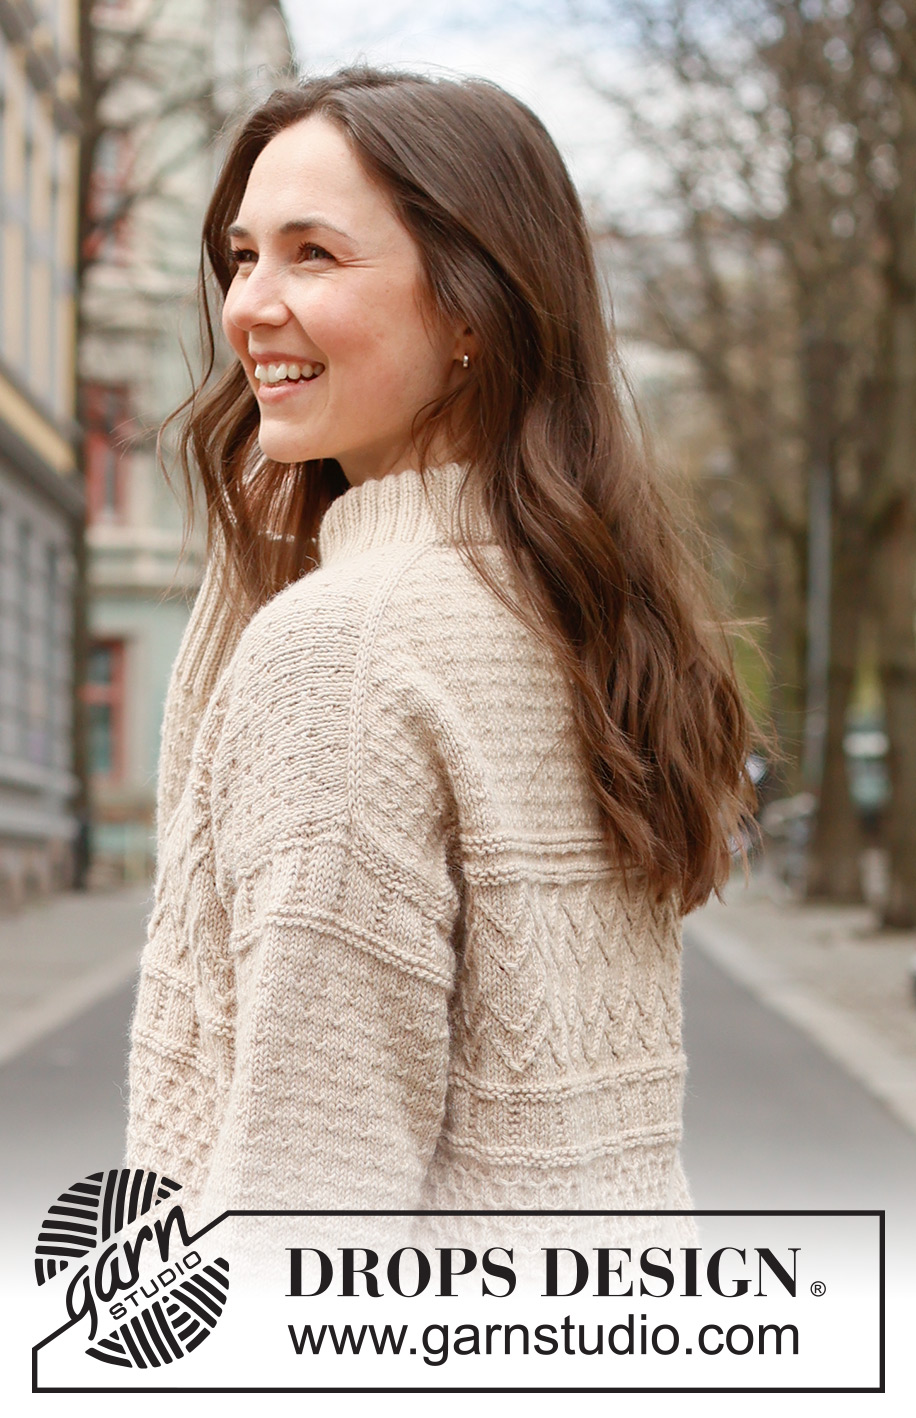
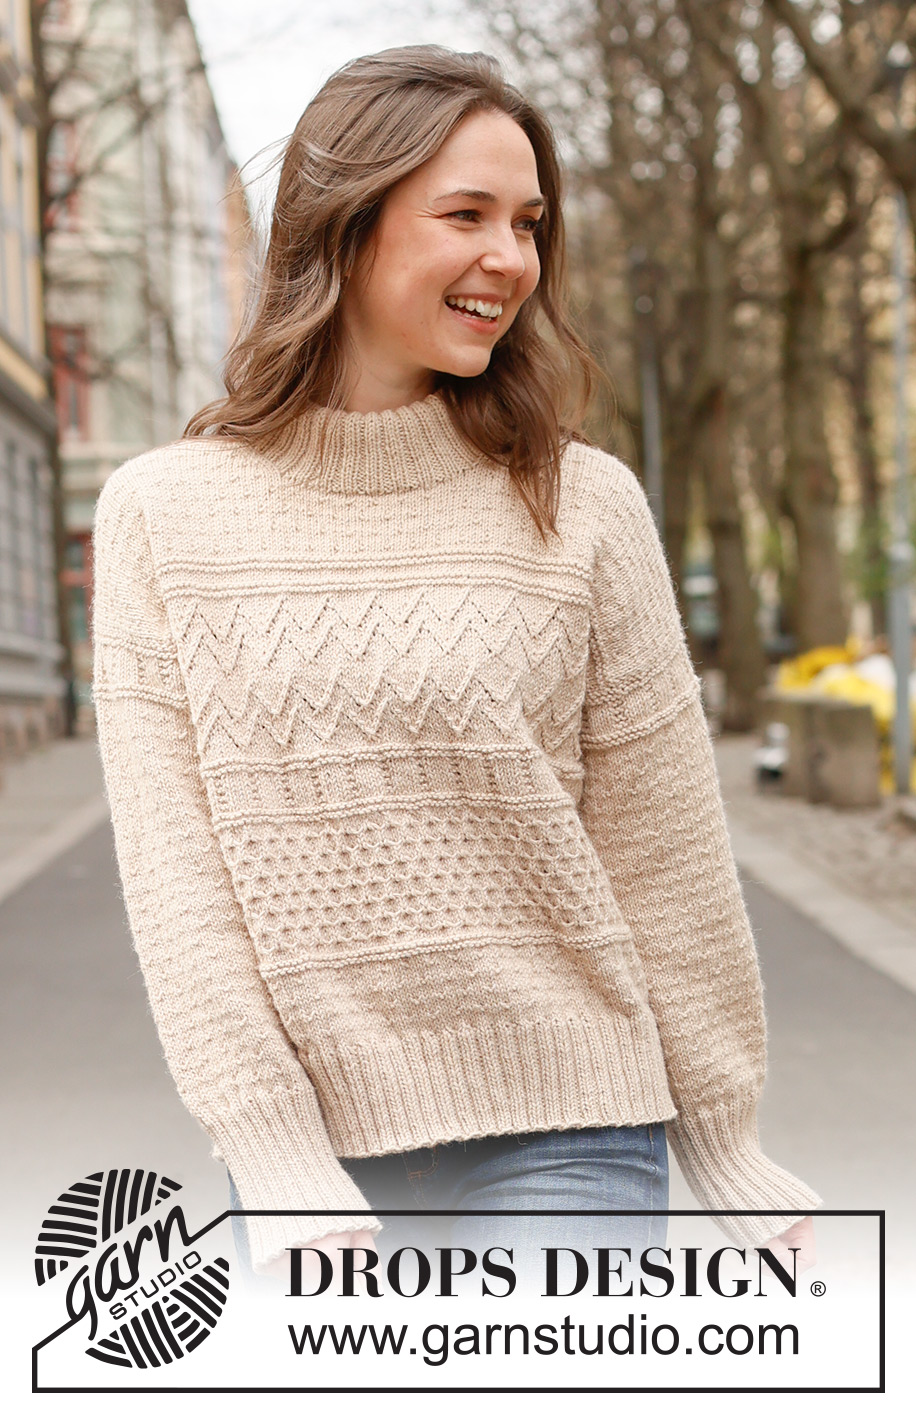
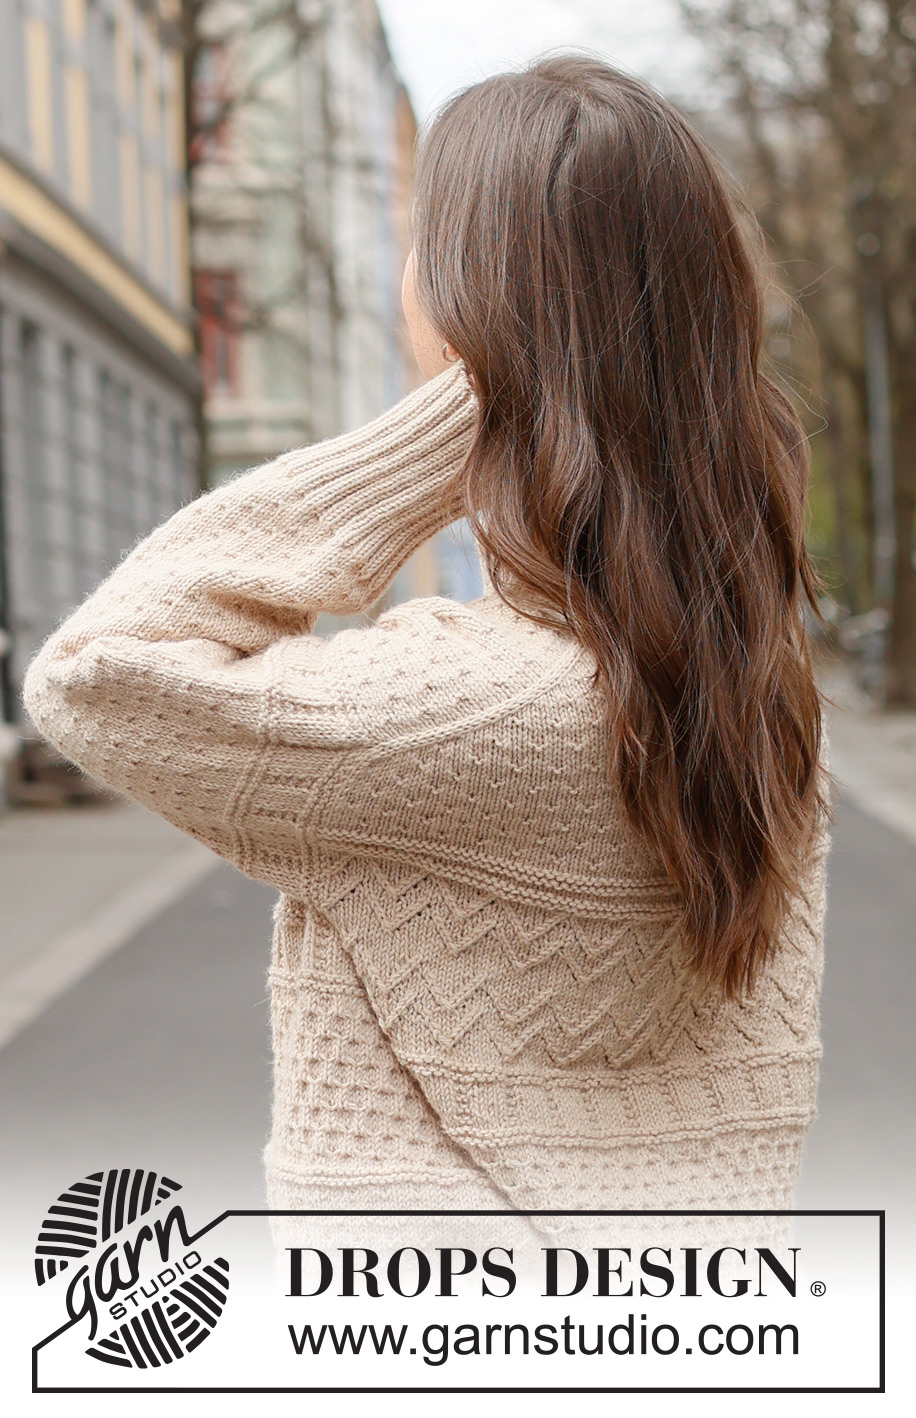
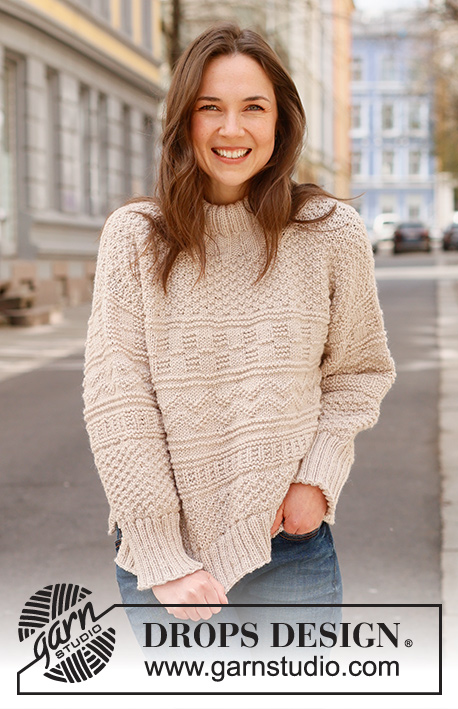
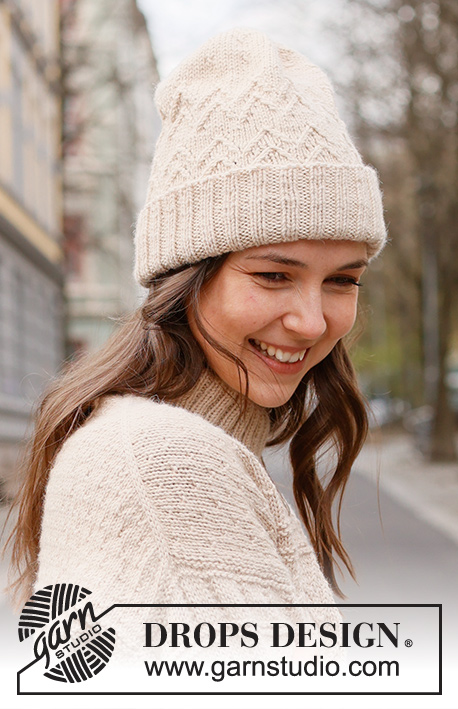
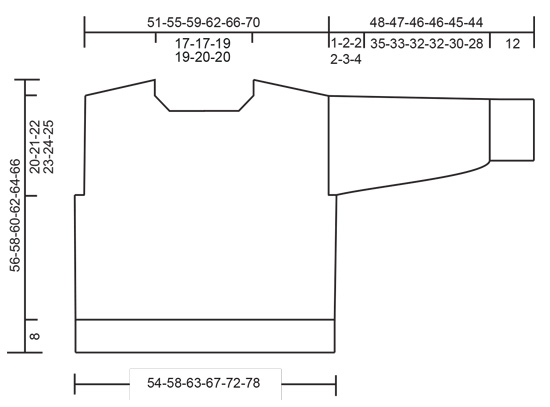
Knitted jumper in DROPS Lima or DROPS Karisma. Piece is knitted top down with European shoulder / diagonal shoulder, relief pattern and double neck edge. Size: S - XXXL
DROPS 235-3 |
||||||||||||||||||||||||||||||||||
|
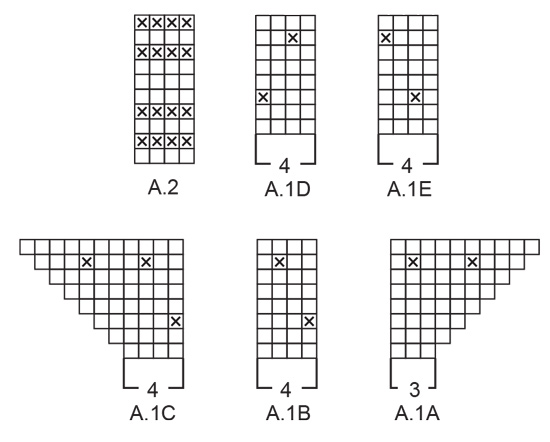
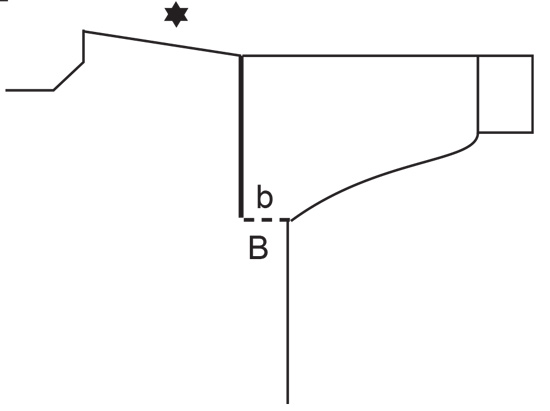
---------------------------------------------------------- EXPLANATION FOR THE PATTERN: ---------------------------------------------------------- PATTERN: See diagrams A.1 to A.6. Diagrams show all rows in pattern seen from the right side. INCREASE TIP FROM THE RIGHT SIDE: Increase towards the left AFTER MARKER: Use left needle to pick up yarn between 2 stitches from row below, pick up yarn from the front and knit in the stitch loop that is on the back of the needle. Increase towards the right BEFORE MARKER: Use left needle to pick up yarn between 2 stitches from row below, pick up yarn from the back and knit in the stitch loop that is on the front side of the needle. INCREASE TIP FROM THE WRONG SIDE: Increase towards the right AFTER MARKER: Use left needle to pick up yarn between 2 stitches from row below, pick up yarn from the back and purl in the stitch loop that is on the front side of the needle. Increase towards the left BEFORE MARKER: Use left needle to pick up yarn between 2 stitches from row below, pick up yarn from the front and purl in the stitch loop that is on the back side of the needle. DECREASE TIP (applies to mid under sleeves): Decrease 1 stitch on each side of marker thread as follows: Work until 3 stitches remain before marker thread and knit 2 together, knit 2 (marker thread is between these 2 stitches), slip 1 stitch knitwise, knit 1, pass slipped stitch over stitch worked. ---------------------------------------------------------- START THE PIECE HERE: ---------------------------------------------------------- JUMPER - SHORT OVERVIEW OF THE PIECE: Work top part of back piece back and forth on circular needle, top down until armholes are done. Then pick up stitches along each shoulder, increase for neck and work front piece back and forth on circular needle, top down until armholes are done. Slip front and back piece together. Work the body in the round on circular needle. Pick up stitches around each armhole. Work sleeve cap back and forth on circular needle, then work the rest of sleeve in the round on double pointed needles/short circular needle. Finish with a double neck edge. BACK PIECE: Cast on 39-39-43-43-47-47 stitches on circular needle size 4 mm with DROPS Lima or DROPS Karisma. Purl 1 row from wrong side. Insert 1 marker on the inside of the 3 outermost stitches in each side. Marker should be inside the outermost 3 stitches on every row. Work first row as follows from right side: A.1A, increase AFTER marker at the beginning of row – read INCREASE TIP FROM RIGHT SIDE, work A.1B 8-8-9-9-10-10 times in total, work A.1C and increase at the same time BEFORE marker at the end of row – remember INCREASE TIP FROM RIGHT SIDE. On next row (wrong side) increase the same way – read INCREASE TIP FROM WRONG SIDE. Continue pattern like this and increase the same way from both right and wrong side 34-38-40-44-46-50 times in total – work the increased stitches in A.1B, but make sure that there are always at least 3 stitches in stocking stitch at the edge in each side. REMEMBER THE KNITTING TENSION! NOTE! When A.1A, A.1B and A.1C have been worked 1 time vertically, repeat A.1 vertically the same way, i.e. every time A.1 is repeated vertically, there is room for 4 more repetitions of A.1B in width. After last increase there are 107-115-123-131-139-147 stitches on needle and piece measures approx. 12-14-14-16-16-18 cm from cast-on edge. Continue pattern back and forth as before until piece measures 8-10-8-9-9-11 cm measured at the edge along armhole (piece measures approx. 20-24-22-25-25-29 cm from cast-on edge mid back) – finish after a row from wrong side. Then work A.2 back and forth over all stitches. When A.2 has been worked, work next row as follows from right side: 1 stitch in stocking stitch, A.3A, work A.3B 12-13-14-15-16-17 times in total, A.3C, 1 stitch in stocking stitch. Continue pattern like this. When back piece measures 17-18-18-19-20-21 cm measured at the edge along armhole, cut the yarn, lay the piece to one side on a thread or on an extra needle. Armholes on back piece are now done (A.3 is not done but is finished on body). Work front piece as explained below. FRONT PIECE: Begin with right shoulder (when garment is worn). Pick up from right side 34-38-40-44-46-50 stitches inside 1 stitch along right shoulder on back piece (i.e. pick up 1 stitch in every row from edge at the top of back piece). Purl 1 row from wrong side. Work next row as follows from the right side (i.e. from armhole): S, M, XXL and XXXL: 3 stitches in stocking stitch, work A.1B until 3 stitches remain, finish with 3 stitches in stocking stitch. L and XL: 3 stitches in stocking stitch, work A.1B until 5 stitches, work the 2 first stitches in A.1B, finish with 3 stitches in stocking stitch. ALL SIZES: Continue pattern back and forth like this. When piece measures 5 cm from where stitches were picked up, increase stitches towards the neck. Increase 1 stitch for neck inside 3 stitches at the end of every row from right side, remember INCREASE TIP FROM THE RIGHT SIDE. Increase for neck the same way 6-6-7-7-8-8 times in total – work the increased stitches in A.1B, but make sure that there are always at least 3 stitches in stocking stitch towards the neck. After last increase there are 40-44-47-51-54-58 stitches on needle. Cut the yarn when last increase from right side is done. Lay the piece to one side on a thread or on an extra needle Then work left shoulder as explained below. Pick up from right side 34-38-40-44-46-50 stitches inside 1 stitch along left shoulder on back piece. Purl 1 row from wrong side. Work next row as follows from the right side (i.e. from neck): S, M, XXL and XXXL: 3 stitches in stocking stitch, work A.1D until 3 stitches remain, finish with 3 stitches in stocking stitch. L and XL: 3 stitches in stocking stitch, work A.1E until 5 stitches, work the 2 first stitches in A.1E, finish with 3 stitches in stocking stitch. ALL SIZES: Continue pattern back and forth like this. When piece measures 5 cm from where stitches were picked up, increase stitches towards the neck. Increase 1 stitch for neck inside 3 stitches at the beginning of every row from right side – remember INCREASE TIP FROM THE RIGHT SIDE. Increase for neck the same way 6-6-7-7-8-8 times in total – work the increased stitches in A.1D/A.1E, but make sure that there are always at least 3 stitches in stocking stitch towards the neck. After last increase there are 40-44-47-51-54-58 stitches on needle. Work next row as follows from wrong side: Work pattern as before over the 40-44-47-51-54-58 stitches from left front, cast on 27-27-29-29-31-31 stitches for neck at the end of this row, then work pattern as before over the 40-44-47-51-54-58 stitches from right front piece = 107-115-123-131-139-147 stitches. Continue A.1 back and forth until piece measures approx. 14-16-16-17-17-19 cm from where stitches were picked up - finish after a row from wrong side as on back piece. Now insert 1 marker at the edge along armhole, 3-3-4-4-4-4 cm from where stitches were picked up. Measure the garment by folding the piece at the top point on the inside of shoulder and at marker on front piece - make sure that A.1 is the same length on front and back piece. This important so that the pattern fits in the sides when piece is put together. Adjust the length of A.1 if needed. Then work A.2 back and forth over all stitches. When A.2 has been worked, work next row as follows from right side: 1 stitch in stocking stitch, A.3A, work A.3B 12-13-14-15-16-17 times in total, A.3C, 1 stitch in stocking stitch. Continue the pattern like this until piece measures 23-24-26-27-28-29 cm, measured along the edge of armhole from where stitches were picked up (A.3 is not done but finish front piece on same row in diagram as back piece – this is important so that the pattern fits in the sides when piece is put together). Now put front piece and back piece together for body as explained below. BODY: Work pattern as before over the 107-115-123-131-139-147 stitches from front piece, cast on 6-8-8-10-14-18 new stitches at the end of this row (in the side under sleeve), work pattern as before over the 107-115-123-131-139-147 stitches from back piece and cast on 6-8-8-10-14-18 new stitches on row (in the side under sleeve) = 226-246-262-282-306-330 stitches. Finish A.3 - work stitches cast on in each side in stocking stitch until A.3 is finished. Now work A.4 in the round - AT THE SAME TIME on first round increase 2-0-2-0-0-0 stitches evenly = 228-246-264-282-306-330 stitches. On next to last round in A.4 increase 32-34-36-38-38-42 stitches evenly = 260-280-300-320-344-372 stitches (this is done because the next pattern contracts the piece). When A.4 has been worked, work A.5 in the round. Repeat A.5 vertically until piece measures 41-43-45-46-46-48 cm, measured from the top point on front piece in towards the neck (work A.5 approx. 3-3-4-4-4-4 times vertically and piece measures approx. 18-19-19-19-18-19 cm from where stitches were cast on in each side) – AT THE SAME TIME on last round in A.5, decrease 32-36-36-40-40-44 stitches evenly = 228-244-264-280-304-328 stitches. Now work A.6 in the round over all stitches. When A.6 has been worked, work A.1B in the round over all stitches until piece measures approx. 48-50-52-54-56-58 cm, measures from the top point on front piece in towards the neck – finish when 2 or 3 rounds in stocking stitch have been worked after a round with purl stitches (piece measures approx. 25-26-26-27-28-29 cm from where stitches were cast on in each side). Knit 1 round while increasing 56-64-68-76-76-84 stitches evenly = 284-308-332-356-380-412 stitches. Switch to circular needle size 3 mm. Work rib (knit 2/purl 2) for 8 cm. Loosely cast off. Jumper measures approx. 56-58-60-62-64-66 cm, measured from the top point on shoulder on front piece. RIGHT SLEEVE: Use circular needle size 4 mm, pick up from right side 36-38-38-40-42-44 stitches from bottom of armhole and up to shoulder (along back piece), and 48-50-54-56-58-60 stitches from shoulder and down to the bottom of armhole on the other side (along front piece) = 84-88-92-96-100-104 stitches. Insert 1 marker thread in the middle of row – use marker thread when counting where pattern should begin and where to measure from. Begin from wrong side with 2nd row in A.4, and work A.4 back and forth – marker thread mid on top of sleeve should fit symbol in A.4. When sleeve measures 1-2-2-2-3-4 cm, slip piece together and work the rest of sleeve on a short circular needle/double pointed needles. When A.4 has been worked, work A.1B in the round. AT THE SAME TIME when piece measures 3 cm from where piece was put together, decrease 2 stitches mid under sleeve - read DECREASE TIP. Decrease like this every 2½-2½-2-2-1½-1½ cm 12-12-14-14-16-16 times in total = 60-64-64-68-68-72 stitches. Work until sleeve measures 35-33-32-32-30-28 cm from where piece was put together. 12 cm remain until finished measurements. Try the jumper and work to desired length before rib. Knit 1 round while increasing 16-16-16-16-20-20 stitches evenly = 76-80-80-84-88-92 stitches. Switch to double pointed needles size 3 mm. Work rib (knit 2/purl 2) for 12 cm. Loosely cast off. Sleeve measures approx. 48-47-46-46-45-44 cm from stitches where knitted up. Sew bottom of armhole - see chart. LEFT SLEEVE: Use circular needle size 4 mm, pick up from right side 48-50-54-56-58-60 stitches from bottom of armhole and up to shoulder (along front piece) and 36-38-38-40-42-44 stitches from shoulder and down to the bottom of armhole on the other side (along front piece) = 84-88-92-96-100-104 stitches. Insert 1 marker thread in the middle of row – use marker thread when counting where pattern should begin and where to measure from. Work the rest of the sleeve the same way as right sleeve. Sew bottom of armhole - see chart. NECK EDGE: Begin at one shoulder line, and pick up from right side inside 1 edge stitch approx. 116-116-128-128-140-140 stitches on a short circular needle size 3 mm. Number of stitches must be divisible by 4. Work rib in the round (knit 2/purl 2) for 12-12-13-13-14-14 cm. Fold the rib down on inside of garment and fasten it with 1 stitch at each shoulder. |
||||||||||||||||||||||||||||||||||
Diagram explanations |
||||||||||||||||||||||||||||||||||
|
||||||||||||||||||||||||||||||||||
 |
||||||||||||||||||||||||||||||||||
 |
||||||||||||||||||||||||||||||||||
 |
||||||||||||||||||||||||||||||||||
 |
||||||||||||||||||||||||||||||||||
Have you finished this pattern?Tag your pictures with #dropspattern #varietysweater or submit them to the #dropsfan gallery. Do you need help with this pattern?You'll find 34 tutorial videos, a Comments/Questions area and more by visiting the pattern on garnstudio.com. © 1982-2026 DROPS Design A/S. We reserve all rights. This document, including all its sub-sections, has copyrights. Read more about what you can do with our patterns at the bottom of each pattern on our site. |
||||||||||||||||||||||||||||||||||


With over 40 years in knitting and crochet design, DROPS Design offers one of the most extensive collections of free patterns on the internet - translated to 17 languages. As of today we count 324 catalogues and 12290 patterns translated into English (UK/cm). 12290
We work hard to bring you the best knitting and crochet have to offer, inspiration and advice as well as great quality yarns at incredible prices! Would you like to use our patterns for other than personal use? You can read what you are allowed to do in the Copyright text at the bottom of all our patterns. Happy crafting!
Post a comment to pattern DROPS 235-3
We would love to hear what you have to say about this pattern!
If you want to leave a question, please make sure you select the correct category in the form below, to speed up the answering process. Required fields are marked *.