
Popular categories
Looking for a yarn?


Comments / Questions (29)
![]() Cornelia Moseid wrote:
Cornelia Moseid wrote:
Jeg får ikke felling til armhule å gå opp. Strikker strl L. Skal ha 82 masker når jeg begynner å feller. 1 g =4+4 =74 masker. 2 g=3+3=68 masker. 3g=2+2=64, 4g=2+2=60 , 4g=2+2=60, 5g=2+2=56, og 7 felling er 1+1 hvilket gir 54 masker. Men oppskriften sier 50???? Som 2: Skal det bare felles i begynnelsen av pinnen, sånn att en «fellerunde» blir 2 pinner høy? Håper på svar 🤞
04.01.2025 - 23:19DROPS Design answered:
Hei Cornelia. Bakstykket. I str. L legger du opp 84 masker, etter vrangborden felles det 10 masker = 74 masker. Deretter skal det økes masker, så når arbeidet måler 26 cm skal du ha 78 masker på pinnen og det skal felles 4 masker til ermhull i hver side = 70 masker. Videre felles det av til ermehull på starten av hver pinne i hver side slik: Fell av 3 masker 1 gang = 64, 2 masker 3 ganger = 52 masker og 1 maske 1 gang = 50 masker. mvh DROPS Design
07.01.2025 - 15:18
![]() Lorraine wrote:
Lorraine wrote:
Hi. As this pattern is not knitted in the round, but back and forth, could I use straight needles? I have arthritis and struggle to hold circular needles. Many thanks
27.10.2024 - 15:59DROPS Design answered:
Dear Lorraine, yes, you could use straight needles. The only issue is that we use circular needles because, since we have many stitches in the row, it's more confortable to have them in the cable of the circular needle than fit them in the straight needles. But if you can manage that then it's fine. Happy knitting!
27.10.2024 - 17:09
![]() Laura wrote:
Laura wrote:
Hei, kan man strikke ermene rundt ved å plukke masker? Vil genseren/ ermene se veldig annerledes ut enn på bilde?
28.08.2024 - 22:18DROPS Design answered:
Hej Laura, ja det går, da må du starte fra ærmekuplen og strikke nedad istedet for at følge opskriften :)
29.08.2024 - 11:56
![]() GorsAnita wrote:
GorsAnita wrote:
Hallo, wat wil zeggen aan de binnenkant van 1 kantsteek voor de mouwen vast te naaien, begrijp het niet dank voor antwoord
31.05.2024 - 10:37
![]() Michelle wrote:
Michelle wrote:
Nu har jeg set flere opskrifter på pind 6 herinde, hvor efter man har strikket den nederste rib, skal tage IND. Opskriften her siger det samme. Hvorfor har man valgt det? Er der for at undgå at ribben strammer? Normalt tager man UD
17.12.2023 - 11:10DROPS Design answered:
Hei Michelle. På 80-tallet skulle gjerne vrangborden stramme inn nederst på et plagg, nå vil man gjerne ha en pen overgang mellom bol og vrangborden. Vi mener det blir penest ved å strikke vrangborden med en pinnestr mindre en resten av plagget og ved å ta inn masker etter vrangborden. mvh DROPS Design
18.12.2023 - 09:27
![]() Julie wrote:
Julie wrote:
Hei, kan dere være så snill å rette oppskriften slik som Vigdis her har kommentert. Jeg har nå strikket hele vrangborden feil fordi jeg tolket det som at jeg skulle strikke 1 vridd rett og 2 vrang både frem og tilbake. Utrolig irriterende!
08.11.2023 - 21:01
![]() Vigdis wrote:
Vigdis wrote:
Når jeg strikker vrangbord; da kan jeg vel ikke strikke *1 vridd rett, 2 vrang* tilbake fra vrangsiden? Da vil det vel bli typ perlestrikk…?
10.04.2023 - 16:03DROPS Design answered:
Hei Vigdis, På vrangen strikker du 2 rett, 1 vridd vrang, slik at du fortsetter vrangborden. God fornøyelse!
11.04.2023 - 06:44
![]() Justyna wrote:
Justyna wrote:
Czy na pewno ściągacz jest robiony wzorem francuskim? Na zdjęciu jest pokazany zwykły ściągacz.
01.01.2023 - 20:31DROPS Design answered:
Witaj Justyno, w ściągaczu powtarzamy sekwencję *1 oczko przekręcone na prawo, 2 oczka lewe*, ściegiem francuskim tylko wykonujemy po 1 oczku brzegowym z każdej strony (na szew, ponieważ sweterek jest przerabiany w częściach i zszywany na końcu). Pozdrawiamy serdecznie w Nowym Roku!
02.01.2023 - 12:25
![]() Monika Engström wrote:
Monika Engström wrote:
Varför rundstickor när beskrivningen är för stickning fram och tillbaka? Hur ska man tex maska av i början av varje varv när man stickar ärmar på rundsticka? Mönstret förutsätter avmaskning på varje sida av ärmen.
07.11.2022 - 10:54DROPS Design answered:
Hei Monika. Du kan fint strikke for-og bakstykket og ermene på lange parpinner, men vi syns det er mer behagelig å bruke rundpinner. Det står ingen steder at du skal strikke ermene rundt, de strikkes frem og tilbake på rundpinne 5, og det felles av akurrat som om du bruker lange parpinner. mvh DROPS Design
07.11.2022 - 14:18
![]() Friedy wrote:
Friedy wrote:
Hoe brei ik een gedraaide rechte boordsteek? En hoe doe ik de samengebreide steek met daarna een omslag bij het boordje?
07.09.2022 - 22:40DROPS Design answered:
Dag Friedy,
In deze video kun je zien hoe je 2 steken recht samen breit. Daarna maak je gelijk een omslag.
08.09.2022 - 16:55
|
|
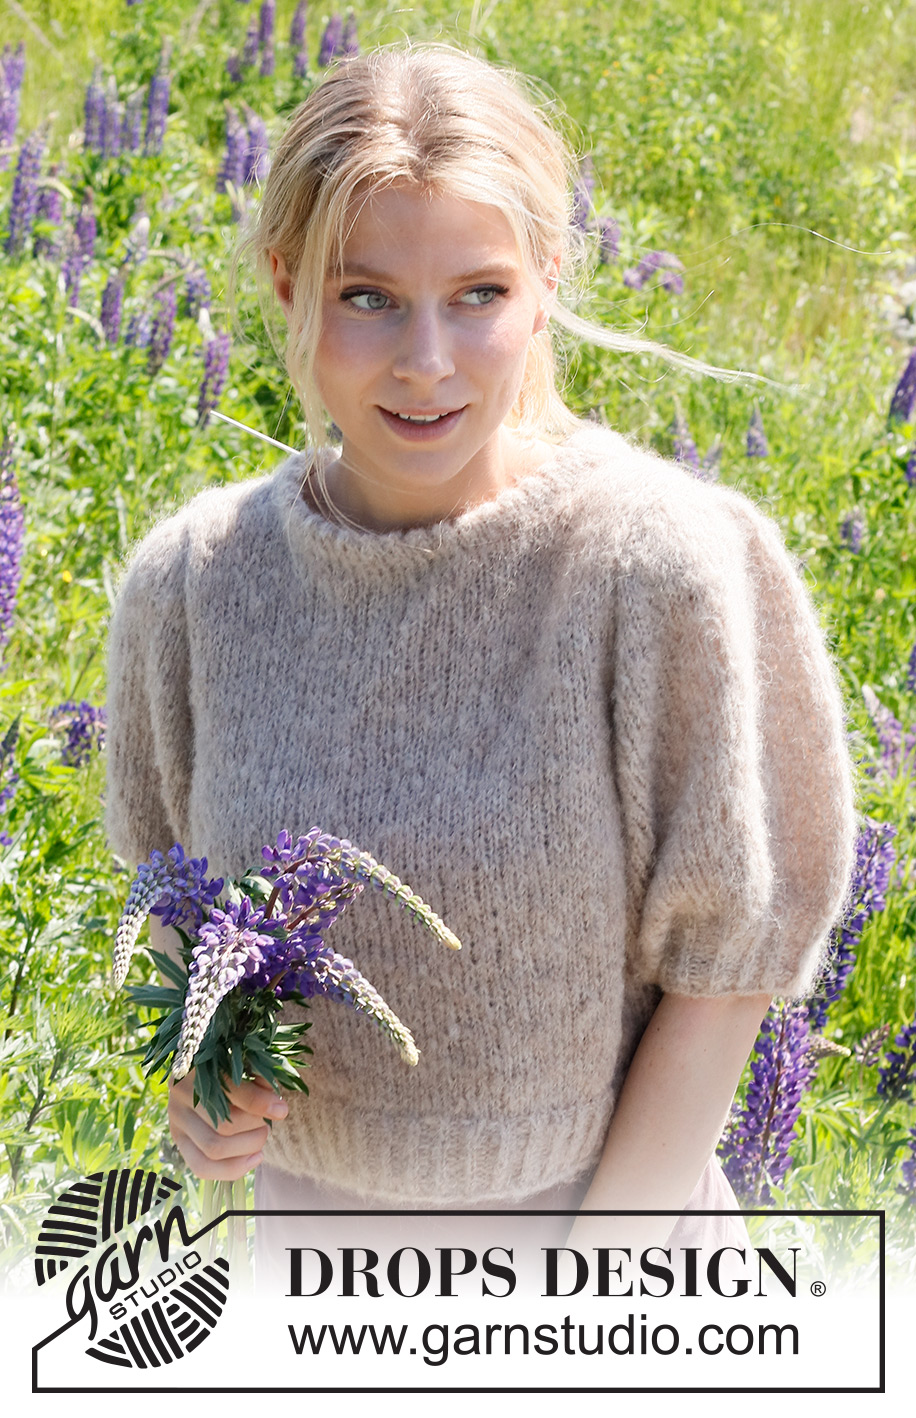
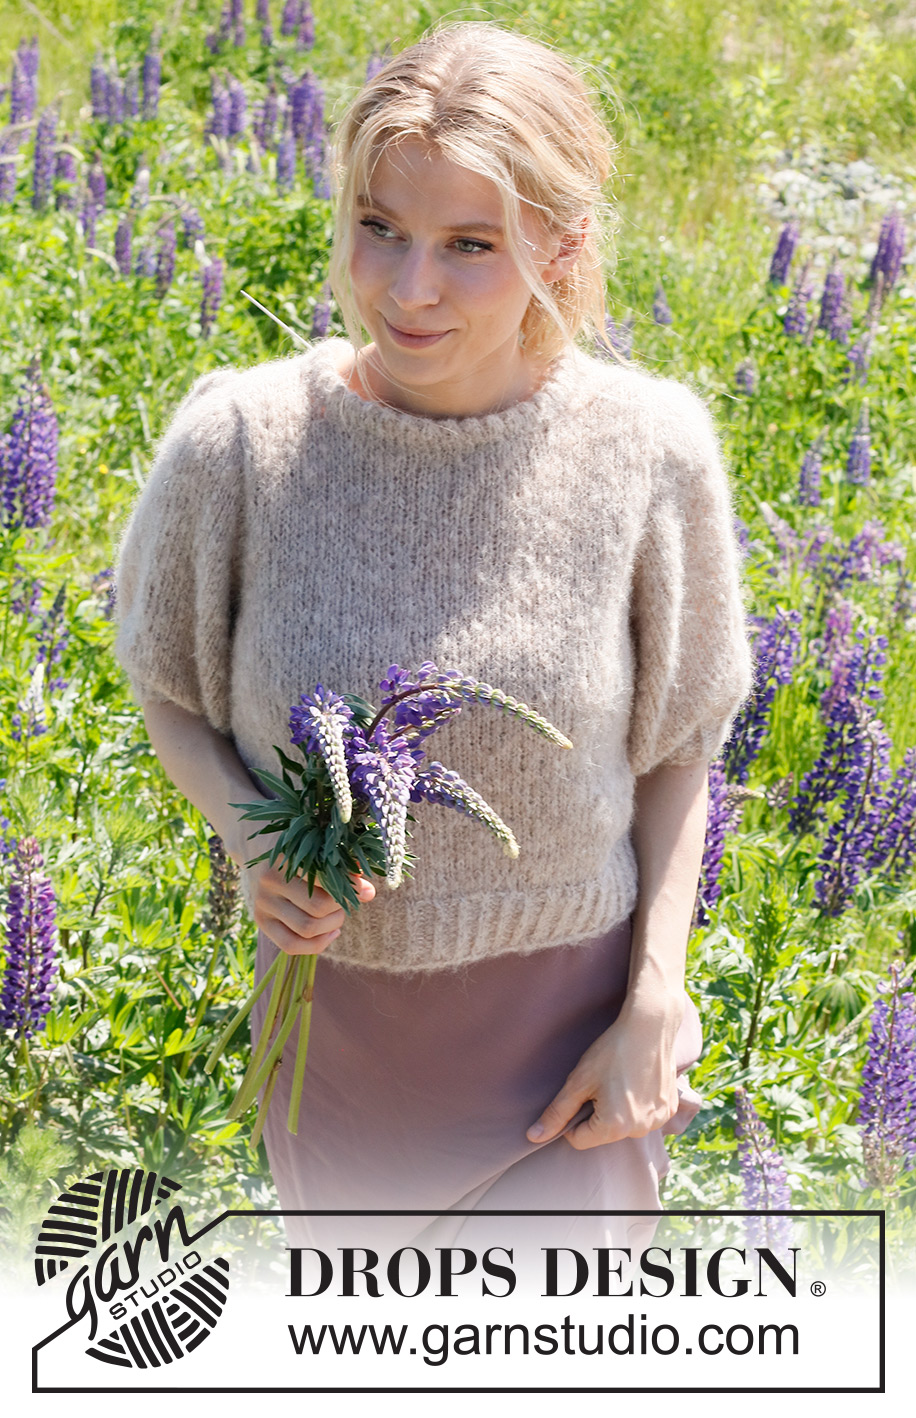
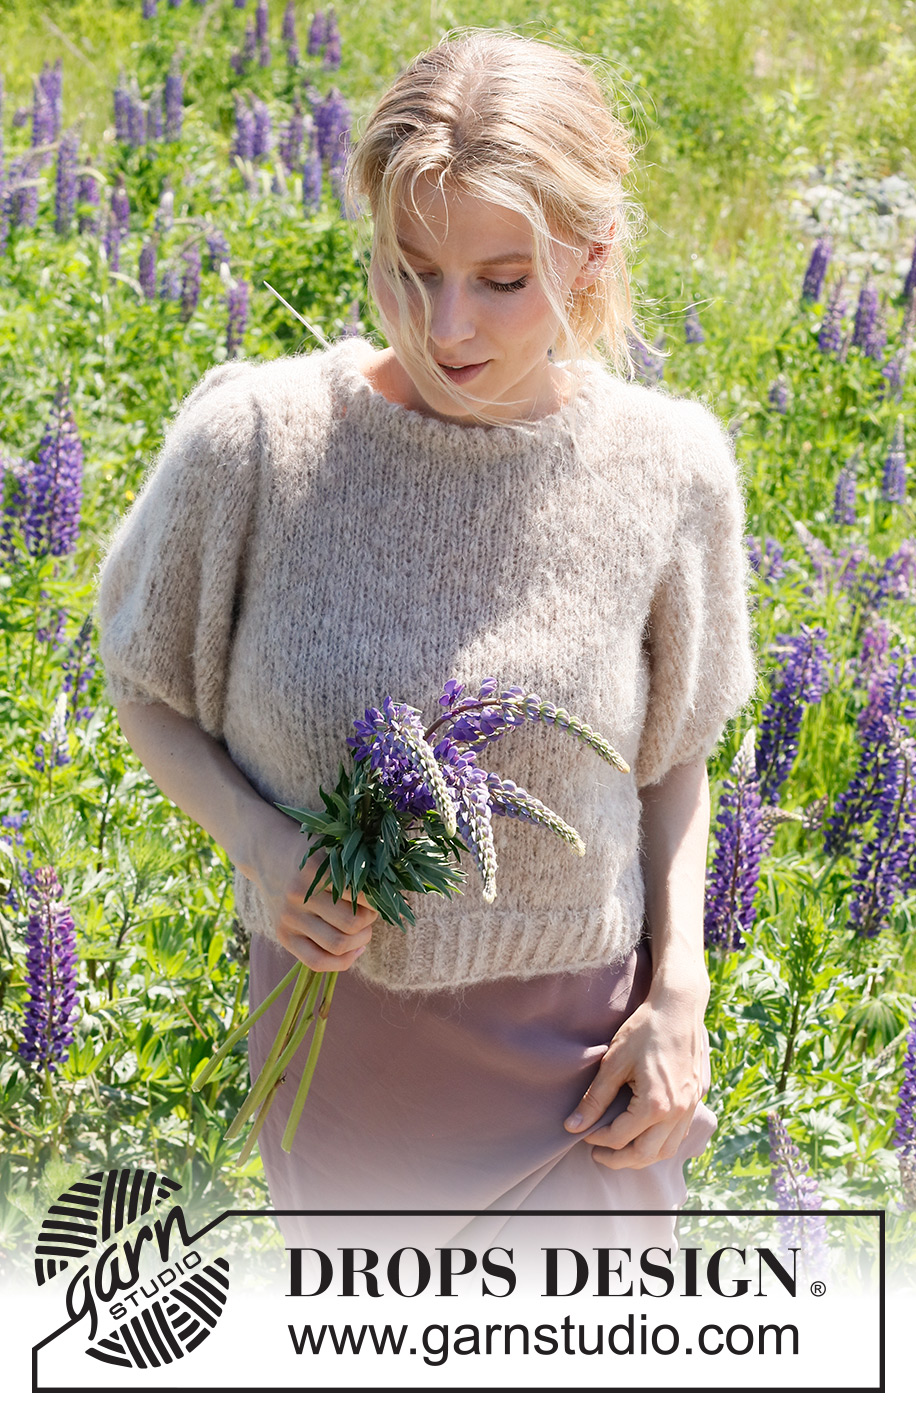
Days to Remember#daystoremembersweater |
|
 |
 |
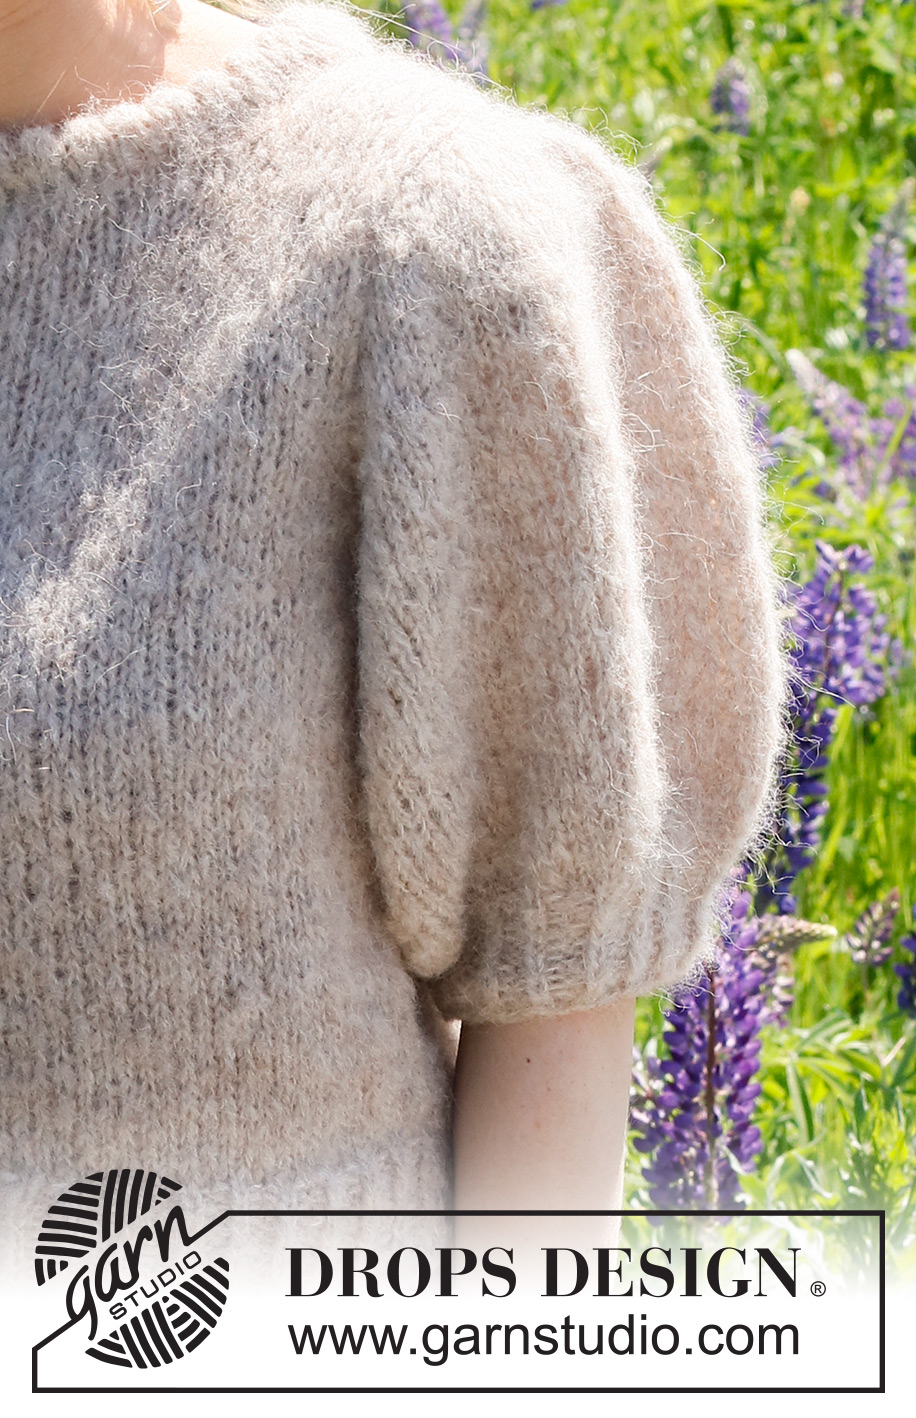
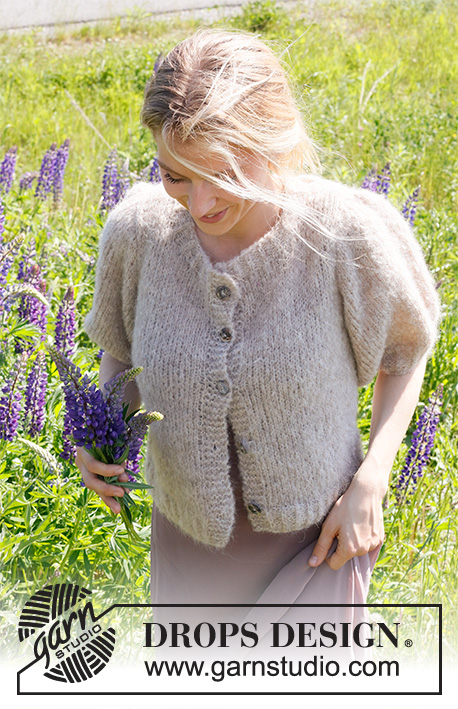
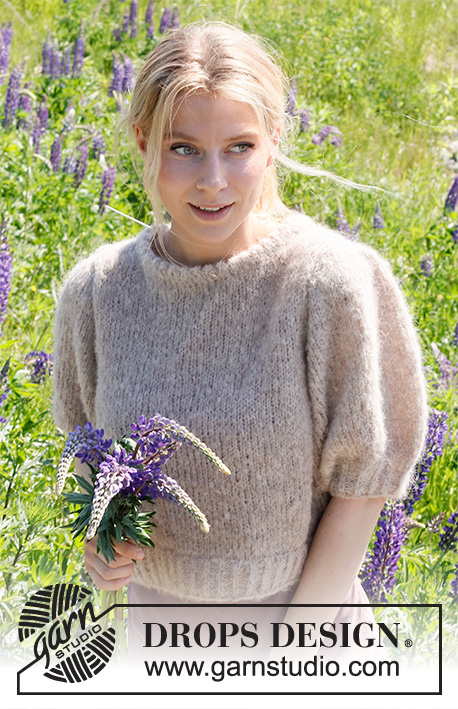
Knitted jumper/top in DROPS Melody. The piece is worked in stocking stitch; with short, puffed sleeves. Sizes S - XXXL.
DROPS 231-39 |
|
|
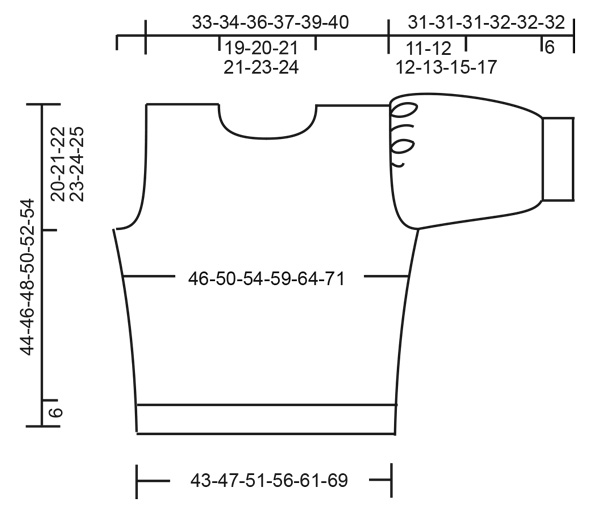
------------------------------------------------------- EXPLANATIONS FOR THE PATTERN: ------------------------------------------------------- RIDGE/GARTER STITCH (worked back and forth): Knit all rows. 1 ridge = knit 2 rows. INCREASE TIP: All increases are worked from the right side! Increase by making 1 yarn over between 2 stitches. On the next row work the yarn over twisted to avoid a hole. ------------------------------------------------------- START THE PIECE HERE: ------------------------------------------------------- JUMPER – SHORT OVERVIEW OF THE PIECE: The piece is worked in sections, back and forth and bottom up, then sewn together. The double neck is worked to finish. BACK PIECE: Cast on 72-78-84-90-99-111 stitches with circular needle size 5 mm and DROPS Melody. Purl 1 row from the wrong side. Then work rib as follows: 1 edge stitch in GARTER STITCH – read description above, * knit 1 twisted, purl 2 *, work from *-* until there are 2 stitches left, knit 1 twisted and 1 edge stitch in garter stitch. When the rib measures 6 cm, change to circular needle size 6 mm. Knit 1 row from the right side where you decrease 10-10-10-10-11-13 stitches evenly spaced = 62-68-74-80-88-98 stitches. Continue with stocking stitch and 1 edge stitch in garter stitch on each side. REMEMBER THE KNITTING TENSION! When the piece measures 12 cm, increase 1 stitch on each side – read INCREASE TIP! Repeat this increase when the piece measures 20-21-22-23-24-25 cm = 66-72-78-84-92-102 stitches. When the piece measures 24-25-26-27-28-29 cm, cast off the first 4 stitches on the next 2 rows for the armholes. Then cast off at the beginning of each row on each side as follows: 3 stitches 1 time, 2 stitches 1-2-3-3-4-6 times and 1 stitch 1-1-1-3-4-4 times = 46-48-50-52-54-56 stitches. Continue with stocking stitch and 1 edge stitch in garter stitch on each side. When the piece measures 42-44-46-48-50-52 cm, cast off the middle 24-26-28-28-30-32 stitches for the neck and finish each shoulder separately. Cast off 1 stitch on the next row from the neck = 10-10-10-11-11-11 stitches. Cast off when the piece measures 44-46-48-50-52-54 cm. Work the other shoulder in the same way. FRONT PIECE: Cast on and work in the same way as the back until the piece measures 37-39-41-42-44-46 cm = 46-48-50-52-54-56 stitches. Place the middle 16-18-20-20-22-24 stitches on a thread for the neck and finish each shoulder separately. Then cast off on each row from the neck as follows: 2 stitches 1 time and 1 stitch 3 times = 10-10-10-11-11-11 stitches. Cast off when the piece measures 44-46-48-50-52-54 cm. Work the other shoulder in the same way. SLEEVES: Cast on 47-50-53-56-62-65 stitches with circular needle size 5 mm and DROPS Melody. Purl 1 row from the wrong side. Then work rib as follows: 1 edge stitch in garter stitch, * knit 1 twisted, purl 2 *, work from *-* until there is 1 stitch left, 1 edge stitch in garter stitch. Continue this rib for 6 cm. Change to circular needle size 6 mm. Knit 1 row from the right side where you increase 30-30-30-34-35-39 stitches evenly spaced = 77-80-83-90-97-104 stitches. Continue with stocking stitch and 1 edge stitch in garter stitch on each side. When the piece measures 20-20-20-18-16-14 cm, cast off the first 4 stitches on the next 2 rows for the armhole = 69-72-75-82-89-96 stitches. Then cast off at the beginning of each row as follows: 3 stitches 1 time, 2 stitches 3 times, then 1 stitch 3-3-3-5-7-9 times on each side = 45-48-51-54-57-60 stitches. On the next row from the right side knit the first 14 stitches together 2 and 2, knit the next 15-18-21-24-27-30 stitches together 3 and 3 and knit the last 16 stitches together 2 and 2 = 20-21-22-23-24-25 stitches. Purl 1 row from the wrong side. Cast off from the right side. The sleeve measures approx. 31-31-31-32-32-32 cm. Work the other sleeve in the same way. ASSEMBLY: Sew the shoulder seams. Sew in the sleeves, inside the 1 edge stitch. Sew the sleeve and side seams in one go, inside the 1 edge stitch and as far as the rib, leaving a 6 cm split. DOUBLE NECK: Start on one shoulder and knit up 72 to 90 stitches around the neck with short circular needle size 5 mm and DROPS Melody (including the stitches on the thread in front, the number of stitches divisible by 2). Work stocking stitch in the round for 2 ½ cm. Now work a folding edge as follows: * Knit 2 together, 1 yarn over *, work from *-* to the end of the round. Continue with stocking stitch for a further 2 cm. Cast off. Fold the neck double to the inside and sew down. To avoid the neck being tight and rolling outwards, it is important that the seam is elastic. |
|
 |
|
Have you finished this pattern?Tag your pictures with #dropspattern #daystoremembersweater or submit them to the #dropsfan gallery. Do you need help with this pattern?You'll find 29 tutorial videos, a Comments/Questions area and more by visiting the pattern on garnstudio.com. © 1982-2026 DROPS Design A/S. We reserve all rights. This document, including all its sub-sections, has copyrights. Read more about what you can do with our patterns at the bottom of each pattern on our site. |
|


With over 40 years in knitting and crochet design, DROPS Design offers one of the most extensive collections of free patterns on the internet - translated to 17 languages. As of today we count 324 catalogues and 12290 patterns translated into English (UK/cm). 12290
We work hard to bring you the best knitting and crochet have to offer, inspiration and advice as well as great quality yarns at incredible prices! Would you like to use our patterns for other than personal use? You can read what you are allowed to do in the Copyright text at the bottom of all our patterns. Happy crafting!
Post a comment to pattern DROPS 231-39
We would love to hear what you have to say about this pattern!
If you want to leave a question, please make sure you select the correct category in the form below, to speed up the answering process. Required fields are marked *.