
Popular categories
Looking for a yarn?
























Comments / Questions (11)
 Camilla wrote:
Hej Det står inget om hur många maskor man ska lägga upp inte heller när man ska avmaska eller öka!! Hur gör jag??? Med vänlig hälsning, Camilla
26.09.2017 - 15:06DROPS Design answered:
Hei Camilla. Når det gjelder sjalet står det slik i oppskriften: SJAL: .... Lägg upp 3 maskor på rundsticka 4,5 med silver fox. VARV 1 (= rätsidan): Sticka 1 rätmaska, 1 omslag, 1 rätmaska, 1 omslag och 1 rätmaska = 5 maskor. VARV 2 (= avigsidan): Stickas rätt....osv Du starter nederst på sjalet og strikker som en slags trekant. Du legger opp 3 masker og øker allerede med 2 masker på 1. rad, så øker du på annenhver rad (se oppskriften for nærmere forklaring). Når arbeidet måler ca 78 ( målt langs midtmasken) feller du løst av. God Fornøyelse!
27.09.2017 - 09:01
|
|
Autumn Joy#autumnjoyshawl |
|
 |
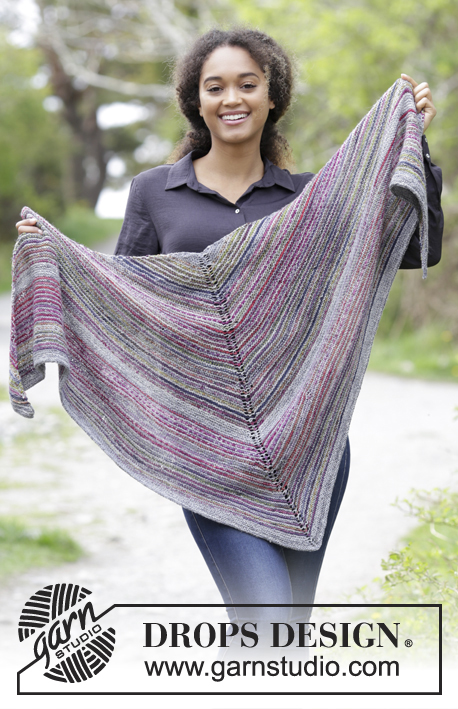 |
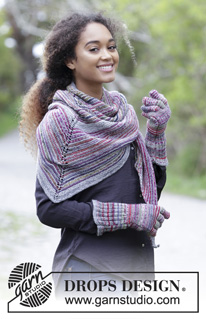
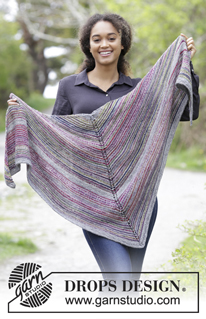
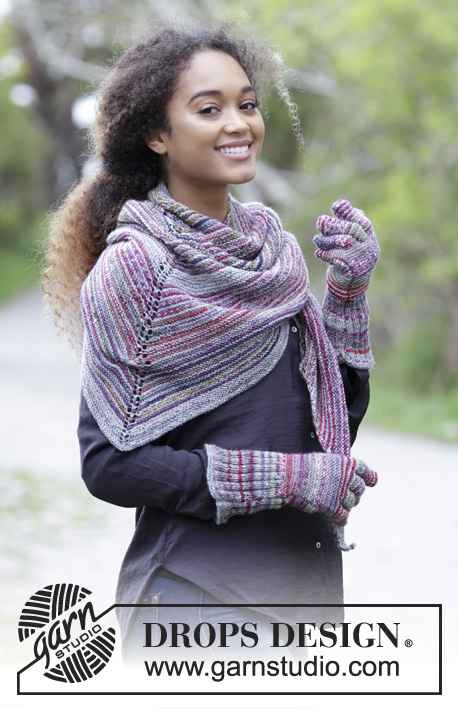
The set consists of: Knitted shawl and gloves with garter stitch and stripes. The set is worked in DROPS Fabel.
DROPS 179-22 |
|
|
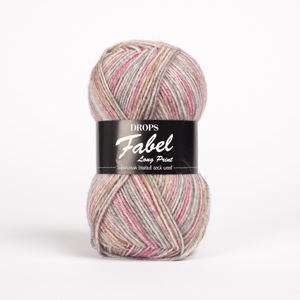
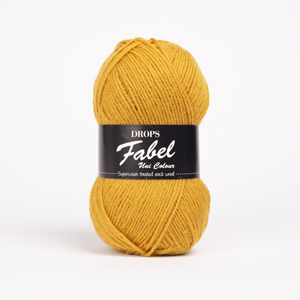
INFORMATION FOR THE PATTERN: RIDGE/GARTER STITCH (worked back and forth): 1 ridge = Knit 2 rows. STRIPES-1 (for shawl): The first row in each stripe is from the right side. STRIPE 1: Work 6 ridges with silver fox. STRIPE 2: Work * 1 ridge with silver fox, 1 ridge with candy *, work from *-* for 10 cm, measured along the mid-stitch, adjust so that you finish with 1 ridge with candy. STRIPE 3: Work * 1 ridge with silver fox, 1 ridge with picnic *, work from *-* for 10 cm, measured along the mid-stitch, adjust so that you finish with 1 ridge with picnic. Repeat stripes 2 and 3 until the piece measures 40 cm, measured along the mid-stitch. Work stripe 1 one more time. Repeat stripes 2 and 3 until the piece measures 67 cm, measured along the mid-stitch. Work stripe 1 one more time. STRIPES-2 (for gloves): The first row in each stripe is from the right side. STRIPE 1: Work * 2 rows picnic, 4 rows silver fox *, work from *-* for 8 cm, adjust so that the last stripe is with picnic. STRIPE 2: Work * 2 rows silver fox, 2 rows picnic *, work from *-* to finished length. INCREASE TIP (for gloves): Increase 1 stitch by making 1 yarn over, on the next row knit the yarn over twisted to prevent a hole. ---------------------------------------------------------- SHAWL: The piece is worked back and forth with circular needle so that there is room for all the stitches. It is worked top down in GARTER STITCH and STRIPES-1 – see description above. Cast on 3 stitches with circular needle size 4.5 mm and silver fox. ROW 1 (= right side): Knit 1 stitch, 1 yarn over, knit 1 stitch, 1 yarn over and knit 1 stitch = 5 stitches. ROW 2 (= wrong side): Knit. ROW 3: Knit 1 stitch, 1 yarn over, knit 1 stitch, 1 yarn over, knit 1 stitch (insert a marker in this stitch = mid-stitch), 1 yarn over, knit 1 stitch, 1 yarn over and knit 1 stitch = 9 stitches. ROW 4: Knit. ROW 5: Knit 1 stitch, 1 yarn over, knit to mid-stitch, 1 yarn over, knit 1 stitch (= mid-stitch), 1 yarn over and knit until there is 1 stitch left on the needle, 1 yarn over and knit 1 stitch = 13 stitches. Repeat rows 4 and 5. REMEMBER THE KNITTING TENSION! When the stripes have been completed in height, the piece measures approx. 78 cm, measured along the mid-stitch. Loosely cast off. Cut and fasten the strands. ---------------------------------------------------------- GLOVES: The piece is worked back and forth and sewn together in the outer edge to finish. RIGHT GLOVE: Cast on 64-72 stitches over 2 needles size 2.5 mm with silver fox (this is done so that the cast-on edge is elastic). Pull one of the needles out and work 3 RIDGES – see description above, with silver fox. Then work the piece in STRIPES-2 – see description above. Then work rib on the next row from the right side as follows: Work 1 stitch garter stitch, * knit 2, purl 2 *, work from *-* and finish with knit 2 and 1 stitch garter stitch. Continue the rib until the piece measures approx. 11-12 cm – adjust so that the next row is worked from the right side. Now purl all 2-purl together to 1-purl = 49-55 stitches left on the needle. Knit 1 row from the wrong side. Continue with garter stitch to finished length. AT THE SAME TIME on the first row, decrease 7-5 stitches evenly on row = 42-50 stitches. REMEMBER THE KNITTING TENSION! Insert 1 marker thread in the 20th-24th stitch on the needle (seen from the right side). THUMB: When the piece measures 13-14 cm increase 1 stitch for thumb on each side of the stitch with marker thread (= 2 stitches increased) – read INCREASE TIP. Increase in this way every 4th row 2-3 more times = 7-9 thumb stitches. When the piece measures 18-20 cm place the 7-9 thumb stitches on 1 thread. Then cast on 1 new stitch behind the thumb stitches = 42-50 stitches, continue with garter stitch as before. When the piece measures 22-24 cm place the middle 34-40 stitches on 1 thread and work the pinkie over the 8-10 stitches left on the needle (place the stitches together so that the seam will be outermost in the side of the hand (not in the side towards the thumb)). Each finger is now worked separately in garter stitch, back and forth on the needle. PINKIE: Increase 3 stitches evenly on the first row = 11-13 stitches. When the finger measures approx. 5-7 cm work the stitches together 2 and 2, cut the strand and pull it through the remaining stitches. Place the 34-40 stitches from the thread back on the needle. Work 2 ridges over all stitches and place the middle 23-27 stitches back on the thread. RING FINGER: Place the 11-13 stitches nearest on each side of the pinkie back on the needle and increase 3 stitches evenly on the first row = 14-16 stitches. When the finger measures approx. 7.5-9 cm work the stitches together 2 and 2, cut the strand and pull it through the remaining stitches. MIDDLE FINGER: Place the outermost 6-7 stitches in each side on the thread back on the needle and increase 3 stitches evenly on the first row = 15-17 stitches. When the finger measures approx. 7.5-9 cm work the stitches together 2 and 2, cut the strand and pull it through the remaining stitches. INDEX FINGER: Place the last 11-13 stitches on the needle and increase 4 stitches evenly on the first row = 15-17 stitches. When the finger measures approx. 6-7.5 cm work the stitches together 2 and 2. Cut the strand and pull it through the remaining stitches. THUMB: Place the 7-9 stitches from the thread back on the needle and knit up 7-9 stitches behind these stitches = 14-18 stitches. Work garter stitch for approx. 5.5-6 cm, then work the stitches together 2 and 2, cut the strand and pull it through the remaining stitches. ASSEMBLY: Sew the fingers, edge to edge in the outermost loop of the outermost stitch. Sew the glove together in the side, inside the 1 stitch in garter stitch. LEFT GLOVE: Worked as for the right but reversed, i.e. insert 1 marker thread in the 18th-22nd stitch on the needle and increase for thumb on either side of this. |
|
Have you finished this pattern?Tag your pictures with #dropspattern #autumnjoyshawl or submit them to the #dropsfan gallery. Do you need help with this pattern?You'll find 12 tutorial videos, a Comments/Questions area and more by visiting the pattern on garnstudio.com. © 1982-2026 DROPS Design A/S. We reserve all rights. This document, including all its sub-sections, has copyrights. Read more about what you can do with our patterns at the bottom of each pattern on our site. |
|






With over 40 years in knitting and crochet design, DROPS Design offers one of the most extensive collections of free patterns on the internet - translated to 17 languages. As of today we count 333 catalogues and 12525 patterns translated into English (UK/cm). 12525
We work hard to bring you the best knitting and crochet have to offer, inspiration and advice as well as great quality yarns at incredible prices! Would you like to use our patterns for other than personal use? You can read what you are allowed to do in the Copyright text at the bottom of all our patterns. Happy crafting!
Post a comment to pattern DROPS 179-22
We would love to hear what you have to say about this pattern!
If you want to leave a question, please make sure you select the correct category in the form below, to speed up the answering process. Required fields are marked *.