
Popular categories
Looking for a yarn?


Comments / Questions (78)
![]() HARDION wrote:
HARDION wrote:
Bonjour, je souhaite tricoter ce modèle 235-3 en commençant par le bas avec des aiguilles droite et je suis perdue dans les explications.
17.10.2022 - 08:21DROPS Design answered:
Bonjour Mme Hardion, nous ne sommes malheureusement pas en mesure de pouvoir adapter chacun de nos modèles à chaque demande; il peut être parfois plus simple de suivre les indications (de haut en bas comme ici) - retrouvez ici tous nos modèles de pulls tricotés de bas en haut; mais aussi ici comment adapter un modèle sur aiguilles droites. Bon tricot!
17.10.2022 - 10:23
![]() Jane Nielsen wrote:
Jane Nielsen wrote:
Hejsa. Jeg forstår ikke, rigtigt hvordan der skal tages 38 masker op på skulderen, jeg får kun 20 masker, hvad har jeg gjort forkert
11.10.2022 - 10:51
![]() Bente Solskinn Vollstad wrote:
Bente Solskinn Vollstad wrote:
Hei. Når for og bakstykke er satt sammen og det strikkes rundt, hvordan skal kast strikkes for å unngå hull og få rett vridning på maske.
06.10.2022 - 11:39DROPS Design answered:
Hei Bente. Om du mener de 2-0-2-0-0-0 maskene som skal økes jevnt fordelt, strikkes de vridd slik at det ikke blir hull. Om du mener de kastene som strikkes i A.3, strikkes de på samme måte som tidligere. Slik at kastene vender samme vei gjennom hele diagrammet. mvh DROPS Design
10.10.2022 - 11:30
![]() Isabelle Raspiengeas wrote:
Isabelle Raspiengeas wrote:
Bonjour ma taille est M comment dois je faire pour savoir combien de pelotes je dois commander Cdlt
04.10.2022 - 15:07DROPS Design answered:
Bonjour Mme Raspiengeas, vous trouverez les quantités nécessaires pour chaque taille dans l'en-tête, autrement dit, en taille M, il vous faudra 800 g DROPS Lima / 50 g la pelote = 16 pelotes. Si vous envisagez d'utiliser une autre laine, utilisez le convertisseur pour avoir la quantité correspondante dans la nouvelle. Bon tricot!
04.10.2022 - 16:18
![]() Vera Wolf wrote:
Vera Wolf wrote:
Een foutje in de 'tip voor het meerderen aan de goede kant' NA de markeerdraad: Het moet zijn: neem de draad op vanaf de VOORKANT. Niet vanaf de achterkant. Zie ook engelse vertaling, daar staat het wel goed
02.10.2022 - 21:14
![]() Bente Solskinn Vollstad wrote:
Bente Solskinn Vollstad wrote:
Ang forstykket. Når arbeidet måler 5 cm fra masker ble strikket opp, skal det økes til hals. Skal denne økningen gjøres fra både rett og vrangen?
28.09.2022 - 19:55DROPS Design answered:
Hei Bente, På forstykket øker du masker kun fra retten på begge skuldrene (på slutten av pinnen på høyre siden og begynnelsen av pinne på venstre siden). God fornøyelse!
29.09.2022 - 07:46
![]() Shez Wills wrote:
Shez Wills wrote:
Hi there, When doing the increase at the start of the Back Piece, do you include the stitch increased on that row in the A.1A & A.1C patern?
20.09.2022 - 13:31DROPS Design answered:
Dear Shez, yes, the increased stitches are in later rows included into A.1A and A.1C. Happy knitting!
20.09.2022 - 23:29
![]() Elin wrote:
Elin wrote:
Hej, jag har svårt att förstå denna bit: Fortsätt A.1 fram och tillbaka till arbetet mäter ca 14-16-16-17-17-19 cm från där det stickades upp maskor – avsluta efter ett varv från avigsidan som på bakstycket. Nu sätts det 1 markör ytterst längs ärmhålet, 3-3-4-4-4-4 cm från där det stickades upp maskor. Menar ni de upptagna maskorna från axlarna mot bakstycket till, eller de skapade maskorna vid halsen på framstycket?
14.09.2022 - 11:54DROPS Design answered:
Hei Elin. Fra der det ble strikket opp masker langs skuldrene (de nye maskene ble lagt opp, ikke strikket opp). I oppskriften står det: ...från där det stickades upp maskor. God fornøyelse videre! mvh DROPS Design
19.09.2022 - 08:48
![]() Petra wrote:
Petra wrote:
Gibt es die Anleitung auch in Deutsch?
12.09.2022 - 10:41DROPS Design answered:
Liebe Petra, ja sicher, alle unsere Anleitungen finden Sie auch in Deutsch - diese finden Sie hier. Viel Spaß beim stricken!
12.09.2022 - 12:09
![]() Shez Wills wrote:
Shez Wills wrote:
Looks like an interesting pattern. My next knitting project 😉
02.09.2022 - 17:50
|
||||||||||||||||||||||||||||||||||
Variety#varietysweater |
||||||||||||||||||||||||||||||||||
 |
 |
|||||||||||||||||||||||||||||||||
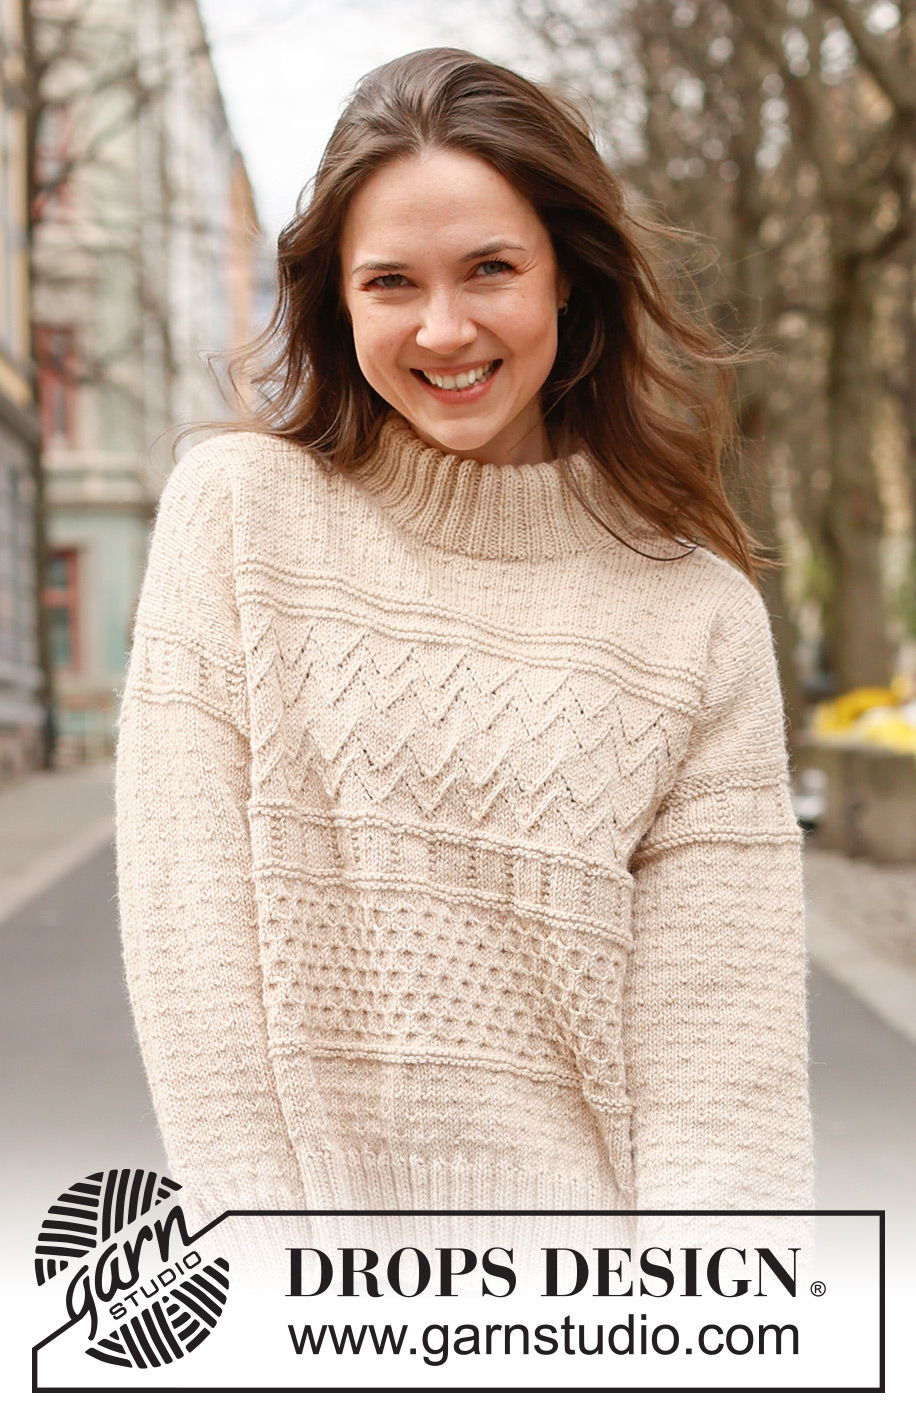
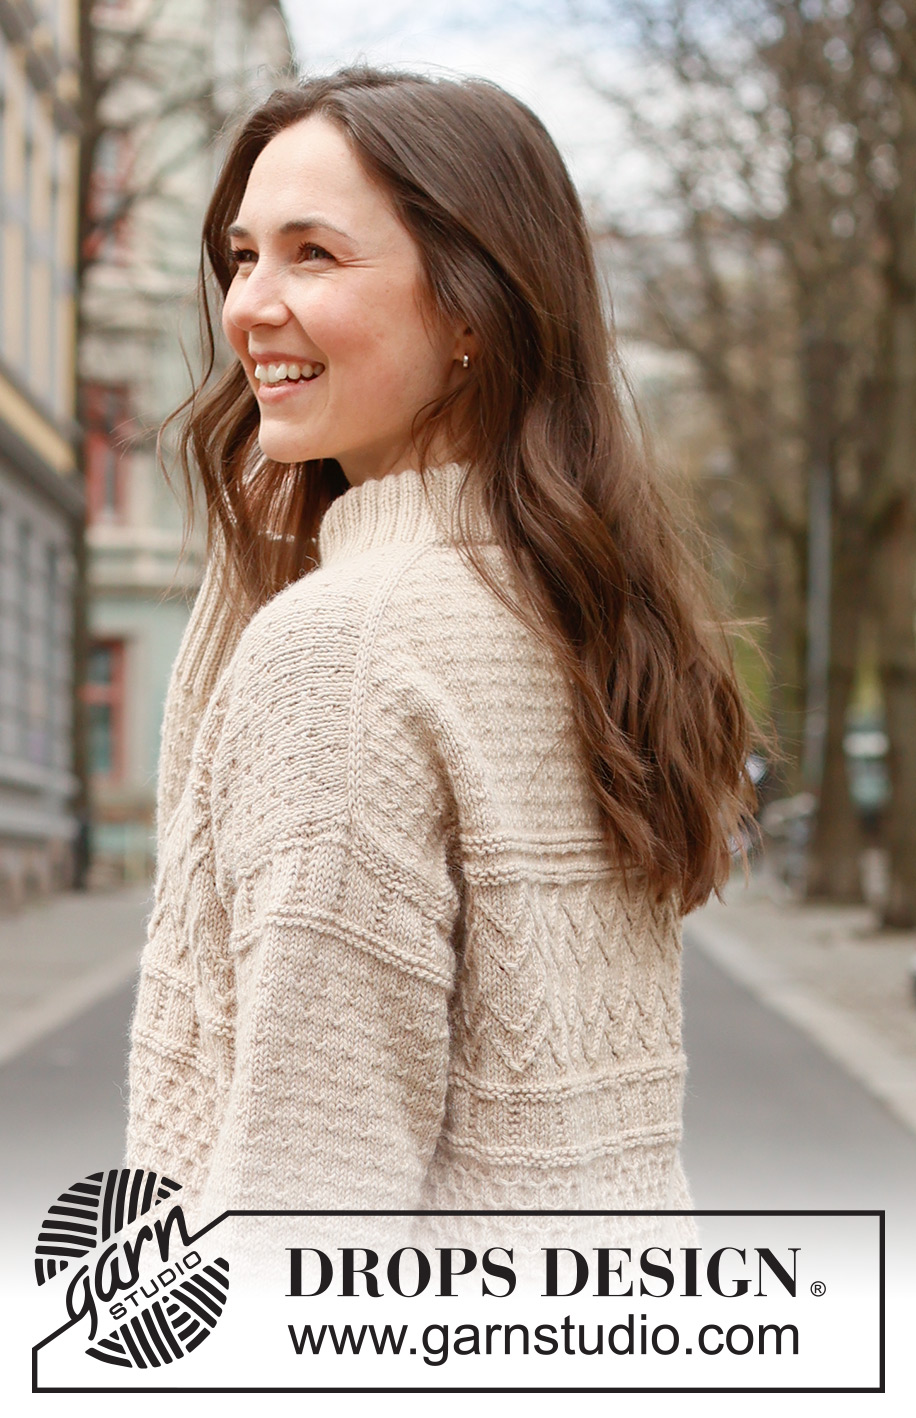
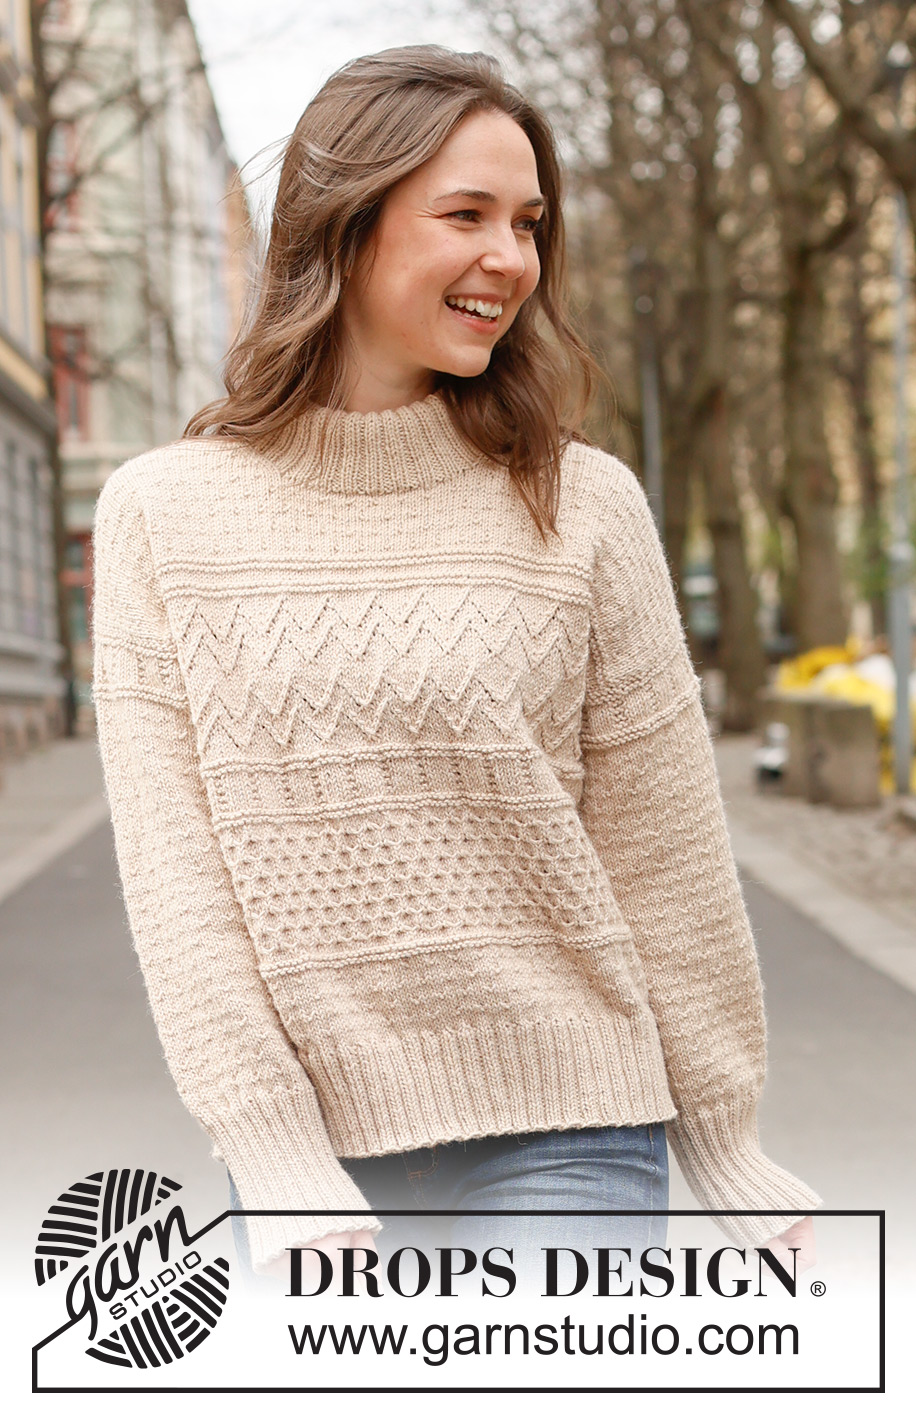
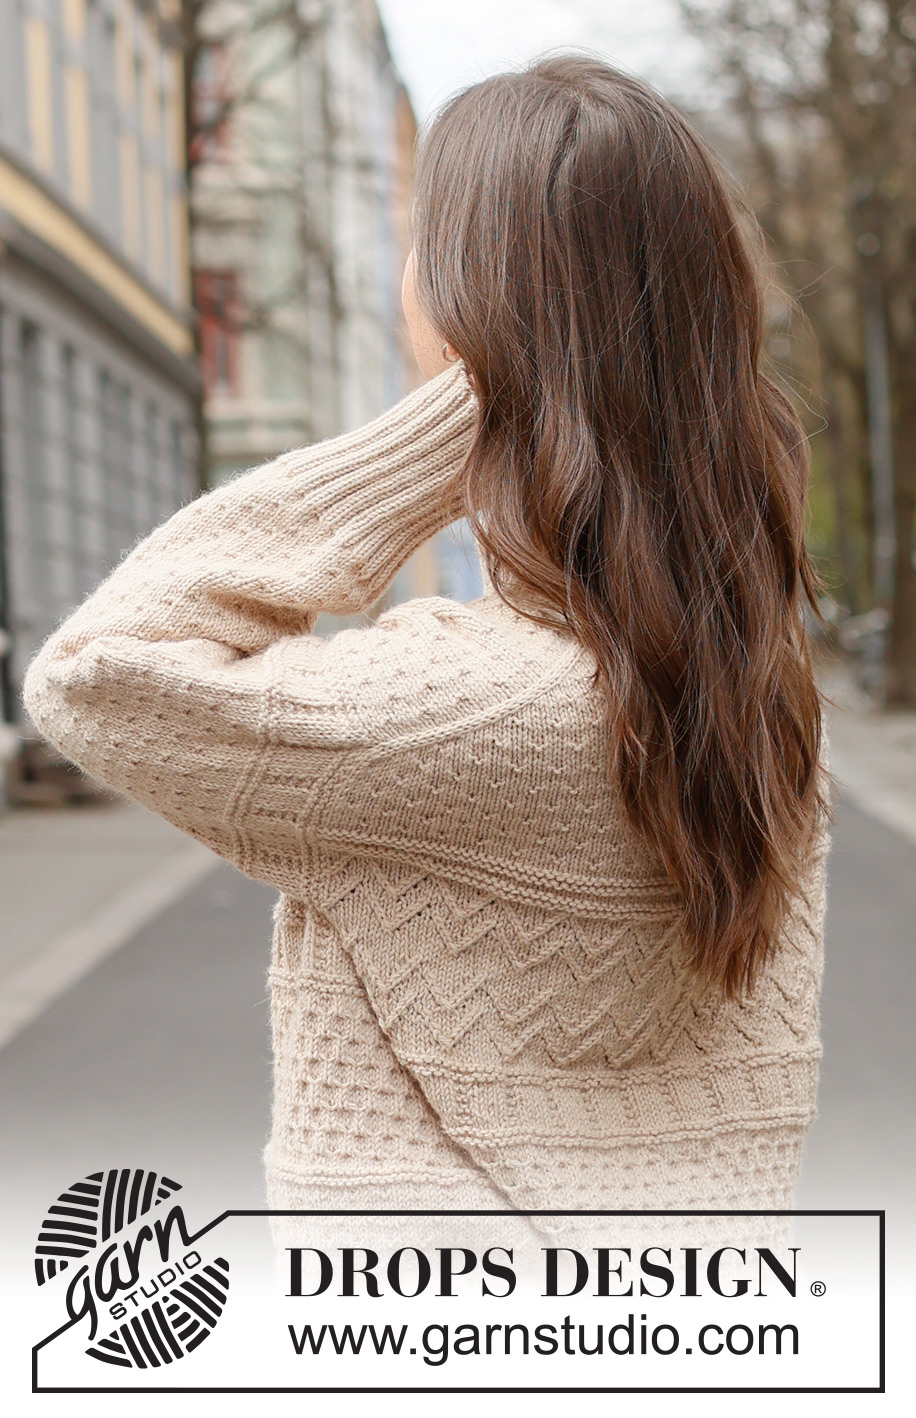
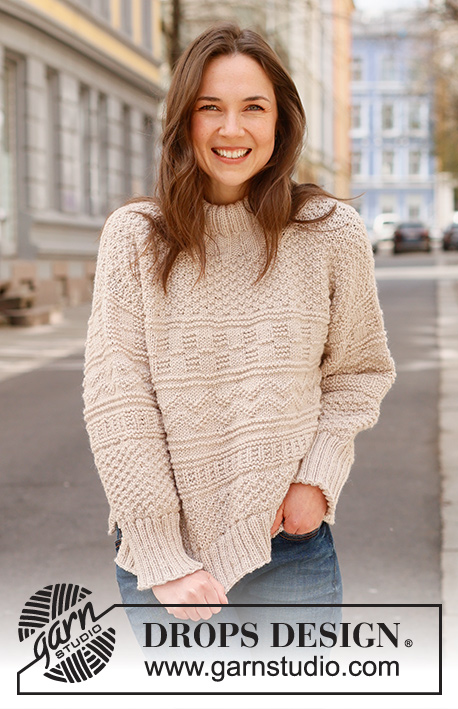
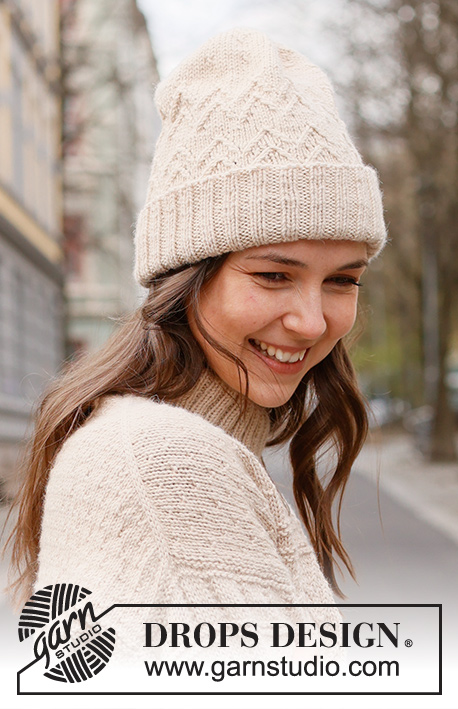
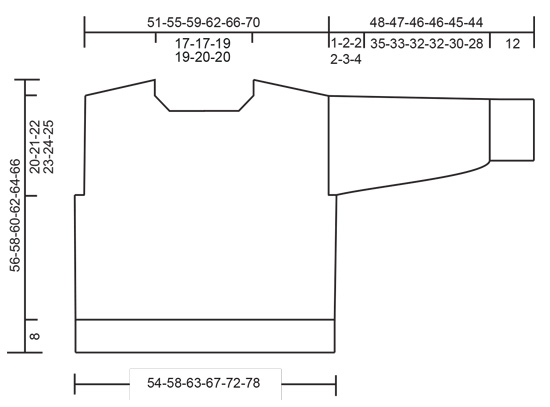
Knitted jumper in DROPS Lima or DROPS Karisma. Piece is knitted top down with European shoulder / diagonal shoulder, relief pattern and double neck edge. Size: S - XXXL
DROPS 235-3 |
||||||||||||||||||||||||||||||||||
|
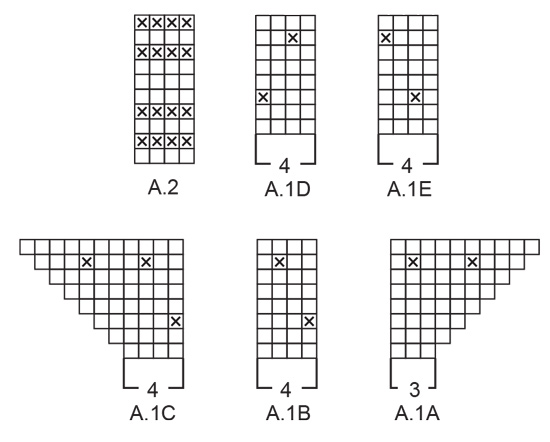
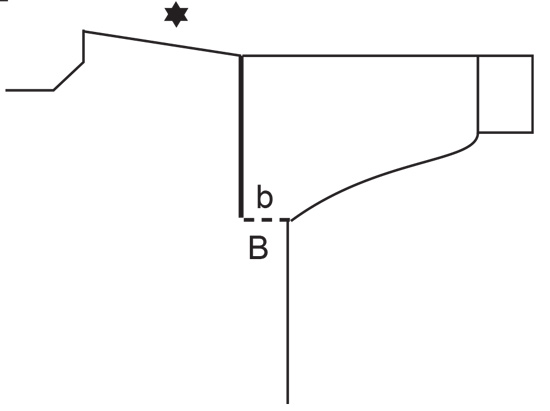
---------------------------------------------------------- EXPLANATION FOR THE PATTERN: ---------------------------------------------------------- PATTERN: See diagrams A.1 to A.6. Diagrams show all rows in pattern seen from the right side. INCREASE TIP FROM THE RIGHT SIDE: Increase towards the left AFTER MARKER: Use left needle to pick up yarn between 2 stitches from row below, pick up yarn from the front and knit in the stitch loop that is on the back of the needle. Increase towards the right BEFORE MARKER: Use left needle to pick up yarn between 2 stitches from row below, pick up yarn from the back and knit in the stitch loop that is on the front side of the needle. INCREASE TIP FROM THE WRONG SIDE: Increase towards the right AFTER MARKER: Use left needle to pick up yarn between 2 stitches from row below, pick up yarn from the back and purl in the stitch loop that is on the front side of the needle. Increase towards the left BEFORE MARKER: Use left needle to pick up yarn between 2 stitches from row below, pick up yarn from the front and purl in the stitch loop that is on the back side of the needle. DECREASE TIP (applies to mid under sleeves): Decrease 1 stitch on each side of marker thread as follows: Work until 3 stitches remain before marker thread and knit 2 together, knit 2 (marker thread is between these 2 stitches), slip 1 stitch knitwise, knit 1, pass slipped stitch over stitch worked. ---------------------------------------------------------- START THE PIECE HERE: ---------------------------------------------------------- JUMPER - SHORT OVERVIEW OF THE PIECE: Work top part of back piece back and forth on circular needle, top down until armholes are done. Then pick up stitches along each shoulder, increase for neck and work front piece back and forth on circular needle, top down until armholes are done. Slip front and back piece together. Work the body in the round on circular needle. Pick up stitches around each armhole. Work sleeve cap back and forth on circular needle, then work the rest of sleeve in the round on double pointed needles/short circular needle. Finish with a double neck edge. BACK PIECE: Cast on 39-39-43-43-47-47 stitches on circular needle size 4 mm with DROPS Lima or DROPS Karisma. Purl 1 row from wrong side. Insert 1 marker on the inside of the 3 outermost stitches in each side. Marker should be inside the outermost 3 stitches on every row. Work first row as follows from right side: A.1A, increase AFTER marker at the beginning of row – read INCREASE TIP FROM RIGHT SIDE, work A.1B 8-8-9-9-10-10 times in total, work A.1C and increase at the same time BEFORE marker at the end of row – remember INCREASE TIP FROM RIGHT SIDE. On next row (wrong side) increase the same way – read INCREASE TIP FROM WRONG SIDE. Continue pattern like this and increase the same way from both right and wrong side 34-38-40-44-46-50 times in total – work the increased stitches in A.1B, but make sure that there are always at least 3 stitches in stocking stitch at the edge in each side. REMEMBER THE KNITTING TENSION! NOTE! When A.1A, A.1B and A.1C have been worked 1 time vertically, repeat A.1 vertically the same way, i.e. every time A.1 is repeated vertically, there is room for 4 more repetitions of A.1B in width. After last increase there are 107-115-123-131-139-147 stitches on needle and piece measures approx. 12-14-14-16-16-18 cm from cast-on edge. Continue pattern back and forth as before until piece measures 8-10-8-9-9-11 cm measured at the edge along armhole (piece measures approx. 20-24-22-25-25-29 cm from cast-on edge mid back) – finish after a row from wrong side. Then work A.2 back and forth over all stitches. When A.2 has been worked, work next row as follows from right side: 1 stitch in stocking stitch, A.3A, work A.3B 12-13-14-15-16-17 times in total, A.3C, 1 stitch in stocking stitch. Continue pattern like this. When back piece measures 17-18-18-19-20-21 cm measured at the edge along armhole, cut the yarn, lay the piece to one side on a thread or on an extra needle. Armholes on back piece are now done (A.3 is not done but is finished on body). Work front piece as explained below. FRONT PIECE: Begin with right shoulder (when garment is worn). Pick up from right side 34-38-40-44-46-50 stitches inside 1 stitch along right shoulder on back piece (i.e. pick up 1 stitch in every row from edge at the top of back piece). Purl 1 row from wrong side. Work next row as follows from the right side (i.e. from armhole): S, M, XXL and XXXL: 3 stitches in stocking stitch, work A.1B until 3 stitches remain, finish with 3 stitches in stocking stitch. L and XL: 3 stitches in stocking stitch, work A.1B until 5 stitches, work the 2 first stitches in A.1B, finish with 3 stitches in stocking stitch. ALL SIZES: Continue pattern back and forth like this. When piece measures 5 cm from where stitches were picked up, increase stitches towards the neck. Increase 1 stitch for neck inside 3 stitches at the end of every row from right side, remember INCREASE TIP FROM THE RIGHT SIDE. Increase for neck the same way 6-6-7-7-8-8 times in total – work the increased stitches in A.1B, but make sure that there are always at least 3 stitches in stocking stitch towards the neck. After last increase there are 40-44-47-51-54-58 stitches on needle. Cut the yarn when last increase from right side is done. Lay the piece to one side on a thread or on an extra needle Then work left shoulder as explained below. Pick up from right side 34-38-40-44-46-50 stitches inside 1 stitch along left shoulder on back piece. Purl 1 row from wrong side. Work next row as follows from the right side (i.e. from neck): S, M, XXL and XXXL: 3 stitches in stocking stitch, work A.1D until 3 stitches remain, finish with 3 stitches in stocking stitch. L and XL: 3 stitches in stocking stitch, work A.1E until 5 stitches, work the 2 first stitches in A.1E, finish with 3 stitches in stocking stitch. ALL SIZES: Continue pattern back and forth like this. When piece measures 5 cm from where stitches were picked up, increase stitches towards the neck. Increase 1 stitch for neck inside 3 stitches at the beginning of every row from right side – remember INCREASE TIP FROM THE RIGHT SIDE. Increase for neck the same way 6-6-7-7-8-8 times in total – work the increased stitches in A.1D/A.1E, but make sure that there are always at least 3 stitches in stocking stitch towards the neck. After last increase there are 40-44-47-51-54-58 stitches on needle. Work next row as follows from wrong side: Work pattern as before over the 40-44-47-51-54-58 stitches from left front, cast on 27-27-29-29-31-31 stitches for neck at the end of this row, then work pattern as before over the 40-44-47-51-54-58 stitches from right front piece = 107-115-123-131-139-147 stitches. Continue A.1 back and forth until piece measures approx. 14-16-16-17-17-19 cm from where stitches were picked up - finish after a row from wrong side as on back piece. Now insert 1 marker at the edge along armhole, 3-3-4-4-4-4 cm from where stitches were picked up. Measure the garment by folding the piece at the top point on the inside of shoulder and at marker on front piece - make sure that A.1 is the same length on front and back piece. This important so that the pattern fits in the sides when piece is put together. Adjust the length of A.1 if needed. Then work A.2 back and forth over all stitches. When A.2 has been worked, work next row as follows from right side: 1 stitch in stocking stitch, A.3A, work A.3B 12-13-14-15-16-17 times in total, A.3C, 1 stitch in stocking stitch. Continue the pattern like this until piece measures 23-24-26-27-28-29 cm, measured along the edge of armhole from where stitches were picked up (A.3 is not done but finish front piece on same row in diagram as back piece – this is important so that the pattern fits in the sides when piece is put together). Now put front piece and back piece together for body as explained below. BODY: Work pattern as before over the 107-115-123-131-139-147 stitches from front piece, cast on 6-8-8-10-14-18 new stitches at the end of this row (in the side under sleeve), work pattern as before over the 107-115-123-131-139-147 stitches from back piece and cast on 6-8-8-10-14-18 new stitches on row (in the side under sleeve) = 226-246-262-282-306-330 stitches. Finish A.3 - work stitches cast on in each side in stocking stitch until A.3 is finished. Now work A.4 in the round - AT THE SAME TIME on first round increase 2-0-2-0-0-0 stitches evenly = 228-246-264-282-306-330 stitches. On next to last round in A.4 increase 32-34-36-38-38-42 stitches evenly = 260-280-300-320-344-372 stitches (this is done because the next pattern contracts the piece). When A.4 has been worked, work A.5 in the round. Repeat A.5 vertically until piece measures 41-43-45-46-46-48 cm, measured from the top point on front piece in towards the neck (work A.5 approx. 3-3-4-4-4-4 times vertically and piece measures approx. 18-19-19-19-18-19 cm from where stitches were cast on in each side) – AT THE SAME TIME on last round in A.5, decrease 32-36-36-40-40-44 stitches evenly = 228-244-264-280-304-328 stitches. Now work A.6 in the round over all stitches. When A.6 has been worked, work A.1B in the round over all stitches until piece measures approx. 48-50-52-54-56-58 cm, measures from the top point on front piece in towards the neck – finish when 2 or 3 rounds in stocking stitch have been worked after a round with purl stitches (piece measures approx. 25-26-26-27-28-29 cm from where stitches were cast on in each side). Knit 1 round while increasing 56-64-68-76-76-84 stitches evenly = 284-308-332-356-380-412 stitches. Switch to circular needle size 3 mm. Work rib (knit 2/purl 2) for 8 cm. Loosely cast off. Jumper measures approx. 56-58-60-62-64-66 cm, measured from the top point on shoulder on front piece. RIGHT SLEEVE: Use circular needle size 4 mm, pick up from right side 36-38-38-40-42-44 stitches from bottom of armhole and up to shoulder (along back piece), and 48-50-54-56-58-60 stitches from shoulder and down to the bottom of armhole on the other side (along front piece) = 84-88-92-96-100-104 stitches. Insert 1 marker thread in the middle of row – use marker thread when counting where pattern should begin and where to measure from. Begin from wrong side with 2nd row in A.4, and work A.4 back and forth – marker thread mid on top of sleeve should fit symbol in A.4. When sleeve measures 1-2-2-2-3-4 cm, slip piece together and work the rest of sleeve on a short circular needle/double pointed needles. When A.4 has been worked, work A.1B in the round. AT THE SAME TIME when piece measures 3 cm from where piece was put together, decrease 2 stitches mid under sleeve - read DECREASE TIP. Decrease like this every 2½-2½-2-2-1½-1½ cm 12-12-14-14-16-16 times in total = 60-64-64-68-68-72 stitches. Work until sleeve measures 35-33-32-32-30-28 cm from where piece was put together. 12 cm remain until finished measurements. Try the jumper and work to desired length before rib. Knit 1 round while increasing 16-16-16-16-20-20 stitches evenly = 76-80-80-84-88-92 stitches. Switch to double pointed needles size 3 mm. Work rib (knit 2/purl 2) for 12 cm. Loosely cast off. Sleeve measures approx. 48-47-46-46-45-44 cm from stitches where knitted up. Sew bottom of armhole - see chart. LEFT SLEEVE: Use circular needle size 4 mm, pick up from right side 48-50-54-56-58-60 stitches from bottom of armhole and up to shoulder (along front piece) and 36-38-38-40-42-44 stitches from shoulder and down to the bottom of armhole on the other side (along front piece) = 84-88-92-96-100-104 stitches. Insert 1 marker thread in the middle of row – use marker thread when counting where pattern should begin and where to measure from. Work the rest of the sleeve the same way as right sleeve. Sew bottom of armhole - see chart. NECK EDGE: Begin at one shoulder line, and pick up from right side inside 1 edge stitch approx. 116-116-128-128-140-140 stitches on a short circular needle size 3 mm. Number of stitches must be divisible by 4. Work rib in the round (knit 2/purl 2) for 12-12-13-13-14-14 cm. Fold the rib down on inside of garment and fasten it with 1 stitch at each shoulder. |
||||||||||||||||||||||||||||||||||
Diagram explanations |
||||||||||||||||||||||||||||||||||
|
||||||||||||||||||||||||||||||||||
 |
||||||||||||||||||||||||||||||||||
 |
||||||||||||||||||||||||||||||||||
 |
||||||||||||||||||||||||||||||||||
 |
||||||||||||||||||||||||||||||||||
Have you finished this pattern?Tag your pictures with #dropspattern #varietysweater or submit them to the #dropsfan gallery. Do you need help with this pattern?You'll find 34 tutorial videos, a Comments/Questions area and more by visiting the pattern on garnstudio.com. © 1982-2026 DROPS Design A/S. We reserve all rights. This document, including all its sub-sections, has copyrights. Read more about what you can do with our patterns at the bottom of each pattern on our site. |
||||||||||||||||||||||||||||||||||


With over 40 years in knitting and crochet design, DROPS Design offers one of the most extensive collections of free patterns on the internet - translated to 17 languages. As of today we count 324 catalogues and 12290 patterns translated into English (UK/cm). 12290
We work hard to bring you the best knitting and crochet have to offer, inspiration and advice as well as great quality yarns at incredible prices! Would you like to use our patterns for other than personal use? You can read what you are allowed to do in the Copyright text at the bottom of all our patterns. Happy crafting!
Post a comment to pattern DROPS 235-3
We would love to hear what you have to say about this pattern!
If you want to leave a question, please make sure you select the correct category in the form below, to speed up the answering process. Required fields are marked *.