
Popular categories
Looking for a yarn?


Comments / Questions (78)
![]() Saskia S wrote:
Saskia S wrote:
Voor de nekrand staat er in het patroon dat deze aan de binnenkant vastgezet wordt met 1 steek aan elke schouder. In het filmpje wordt deze echter rondom vastgezet. Welke optie is het beste? Maakt dit nog verschil in het eindresultaat? P.S. Het is natuurlijk logisch maar in het patroon staat niet genoemd dat je de nekrand (héél losjes voor de elasticiteit) moet afhechten.
16.01.2024 - 17:41
![]() Carola Kaandorp wrote:
Carola Kaandorp wrote:
Prachtig patroon! Wel een vraag over het achterpand: in tekening A.1A en A.1C is de eerste rij zonder meerderingen, terwijl volgens de tekst ook de eerste rij wordt gemeerderd, want 43 + 40x2 = 123 steken; wat is de bedoeling?
12.12.2023 - 22:26DROPS Design answered:
Dag Carola,
Je meerdert inderdaad naast de markeerdraden die ook naast A.1A en A.1C zitten. De gemeerderde steken komen uiteindelijk bij de telpatronen, zodat er op de volgende rij in het telpatroon een steek bij zit.
13.12.2023 - 21:12
![]() Carina Tangsgaard wrote:
Carina Tangsgaard wrote:
Jeg er lige begyndt og synes det ser ud som et super spændende projekt. Jeg strikker normalt altid sweatre rundt så begyndelsen er lidt tricky. Skal en af de tre masker i siderne være en kantmaske eller er der ikke en kantmaske i dette arbejde? Jeg tror ikke men kan ikke helt tyde det. Og udtagninger er ikke tegnet ind i mønstret vel? Altså de to er extra før og efter man strikker A.1B. Ellers får jeg det ikke til at passe.
09.12.2023 - 12:31DROPS Design answered:
Hei Carina. Starten på en genser med Europeisk skulder er noe annerledes en "vanlig" genser. Genser med Europeisk skulder får en flott passform hvor skulderen sitter litt bakpå og litt skrå, hvilket designet også kalles skrå skulder. Ta gjerne en titt på de 3 hjelpevideoene du finner under målskissene, da får du en viss oversikt over hvordan det strikkes. Ingen av de 3 ytterste maskene strikkes som en kantmaske. De økte maskene er tegnet inn i A.1A og A.1C, men blir nye masker / flere rapporter av A.1 B jo flere ganger man øker. mvh DROPS Design
11.12.2023 - 09:46
![]() C Bal wrote:
C Bal wrote:
Kan ik het patroon ook vertalen in het pakistaans?
06.12.2023 - 11:12
![]() Anja Nielsen wrote:
Anja Nielsen wrote:
Jeg mangler at få jeres størrelse oversat til brystmål, for st sikre at jeg strikker den rigtige størrelse. eks. Hvilket brystmål svarer til str xxl
24.11.2023 - 13:42DROPS Design answered:
Hej Anja, jo, nederst i opskriften finder du måleskitsen. Brystmålet i XXL er 72+72 = 144 cm :)
24.11.2023 - 15:05
![]() Carol McMillan wrote:
Carol McMillan wrote:
Working on back piece -when you work A.2 over all stitches do I keep the 3 outermost stitches on each side in stocking stitch ?
23.11.2023 - 21:27DROPS Design answered:
Hi Carol, Yes, you always have 3 stocking stitches outermost on each side. Happy knitting!
24.11.2023 - 06:49
![]() Päivi N wrote:
Päivi N wrote:
Heti takakappaleen alussa on ongelma: Mitä tarkoittaa " kun A1A, A1B , A1C on neulottu loppuun,toista A1 mallikertaa" ? Eli onko 9.krs A1A + A1Bx8 + A1C + A1D+ A1E. En ymmärrä mikä on mallikerta A1? Tarvitsisin selkokielisen ohjeen,kiitos.
26.10.2023 - 11:36DROPS Design answered:
Hei, piirroksen A.1 mallikerralla tarkoitetaan A.1A + A.1B + A.1C. Eli 9.kerroksella neulotaan A.1A + A.1B x 12 + A.1C (työhön mahtuu nyt 4 piirroksen A.1B mallikertaa enemmän).
30.10.2023 - 17:05
![]() Loredana wrote:
Loredana wrote:
Buonasera, non mi è chiaro il numero totale di aumenti in base alle spiegazioni del diagramma. Provo a spiegarmi: per la taglia M 39 m. Inizio A1A, A1B e A1C in successione per 8 ferri facendo un totale di 14 aumenti (7 per lato). Come posso ripetere questa combinazione per 38 volte e avere alla fine 115 maglie come indicato nel modello? Cosa si intende per 38 volte, 38 ferri o 38 aumenti per lato? (Con 38 aumenti X2 + 39m iniziali tornerebbero 115 m). Grazie!
11.05.2023 - 20:38DROPS Design answered:
Buonasera Loredana, nel modello è indicato di ripetere gli aumenti per 38 volte, cioè 38x2 + 39 = 115 maglie. Buon lavoro!
11.05.2023 - 21:42
![]() Hélène wrote:
Hélène wrote:
Voor het lijf: “Meerder op de volgende tot laatste naald in A.4” leidt tot verwarring. Ik had de Franse en Engelse versie nodig om te begrijpen dat ik pas moest meerderen in de voorlaatste naald van A.4. Dat wordt misschien het best aangepast.
08.04.2023 - 11:19DROPS Design answered:
Dag Hélène,
Oeps, dat is inderdaad niet duidelijk. Bedankt voor het doorgeven; het is nu aangepast!
12.04.2023 - 20:30
![]() Lola wrote:
Lola wrote:
Bonjour, Dans la partie DOS ET DEVANT lorsqu'on termine A3, les rangs pairs du diagramme deviennent des rangs endroits puisqu'on tricote en rond. Les jetés après 2 mailles tricotées ensembles sont tricotés endroit torse sur le rang suivant, mais qu'en est-il des jetés avant les surjets ? Comment faire pour que les mailles aillent dans le bon sens sans avoir de trou ? Merci d'avance
26.03.2023 - 18:35DROPS Design answered:
Bonjour Lola, tricotez les jetés comme indiqué aux symboles 3 et 4 pour que les mailles soient orientées dans le bon sens, sans faire de trou. Bon tricot!
27.03.2023 - 09:34
|
||||||||||||||||||||||||||||||||||
Variety#varietysweater |
||||||||||||||||||||||||||||||||||
 |
 |
|||||||||||||||||||||||||||||||||
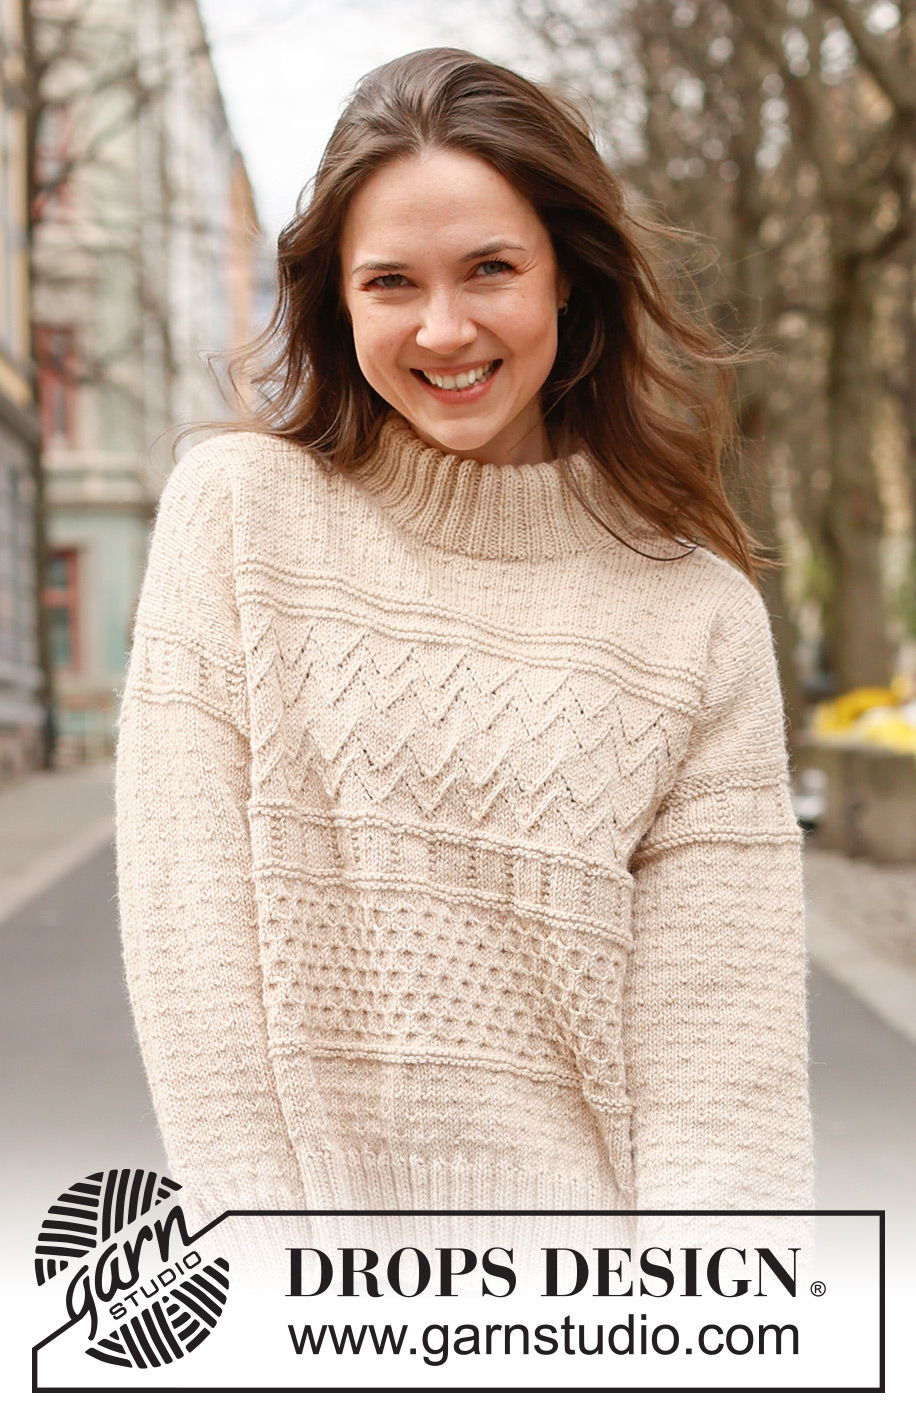
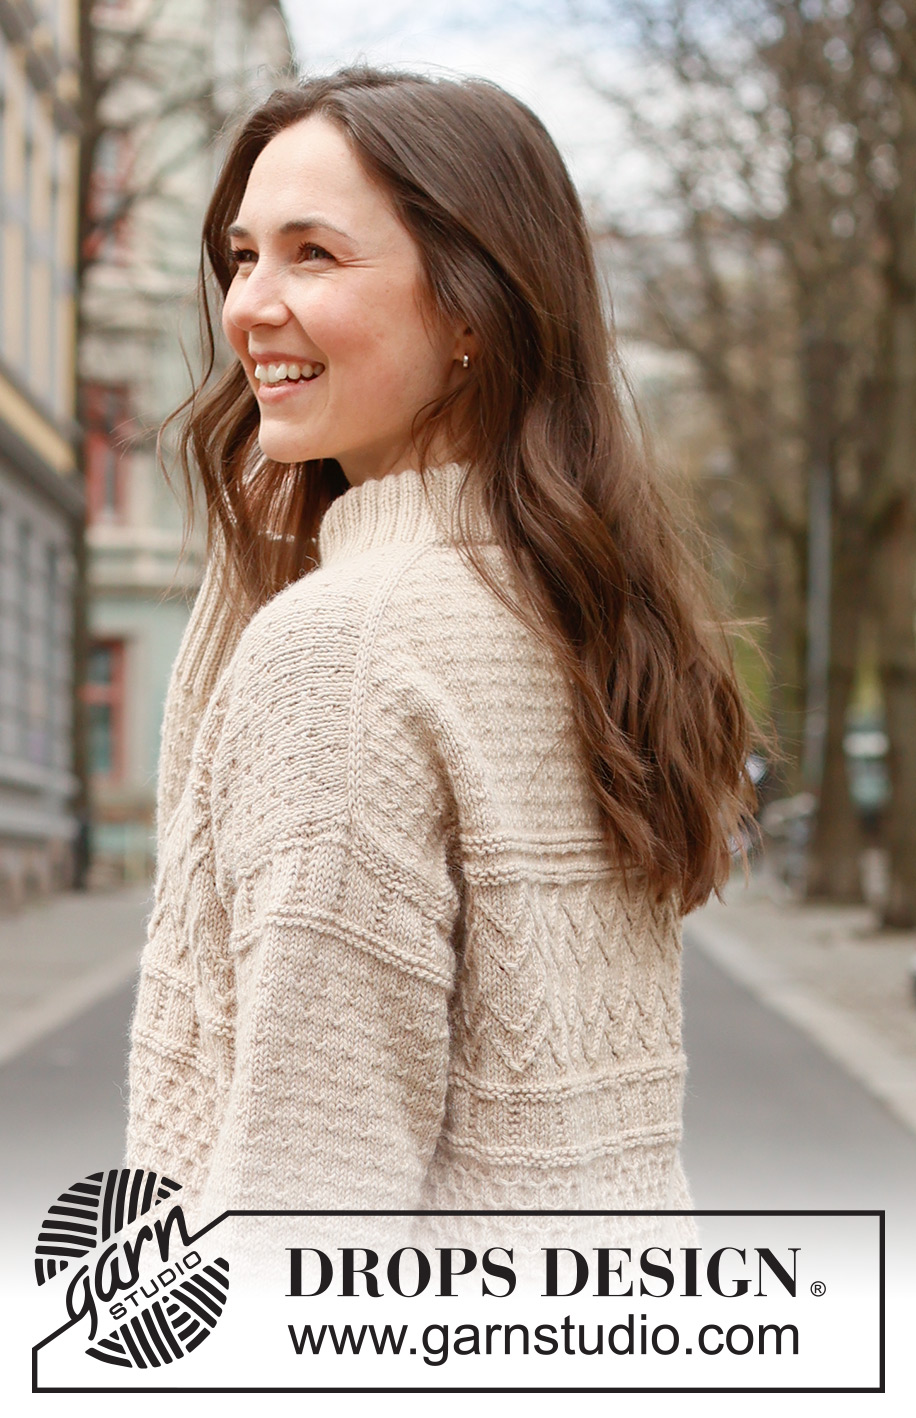
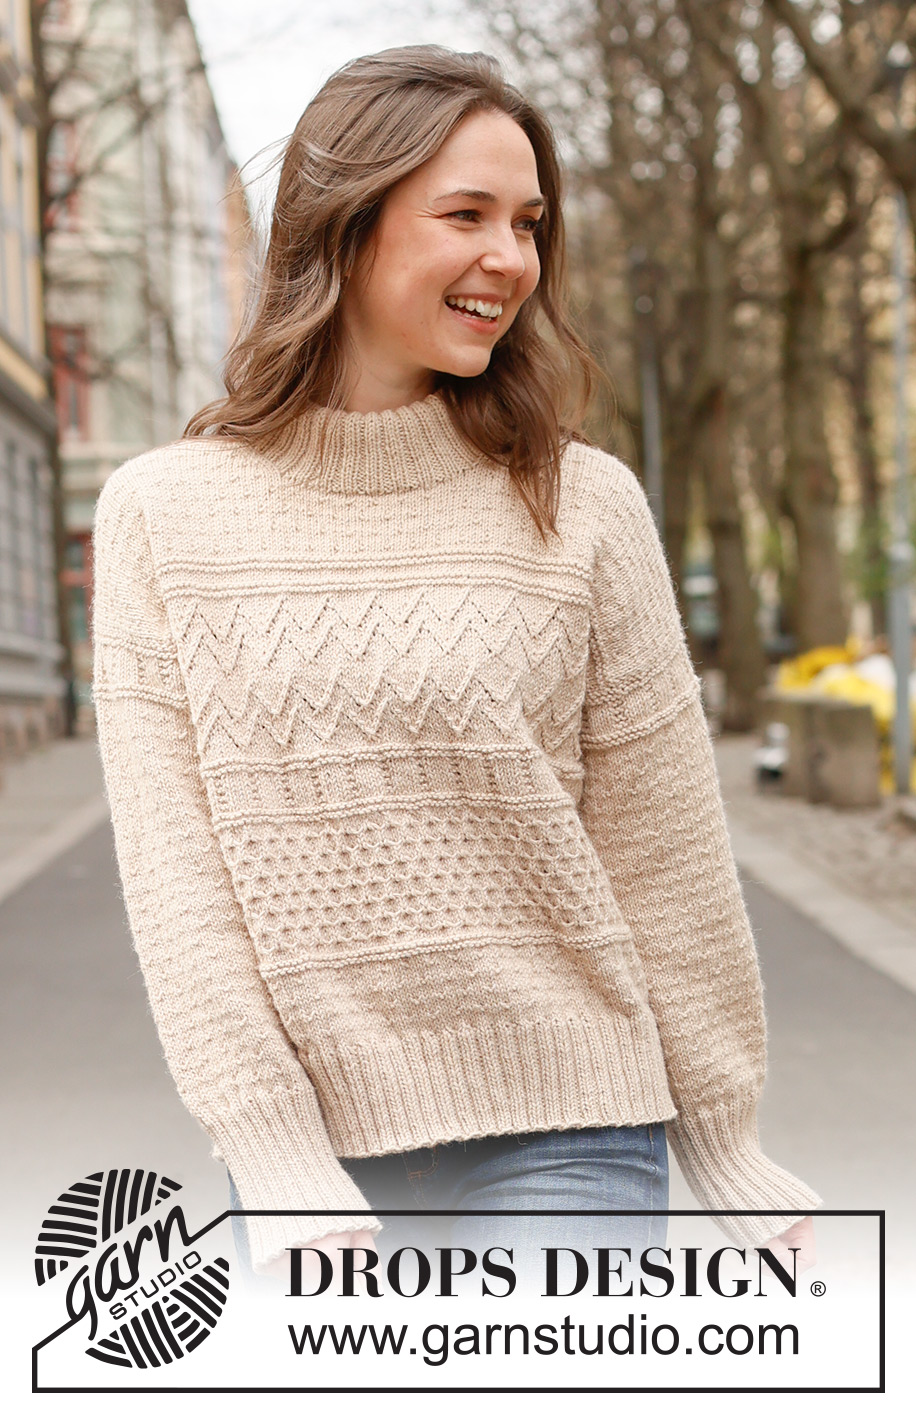
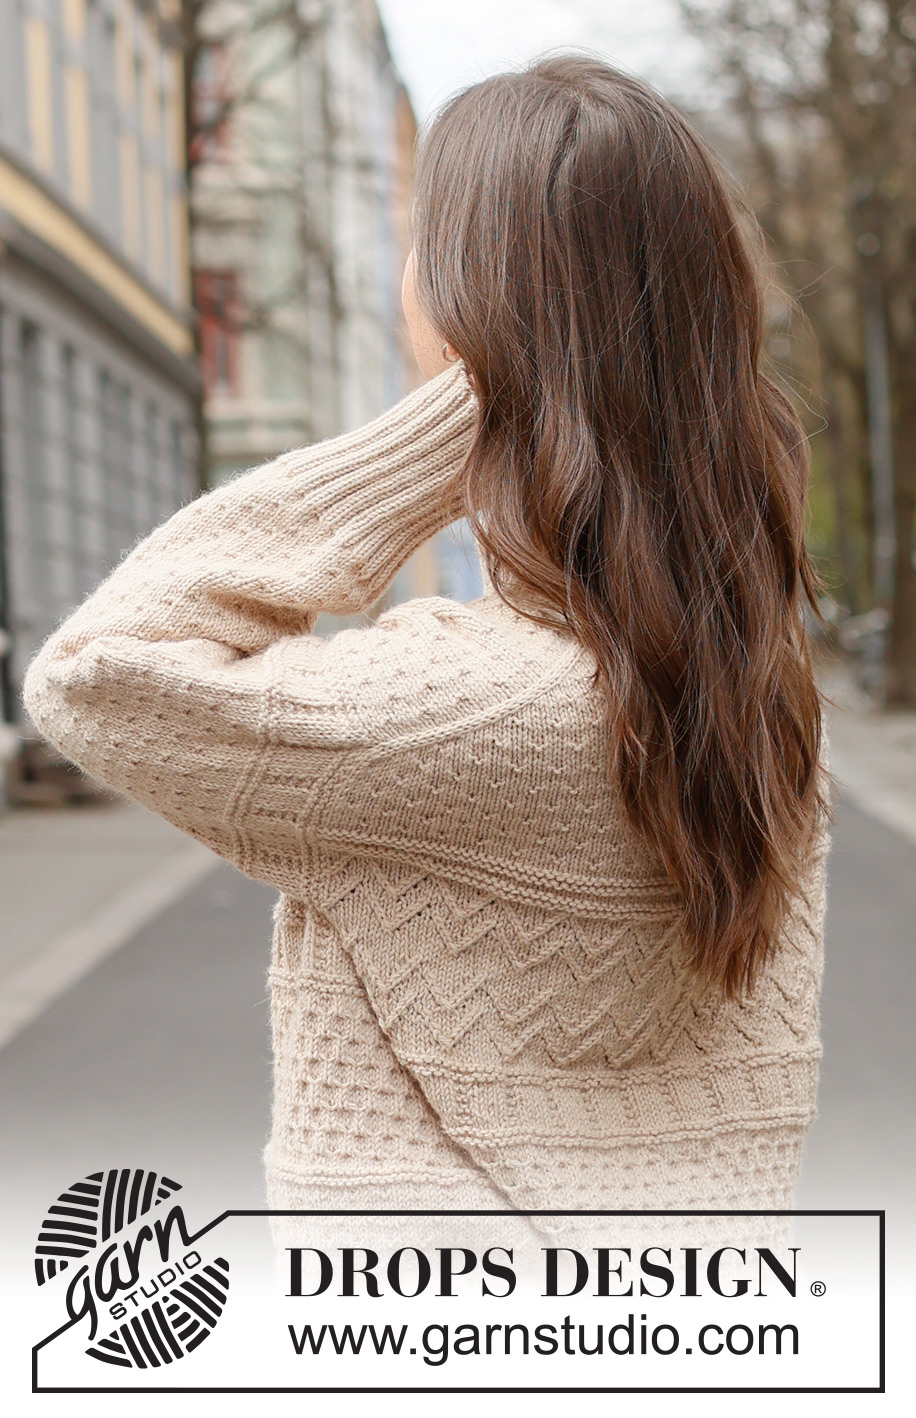
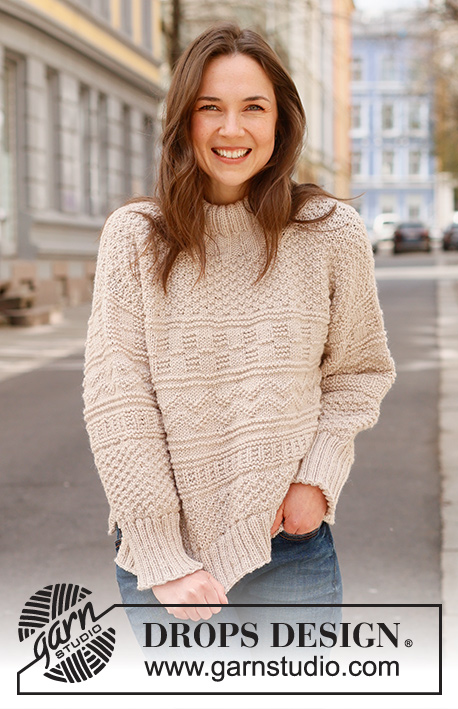
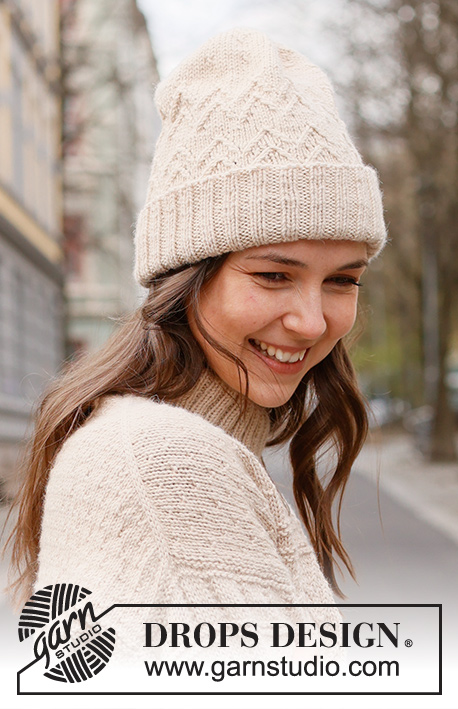
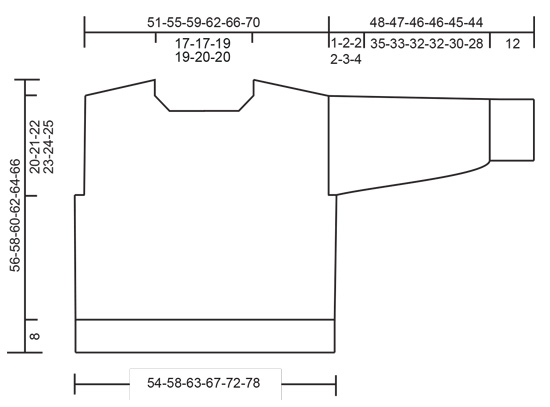
Knitted jumper in DROPS Lima or DROPS Karisma. Piece is knitted top down with European shoulder / diagonal shoulder, relief pattern and double neck edge. Size: S - XXXL
DROPS 235-3 |
||||||||||||||||||||||||||||||||||
|
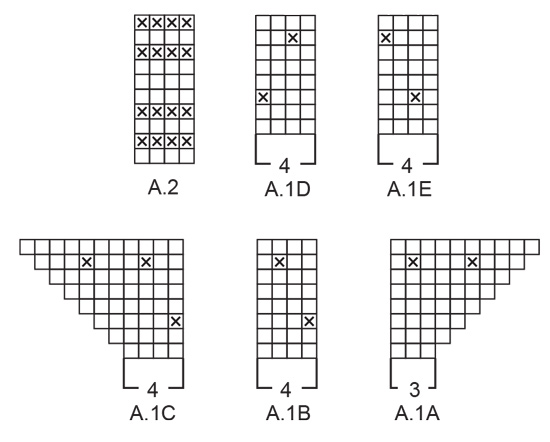
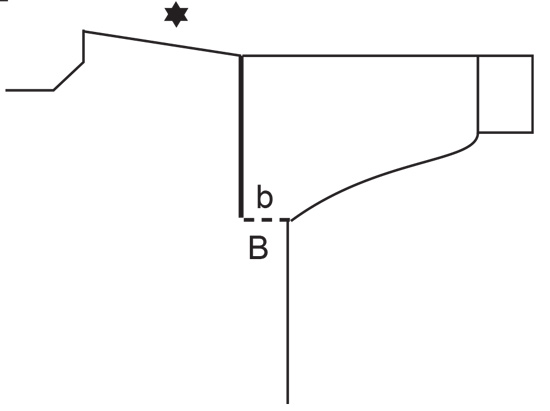
---------------------------------------------------------- EXPLANATION FOR THE PATTERN: ---------------------------------------------------------- PATTERN: See diagrams A.1 to A.6. Diagrams show all rows in pattern seen from the right side. INCREASE TIP FROM THE RIGHT SIDE: Increase towards the left AFTER MARKER: Use left needle to pick up yarn between 2 stitches from row below, pick up yarn from the front and knit in the stitch loop that is on the back of the needle. Increase towards the right BEFORE MARKER: Use left needle to pick up yarn between 2 stitches from row below, pick up yarn from the back and knit in the stitch loop that is on the front side of the needle. INCREASE TIP FROM THE WRONG SIDE: Increase towards the right AFTER MARKER: Use left needle to pick up yarn between 2 stitches from row below, pick up yarn from the back and purl in the stitch loop that is on the front side of the needle. Increase towards the left BEFORE MARKER: Use left needle to pick up yarn between 2 stitches from row below, pick up yarn from the front and purl in the stitch loop that is on the back side of the needle. DECREASE TIP (applies to mid under sleeves): Decrease 1 stitch on each side of marker thread as follows: Work until 3 stitches remain before marker thread and knit 2 together, knit 2 (marker thread is between these 2 stitches), slip 1 stitch knitwise, knit 1, pass slipped stitch over stitch worked. ---------------------------------------------------------- START THE PIECE HERE: ---------------------------------------------------------- JUMPER - SHORT OVERVIEW OF THE PIECE: Work top part of back piece back and forth on circular needle, top down until armholes are done. Then pick up stitches along each shoulder, increase for neck and work front piece back and forth on circular needle, top down until armholes are done. Slip front and back piece together. Work the body in the round on circular needle. Pick up stitches around each armhole. Work sleeve cap back and forth on circular needle, then work the rest of sleeve in the round on double pointed needles/short circular needle. Finish with a double neck edge. BACK PIECE: Cast on 39-39-43-43-47-47 stitches on circular needle size 4 mm with DROPS Lima or DROPS Karisma. Purl 1 row from wrong side. Insert 1 marker on the inside of the 3 outermost stitches in each side. Marker should be inside the outermost 3 stitches on every row. Work first row as follows from right side: A.1A, increase AFTER marker at the beginning of row – read INCREASE TIP FROM RIGHT SIDE, work A.1B 8-8-9-9-10-10 times in total, work A.1C and increase at the same time BEFORE marker at the end of row – remember INCREASE TIP FROM RIGHT SIDE. On next row (wrong side) increase the same way – read INCREASE TIP FROM WRONG SIDE. Continue pattern like this and increase the same way from both right and wrong side 34-38-40-44-46-50 times in total – work the increased stitches in A.1B, but make sure that there are always at least 3 stitches in stocking stitch at the edge in each side. REMEMBER THE KNITTING TENSION! NOTE! When A.1A, A.1B and A.1C have been worked 1 time vertically, repeat A.1 vertically the same way, i.e. every time A.1 is repeated vertically, there is room for 4 more repetitions of A.1B in width. After last increase there are 107-115-123-131-139-147 stitches on needle and piece measures approx. 12-14-14-16-16-18 cm from cast-on edge. Continue pattern back and forth as before until piece measures 8-10-8-9-9-11 cm measured at the edge along armhole (piece measures approx. 20-24-22-25-25-29 cm from cast-on edge mid back) – finish after a row from wrong side. Then work A.2 back and forth over all stitches. When A.2 has been worked, work next row as follows from right side: 1 stitch in stocking stitch, A.3A, work A.3B 12-13-14-15-16-17 times in total, A.3C, 1 stitch in stocking stitch. Continue pattern like this. When back piece measures 17-18-18-19-20-21 cm measured at the edge along armhole, cut the yarn, lay the piece to one side on a thread or on an extra needle. Armholes on back piece are now done (A.3 is not done but is finished on body). Work front piece as explained below. FRONT PIECE: Begin with right shoulder (when garment is worn). Pick up from right side 34-38-40-44-46-50 stitches inside 1 stitch along right shoulder on back piece (i.e. pick up 1 stitch in every row from edge at the top of back piece). Purl 1 row from wrong side. Work next row as follows from the right side (i.e. from armhole): S, M, XXL and XXXL: 3 stitches in stocking stitch, work A.1B until 3 stitches remain, finish with 3 stitches in stocking stitch. L and XL: 3 stitches in stocking stitch, work A.1B until 5 stitches, work the 2 first stitches in A.1B, finish with 3 stitches in stocking stitch. ALL SIZES: Continue pattern back and forth like this. When piece measures 5 cm from where stitches were picked up, increase stitches towards the neck. Increase 1 stitch for neck inside 3 stitches at the end of every row from right side, remember INCREASE TIP FROM THE RIGHT SIDE. Increase for neck the same way 6-6-7-7-8-8 times in total – work the increased stitches in A.1B, but make sure that there are always at least 3 stitches in stocking stitch towards the neck. After last increase there are 40-44-47-51-54-58 stitches on needle. Cut the yarn when last increase from right side is done. Lay the piece to one side on a thread or on an extra needle Then work left shoulder as explained below. Pick up from right side 34-38-40-44-46-50 stitches inside 1 stitch along left shoulder on back piece. Purl 1 row from wrong side. Work next row as follows from the right side (i.e. from neck): S, M, XXL and XXXL: 3 stitches in stocking stitch, work A.1D until 3 stitches remain, finish with 3 stitches in stocking stitch. L and XL: 3 stitches in stocking stitch, work A.1E until 5 stitches, work the 2 first stitches in A.1E, finish with 3 stitches in stocking stitch. ALL SIZES: Continue pattern back and forth like this. When piece measures 5 cm from where stitches were picked up, increase stitches towards the neck. Increase 1 stitch for neck inside 3 stitches at the beginning of every row from right side – remember INCREASE TIP FROM THE RIGHT SIDE. Increase for neck the same way 6-6-7-7-8-8 times in total – work the increased stitches in A.1D/A.1E, but make sure that there are always at least 3 stitches in stocking stitch towards the neck. After last increase there are 40-44-47-51-54-58 stitches on needle. Work next row as follows from wrong side: Work pattern as before over the 40-44-47-51-54-58 stitches from left front, cast on 27-27-29-29-31-31 stitches for neck at the end of this row, then work pattern as before over the 40-44-47-51-54-58 stitches from right front piece = 107-115-123-131-139-147 stitches. Continue A.1 back and forth until piece measures approx. 14-16-16-17-17-19 cm from where stitches were picked up - finish after a row from wrong side as on back piece. Now insert 1 marker at the edge along armhole, 3-3-4-4-4-4 cm from where stitches were picked up. Measure the garment by folding the piece at the top point on the inside of shoulder and at marker on front piece - make sure that A.1 is the same length on front and back piece. This important so that the pattern fits in the sides when piece is put together. Adjust the length of A.1 if needed. Then work A.2 back and forth over all stitches. When A.2 has been worked, work next row as follows from right side: 1 stitch in stocking stitch, A.3A, work A.3B 12-13-14-15-16-17 times in total, A.3C, 1 stitch in stocking stitch. Continue the pattern like this until piece measures 23-24-26-27-28-29 cm, measured along the edge of armhole from where stitches were picked up (A.3 is not done but finish front piece on same row in diagram as back piece – this is important so that the pattern fits in the sides when piece is put together). Now put front piece and back piece together for body as explained below. BODY: Work pattern as before over the 107-115-123-131-139-147 stitches from front piece, cast on 6-8-8-10-14-18 new stitches at the end of this row (in the side under sleeve), work pattern as before over the 107-115-123-131-139-147 stitches from back piece and cast on 6-8-8-10-14-18 new stitches on row (in the side under sleeve) = 226-246-262-282-306-330 stitches. Finish A.3 - work stitches cast on in each side in stocking stitch until A.3 is finished. Now work A.4 in the round - AT THE SAME TIME on first round increase 2-0-2-0-0-0 stitches evenly = 228-246-264-282-306-330 stitches. On next to last round in A.4 increase 32-34-36-38-38-42 stitches evenly = 260-280-300-320-344-372 stitches (this is done because the next pattern contracts the piece). When A.4 has been worked, work A.5 in the round. Repeat A.5 vertically until piece measures 41-43-45-46-46-48 cm, measured from the top point on front piece in towards the neck (work A.5 approx. 3-3-4-4-4-4 times vertically and piece measures approx. 18-19-19-19-18-19 cm from where stitches were cast on in each side) – AT THE SAME TIME on last round in A.5, decrease 32-36-36-40-40-44 stitches evenly = 228-244-264-280-304-328 stitches. Now work A.6 in the round over all stitches. When A.6 has been worked, work A.1B in the round over all stitches until piece measures approx. 48-50-52-54-56-58 cm, measures from the top point on front piece in towards the neck – finish when 2 or 3 rounds in stocking stitch have been worked after a round with purl stitches (piece measures approx. 25-26-26-27-28-29 cm from where stitches were cast on in each side). Knit 1 round while increasing 56-64-68-76-76-84 stitches evenly = 284-308-332-356-380-412 stitches. Switch to circular needle size 3 mm. Work rib (knit 2/purl 2) for 8 cm. Loosely cast off. Jumper measures approx. 56-58-60-62-64-66 cm, measured from the top point on shoulder on front piece. RIGHT SLEEVE: Use circular needle size 4 mm, pick up from right side 36-38-38-40-42-44 stitches from bottom of armhole and up to shoulder (along back piece), and 48-50-54-56-58-60 stitches from shoulder and down to the bottom of armhole on the other side (along front piece) = 84-88-92-96-100-104 stitches. Insert 1 marker thread in the middle of row – use marker thread when counting where pattern should begin and where to measure from. Begin from wrong side with 2nd row in A.4, and work A.4 back and forth – marker thread mid on top of sleeve should fit symbol in A.4. When sleeve measures 1-2-2-2-3-4 cm, slip piece together and work the rest of sleeve on a short circular needle/double pointed needles. When A.4 has been worked, work A.1B in the round. AT THE SAME TIME when piece measures 3 cm from where piece was put together, decrease 2 stitches mid under sleeve - read DECREASE TIP. Decrease like this every 2½-2½-2-2-1½-1½ cm 12-12-14-14-16-16 times in total = 60-64-64-68-68-72 stitches. Work until sleeve measures 35-33-32-32-30-28 cm from where piece was put together. 12 cm remain until finished measurements. Try the jumper and work to desired length before rib. Knit 1 round while increasing 16-16-16-16-20-20 stitches evenly = 76-80-80-84-88-92 stitches. Switch to double pointed needles size 3 mm. Work rib (knit 2/purl 2) for 12 cm. Loosely cast off. Sleeve measures approx. 48-47-46-46-45-44 cm from stitches where knitted up. Sew bottom of armhole - see chart. LEFT SLEEVE: Use circular needle size 4 mm, pick up from right side 48-50-54-56-58-60 stitches from bottom of armhole and up to shoulder (along front piece) and 36-38-38-40-42-44 stitches from shoulder and down to the bottom of armhole on the other side (along front piece) = 84-88-92-96-100-104 stitches. Insert 1 marker thread in the middle of row – use marker thread when counting where pattern should begin and where to measure from. Work the rest of the sleeve the same way as right sleeve. Sew bottom of armhole - see chart. NECK EDGE: Begin at one shoulder line, and pick up from right side inside 1 edge stitch approx. 116-116-128-128-140-140 stitches on a short circular needle size 3 mm. Number of stitches must be divisible by 4. Work rib in the round (knit 2/purl 2) for 12-12-13-13-14-14 cm. Fold the rib down on inside of garment and fasten it with 1 stitch at each shoulder. |
||||||||||||||||||||||||||||||||||
Diagram explanations |
||||||||||||||||||||||||||||||||||
|
||||||||||||||||||||||||||||||||||
 |
||||||||||||||||||||||||||||||||||
 |
||||||||||||||||||||||||||||||||||
 |
||||||||||||||||||||||||||||||||||
 |
||||||||||||||||||||||||||||||||||
Have you finished this pattern?Tag your pictures with #dropspattern #varietysweater or submit them to the #dropsfan gallery. Do you need help with this pattern?You'll find 34 tutorial videos, a Comments/Questions area and more by visiting the pattern on garnstudio.com. © 1982-2026 DROPS Design A/S. We reserve all rights. This document, including all its sub-sections, has copyrights. Read more about what you can do with our patterns at the bottom of each pattern on our site. |
||||||||||||||||||||||||||||||||||


With over 40 years in knitting and crochet design, DROPS Design offers one of the most extensive collections of free patterns on the internet - translated to 17 languages. As of today we count 324 catalogues and 12290 patterns translated into English (UK/cm). 12290
We work hard to bring you the best knitting and crochet have to offer, inspiration and advice as well as great quality yarns at incredible prices! Would you like to use our patterns for other than personal use? You can read what you are allowed to do in the Copyright text at the bottom of all our patterns. Happy crafting!
Post a comment to pattern DROPS 235-3
We would love to hear what you have to say about this pattern!
If you want to leave a question, please make sure you select the correct category in the form below, to speed up the answering process. Required fields are marked *.