
Popular categories
Looking for a yarn?


Comments / Questions (23)
![]() Nina Elisabeth Gulstad wrote:
Nina Elisabeth Gulstad wrote:
Det skulle vært flere bilder som viste rygg og siden av jakken. Skal til med splitt nå, men får det ikke til å stemme, stopper a1 når det skal begynne på splitt?
29.07.2025 - 22:29
![]() Ti Ziana wrote:
Ti Ziana wrote:
Ho risolto lavorando gli aum a diritto nel filo tra le maglie prima e dopo il motivo. Si formano del piccoli fori simmetrici da entrambi i lati
24.12.2021 - 17:41
![]() Tiziana wrote:
Tiziana wrote:
Buongiorno,nella spiegazione degli aumenti x il raglan si dice di lavorare i gettati a ritorto,ma nella foto vedi che avete lasciato i buchetti dei gettati a lato del motivo. Cosa è giusto?
23.12.2021 - 17:14DROPS Design answered:
Buonasera Tiziana, i gettati vanno lavorati a rovescio ritorto sul ferro successivo: grazie per la segnalazione, abbiamo corretto il testo. Buon lavoro!
26.12.2021 - 22:55
![]() Anne-Claire wrote:
Anne-Claire wrote:
Bonjour. Je tricote en taille L. A la fin de mes augmentations, j'ai bien 274 mailles. Mais au moment de mettre les mailles des manches en attente, si je compte 43m (devant droit) puis 56m (manche) je sépare les mailles en plein milieu de A1. Est-ce normal? Si c'est bien ça, j'aurai normalement 5m de A1 côté devant droit qui rejoindront 5m de A1 côté dos, ce qui me fera repartir avec 10m pour poursuivre A1, or le schéma est sur 9m... Je suis un peu perdue... Merci de votre aide!
12.11.2021 - 22:56DROPS Design answered:
Bonjour Anne-Claire, vous divisez effectivement au niveau de A.1, autrement dit on garde 5 mailles de A.1 pour les devants/le dos et les 4 autres mailles pour les manches; si vous divisez sur un rang de A.1 avec 10 mailles, diminuez 1 maille au 1er rang de la manche pour bien conserver le bon nombre de mailles. Bon tricot!
15.11.2021 - 07:28
![]() Annika wrote:
Annika wrote:
I midten av A1: Skal jeg løfte første maske over på høyre pinne, strikke to masker rett og så løfte den første masken over dem slik at den felles? Når jeg har strikket vrang-kast-vrang fra vrangen, og snur - skal jeg strikke rett maske, rett kast og rett maske, eller skal kastet i midten strikkes vridd? Og så er det en runde uten kast/fellinger før jeg repeterer mønsteret, ikke sant?
08.09.2021 - 22:56DROPS Design answered:
Hei Annika. Ja, du feller 1 maske, som da ligger over de 2 rettmaskene (midten av A.1).Kastet på vrangen strikkes rett, lik hvordan masken før- og etter kastet strikkes. Du strikker 2 pinner uten at det "skjer" noe, altå kun rett og vrangmasker (blank firkant og firkant med et kryss). mvh DROPS design
15.09.2021 - 14:29
![]() Gerda Smets wrote:
Gerda Smets wrote:
Hallo, ik zou graag dit model op mijn breimachine breien, ik heb dus enkel het schema nodig, maar kan uit het schema niet opmaken hoe breed de mouw van onder is en hoe breed wanneer de raglan begint, bijvoorbeeld. Ik weet niet of u mij hiermee zou kunnen helpen. Ik zie heel veel mooie patronen op de website maar hierom kan ik ze jammer genoeg niet breien. vriendelijke groet Gerda
16.01.2021 - 23:38DROPS Design answered:
Dag Gerda,
Helaas zijn onze patronen alleen geschreven om met de hand te breien. Misschien kun je je vraag kwijt op een ander forum, voor bijvoorbeeld breimachines.
17.01.2021 - 11:41
![]() Jane wrote:
Jane wrote:
Hello. What is the difference between the jacket and the body? I always assume they are the same? Also in the second row of the jacket there is a section “=sleeve” what does that mean?
31.08.2020 - 17:04DROPS Design answered:
Dear Jane, under "JACKET" you will find the beginning of the pattern = the yoke part, then under BODY you will find the end of the body part, ie after division for sleeves. In the 2nd paragraph under JACKET you can find description of all pieces from RS, ie from left front piece to right front piece, including sleeves and back piece. Read more about a pattern worked top down here. Happy knitting!
01.09.2020 - 08:48
![]() Robyn wrote:
Robyn wrote:
In the jacket after casting on 76 stitches (M )and working 2 ridges I don’t understand the next row and when to work the increases. I understand that the front bands are the first and last 5 stitches. After that I’m completely lost. Do I knit 5 (band), knit 13, then increase somehow? And is this the row to do the first buttonhole on?
25.03.2020 - 09:08DROPS Design answered:
Dear Robyn, yes the first buttonhole will be worked at the end of this row - see BUTTONHOLES. And work this row as follows: 5 front band sts, knit 13 sts increasing evenly 2 sts (= there are now 15 sts), (YO, K1) x 6 (= there are now 12 sts), K28 inc evenly 2 sts (= there are now 30 sts), (YO, K1) x 6 (= there are now 12 sts), K13 inc evenly 2 sts (= there are now 15 sts), 5 front band sts (work buttonhole), ie: 5+ 15+12+30+12+15+5=94 sts on the needle. Happy knitting!
25.03.2020 - 10:14
![]() Hanna Derkinderen wrote:
Hanna Derkinderen wrote:
Gaat patroon A1 verder op de mouw of niet?
21.12.2019 - 09:42DROPS Design answered:
Dag Hanna,
Nee, A.1 gaat niet verder op de mouw; je breit de mouw in tricotsteek in de rondte
26.12.2019 - 15:41
![]() Silvia wrote:
Silvia wrote:
"A.1. Il diagramma mostra tutti i ferri del motivo, visti sul diritto del lavoro." Non ho capito se Il diagramma indica solo i giri al dritto o anche quelli a rovescio . Grazie per la risposta
06.09.2019 - 18:57DROPS Design answered:
Buonasera Silvia, il diagramma mostra sia i ferri di andata che quelli di ritorno. Buon lavoro!
06.09.2019 - 19:13
|
||||||||||||||||
Beloved Cardigan#belovedcardigan |
||||||||||||||||
 |
 |
|||||||||||||||
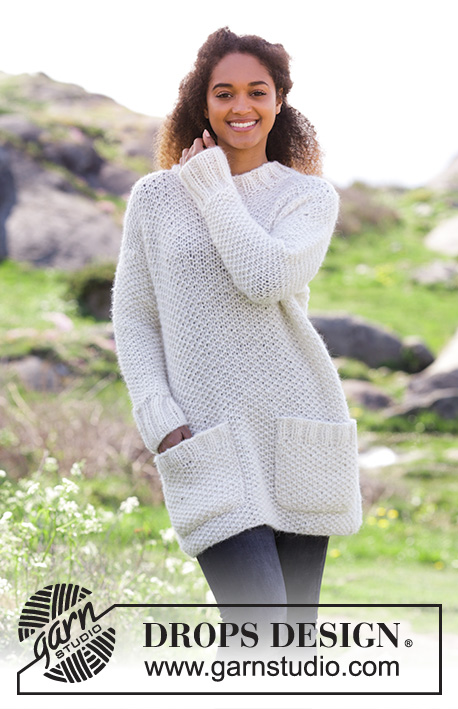
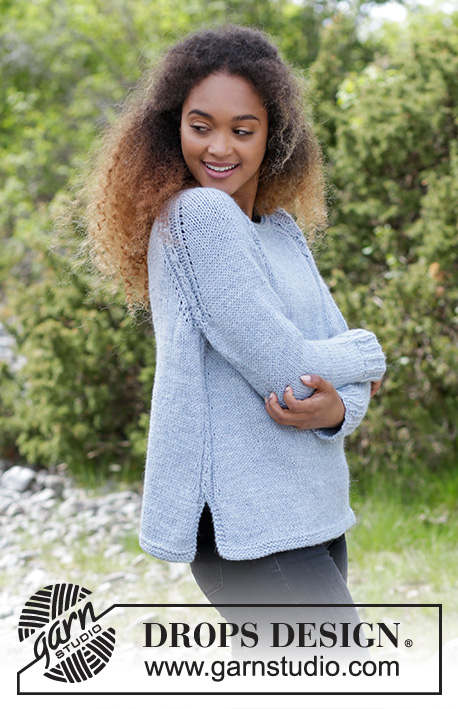
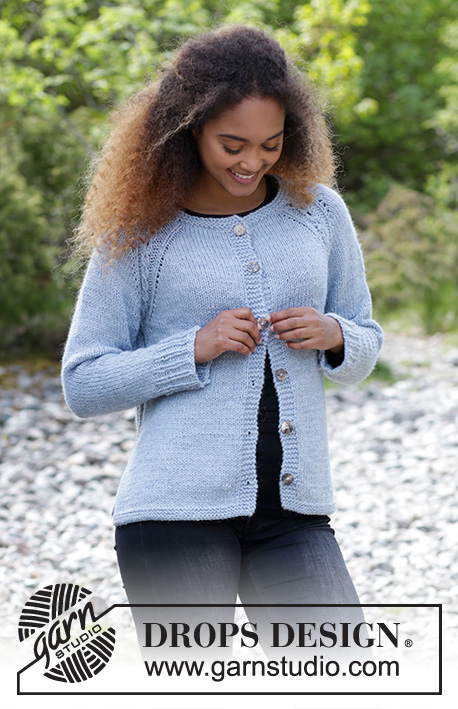
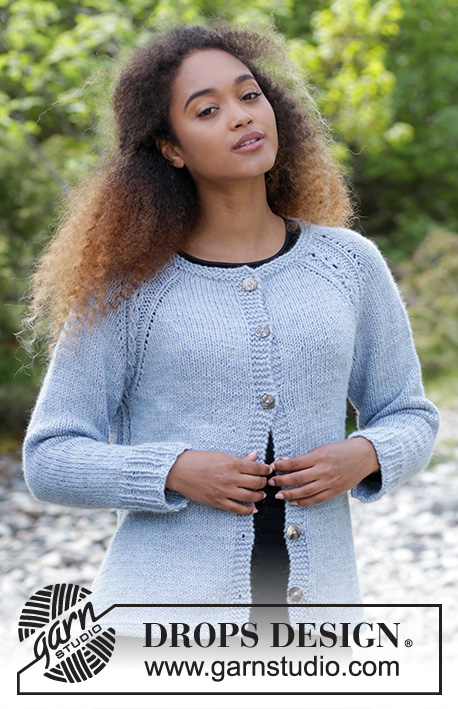
Knitted jacket with cables and raglan, worked top down. Sizes S - XXXL. The piece is worked in DROPS Nepal.
DROPS 181-29 |
||||||||||||||||
|
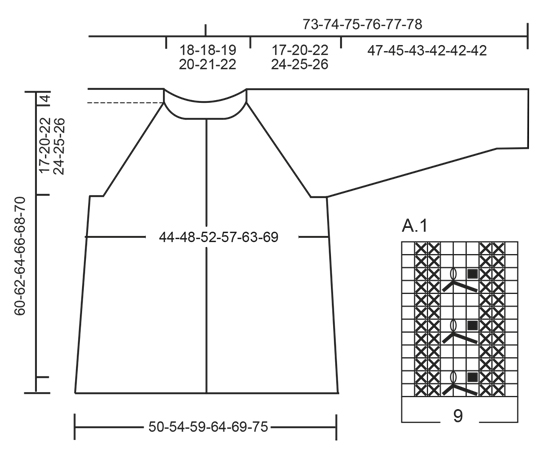
RIDGE/GARTER STITCH (worked back and forth): 1 ridge = Knit 2 rows. PATTERN: See diagram A.1. The diagram shows all the rows in the pattern seen from the right side. RAGLAN: Increase to raglan on each side of A.1 (= 8 increased stitches per increase row). Increase by making 1 yarn over, on the next row purl the yarn overs twisted to prevent holes. DECREASE TIP: Decrease 1 stitch on each side of the marker thread as follows: Work until there are 3 stitches left before the marker thread, slip 1 stitch as if to knit, knit 1, pass the slipped stitch over, knit 2 stitches (the marker thread sits between these stitches), knit the next 2 stitches together. BUTTONHOLE: The first buttonhole is worked on the first row from the right side after the garter stitch edge in the neck, then work the next 5-5-5-6-6-6 with approx. 8 cm between each. Decrease for the buttonhole on the right band as follows: Work until there are 3 stitches on the needle (seen from the right side), make 1 yarn over, knit 2 together and knit 1. On the next row, knit the yarn overs so that there is a hole. ---------------------------------------------------------- The piece is worked back and forth with circular needle, from mid front and top down. JACKET: Cast on 76-76-80-86-92-96 stitches (including 5 band stitches in each side towards mid front) with circular needle size 5.5 mm and Nepal. Work 2 RIDGES – see description above. Now start decreasing for BUTTONHOLE – see description above. The next row is worked as follows – from the right side: 5 stitches garter stitch (= band), 13-13-14-16-17-18 stitches stocking stitch, AT THE SAME TIME as you increase 2-2-2-2-4-6 stitches evenly over these stitches, *1 yarn over, knit 1 *, work from *-* 6 times in total, 28-28-30-32-36-38 stitches stocking stitch, AT THE SAME TIME as you increase 2-2-2-4-6-10 stitches evenly over these stitches, *1 yarn over, knit 1 *, work from *-* 6 times in total, 13-13-14-16-17-18 stitches stocking stitch, AT THE SAME TIME as you increase 2-2-2-2-4-6 stitches evenly over these stitches, finish with 5 stitches garter stitch (= band) = 94-94-98-106-118-130 stitches. Purl 1 row from the wrong side (the band stitches are knitted and the yarn overs are purled twisted to prevent holes). REMEMBER THE KNITTING TENSION! Work the next row as follows from the right side: Work 5 stitches garter stitch (= band), 10-10-11-13-16-19 stitches stocking stitch (= left front piece), A.1 (= 9 stitches), work 4 stitches stocking stitch (= sleeve), A.1 (= 9 stitches), knit 20-20-22-26-32-38 stitches (= back piece), A.1, work 4 stitches stocking stitch (= sleeve), A.1, work 10-10-11-13-16-19 stitches stocking stitch (= right front piece) and finish with 5 stitches garter stitch (= band). Continue this pattern, at the same time increase 1 stitch on each side of each A.1 to raglan – SEE DESCRIPTION ABOVE. Increase every 2nd row (= each row from the right side) a total of 17-20-22-24-25-26 times. After all the increases, there are 230-254-274-298-318-338 stitches on the needle. Continue with pattern and stocking stitch (without increases) until the piece measures 18-21-23-25-26-28 cm from the cast-on edge mid front. The next row is worked as follows from the wrong side: Work 37-40-43-47-51-55 stitches (= right front piece), place the next 46-52-56-60-62-64 stitches on 1 thread (= sleeve), cast on 6-6-8-8-8-10 new stitches on the needle (= under the sleeve), work 64-70-76-84-92-100 stitches (= back piece), place the next 46-52-56-60-62-64 stitches on 1 thread (= sleeve), cast on 6-6-8-8-8-10 new stitches on the needle (= under the sleeve) and work the remaining 37-40-43-47-51-55 stitches (= left front piece). BODY: = 150-162-178-194-210-230 stitches. Continue back and forth with stocking stitch and 5 stitches garter stitch in each side. Now work A.1 over the 9 middle stitches in each side (under the sleeves). Insert 1 marker here, the piece is now measured from here. When the piece measures 3 cm increase 1 stitch on each side of A.1 in each side (= 4 stitches increased). Increase every 5 cm a total of 5 times = 170-182-198-214-230-250 stitches. When the piece measures 28-27-27-27-28-28 cm place the first and last 45-48-52-56-60-65 stitches on one thread, now only work over the stitches on the back piece (= 80-86-94-102-110-120 stitches). Continue with stocking stitch with 3 stitches garter stitch in each side. When the piece measures 36-35-35-35-36-36 cm (the split measures 8 cm) work 3 ridges over all stitches. Then cast off. Place the stitches from the right front piece on the needle. Work stocking stitch with 5 stitches garter stitch towards mid front and 3 stitches garter stitch towards the side. When the piece measures 36-35-35-35-36-36 cm (the split measures 8 cm) work 3 ridges over all stitches. Then cast off. Repeat on the left front piece. The whole jacket measures approx. 60-62-64-66-68-70 cm from the shoulder. SLEEVE: The piece is worked in the round with short circular needle/double pointed needles. Place the 46-52-56-60-62-64 stitches from the thread in one side of the piece on double pointed needles size 5.5 mm and in addition, cast on 6-6-8-8-8-10 new stitches mid under the sleeve = 52-58-64-68-70-74 stitches on needle. Insert a marker thread in the middle of the new stitches – THE PIECE IS NOW MEASURED FROM HERE! Work stocking stitch in the round. AT THE SAME TIME after 3 cm decrease 2 stitches mid under the sleeve – READ DECREASE TIP. Decrease every 4-3-2-2-2-1½ cm a total of 10-12-15-16-16-17 times = 32-34-34-36-38-40 stitches. When the piece measures 40-38-36-35-35-35 cm knit 1 round where you increase 4-5-5-6-7-8 stitches evenly on round = 36-39-39-42-45-48 stitches. Change to double pointed needles size 5 mm and work rib, knit 1/ purl 2. Continue with rib for 7 cm, then cast off with knit over knit and purl over purl. The sleeve measures approx. 47-45-43-42-42-42 cm. Work the other sleeve in the same way. ASSEMBLY: Sew the openings under the sleeves. Sew the buttons onto the left front piece. |
||||||||||||||||
Diagram explanations |
||||||||||||||||
|
||||||||||||||||
 |
||||||||||||||||
Have you finished this pattern?Tag your pictures with #dropspattern #belovedcardigan or submit them to the #dropsfan gallery. Do you need help with this pattern?You'll find 30 tutorial videos, a Comments/Questions area and more by visiting the pattern on garnstudio.com. © 1982-2026 DROPS Design A/S. We reserve all rights. This document, including all its sub-sections, has copyrights. Read more about what you can do with our patterns at the bottom of each pattern on our site. |
||||||||||||||||


With over 40 years in knitting and crochet design, DROPS Design offers one of the most extensive collections of free patterns on the internet - translated to 17 languages. As of today we count 324 catalogues and 12290 patterns translated into English (UK/cm). 12290
We work hard to bring you the best knitting and crochet have to offer, inspiration and advice as well as great quality yarns at incredible prices! Would you like to use our patterns for other than personal use? You can read what you are allowed to do in the Copyright text at the bottom of all our patterns. Happy crafting!
Post a comment to pattern DROPS 181-29
We would love to hear what you have to say about this pattern!
If you want to leave a question, please make sure you select the correct category in the form below, to speed up the answering process. Required fields are marked *.