
Popular categories
Looking for a yarn?


Comments / Questions (29)
![]() Charlotte wrote:
Charlotte wrote:
Hello! This is my first time knitting a European shoulder and I have just started on the sleeves. I read the lesson, which said to knit short rows of 4/8/12 past the top marker, but this was for a children’s sweater and this whisper of spring pattern doesn’t mention short rows for the sleeve. Should I be knitting short rows for a sleeve cap? If so, how should I determine how many short rows and how long of short rows?
25.01.2026 - 22:29DROPS Design answered:
Dear Charlotte, in this pattern there is no short rows for sleeve cap, you just work first back and forth for 1-5 cm (see size) then continue in the round - the lesson for sleeve will you looking where to pick up sts (except at the bottom of armhole here for this jumper), but consider maybe the sleeves worked like this lesson (just remember the shoulder line is not on same place than in this lesson). Happy knitting!
27.02.2026 - 15:43
![]() Onute wrote:
Onute wrote:
Hello. Do I understand correctly: for the back neck (M size), we have 12 stitches, and for the front, we increase 8 stitches and then 22 more? Does it mean that the front neck part is much wider? Thank you.
04.10.2025 - 07:20DROPS Design answered:
Dear Onute, this sweater doesn't have the usual neck shape. For the neck in the back you have 34 stitches and, out of these, 12 stitches are worked in stocking stitch while the other 22 stitches are worked into A.1 and A.2, but are still part of the back neck. And you increase 28 times for the shoulders, to have 90 stitches in the back. In the front pieces you pick up 28 stitches from each shoulder in the back, then increase 4 stitches in each shoulder for the shape of the neck and finally you cast on 22 stitches to join both shoulders. Happy knitting!
05.10.2025 - 20:23
![]() Ewa wrote:
Ewa wrote:
Dzień dobry. Co oznacza w sformułowaniu następującym: "DODAWANIE OCZEK NA PRAWEJ STRONIE ROBÓTKI: Nowe oczko będzie skierowane w lewą stronę, ZA SCHEMATEM A.1 / 3 oczka:" określenie " 3 oczka”? Czy należy dodawać oczko 3 oczka za schematem? Na zdjęciu swetra dodawanie jest bezpośrednio przy warkoczu. Dziękuję za odpowiedź.
09.07.2025 - 14:03DROPS Design answered:
Witaj Ewo, należy dodawać oczko bezpośrednio po warkoczu, albo przed warkoczem. Również nie rozumiem o co chodzi z tymi 3 oczkami, zgłoszę ten problem do korekty. Ze względu na sezon wakacyjny możemy na nią liczyć dopiero w sierpniu. Pozdrawiam!
14.07.2025 - 10:28
![]() Roshanka wrote:
Roshanka wrote:
Hi this is my first time knitting cables. So I can't understand when working on the cable on the wrong side do i need to follow the same instructions on the right and the wrong side? Knit all or knit on right side and purl on wrong side? Just watch few youtube videos also but can't get the idea of it. Thank you in advance.
11.03.2025 - 07:20DROPS Design answered:
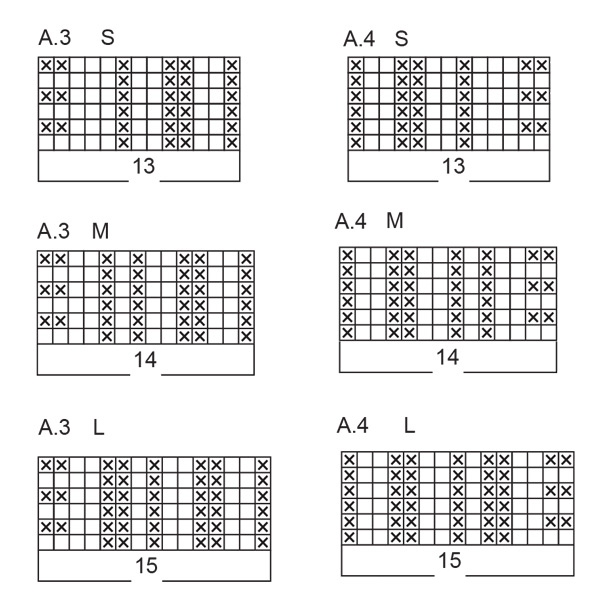
Dear Roshanka, diagrams show all rows, ie from right side you will knit the white squares and purl the crosses; from wrong side you will knit the crosses and purl the white squares. Read diagrams from the left towards the right from wrong side. Read more about diagrams here. Happy knitting!
12.03.2025 - 08:18
![]() Pauline Mehee wrote:
Pauline Mehee wrote:
Bonjour, j’ai une petite question concernant le relevé des 28 mailles jusqu’au marqueur pour le devant. on nous dit de relever 28 mailles jusqu’au marqueur or il y a 34 mailles en tout. Doit on sauter des mailles lorsqu’on relève ? je vous remercie d’avance
22.02.2025 - 11:09DROPS Design answered:
Bonjour Mme Mehee, vous devez relever 1 maille dans chacun des 28 rangs tricotés au début du dos - regardez dans cette vidéo ou bien dans cette leçon comment on relève les mailles pour chaque épaule du devant. Bon tricot!
24.02.2025 - 08:13
![]() Silje wrote:
Silje wrote:
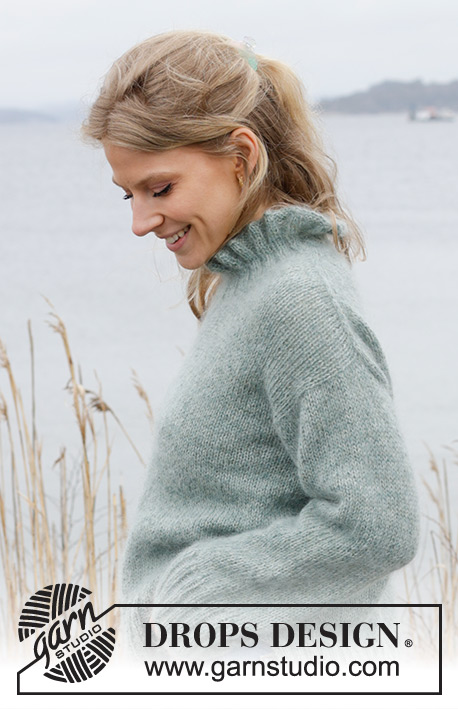
Hvordan ser genseren ut i nakken?
22.02.2025 - 09:51DROPS Design answered:
Hei Silje. Vi skal se om vi har noen bilder i arkivet som kan brukes, der man ser baksiden bedre. mvh DROPS Design
24.02.2025 - 13:44
![]() Gisela Grünert wrote:
Gisela Grünert wrote:
Non si vede nel diagramma le schede A1 e A2 come descritto.
04.02.2025 - 11:05DROPS Design answered:
Buonasera Gisela, i diagrammi sono in fondo alla pagina. Buon lavoro!
13.02.2025 - 23:05
![]() Valerie O'Donovan wrote:
Valerie O'Donovan wrote:
Hi there, I'm trying to figure out how to knit back and forth on circular needles when I pick up the stitches on the sleeve? It seems impossible as it's just too tight. I must be missing something here,. Can you help please? Many thanks, Val
05.02.2024 - 22:01DROPS Design answered:
See previous answer below, tell us if it was clear for you.
06.02.2024 - 08:44
![]() Valerie O'Donovan wrote:
Valerie O'Donovan wrote:
Hi there, I need to ask about picking up stitches for the sleeves in this pattern on circular needles size 5mm and then knit stocking stitch back and forth for 2cms? I just can't figure out how to do that. It's so tight, I can't go back and forth.. I can just about knit in the round using the magic loop method. Is it really necessary to go back and forth? Can I just knit in the round? I'd appreciate any help you csn give. Thanks, Val
05.02.2024 - 21:58DROPS Design answered:
Dear Mrs O'Donovan, in this pattern you pick up the stitches just along the armhole, not in the new stitches cast on when joining front and back piece together and work back and forth for 2 cm before joining in the round. These 2 cm will be then sewn to the stitches cast on mid under sleeve. Happy knitting!
06.02.2024 - 08:43
![]() Evelyn Messing wrote:
Evelyn Messing wrote:
Nach den 6 Reihen müssen Markierer gesetzt werden. Aber wohin. Direkt nach und vor A1 und A2. .
24.12.2023 - 11:27DROPS Design answered:
Liebe Frau Messin, diese Markierer sollen beidseitig eingesetzt werden, dh in die 1. und in die letzte Masche, von hier wird dann die Arbeit für die Armausschnitt gemessen. Viel Spaß beim stricken!
02.01.2024 - 08:14
|
|||||||||||||||||||
Whisper of Spring#whisperofspringsweater |
|||||||||||||||||||
 |
 |
||||||||||||||||||
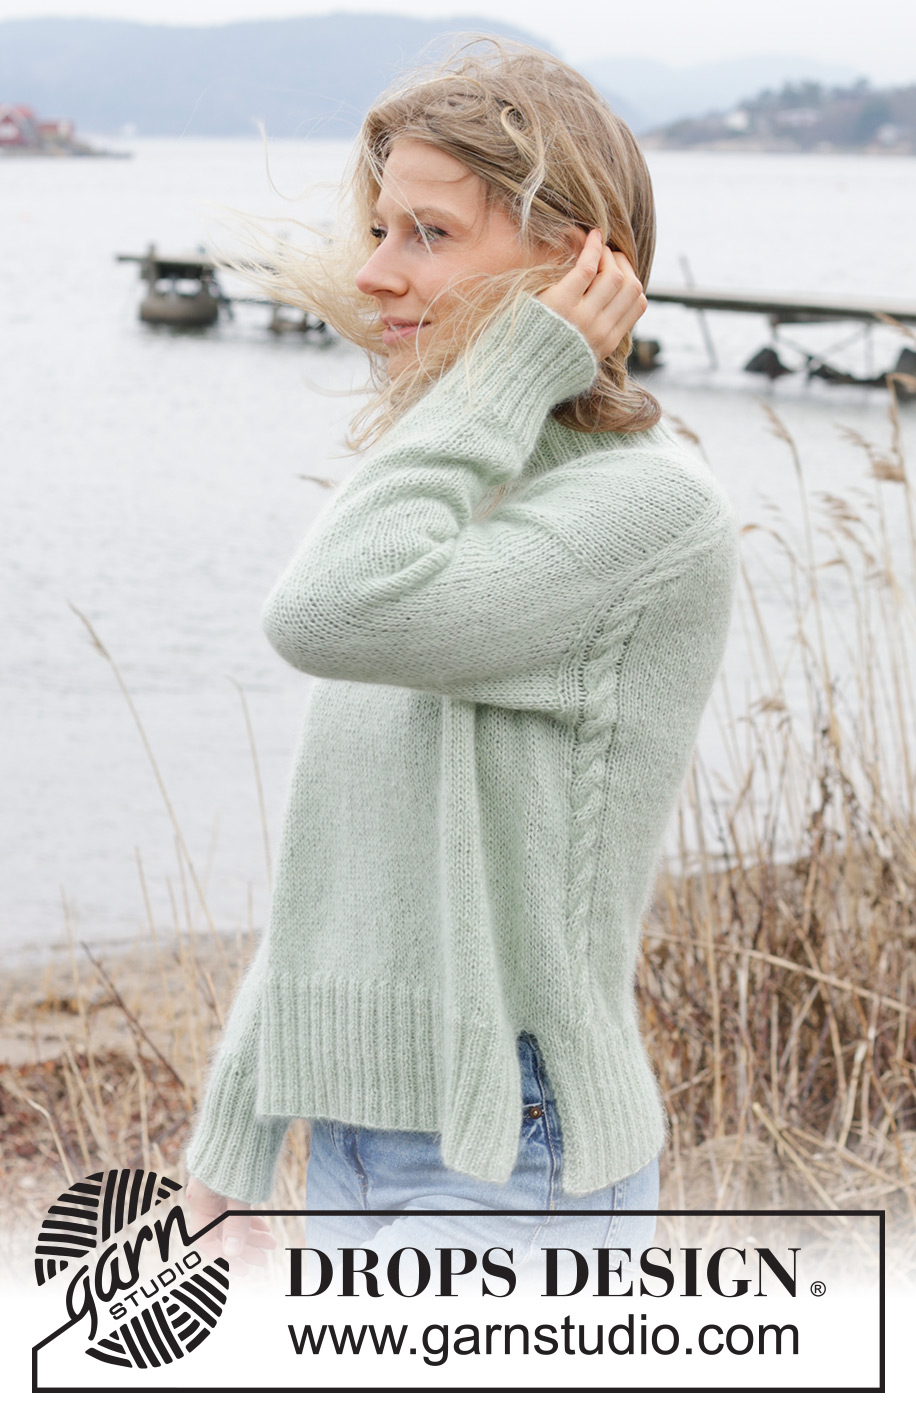
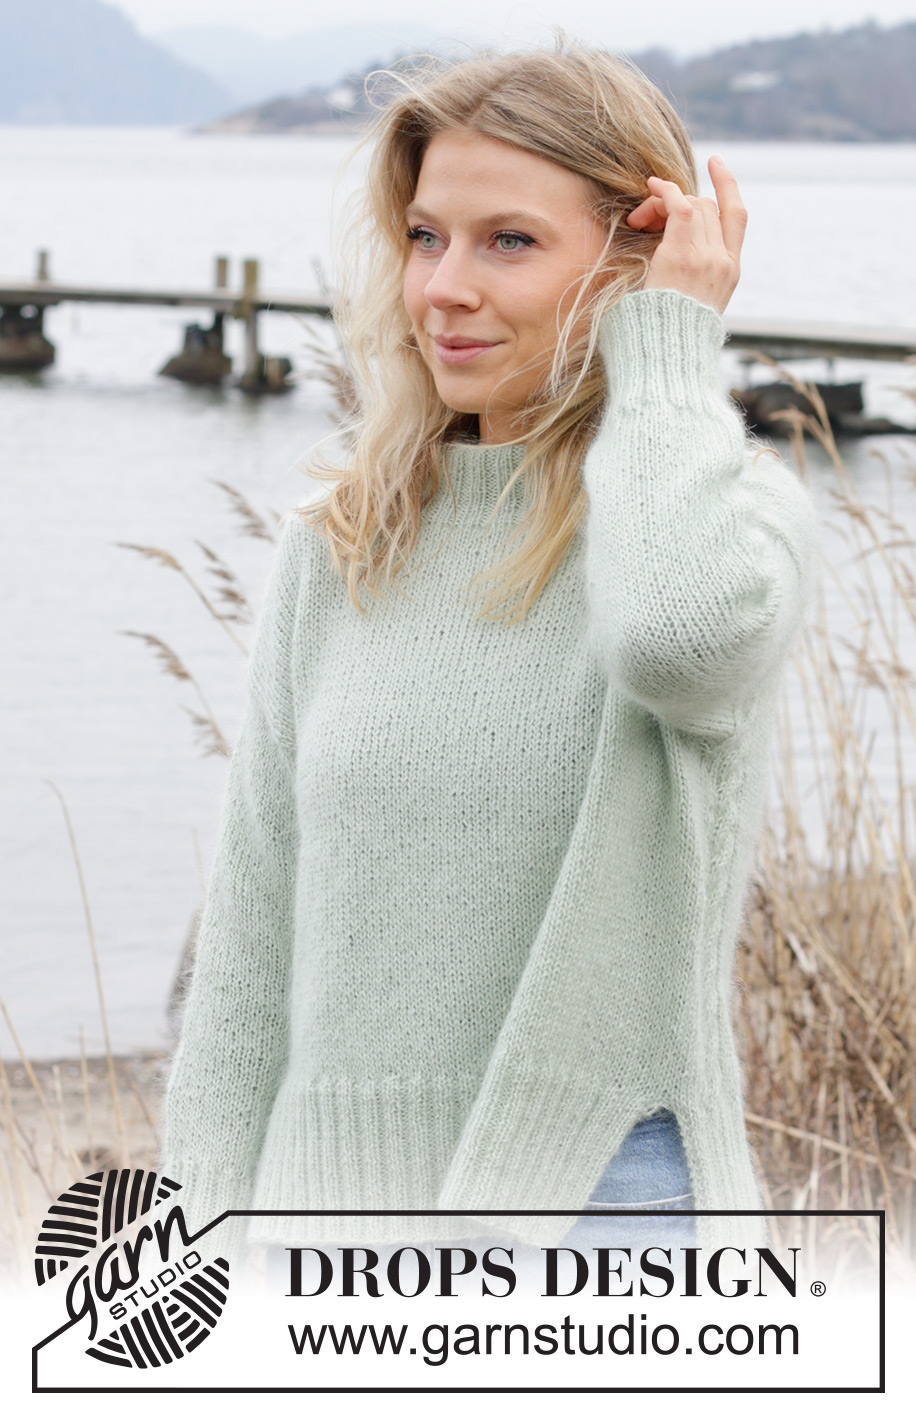
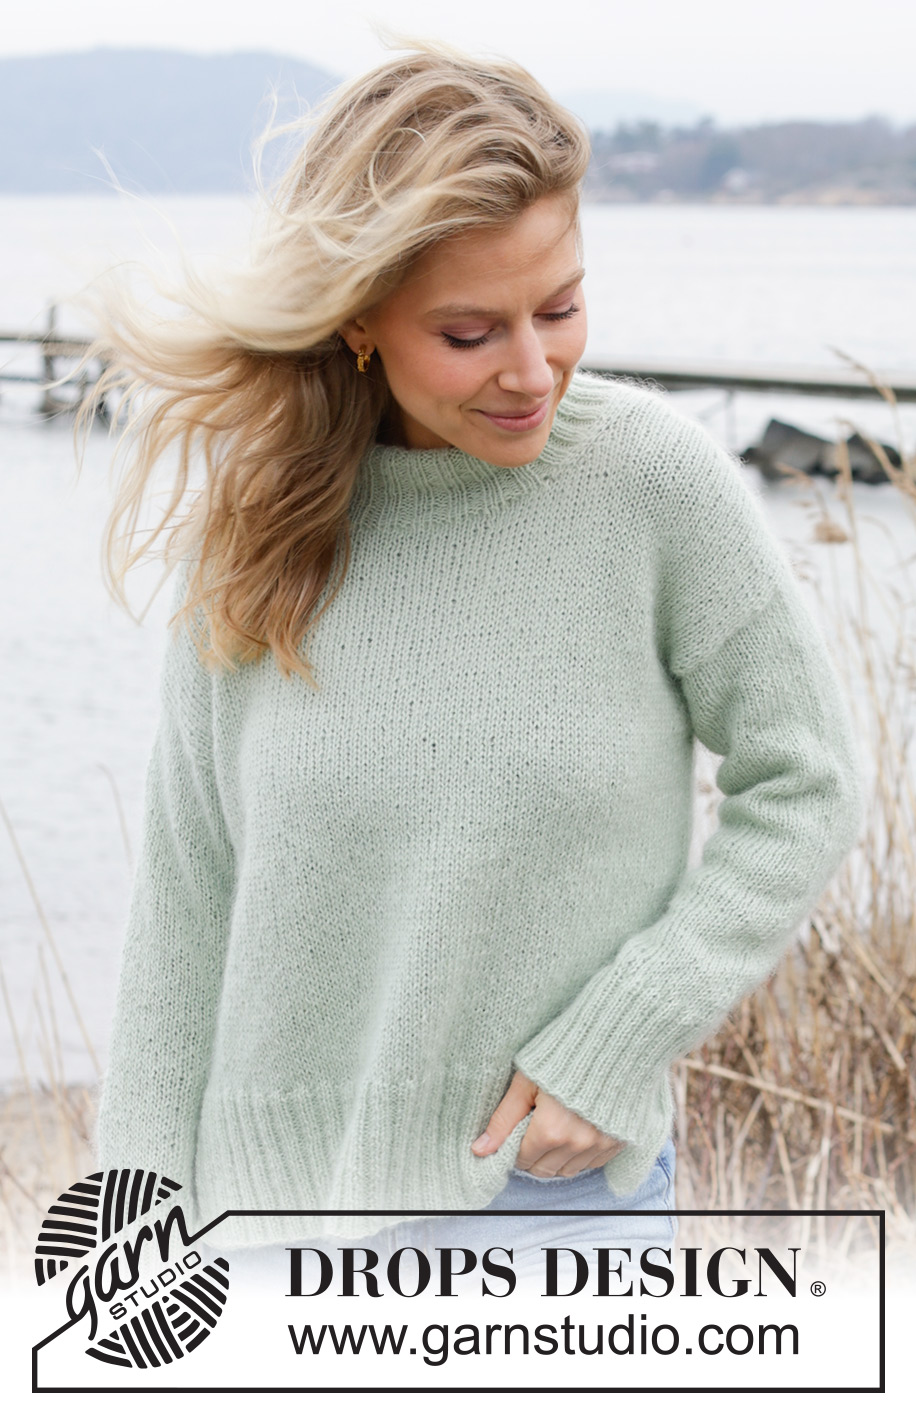
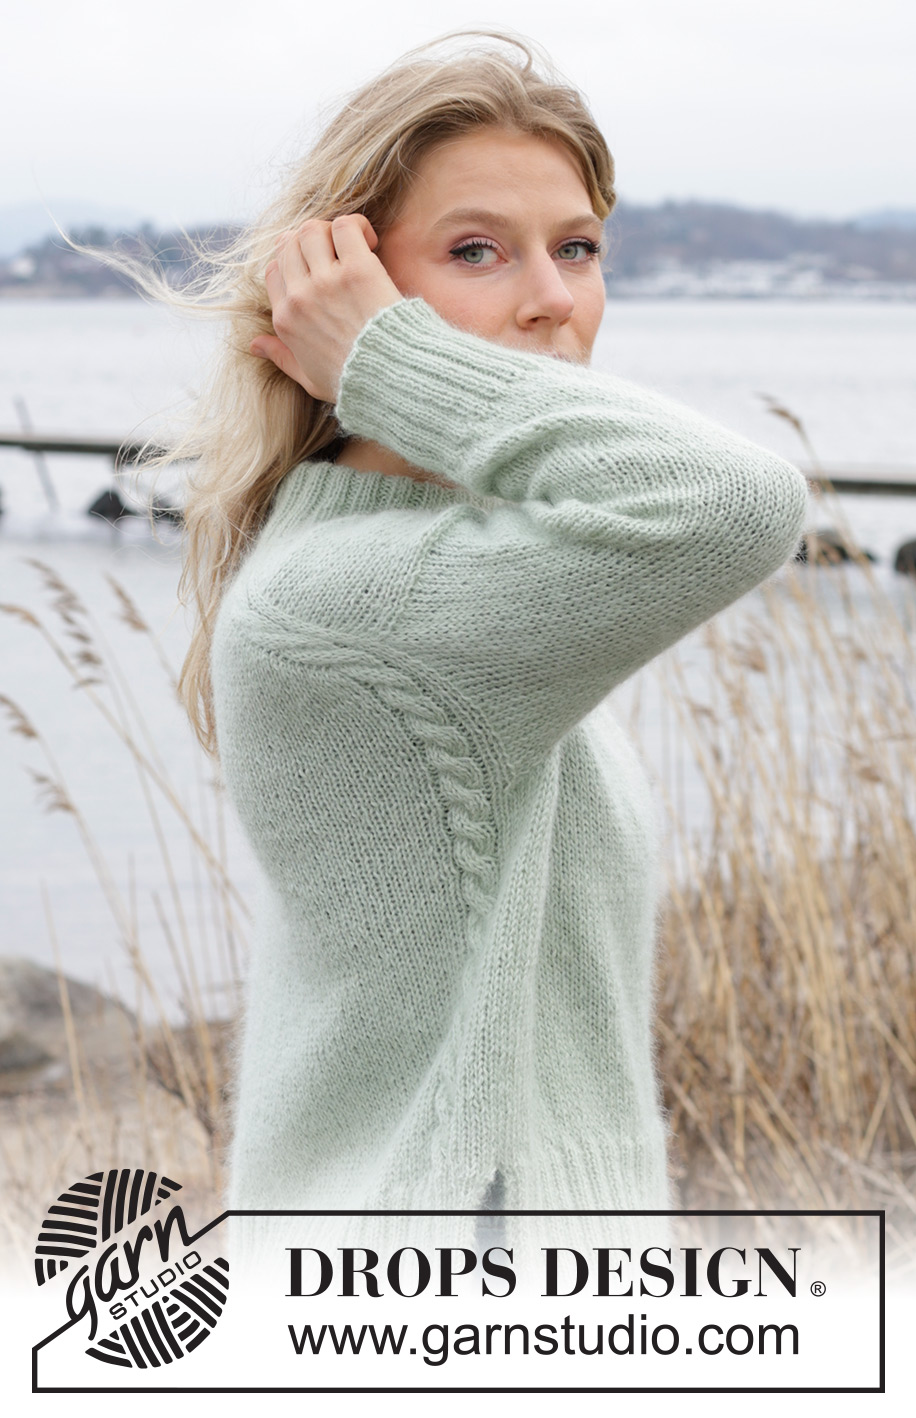
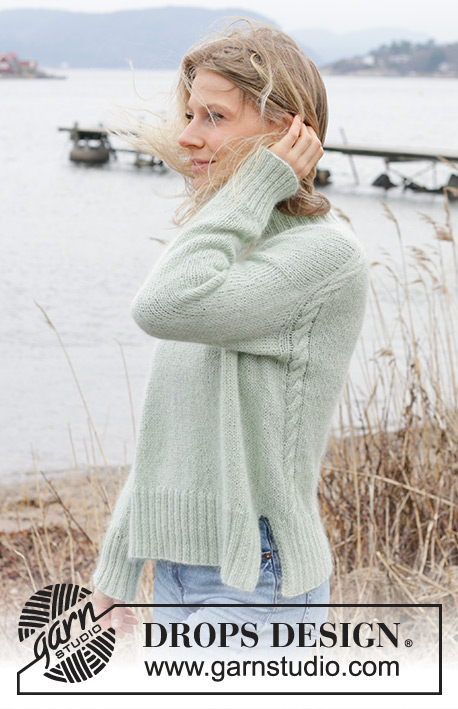
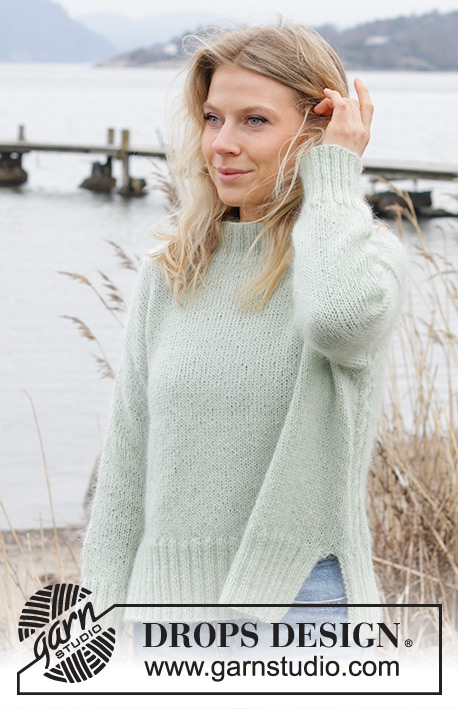
Knitted jumper in DROPS Alpaca and DROPS Kid-Silk. The piece is worked top down with European/diagonal shoulders, cables and split in sides. Sizes S - XXXL.
DROPS 243-6 |
|||||||||||||||||||
|
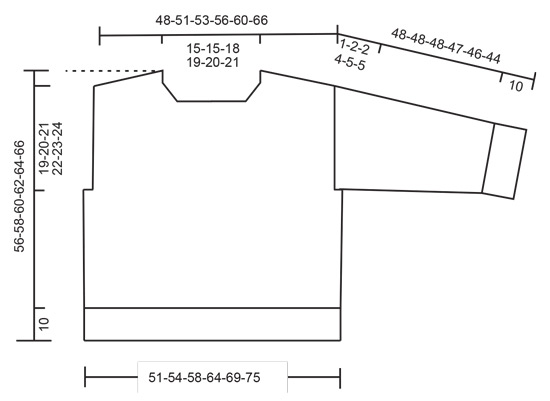
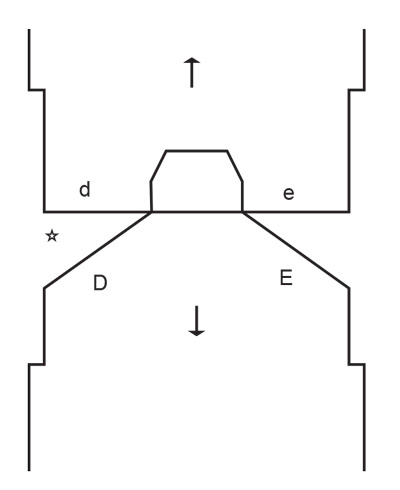
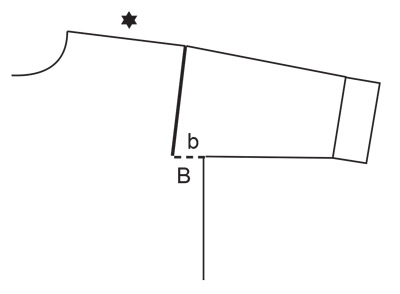
------------------------------------------------------- EXPLANATIONS FOR THE PATTERN: ------------------------------------------------------- GARTER STITCH (worked back and forth): Knit all rows. 1 ridge = knit 2 rows. INCREASE TIP FROM THE RIGHT SIDE: Increase towards the left AFTER MARKER / 3 stitches on neck: Use left needle to pick up yarn between 2 stitches from row below, pick up yarn from the front and knit in the stitch loop that is on the back of the needle. Increase towards the right BEFORE MARKER / 3 stitches on neck: Use left needle to pick up yarn between 2 stitches from row below, pick up yarn from the back and knit in the stitch loop that is on the front side of the needle. INCREASE TIP FROM THE WRONG SIDE: Increase towards the right AFTER MARKER: Use left needle to pick up yarn between 2 stitches from row below, pick up yarn from the back and purl in the stitch loop that is on the front side of the needle. Increase towards the left BEFORE MARKER: Use left needle to pick up yarn between 2 stitches from row below, pick up yarn from the front and purl in the stitch loop that is on the back side of the needle. DECREASE TIP (for sleeves): Decrease 1 stitch on each side of the marker-thread as follows: Work until there are 3 stitches left before the marker-thread, knit 2 together, knit 2 (marker-thread sits between these 2 stitches), slip 1 stitch knit-wise, knit 1 and pass the slipped stitch over the knitted stitch. ------------------------------------------------------- START THE PIECE HERE: ------------------------------------------------------- JUMPER – SHORT OVERVIEW OF THE PIECE: The top of the back piece is worked back and forth on circular needle until the armholes are finished. Stitches are knitted up along each shoulder for the front piece. Then increased for the neck. Then the front piece is worked back and forth on circular needle until the armholes are finished. The pieces are joined and the body worked in the round. Stitches are knitted up around the armholes and the sleeves worked first back and forth for the sleeve cap, then in the round with short circular needle/double pointed needles. The neck is worked to finish. BACK PIECE: Cast on 34-34-38-40-42-44 stitches with circular needle size 5 mm and 1 strand DROPS Alpaca and 1 strand DROPS Kid-Silk (2 strands). Purl 1 row from the wrong side. Insert 1 marker inside the outermost 11 stitches in each side. Markers should be placed inside the 11 outermost stitches on every row, A.1 and A.2 will be worked over these 11 stitches. Now work as follows from the right side, AT THE SAME TIME increase AFTER MARKER at the beginning of the row and BEFORE the marker at the end of the row – read INCREASE TIP FROM RIGHT SIDE: Work A.1, work in stocking stitch to next marker, A.2. On the next row (wrong side) increase after A.2 and before A.1 – read INCREASE TIP FROM WRONG SIDE. Continue increasing from both the right and wrong side a total of 26-28-28-30-32-36 times = 86-90-94-100-106-116 stitches. Continue the pattern for 6 rows, without increasing. Insert a marker in each side; the piece is now measured from here! REMEMBER THE KNITTING TENSION! Continue the pattern until the piece measures 14-15-16-17-17-18 cm from the marker and down the armholes. Cut the strand. Place the stitches on a stitch holder. FRONT PIECE: Start on the left shoulder (when the garment is worn). Knit up 26-28-28-30-32-36 stitches inside 1 stitch along the left shoulder on the back piece; start by the neck and knit up stitches as far as the marker in the side of the back piece. Work stocking stitch back and forth for 4 cm. Increase for the neck at the beginning of each row from the right side, after 3 stitches - remember INCREASE TIP FROM RIGHT SIDE. Increase 1 stitch 4 times = 30-32-32-34-36-40 stitches. Purl 1 row from the wrong side. Cut the strand. Place the stitches on a stitch holder and work the right front shoulder as follows. Knit up 26-28-28-30-32-36 stitches inside 1 stitch along the right shoulder on the back piece. Start by the marker and knit up stitches as far as the neck. Work stocking stitch back and forth for 4 cm. Increase for the neck at the end of each row from the right side, before 3 stitches - remember INCREASE TIP FROM RIGHT SIDE. Increase 1 stitch 4 times = 30-32-32-34-36-40 stitches. Purl back from the wrong side. Work the next row as follows from the right side: Work the 30-32-32-34-36-40 stitches from the right shoulder, cast on 22-22-26-28-30-32 stitches for the neck and work the 30-32-32-34-36-40 stitches from the left front shoulder = 82-86-90-96-102-112 stitches. NOTE! There are 4 more stitches on the back piece than on the front piece because the cables tighten the piece slightly. Work stocking stitch back and forth until the piece measures 24-25-26-27-29-30 cm down the armhole. Now join the front and back pieces for the body. BODY: Work the 82-86-90-96-102-112 stitches from the front piece, cast on 4-6-8-12-16-16 stitches (= side), work stocking stitch with A.1/A.2 over the 86-90-94-100-106-116 stitches from the back piece, cast on 4-6-8-12-16-16 stitches = 176-188-200-220-240-260 stitches. Work stocking stitch, A.1 and A.2 in the round until the piece measures 46-48-50-52-54-46 cm, from the top of the shoulder on the front piece. Now divide for the split in each side. Work the 86-92-98-108-118-128 stitches from the front piece and place them on a stitch holder and work the back piece. BACK PIECE: = 90-96-102-112-122-132 stitches. Change to circular needle size 3.5 mm. Knit 1 row from the right side and increase 34-34-38-44-46-48 stitches evenly spaced between the outermost 13-14-15-17-19-19 stitches on each side = 124-130-140-156-168-180 stitches. Work as follows from the wrong side: A.3 (see diagram for your size and start on 2nd row in diagram), * purl 2, knit 2 *, work from *-* until there are 15-16-17-19-21-21 stitches left, purl 2 and A.4 (see diagram for your size and start on 2nd row in diagram). Work this rib for 10 cm. Cast off. The jumper measures approx. 56-58-60-62-64-66 cm from the top of the shoulder. FRONT PIECE: = 86-92-98-108-118-128 stitches. Knit 1 row from the right side and increase 36-38-40-46-48-50 stitches evenly spaced = 122-130-138-154-166-178 stitches. Work the next row from the wrong side as follows: 2 edge stitches in GARTER STITCH – read description above, * purl 2, knit 2 *, work from *-* until there are 4 stitches left, purl 2 and 2 edge stitches in garter stitch. Work this rib for 10 cm. Cast off. The jumper measures approx. 56-58-60-62-64-66 cm from the top of the shoulder. LEFT SLEEVE: Using circular needle size 5 mm and 1 strand DROPS Alpaca and 1 strand DROPS Kid-Silk, knit up from the right side 37-39-41-43-46-48 stitches from the bottom of the armhole and up the front piece to the shoulder, then 27-29-31-31-32-34 stitches from the shoulder down the back piece = 64-68-72-74-78-82 stitches. Insert a marker in the middle of the row – the sleeve is measured from this marker. Work stocking stitch back and forth for 1-2-2-4-5-5 cm. Now join the sleeve on short circular needle/double pointed needles size 5 mm and work in the round. Insert 1 marker-thread at the beginning of the round (mid-under sleeve). Allow it to follow your work onwards. Start at the marker-thread and continue with stocking stitch. When the sleeve measures 4-4-4-5-6-6 cm from the marker, decrease 2 stitches mid-under the sleeve – read DECREASE TIP. Decrease like this every 6-4-3-3-2½-2 cm a total of 6-8-9-9-10-11 times = 52-52-54-56-58-60 stitches. Continue working until the sleeve measures 38-38-38-37-36-34 cm. There is 10 cm left; try the jumper on and work to desired length before the rib. Knit 1 round and increase 16-16-18-16-18-20 stitches evenly spaced = 68-68-72-72-76-80 stitches. Change to double pointed needles size 3.5 mm. Work rib (knit 2, purl 2) for 10 cm. Cast off. The sleeve measures approx. 48-48-48-47-46-44 cm from the marker. RIGHT SLEEVE: Knit up and work in the same way as the left sleeve but, when knitting up stitches, knit up 27-29-31-31-32-34 stitches from the bottom of the armhole and up the back piece and 37-39-41-43-46-48 stitches from the shoulder and down the front piece. Sew the bottom of the armholes – see sketch. NECK: Start on one shoulder and knit up from the right side (inside 1 stitch) 88 to 120 stitches with short circular needle size 3.5 mm and 1 strand of each quality. Stitch number must be divisible by 4. Work rib in the round (knit 2, purl 2) for 10 cm. Cast off. Fold the neck double to the inside and fasten with a stitch in each side. |
|||||||||||||||||||
Diagram explanations |
|||||||||||||||||||
|
|||||||||||||||||||
 |
|||||||||||||||||||
 |
|||||||||||||||||||
 |
|||||||||||||||||||
 |
|||||||||||||||||||
 |
|||||||||||||||||||
Have you finished this pattern?Tag your pictures with #dropspattern #whisperofspringsweater or submit them to the #dropsfan gallery. Do you need help with this pattern?You'll find 31 tutorial videos, a Comments/Questions area and more by visiting the pattern on garnstudio.com. © 1982-2026 DROPS Design A/S. We reserve all rights. This document, including all its sub-sections, has copyrights. Read more about what you can do with our patterns at the bottom of each pattern on our site. |
|||||||||||||||||||


With over 40 years in knitting and crochet design, DROPS Design offers one of the most extensive collections of free patterns on the internet - translated to 17 languages. As of today we count 325 catalogues and 12298 patterns translated into English (UK/cm). 12298
We work hard to bring you the best knitting and crochet have to offer, inspiration and advice as well as great quality yarns at incredible prices! Would you like to use our patterns for other than personal use? You can read what you are allowed to do in the Copyright text at the bottom of all our patterns. Happy crafting!
Post a comment to pattern DROPS 243-6
We would love to hear what you have to say about this pattern!
If you want to leave a question, please make sure you select the correct category in the form below, to speed up the answering process. Required fields are marked *.