
Popular categories
Looking for a yarn?


Comments / Questions (28)
![]() Natratics Éva wrote:
Natratics Éva wrote:
Tisztelt Drops csapat. Ennél a mintánál a nyak betétje , amikor a szemeket eltoljuk jobb és bal írányba teljesen rosszul van leírva A minta a 244-28-as számú minta leírásánal van jól közölve. Kérem a javítást. Köszönöm szépen
19.01.2026 - 08:39
![]() Tatjana wrote:
Tatjana wrote:
Wie kann das Grundmuster kraus rechts sein? Auf dem Foto ist eindeutig zu sehen, dass der Pullover glatt rechts - also Hinreihe rechts, Rückreihe links - gestrickt wird. Das ist mir bei den Drops-Anleitungen nun schon häufiger aufgefallen!
23.08.2025 - 16:23DROPS Design answered:
Liebe Tatjana, das Grundmuster wird nicht kraus rechts sein, es wird hier nur am Anfang der Anleitung, wie man kraus rechtg strickt. Viel Spaß beim Stricken!
25.08.2025 - 09:56
![]() Karin wrote:
Karin wrote:
Question regarding the yarn. For this pattern, it uses one strand of lace weight yarn + one strand from yarn group B. I do understand the conversion for yarns; however, I would like to use one strand of yarn. So, what yarn group would A+B make? Closer to C or D? Thank you!!!
19.03.2025 - 15:35DROPS Design answered:
Dear Karin, texture and tension will be the same as a yarn group C - read more about this combination here. Happy knitting!
19.03.2025 - 16:26
![]() Linda Langlois wrote:
Linda Langlois wrote:
Bonjour j'aurais une question pour que je puisse poursuivre. Devant gauche, on dit faire le rang endroit tel quel et envers tel quel. Ensuite continuer AINSI et tricoter le déclage. Je ne comprend les rangs qu'on doit faire, on répète les deux premiers rangs ce qui dit d'ajouter 4 mailles à la fin ou bien est-ce qu'on tricote en jersey tous les prochains rangs. Ce n'est pas clair pour moi. Je suis bloquée-là. Merci de m'éclairer.
15.03.2025 - 14:50DROPS Design answered:
Bonjour Mme Langlois, le continuer "ainsi" signifie continuer à tricoter les mailles en côtes, jersey et point mousse en décalant les mailles de l'encolure comme indiqué sous DÉCALAGE ENCOLURE: DEVANT GAUCHE:; vous ne montez plus de mailles vous tricotez seulement les mailles comme auparavant, mais décalez les côtes pour créer l'empiètement. Bon tricot!
17.03.2025 - 07:42
![]() Marianna wrote:
Marianna wrote:
Witam. Jestem na etapie robienia rękawa. Rozmiar M - Nie rozumiem uskoku/pęknięcia o długości 3 cm na górze rękawa. Proszę o sprecyzowanie robienia końcówki tego rękawa. Z góry dziękuję za pomoc.
01.12.2024 - 10:35DROPS Design answered:
Witaj Marianno, chodzi o to, że na górze rękawa na wys. 49-47-46-45-42-41 cm będziesz przerabiać dalej rękaw w tę i z powrotem, zaczynając od środka pod spodem rękawa. Na środku pod rękawem będzie pęknięcie o dł. ok. 1-3-4-5-8-9 cm (zależy od rozmiaru). Zobacz video jak później wszyć rękaw do swetra TUTAJ. Technika wszywania rękawa jest taka sama, tylko na filmie cały rękaw jest przerabiany w tę i z powrotem (nie tylko główka). Pozdrawiamy!
02.12.2024 - 08:54
![]() Marianna wrote:
Marianna wrote:
Pytam o robienie przodu: w opisie jest: "PRZÓD Nabrać oczka i przerabiać jak tył aż długość przodu wynosi 35 cm= 86 oczek" ( podaje rozmiar M) skąd się bierze 86 oczek ? według mnie wychodzi 96 oczek
22.11.2024 - 13:43DROPS Design answered:
Witaj Marianno, po przerobieniu ściągacza, zgodnie z opisem powinnaś równomiernie zamknąć 10 oczek w rzędzie w Twoim rozmiarze. Czyli: 96-10=86 oczek. Pozdrawiamy!
22.11.2024 - 14:00
![]() Paola wrote:
Paola wrote:
Buongiorno ho una domanda sulla maniche; il modello dice di avviare 45maglie ma se il campione dice che 16 maglie sono 10 cm, 45 sono 72?? Possibile che il polso sia così grande?
27.03.2024 - 11:08DROPS Design answered:
Buongiorno Paola, le maniche vengono avviate con i ferri più piccoli e con più maglie a causa della lavorazione a coste. Buon lavoro!
27.03.2024 - 16:23
![]() Highfield wrote:
Highfield wrote:
Hello. In the British English version, the instruction for the front neck displacement is unclear to me: where does the rib begin and end? Would you mind explaining, please? Thank you very much.
25.02.2024 - 07:47
![]() Highfield wrote:
Highfield wrote:
Hello. In the British English version, instruction for the rib section in the front neck displacement is unclear to me. Where does the rib pattern begin and end? Could you elaborate, please? Thank you very much.
25.02.2024 - 07:44DROPS Design answered:
Dear Mrs Highfield, rib pattern starts when working each front piece separately - insert the marker as stated and work the displacement as explained at the beg of the pattern. On the left front piece for ex you will decrease 1 stitch before marker and increase 1 stitch after marker on either side of the 2 sts with a marker in between. Happy knitting!
26.02.2024 - 09:03
![]() Ilovedogs wrote:
Ilovedogs wrote:
Ho fatto una domanda qualche giorno fa, ma mi sono resa conto di non aver comunicato il modello cui faccio riferimento: si tratta del modello Travellers Rest, n°237-8
23.11.2023 - 10:06
|
||||
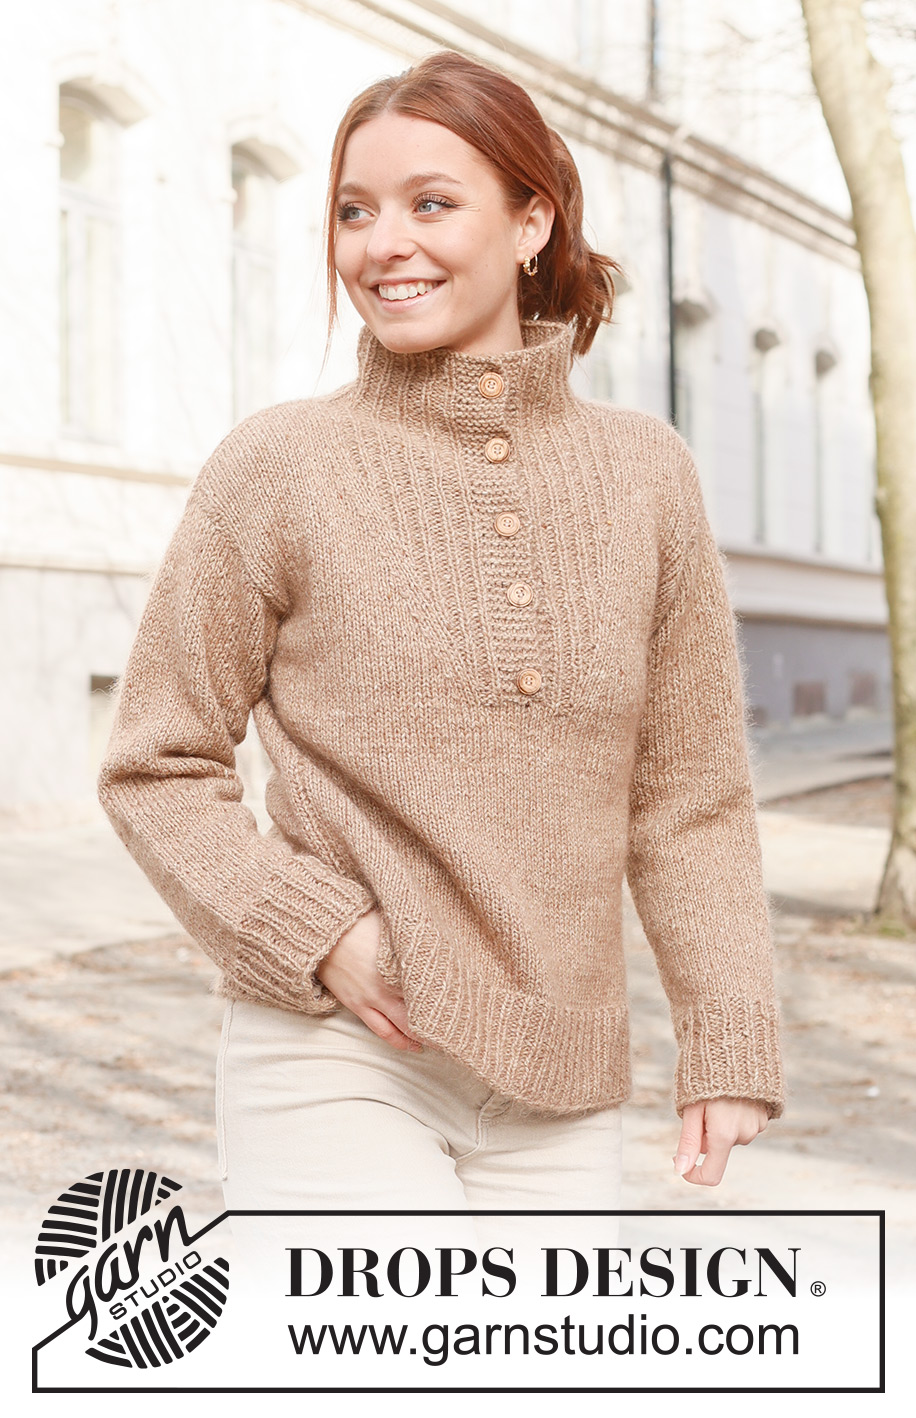
Travellers Rest#travellersrestsweater |
||||
 |
 |
|||
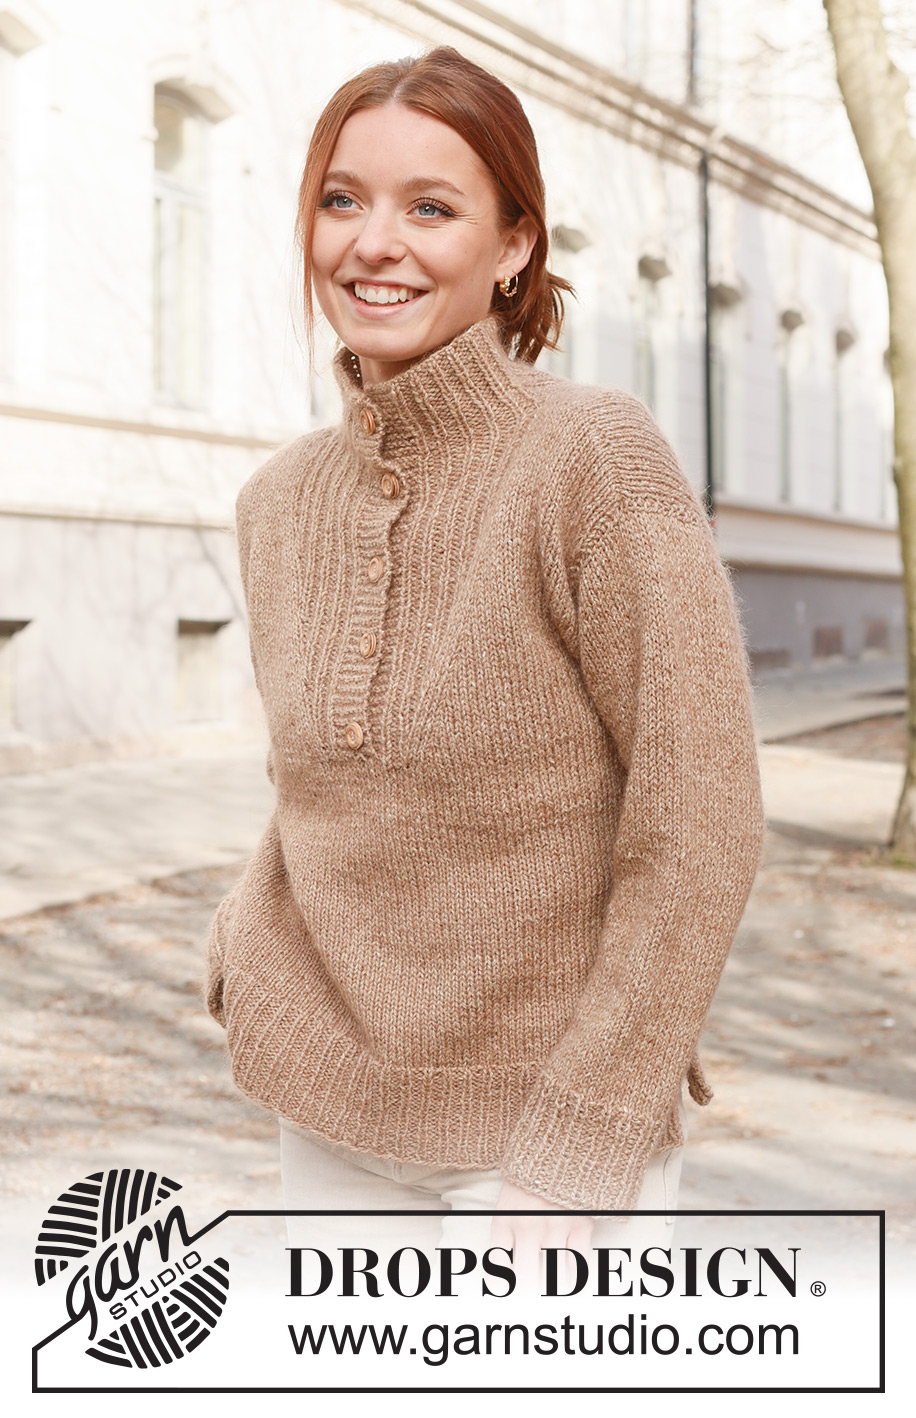
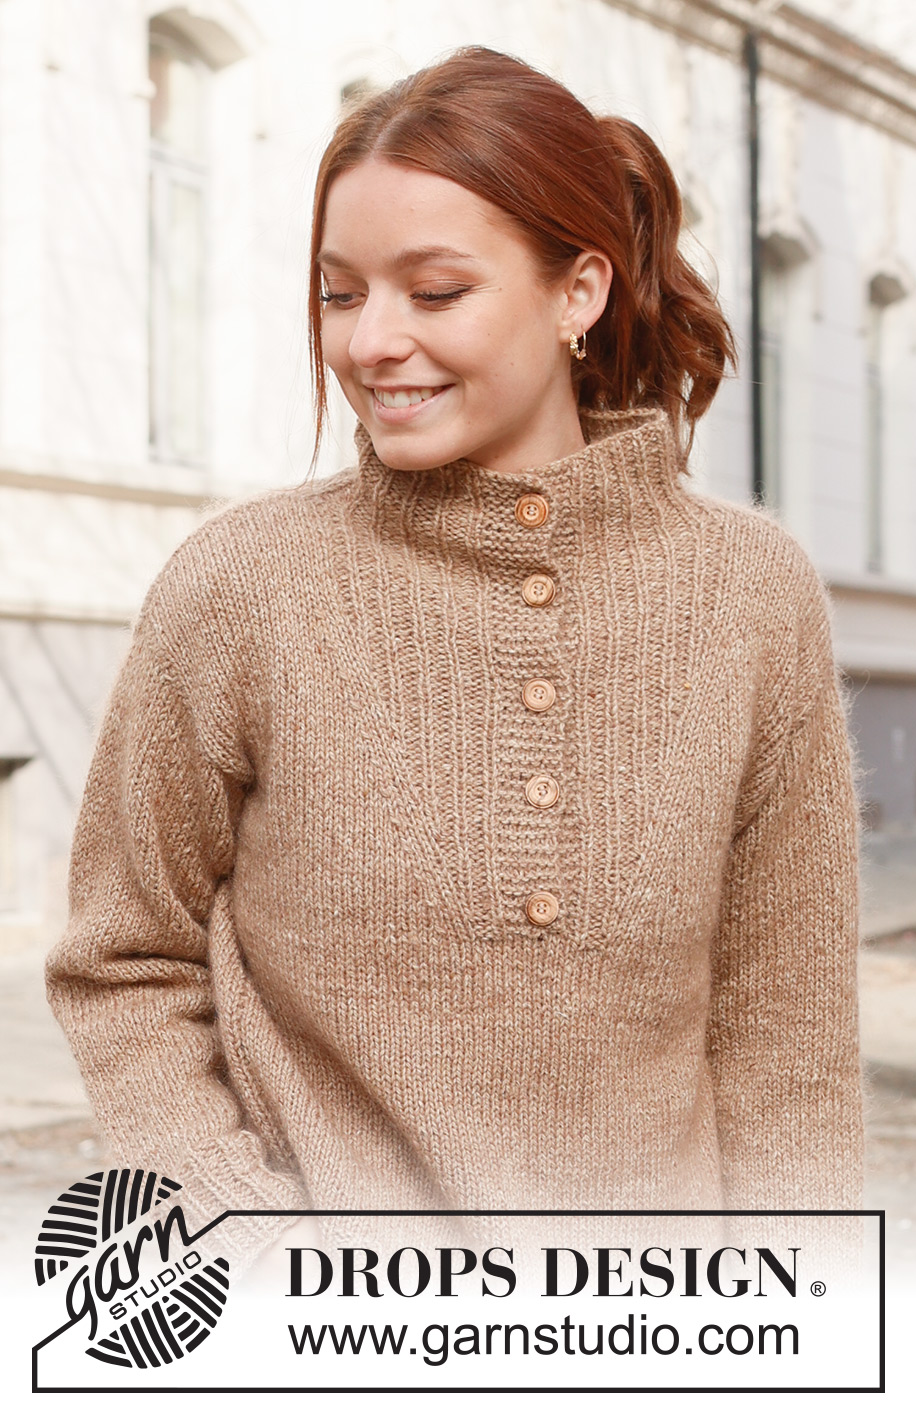
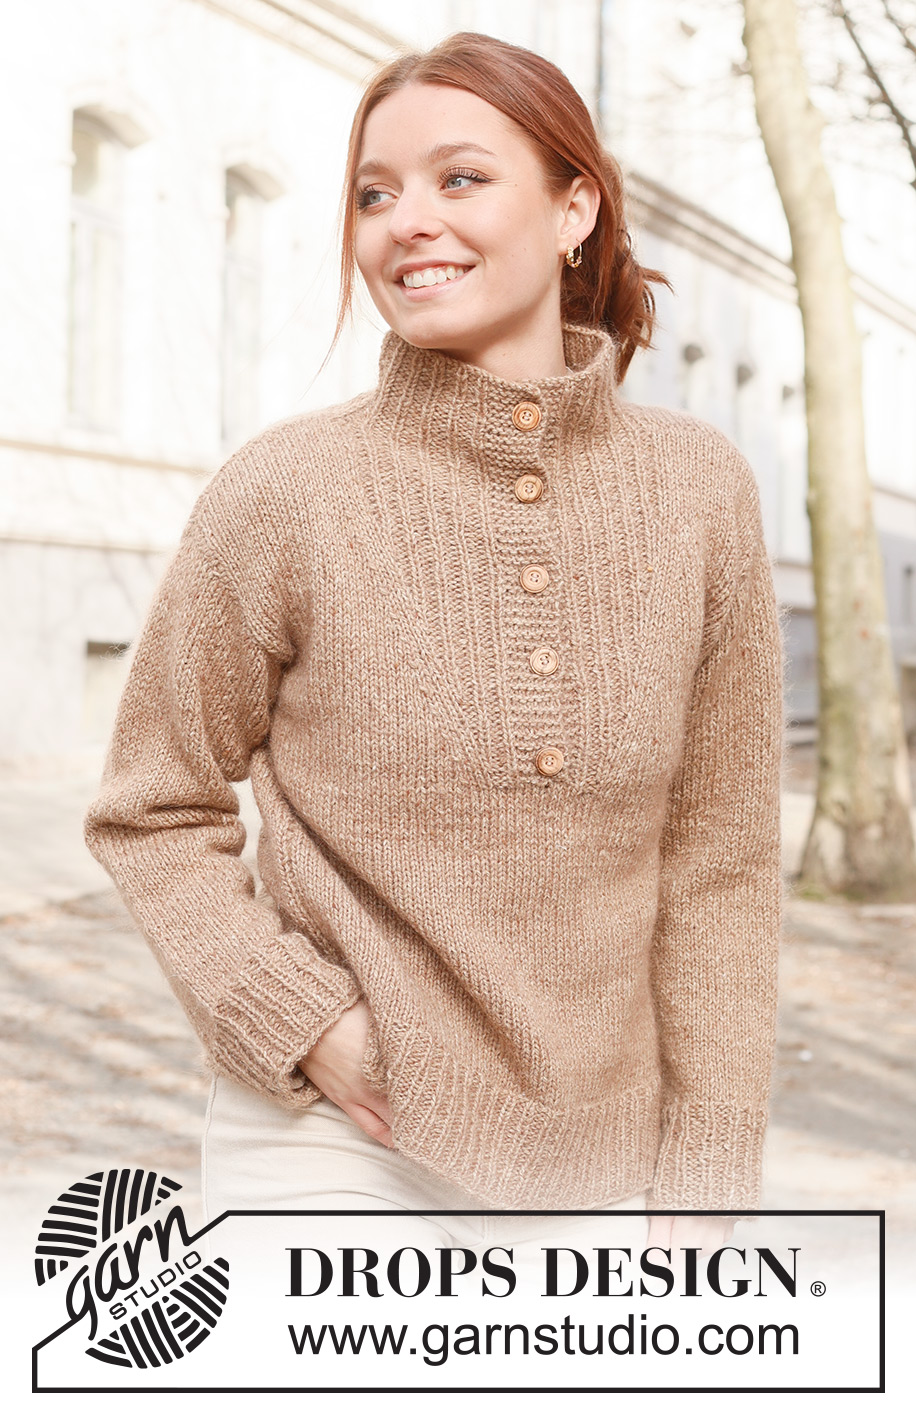
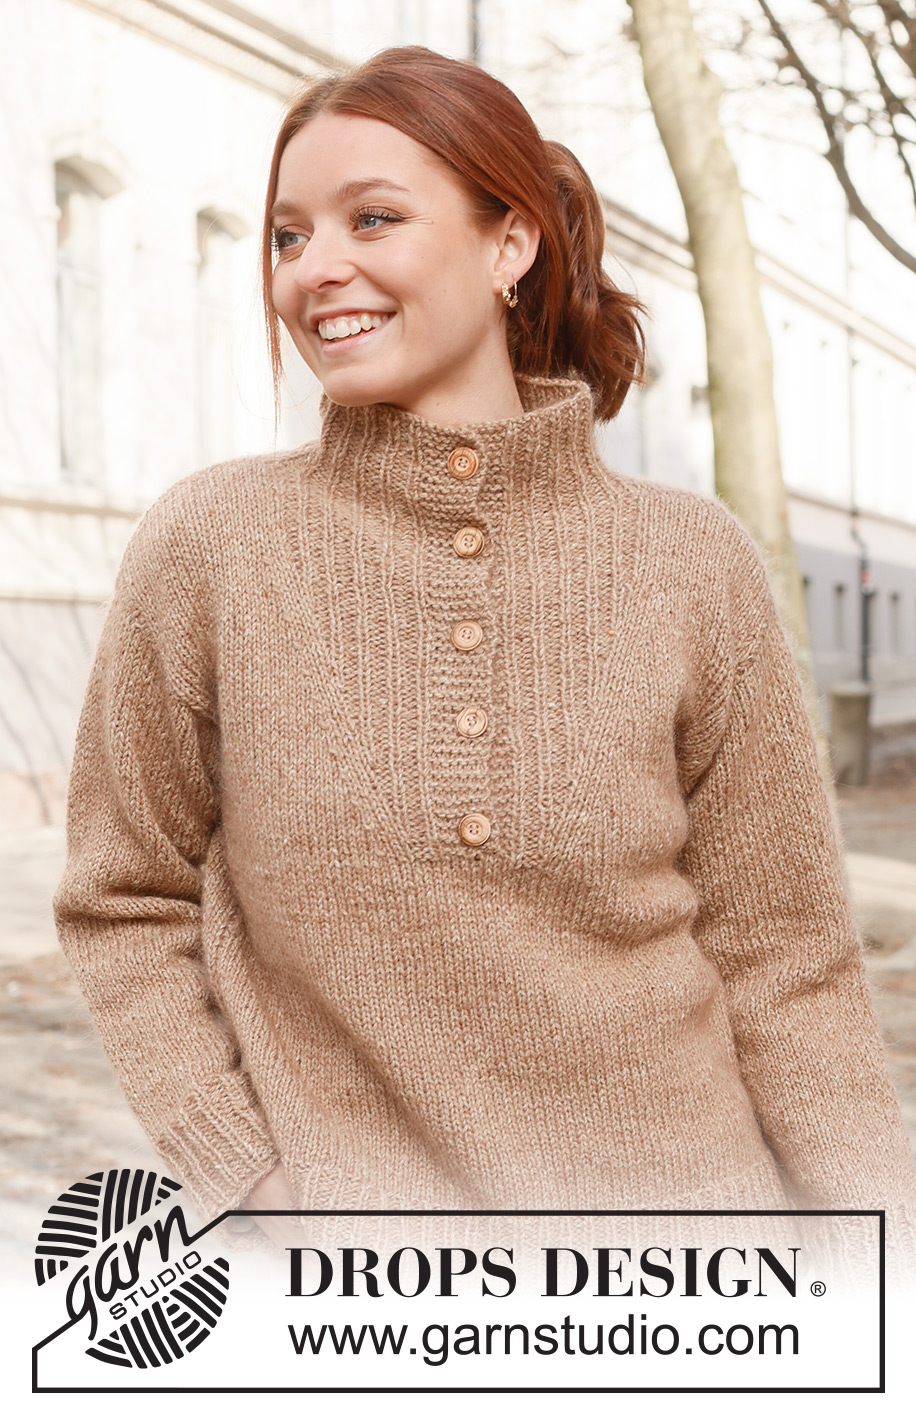
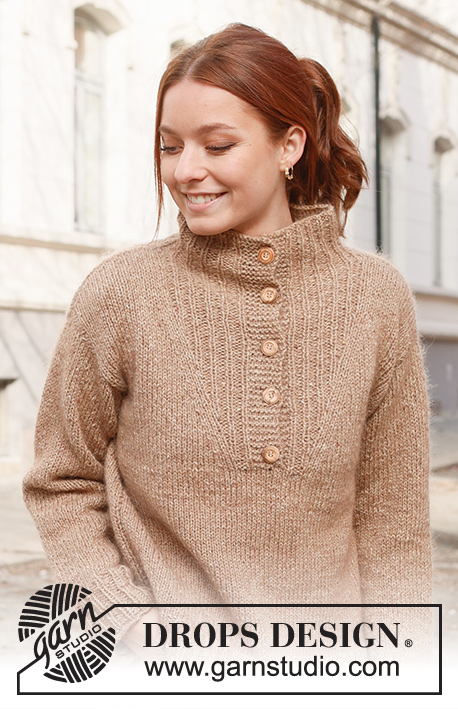
Knitted jumper in DROPS Soft tweed and DROPS Kid-Silk. The piece is worked bottom up with high neck. Sizes S - XXXL.
DROPS 237-8 |
||||
|
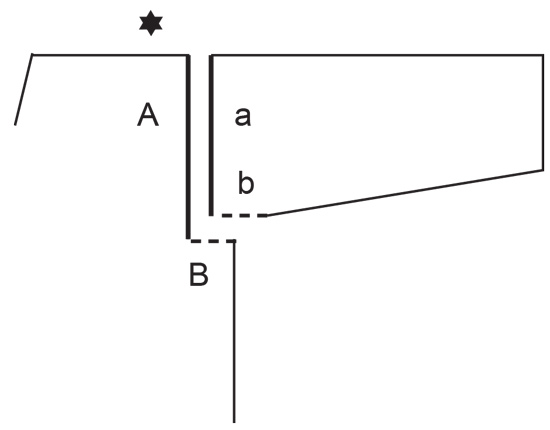
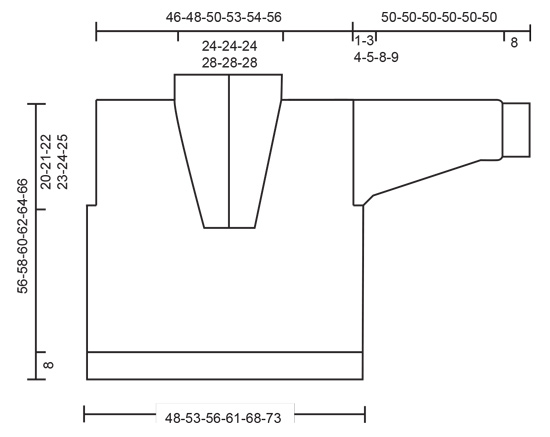
------------------------------------------------------- EXPLANATIONS FOR THE PATTERN: ------------------------------------------------------- RIDGE/GARTER STITCH (worked back and forth): Knit all rows. 1 ridge = knit 2 rows. NECK DISPLACEMENT: LEFT FRONT PIECE: Decrease 1 stitch before the marker and increase 1 stitch after the marker as follows: Work until there are 3 stitches left before the marker, knit 2 together, knit 2 (marker sits between these 2 stitches), make 1 yarn over, work to end of row as before. To prevent the rib from tightening, increase 1 extra stitch without decrease after each 3rd increase/decrease. Yarn overs are worked twisted on the next row, and worked into the rib knit 1, purl 3 (seen from the right side). Increase and decrease like this: ROW 1: increase and decrease ROW 2-4: work as before ROW 5: increase and decrease ROW 6-8: work as before ROW 9: increase and decrease ROW 10: work as before ROW 11: increase ROW 12: work as before. Repeat these 12 rows. RIGHT FRONT PIECE: Increase 1 stitch before the marker and decrease 1 stitch after the marker as follows: Work until there is 1 stitch left before the marker, make 1 yarn over, knit 2 (marker sits between these 2 stitches), slip 1 stitch, knit 1 and pass the slipped stitch over the knitted stitch then work to end of row as before. Increase and decrease in the same way as for the left front piece. BUTTONHOLES: Work the buttonholes on the right band. 1 BUTTONHOLE = knit together the third and fourth stitch from the edge and make 1 yarn over. Knit the yarn over on the next row to leave a hole. Work the buttonholes when the piece measures: S: 34, 41, 49 and 57 cm M: 36, 43, 51 and 59 cm L: 38, 45, 53 and 61 cm XL: 39, 47, 55 and 63 cm XXL: 41, 49, 57 and 65 cm XXXL: 43, 51, 59 and 67 cm The last buttonhole is worked when the neck measures 6 cm. INCREASE TIP (for sleeves): Start 1 stitch before the marker, 1 yarn over, knit 2 (marker sits between these 2 stitches), 1 yarn over. On the next round, knit the yarn overs twisted to avoid holes. ------------------------------------------------------- START THE PIECE HERE: ------------------------------------------------------- JUMPER – SHORT OVERVIEW OF THE PIECE: The piece is worked in sections back and forth, then sewn together. The neck-line is shaped by displacing stitches to give more ribbed stitches mid-front and less stocking stitches towards the sides. The neck is worked to finish. BACK PIECE: Cast on 87-96-102-111-120-129 stitches with circular needle size 4 mm, 1 strand DROPS Soft Tweed and 1 strand DROPS Kid-Silk. Purl 1 row from the wrong side. Then work rib as follows: 1 edge stitch in GARTER STITCH – read description above, * knit 1, purl 2 *, work from *-* until there are 2 stitches left, knit 1 and 1 edge stitch in garter stitch. Continue this rib back and forth for 8 cm. Knit 1 row from the right side and decrease 9-10-10-11-10-11 stitches evenly spaced = 78-86-92-100-110-118 stitches. Change to circular needle size 5 mm. Continue with stocking stitch and 1 edge stitch in garter stitch on each side. REMEMBER THE KNITTING TENSION! When the piece measures 36-37-38-39-40-41 cm, cast off 2-5-6-8-12-14 stitches at the beginning of the next 2 rows for the armholes = 74-76-80-84-86-90 stitches. Continue with stocking stitch and 1 edge stitch in garter stitch on each side. When the piece measures 54-56-58-60-62-64 cm, cast off the middle 36-36-36-42-42-42 stitches for the neck. Finish each shoulder separately. Cast off 1 stitch on the next row from the neck = 18-19-21-20-21-23 stitches. Continue with stocking stitch and 1 edge stitch in garter stitch on each side until the piece measures 56-58-60-62-64-66 cm. Cast off. Work the other shoulder in the same way. FRONT PIECE: Cast on and work in the same way as the back until the front piece measures 33-35-37-38-40-42 cm = 78-86-92-100-110-118 stitches. Now divide the piece and increase and decrease stitches, shaping the neck-line. Place the last 39-43-46-50-55-59 stitches on a thread and work the first 39-43-46-50-55-59 stitches as follows: LEFT FRONT PIECE: First row from the right side: 1 edge stitch in garter stitch, work stocking stitch over the next 31-35-38-42-47-51 stitches, purl 3, knit 1, 3 garter stitches, cast on 4 stitches at the end of the row = 43-47-50-54-59-63 stitches. Work like this from the wrong side: 7 garter stitches, purl 1, knit 3, purl 2 and insert a marker between these 2 stitches, work as before to the end of the row. Continue this pattern and work NECK DISPLACEMENT – read description above (remember to cast off for the armhole – see below). Increase and decrease 1 stitch every 4th row (= every 2nd row from the right side) a total of 12-12-12-15-15-15 times. NOTE! In addition you increase an extra stitch 4-4-4-5-5-5 times. The rib mid-front will have more and more stitches, the stocking stitch-section will have less and less. Decrease and increase on each side of 2 stocking stitches (marker sits between these 2 stitches), which creates a diagonal line up the shoulder. AT THE SAME TIME when the piece measures 36-37-38-39-40-41 cm cast off the first 2-5-6-8-12-14 stitches from the side for the armhole. When the neck-displacements are finished there are 45-46-48-51-52-54 stitches. Continue working until the piece measures 56-58-60-62-64-66 cm, cast off the first 18-19-21-20-21-23 stitches from the side = 27-27-27-31-31-31 stitches. Lay the piece to one side and work the right front piece. RIGHT FRONT PIECE: Cast on 4 new stitches, place the 39-43-46-50-55-59 stitches back on the needle and work them as follows: 3 garter stitches, knit 1, purl 3, work stocking stitch until there is 1 stitch left and 1 edge stitch in garter stitch = 43-47-50-54-59-63 stitches. Work as follows from the wrong side: 1 edge stitch in garter stitch, work stocking stitch until there are 13 stitches left, purl 2 and insert a marker between these 2 stitches, knit 3, purl 1 and 7 band stitches in garter stitch. Continue this pattern and work NECK DISPLACEMENT (remember to cast off for the armhole – see below). Increase and decrease 1 stitch every 4th row (= every 2nd row from the right side) a total of 12-12-12-15-15-15 times. NOTE! In addition increase an extra stitch 4-4-4-5-5-5 times. The rib mid-front will have more and more stitches, the stocking stitch-section will have less and less. Decrease and increase on each side of 2 stocking stitches (marker sits between these 2 stitches), which creates a diagonal line up the shoulder. Work the BUTTONHOLES – see description above. AT THE SAME TIME when the piece measures 36-37-38-39-40-41 cm cast off the first 2-5-6-8-12-14 stitches from the side for the armhole. When the neck-displacements are finished there are 45-46-48-51-52-54 stitches. Continue working until the piece measures 56-58-60-62-64-66 cm, cast off the first 18-19-21-20-21-23 stitches from the side = 27-27-27-31-31-31 stitches. Put piece aside. SLEEVES: The sleeves are worked in the round bottom up, with double pointed needles/short circular needle. Cast on 45-45-48-48-51-54 stitches with double pointed needles size 4 mm and 1 strand of each quality (2 strands). Knit 1 round then work rib (knit 1, purl 2) for 8 cm. Change to double pointed needles size 5 mm and insert a marker at the beginning of the round = mid-under sleeve. Work stocking stitch. When the sleeve measures 11-12-11-12-11-13 cm, increase 1 stitch on each side of the marker – read INCREASE TIP. Increase every 4-3-3-2½-2½-2 cm a total of 10-12-12-13-13-13 times = 65-69-72-74-77-80 stitches. When the sleeve measures 49-47-46-45-42-41 cm work the sleeve cap back and forth (from mid-under the sleeve) until the sleeve measures 50 cm, i.e. a split of 1-3-4-5-8-9 cm at the top of the sleeve. Work the other sleeve in the same way. ASSEMBLY: Sew the shoulder seams. Sew the sleeve cap to the armhole and sew together the bottom of the armhole – see sketch. Sew the side seams, leaving an 8 cm split at the bottom. NECK: Place the 27-27-27-31-31-31 stitches from each front piece on circular needle size 4 mm and knit up 37-37-37-45-45-45 stitches around the neck-line on the back piece = 91-91-91-107-107-107 stitches. The first row is worked as follows from the wrong side: 7 band stitches in garter stitch, *purl 1, knit 3 *, work from *-* until there are 8 stitches left, purl 1 and 7 band stitches in garter stitch. Work this rib for 8 cm, cast off with knit over knit and purl over purl. Lay the right band over the left and sew together at the bottom. Sew the buttons onto the left band. |
||||
Diagram explanations |
||||
|
||||
 |
||||
 |
||||
Have you finished this pattern?Tag your pictures with #dropspattern #travellersrestsweater or submit them to the #dropsfan gallery. Do you need help with this pattern?You'll find 36 tutorial videos, a Comments/Questions area and more by visiting the pattern on garnstudio.com. © 1982-2026 DROPS Design A/S. We reserve all rights. This document, including all its sub-sections, has copyrights. Read more about what you can do with our patterns at the bottom of each pattern on our site. |
||||


With over 40 years in knitting and crochet design, DROPS Design offers one of the most extensive collections of free patterns on the internet - translated to 17 languages. As of today we count 324 catalogues and 12290 patterns translated into English (UK/cm). 12290
We work hard to bring you the best knitting and crochet have to offer, inspiration and advice as well as great quality yarns at incredible prices! Would you like to use our patterns for other than personal use? You can read what you are allowed to do in the Copyright text at the bottom of all our patterns. Happy crafting!
Post a comment to pattern DROPS 237-8
We would love to hear what you have to say about this pattern!
If you want to leave a question, please make sure you select the correct category in the form below, to speed up the answering process. Required fields are marked *.