
Popular categories
Looking for a yarn?


Comments / Questions (9)
![]() Bärbel Grabsch wrote:
Bärbel Grabsch wrote:
Wie ist die Beschreibung für die Rückreihen und Zunahme für die sattelschulter zu verstehen? Welche Markierer sind jeweils gemeint? Beispielsweise vor dem 4. und 2. Markierer zunehmen. Gezählt von der Vorderseite oder Rückreihe? Irgendwie passt es nicht.
17.11.2024 - 15:42DROPS Design answered:
Liebe Frau Grabsch, siehe Zeichenerklärung "in Rück-Reihen für beide ersten Symbolen. Die Markierungen sind im gleichen Order wie am Anfang der Passe erklärt, so sind Ärmel zwischen 1. und 2. + zwischen 3. und 4. Markierung und dann ist Rückenteil zwischen 2. und 3. Markierung. Viel Spaß beim Stricken!
18.11.2024 - 08:24
![]() Inge Koch wrote:
Inge Koch wrote:
Passer antallet på ærmemaskerne? Før deling skal der i følge opskrift være 60masker. Men jeg har en del mere 86m
28.04.2024 - 20:02
![]() ANGELA CITARDA wrote:
ANGELA CITARDA wrote:
Salve dubbio x il collo misura s Aumentare 9 m nei 2 ferri successivi Dopo 4 cm di coste dove faccio aumenti? Ai due lati esterni del collo oppure tra le m del ferro? Non è specificato Grazie in attesa di risposta
13.11.2023 - 07:15DROPS Design answered:
Buonasera Angela, dopo i 4 cm a coste deve avviare 9 maglie alla fine dei 2 ferri successivi come indicato. Buon lavoro!
16.11.2023 - 20:53
![]() Fatma KISRANE wrote:
Fatma KISRANE wrote:
Bonjour apres avoir tricoter le col pendant 4 cm comment monter les 9 mailles du col est ce que c est des augmentations merci
23.09.2023 - 12:07DROPS Design answered:
Bonjour Mme Kirsane, montez les mailles à la fin du rang sur l'endroit en utilisant la technique de cette vidéo, tournez, tricotez le rang suivant sur l'envers et montez les mailles en fin de rang de la même façon. Bon tricot!
25.09.2023 - 08:36
![]() Nelly Lafon wrote:
Nelly Lafon wrote:
J'ai déjà laissé un message tout à l'heure concernant le paragraphe AUGMENTATIONS MANCHES si l'on veut que les mailles du milieu restent entre les 2 marqueurs il faut augmenter AVANT le 1er et le 3ème marqueur et augmenter APRES le 2ème et le 4ème marqueur j'ai tout repris après avoir regardé la vidéo qui montre comment augmenter pour les manches marteau
30.01.2023 - 22:51DROPS Design answered:
Bonjour Mme Lafon, tout à fait, c'est bien ainsi que l'on augmente pour les épaules/manches marteau (on augmente ainsi le nombre de mailles du dos et des devants, pas celui des manches/épaules), puis, on augmente pour les manches seulement, vous augmenterez alors après le 1er et le 3ème marqueur et avant le 2ème et le 4ème marqueur (on augmente que le nombre de mailles des manches, pas celui des devants/du dos). Bon tricot!
31.01.2023 - 09:51
![]() Nelly Lafon wrote:
Nelly Lafon wrote:
Pour ce qui est de la partie AUGMENTATION EMPIECEMENT ça y est j'ai compris pas de problème
30.01.2023 - 22:46
![]() Dubois wrote:
Dubois wrote:
Augmentations epaules/manches marteau: Les marqueurs gardent ils toujours le même numéro que l'on soit sur l'endroit ou l'envers ? Ainsi le 4ème marqueur se trouverait en position 1 sur l'envers ? Je pense ne pas avoir mis mes augmentations au bon endroit sur l'envers... Merci de m'éclairer.
13.10.2022 - 21:50DROPS Design answered:
Bonjour Mme Dubois, tout à fait, le 1er marqueur sur l'endroit devient le 4ème marqueur sur l'envers - notez que pour les épaules/manches vous devez augmenter à la fin des devants, avant les épaules et au début + à la fin du dos (après la 1ère épaule + avant la 2ème épaule). Cette vidéo pourra peut-être vous aider. Bon tricot!
14.10.2022 - 08:29
![]() Ola wrote:
Ola wrote:
Po wykonaniu 4 cm wykończenia dekoltu trzeba dodać 9 oczek na końcu dwóch kolejnych rzędów. We wzorze jest napisane, żeby przerabiać dalej ściągaczem. Rozumiem, że drugą połowę dekoltu, owszem, ale czy te 9 dodanych oczek nie należy już do ramienia, które powinno być przerabiane dżersejem?
07.10.2022 - 18:36DROPS Design answered:
Witaj Olu, te 9 oczek dodanych z każdej strony to będą później obszycia przodów (w zasadzie obszycie stanowi 7 z tych oczek). Przerabiasz je ściągaczem, aż wykończenie dekoltu jest zakończone. Później 7 oczek brzegowych z każdej strony będzie przerabiane ściegiem francuskim. Pozdrawiamy!
10.10.2022 - 09:29
![]() Pernille wrote:
Pernille wrote:
Veldig fin!
04.08.2022 - 12:15
|
||||||||||||||||||||||||||||
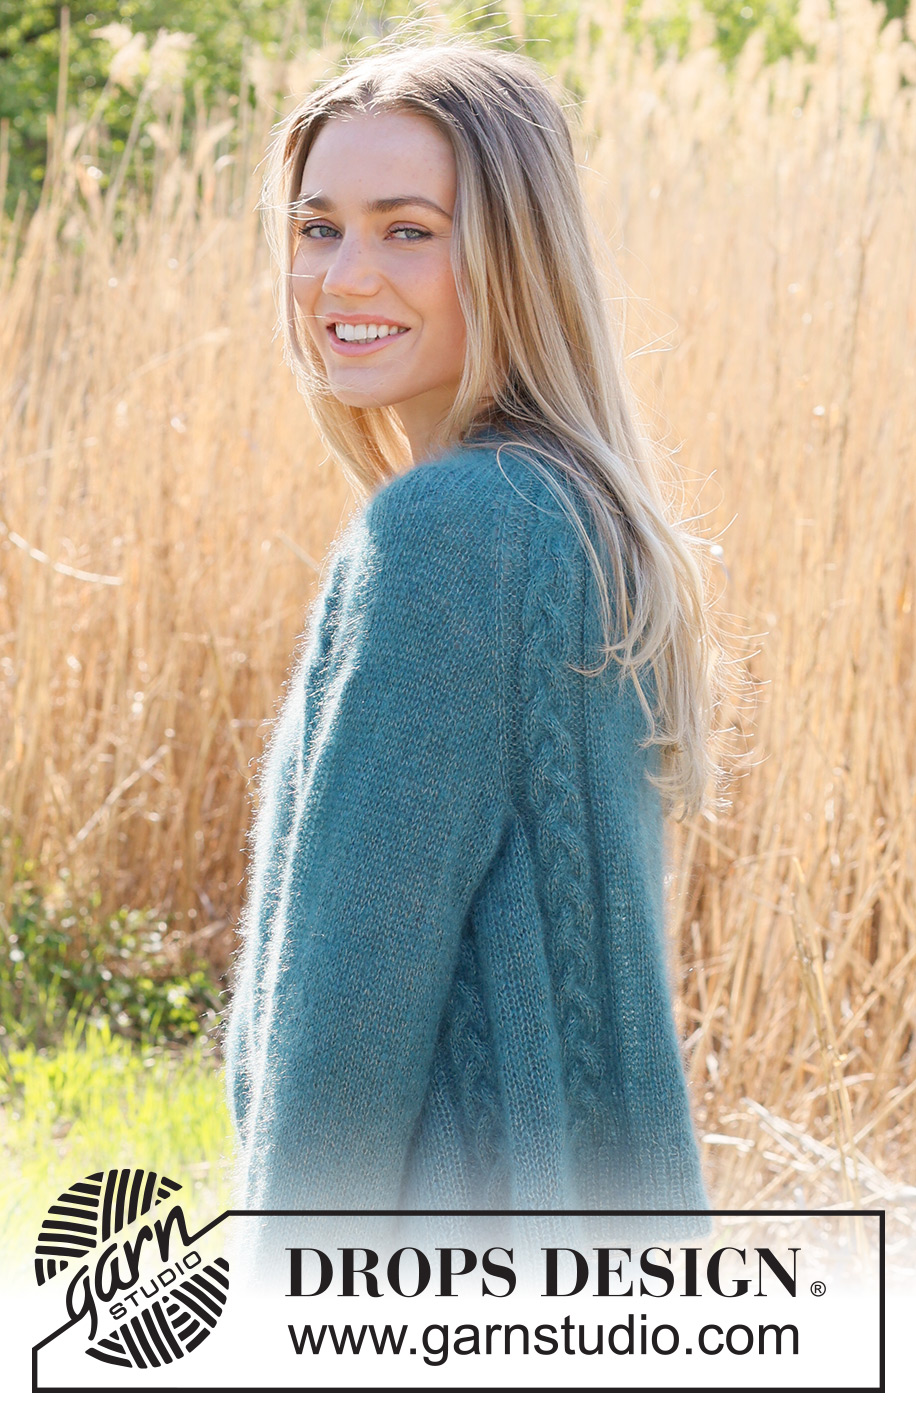
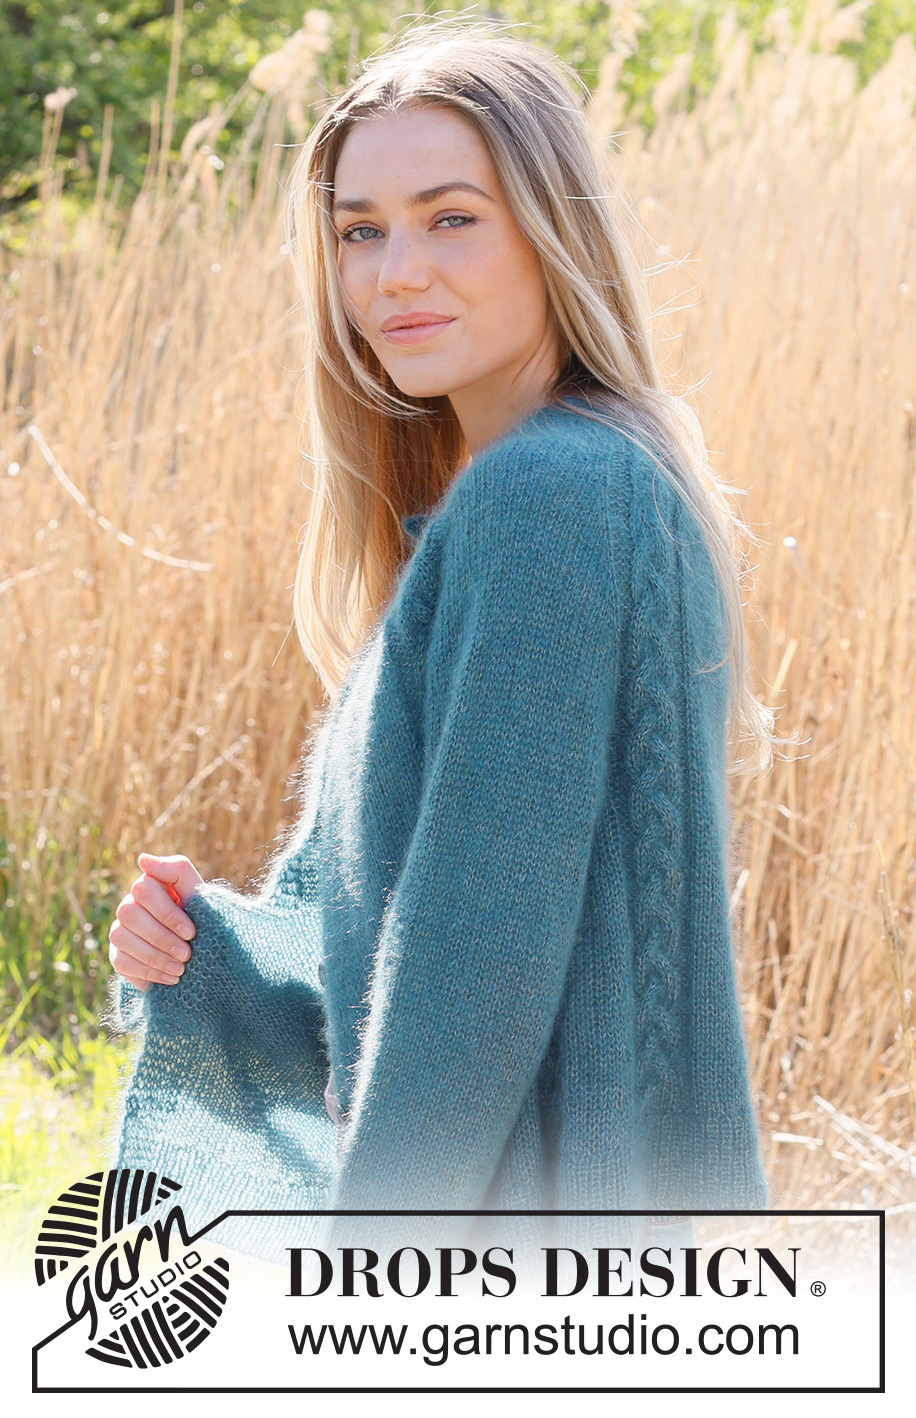
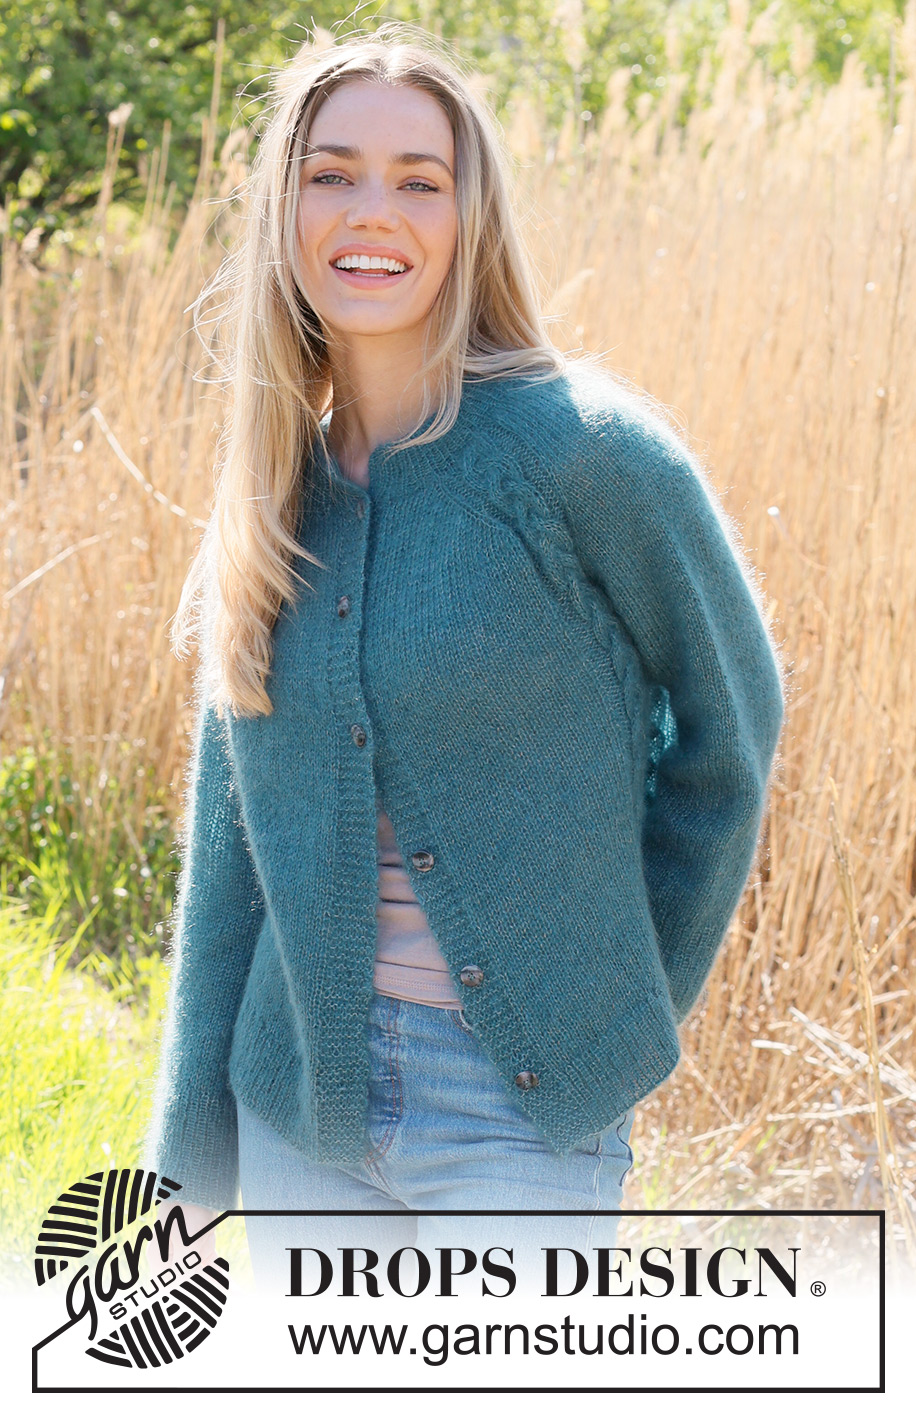
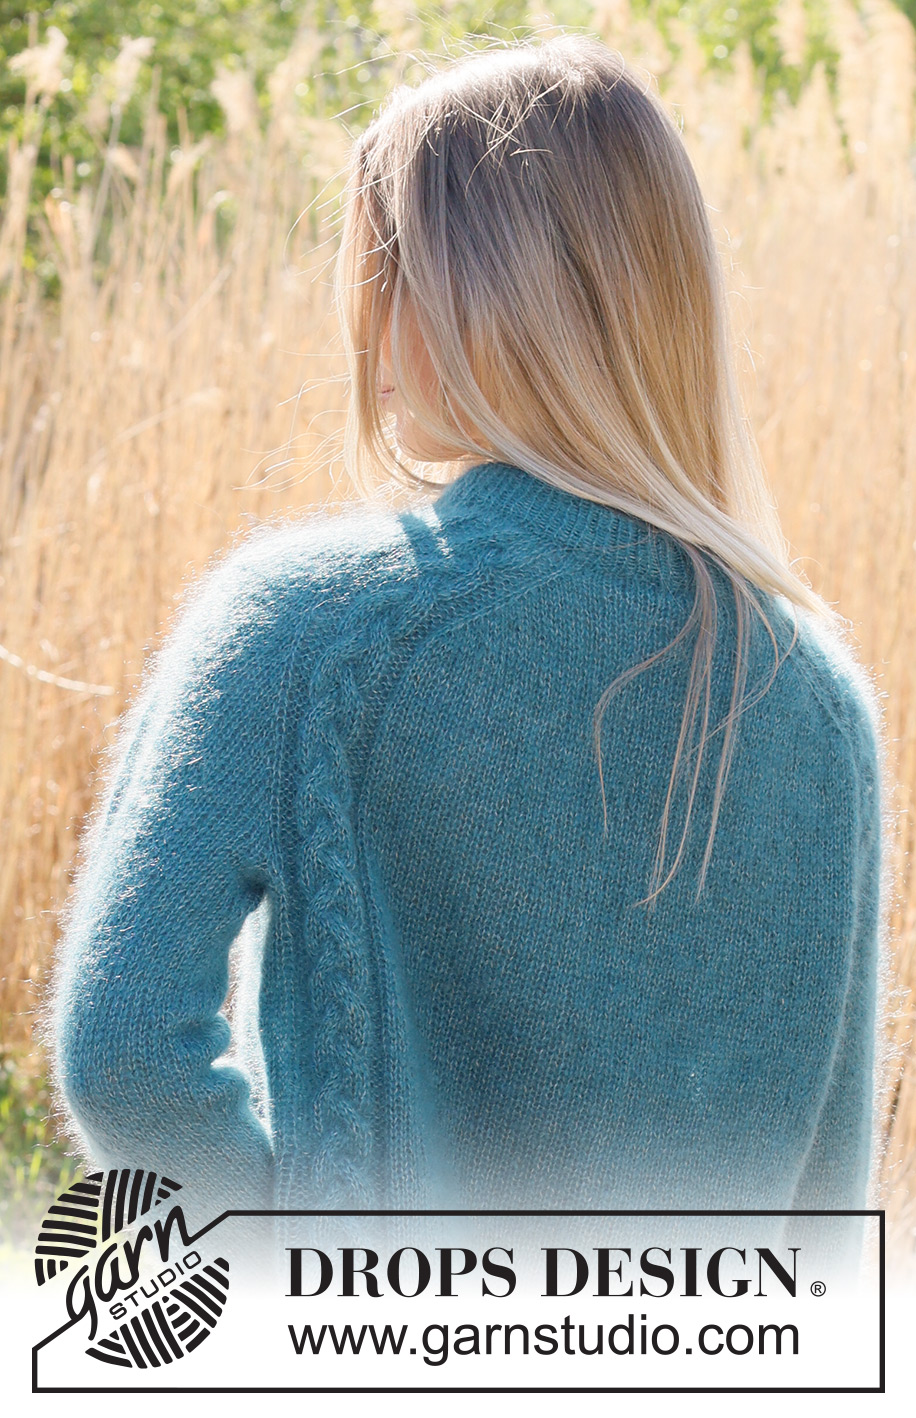
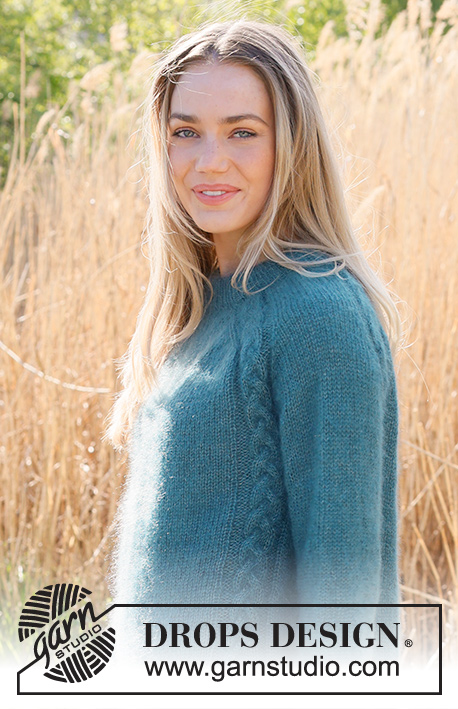
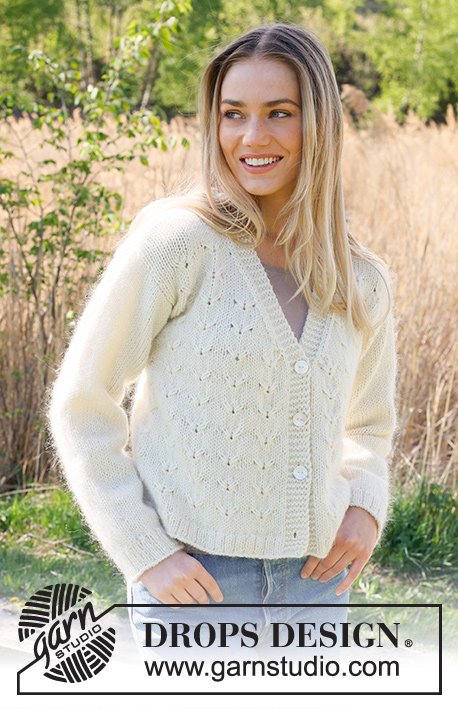
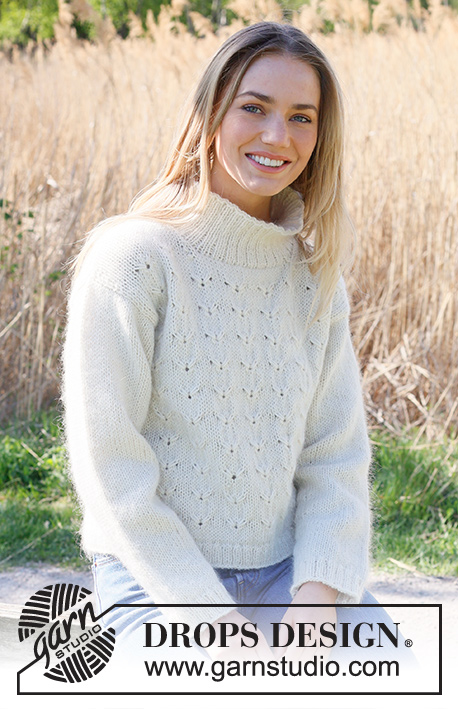
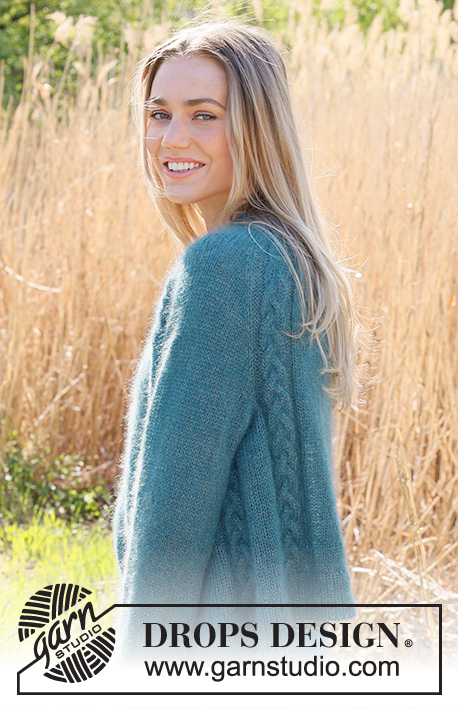
Cabled Bliss Cardigan#cabledblisscardigan |
||||||||||||||||||||||||||||
 |
 |
|||||||||||||||||||||||||||
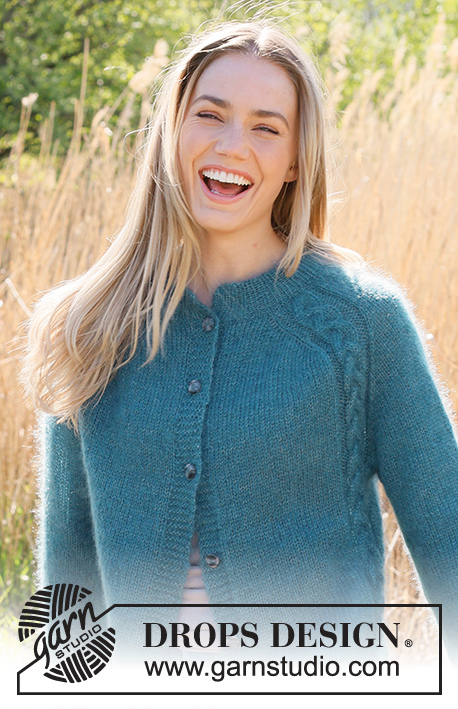
Knitted jacket in 2 strands DROPS Kid-Silk. Piece is knitted top down with double neck edge, saddle shoulders and cables. Size: S - XXXL
DROPS 236-26 |
||||||||||||||||||||||||||||
|
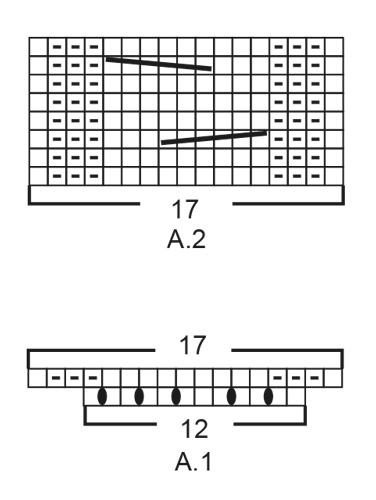
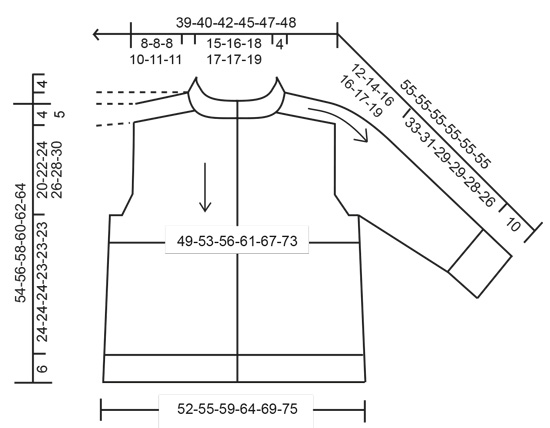
---------------------------------------------------------- EXPLANATION FOR THE PATTERN: ---------------------------------------------------------- GARTER STITCH (back and forth): Knit all rows. 1 ridge vertically = knit 2 rows. PATTERN: See diagrams A.1 and A.2. Diagrams show all rows in pattern seen from the right side. BUTTONHOLES: Decrease for buttonholes on right band (when garment is worn). Decrease from right side when 4 stitches remain on row as follows: Make 1 yarn over, knit 2 together, knit 2. On next row (wrong side) knit the yarn over to make a hole. Decrease for first buttonhole when rib in the neck has been worked. Then decrease the next 5-5-5-6-6-6 buttonholes, approx. 9-9-9½-8-8½-8½ cm apart. INCREASE TIP-1 (from right side): BEFORE MARKER: The new stitch is twisted towards the right. Use left needle to pick up yarn between 2 stitches from round below, pick up yarn from the back and knit stitch in front loop of stitch. AFTER MARKER: The new stitch is twisted towards the left. Use left needle to pick up yarn between 2 stitches from round below, pick up yarn from the front and knit stitch in back loop of stitch. INCREASE TIP-2 (from wrong side): BEFORE MARKER: The new stitch is twisted towards the right. Use left needle to pick up yarn between 2 stitches from round below, pick up yarn from the front and purl stitch in back loop of stitch. AFTER MARKER: The new stitch is twisted towards the left. Use left needle to pick up yarn between 2 stitches from round below, pick up yarn from the back and purl stitch in front loop of stitch. INCREASE TIP-3 (applies to sides of body): All increases are done from the right side. Work until 3 stitches remain before marker thread, make 1 yarn over, knit 6 (marker thread is in the middle of these 6 stitches), make 1 yarn over (= 2 stitches increased at marker thread). On next row (wrong side) purl yarn over twisted to avoid holes. Then work the new stitches in stocking stitch. DECREASE TIP (applies to mid under sleeves): Begin 3 stitches before marker thread, slip 1 stitch knitwise, knit 1, pass slipped stitch over stitch worked, knit 2 (marker is in the middle of these 2 stitches), knit 2 together (= 2 stitches decreased). ---------------------------------------------------------- START THE PIECE HERE: ---------------------------------------------------------- JACKET - SHORT OVERVIEW OF THE PIECE: Work double neck edge and yoke back and forth on circular needle from mid front, work top down. Increase stitches for saddle shoulder, then increase stitches for sleeves, and increase stitches for yoke. Now divide yoke for body and sleeves. Work body back and forth on circular needle. Work sleeves in the round on double pointed needles/a short circular needle. DOUBLE NECK EDGE: Cast on 79-83-87-91-93-97 stitches on circular needle size 5 mm with 1 strand of colour north sea and 2 strands of colour denim blue (3 strands). Remove one strand of denim blue. Switch to circular needle size 4 mm. Work the rest of garment with 1 strand in each colour in DROPS Kid-Silk (2 strands). Purl 1 row from wrong side. Work next row as follows from right side: 1 stitch in GARTER STITCH - read explanation above - * purl 1, knit 1 *, repeat from *-* until 2 stitches remain on needle, purl 1, and finish with 1 edge stitch in garter stitch. Continue rib like this for 4 cm. At the end of the next 2 rows cast on 9 new stitches = 97-101-105-109-111-115 stitches. Continue rib (knit 1/purl 1) with 1 stitch in garter stitch in each side (continue rib nicely over all stitches). When rib measures 8 cm from cast-on edge, knit 1 row from right side while increasing 21-21-21-21-23-23 stitches evenly (do not increase over the outermost 7 stitches in each side) = 118-122-126-130-134-138 stitches - remember BUTTONHOLES - read explanation above. Work next row as follows from wrong side: 7 stitches in garter stitch, purl until 7 stitches remain, finish with 7 stitches in garter stitch. The 7 outermost stitches in each side are bands. Insert 1 marker after band at the beginning of row mid front. Work yoke as explained below - measure yoke from this marker! YOKE: Switch to circular needle size 5 mm. Insert 4 new markers in piece as explained below – without working the stitches. Use these markers when increasing stitches for saddle shoulders, sleeves and yoke. They should be in a different colour than the marker inserted at the neck. 1st marker: Begin mid front, count 14-15-16-16-17-18 stitches (front piece), insert 1st marker before next stitch. 2nd marker: Count 38-38-38-40-40-40 stitches from 1st marker, insert 2nd marker before next stitch. 3rd marker: Count 14-16-18-18-20-22 stitches from 2nd marker (back piece), insert 3rd marker before next stitch. 4th marker: Count 38-38-38-40-40-40 stitches from 3rd marker, insert 4th marker before next stitch. 14-15-16-16-17-18 stitches remain on front piece after last marker. Move these 4 markers upwards when working, increase at each of these markers later. Work next row as follows from right side: 7 stitches in garter stitch, 7-8-9-9-10-11 stitches in stocking stitch, A.1, 14-14-14-16-16-16 stitches in stocking stitch, A.1, 14-16-18-18-20-22 stitches in stocking stitch, A.1, 14-14-14-16-16-16 stitches in stocking stitch, A.1, 7-8-9-9-10-11 stitches in stocking stitch, 7 stitches in garter stitch. There are now 138-142-146-150-154-158 stitches on needle. Work back from wrong side with garter stitch over garter stitch, purl over purl and last row in A.1 over A.1. Then increase for saddle shoulder as explained below: SADDLE SHOULDER INCREASE: Read all of the following section before continuing! Continue piece in stocking stitch on front pieces, back piece and sleeves, A.2 over A.1 and 7 stitches in garter stitch in each side towards mid front (bands). Repeat A.2 vertically until finished measurements. AT THE SAME TIME on first row from right side increase 4 stitches for saddle shoulder as follows: Increase BEFORE 1st and 3rd marker (i.e. before A.2) and increase AFTER 2nd and 4th marker (i.e. After A.2) – read INCREASE TIP-1. Increase only on front piece and back piece and number of shoulder stitches stays the same. On next row (wrong side) increase 4 stitches for saddle shoulder as follows: Increase BEFORE 4th and 2nd marker and increase AFTER 3rd and 1st marker – read INCREASE TIP-2. I.e. increase on EVERY row, and increase differently from right side and wrong side so that the stitch lays nicely. Continue the pattern like this, and increase the same way on every row (both from right side and wrong side) 14-14-14-18-20-20 times in total, then increase every other row (every row from right side) 2 times in total - work the increased stitches in stocking stitch. REMEMBER THE KNITTING TENSION! After last increase there are 202-206-210-230-242-246 stitches on row and piece measures approx. 8-8-8-10-11-11 cm from marker at the neck. Then increase for sleeves as explained below. SLEEVE INCREASE: Move the 4 markers from increase for saddle shoulder so that they are placed on each side of the middle 14-14-14-16-16-16 stitches on each shoulder (i.e. in opposite side of A.2). Continue pattern as before. AT THE SAME TIME on next row from right side increase 4 stitches for sleeves as follows: Increase AFTER 1st and 3rd marker and increase BEFORE 2nd and 4th marker – remember INCREASE TIP-1. Increase now only on sleeves and number of stitches on front pieces and back piece is the same. Increase like this every other row (every row from right side) 10-13-14-13-14-16 times in total, and then every row (both from right side and wrong side) 3-0-0-6-4-0 times in total - remember INCREASE TIP-2. After last increase there are 254-258-266-306-314-310 stitches on row and piece measures approx. 18-20-21-25-26-26 cm from marker at the neck. Then increase for yoke as explained below. YOKE INCREASE: Move the 4 markers from increase for sleeves so that they are placed in outermost stitch in stocking stitch in each side on sleeves. Continue pattern as before. AT THE SAME TIME on next row from right side increase 8 stitches for yoke by increasing both before and after each of the 4 stitches with marker - remember INCREASE TIP-1 and INCREASE TIP-2. Increase stitches on front piece, back piece and both sleeves, and work the increased stitches in stocking stitch. Increase like this every other row (every row from right side) 0-0-2-0-0-2 times in total, and then every row (both from right side and wrong side) 4-5-4-4-5-6 times in total. After last increase there are 286-298-314-338-354-374 stitches on row and piece measures approx. 20-22-24-26-28-30 cm from marker at the neck. If the garment is shorter than this, continue as before, but without increases until correct measurements. On next row divide piece for body and sleeves as follows: Work the first 51-53-55-58-62-66 stitches as before (front piece), slip the next 48-50-54-60-60-62 stitches on a thread for sleeve, cast on 6-8-10-12-14-16 new stitches on row (in the side under sleeve), work 88-92-96-102-110-118 stitches as before (back piece), slip the next 48-50-54-60-60-62 stitches on a thread for sleeve, cast on 6-8-10-12-14-16 new stitches on row (in the side under sleeve) and work the last 51-53-55-58-62-66 stitches as before (front piece). Finish body and sleeves separately. Now measure piece from here. BODY: = 202-214-226-242-262-282 stitches. Insert 1 marker thread after 54-57-60-64-69-74 stitches in from each side (in the side on body). There are 94-100-106-114-124-134 stitches between markers threads on back piece. Move the marker threads upwards when working; they should be used for increase later in the sides on body. Work in stocking stitch back and forth with 7 stitches in garter stitch in each side towards mid front, and continue A.2 as before. When piece measures 6 cm from division, increase 1 stitch on each side of marker threads - read INCREASE TIP-3. Repeat increase when piece measures 15 cm from division = 210-222-234-250-270-290 stitches. Work until piece measures 24-24-24-23-23-23 cm from division. Knit 1 row from right side while increasing 43-45-47-51-55-59 stitches evenly( do not increase over bands) = 253-267-281-301-325-349 stitches. Switch to circular needle size 4 mm. Work next row as follows from wrong side: 7 stitches in garter stitch, * purl 1, knit 1 *, repeat from *-* until 8 stitches remain, purl 1 and 7 stitches in garter stitch. Continue rib like this for 6 cm. Loosely cast off. Jacket measures approx. 54-56-58-60-62-64 cm from shoulder and down. SLEEVES: Slip the 48-50-54-60-60-62 stitches from stitch holder in one side of piece on double pointed needles or a short circular needle size 5 mm and pick in addition up 1 stitch in each of the 6-8-10-12-14-16 new stitches cast on under sleeve = 54-58-64-72-74-78 stitches. Insert 1 marker thread mid under sleeve, i.e. in the middle of the 6-8-10-12-14-16 stitches that were cast on under sleeves. Begin round at the marker thread and work stocking stitch in the round. When sleeve measures 8-6-4-3-3-3 cm from division, decrease 2 stitches mid under sleeve - read DECREASE TIP. Decrease like this every 8-6-4-2½-2½-2 cm 3-4-6-10-10-11 times in total = 48-50-52-52-54-56 stitches. Work until sleeve measures 33-31-29-29-28-26 cm from division. 10 cm remain until finished measurements. Try the jacket and work to desired length before rib. Knit 1 round while increasing 16-16-16-18-18-20 stitches evenly = 64-66-68-70-72-76 stitches. Switch to double pointed needles size 4 mm. Work rib (knit 1/purl 1) for 10 cm. Loosely cast off. Sleeve measures approx. 43-41-39-39-38-36 cm from division. Work the other sleeve the same way. ASSEMBLY: Fold rib at the top of neck double in towards wrong side of garment. Fasten the rib. To avoid a tight neck edge that sticks out it is important to keep the seam elastic. Sew the buttons on to the left band. |
||||||||||||||||||||||||||||
Diagram explanations |
||||||||||||||||||||||||||||
|
||||||||||||||||||||||||||||
 |
||||||||||||||||||||||||||||
 |
||||||||||||||||||||||||||||
 |
||||||||||||||||||||||||||||
Have you finished this pattern?Tag your pictures with #dropspattern #cabledblisscardigan or submit them to the #dropsfan gallery. Do you need help with this pattern?You'll find 37 tutorial videos, a Comments/Questions area and more by visiting the pattern on garnstudio.com. © 1982-2026 DROPS Design A/S. We reserve all rights. This document, including all its sub-sections, has copyrights. Read more about what you can do with our patterns at the bottom of each pattern on our site. |
||||||||||||||||||||||||||||


With over 40 years in knitting and crochet design, DROPS Design offers one of the most extensive collections of free patterns on the internet - translated to 17 languages. As of today we count 324 catalogues and 12290 patterns translated into English (UK/cm). 12290
We work hard to bring you the best knitting and crochet have to offer, inspiration and advice as well as great quality yarns at incredible prices! Would you like to use our patterns for other than personal use? You can read what you are allowed to do in the Copyright text at the bottom of all our patterns. Happy crafting!
Post a comment to pattern DROPS 236-26
We would love to hear what you have to say about this pattern!
If you want to leave a question, please make sure you select the correct category in the form below, to speed up the answering process. Required fields are marked *.