
Popular categories
Looking for a yarn?


Comments / Questions (10)
![]() Mary Polart wrote:
Mary Polart wrote:
Bonjour, J’ai une autre question pour les augmentations. On augmente avec un jeté et tour suivant on tricote le jeté torse endroit ou envers? Ensuite les augmentations doivent suivirent le schéma A1. Mais comme on ajoute des mailles, les suivantes ne vont plus suivre le schéma ?? Merci
08.07.2025 - 15:57DROPS Design answered:
Bonjour Mary, cela depend, regardez comment le point de blé tombe. Bon tricot!
14.07.2025 - 11:38
![]() Mary Polart wrote:
Mary Polart wrote:
Bonjour, J’arrive à la partie empiècement. Doit on augmenter pour le raglan EN MÊME TEMPS QUE LES AUGMENTATIONS des manches ? Ou fait on l’augmentation de raglan et ensuite les manches ? Merci d’avance.
07.07.2025 - 22:34DROPS Design answered:
Bonjour Mary, vous augmentez en meme temps pour les reglans du dos/devants et des manches (8 mailles par rang) 18-20-23-24-25-27 fois (selon votre taille) tous les 2 rangs. Les augmentations des manches sont faites maintenant. Continuer ensuite en augmentant encore 2-1-1-1-2-3 fois sur les devants et le dos (4 mailles par rang). Bon tricot!
14.07.2025 - 11:16
![]() Lilian wrote:
Lilian wrote:
Hallo, ich möchte für das Modell Hydepark Cardigan das Garn ‚Alpaka‘ verwenden. Geht das? Vielen Dank für die Rückmeldung!
29.09.2023 - 08:24DROPS Design answered:
Liebe Lilian, ja gerne, dann stricken Sie mit 2 Fäden Alpaca - (2 Fäden der Garngruppe A wie Kid-Silk); benutzen Sie den Garnumrechner, um die neue Garnmenge kalkulieren zu lassen. Viel Spaß beim stricken!
02.10.2023 - 08:27
![]() Bente wrote:
Bente wrote:
Hvordan kan jeg fortsætte med mønster a2, efter jeg har delt til ærmer og krop. Der er jo de opslåede masker under ærmerne imellem de to halvdele? Vh Bente
24.06.2023 - 12:47DROPS Design answered:
Hei Bente. Du fortsetter rundt med rett over rett og vrang over vrang over maskene fra A.2 og strikker A.1 over de resterende maskene på omgangen, inkludert de nye maskene som ble lagt opp i siden under ermene. mvh DROPS Design
26.06.2023 - 11:12
![]() Frenay Evelyne wrote:
Frenay Evelyne wrote:
Augmenter ainsi 18-20-23-24-25-27 fois au total tous les 2 rangs = 237-265-289-305-317-345 mailles. BIEN CONSERVER LA MÊME TENSION QUE POUR L'ÉCHANTILLON! Les augmentations des manches sont faites maintenant. Continuer ensuite en augmentant encore 2-1-1-1-2-3 fois sur les devants et le dos (= on augmente 18-20-23-24-25-27 mailles de chaque côté des manches et 20-21-24-25-27-30 mailles côté raglan sur les devants et le dos) = 245-269-293-309-325-357.Je ne comprends pas cette partie ci ?
06.03.2023 - 14:45DROPS Design answered:
Bonjour Mme Frenay, on augmente pour le raglan en 2 temps, d'abord sur les devants, le dos et les manches (= 8 m à chaque fois) tous les 2 rangs; puis on va augmenter tous les 2 rangs pour les devants et le dos seulement (4 augmentations) - cf taille pour le nombre de fois; autrement dit, lorsque la première séquence d'augmentation tous les 2 rangs est terminée pour votre taille, continuez en augmentant encore 1, 2 ou 3 fois (cf taille) pour les devants et le dos (plus pour les manches) = vous augmentez 4 mailles seulement, 1 pour chaque devant et 2 pour le dos. Bon tricot!
06.03.2023 - 15:07
![]() Béatrice LASSALLE wrote:
Béatrice LASSALLE wrote:
Bonjour, Lorsque je fais les augmentations pour le raglan ts les 2 rangs, entre chaque A2, je me retrouve au fur et à mesure avec 1 maille de plus , cela fera 8 augmentations sur rang endroit. C\'est bien cela ? Je tricote ensuite ces mailles supplémentaires en A1. Donc ce sera toujours le même nombre de mailles à tricoter en A2 ? Je ne sais pas si je me suis bien fait comprendre...merci de votre réponse.
28.11.2021 - 18:18DROPS Design answered:
Bonjour Mme Lassalle, effectivement vous augmentez bien 8 mailles à chaque fois (1 m pour chaque devant et 2 pour les manches + le dos). Ces mailles sont incorporées à A.1, les mailles de A.6 sont celles du raglan et doivent toujours être au nombre de 6. En espérant avoir bien compris votre question. Bon tricot!
29.11.2021 - 08:04
![]() LASSALLE Béatrice wrote:
LASSALLE Béatrice wrote:
Bonjour J'ai tricoté les côtes du col mais pour poursuivre, je ne comprends ce que veut dire "au-dessus". Vous parlez de jersey, on tricote donc en jersey endroit ? Merci de m'aider.
09.11.2021 - 18:22DROPS Design answered:
Bonjour Mme Lassalle, lorsqu'il est dit par ex de tricoter "A.2 au-dessus des 6 mailles suivantes", vous tricotez simplement les 6 mailles de A.2. Effectivement, lorsque l'on indique "jersey", il s'agit de jersey endroit à tricoter à l'endroit sur l'endroit et à l'envers sur l'envers. Bon tricot!
10.11.2021 - 07:30
![]() Miryam Van Ommen wrote:
Miryam Van Ommen wrote:
Kan ik een verhoging in de nek breien, en zo ja, hoe doe ik dat. Heeft U een voorbeeldbeschrijving?
07.11.2021 - 15:56DROPS Design answered:
Dag Miryam,
Helaas heb ik niet echt een voorbeeld, maar om een verhoging te maken kun je vanaf midden achter een aantal naalden heen en weer breien, waarbij je steeds meer steken breit. Je breit bijvoorbeeld eerst 8 steken, dan brei je terug over de 8 steken via midden achter de andere kant op 8 steken, dan keer je het werk en brei je na midden achter bijvoorbeeld 16 steken, enzovoort.
11.11.2021 - 07:45
![]() Béatrice LASSALLE wrote:
Béatrice LASSALLE wrote:
Bonjour, Est-ce bien avec aiguilles n°5 au point de blé que l'on doit faire l'échantillon ? Merci de votre réponse.
27.10.2021 - 16:55DROPS Design answered:
Bonjour Beatrice. Oui, aiguilles no 5, avec 2 fils. Ne pas oublier que la taille des aiguilles est uniquement une suggestion. Si vous avez trop de mailles pour 10 cm, essayez avec des aiguilles plus grosses. Si vous n'avez pas assez de mailles pour 10 cm, essayez avec des aiguilles plus fines. Bon tricot!
27.10.2021 - 18:17
![]() Jette Nielsen wrote:
Jette Nielsen wrote:
Forrest Embrace
08.08.2021 - 09:19
|
|||||||
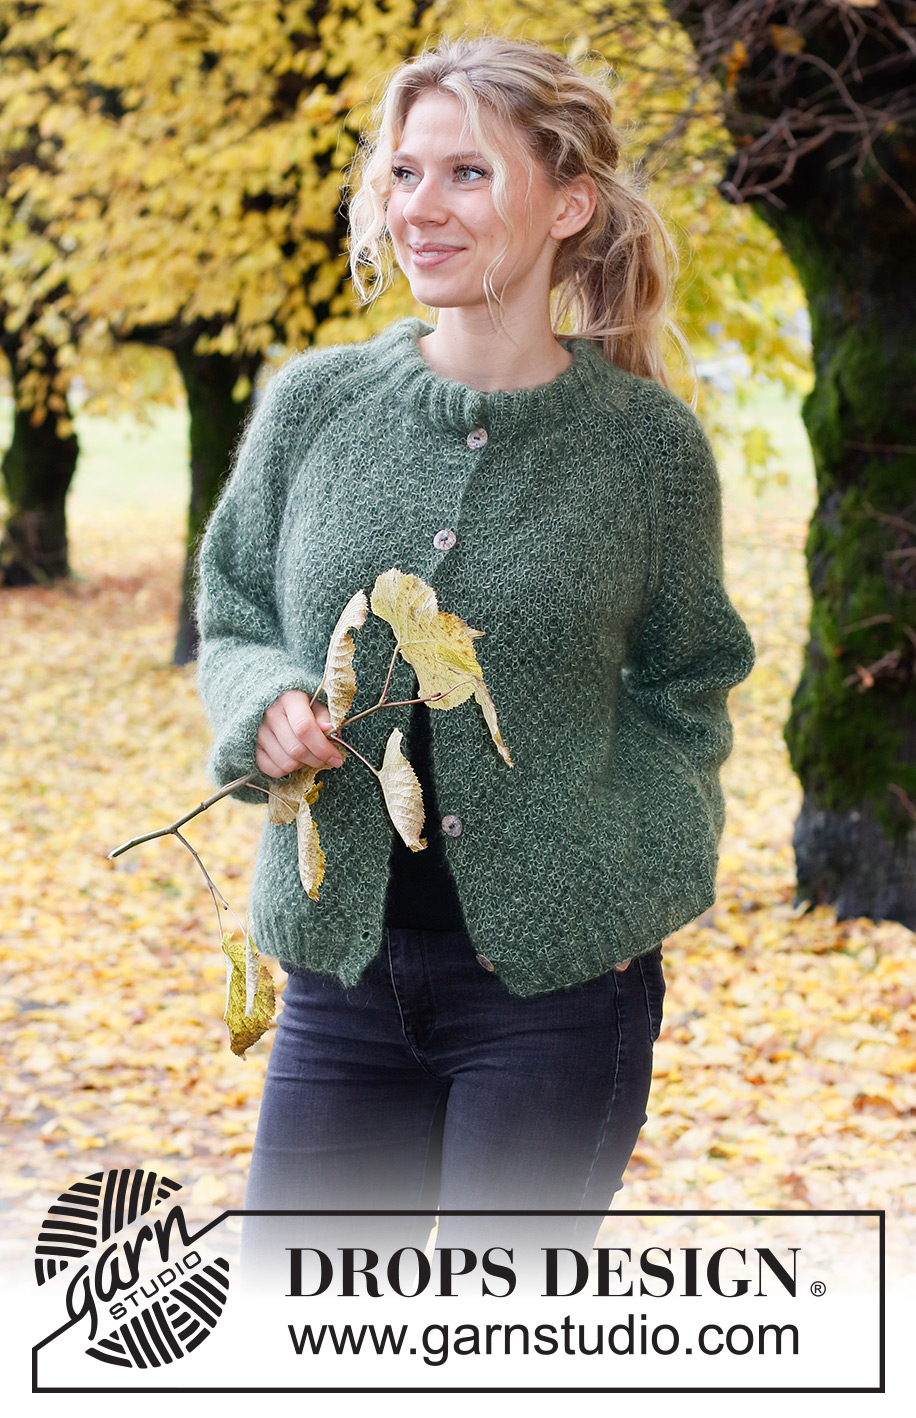
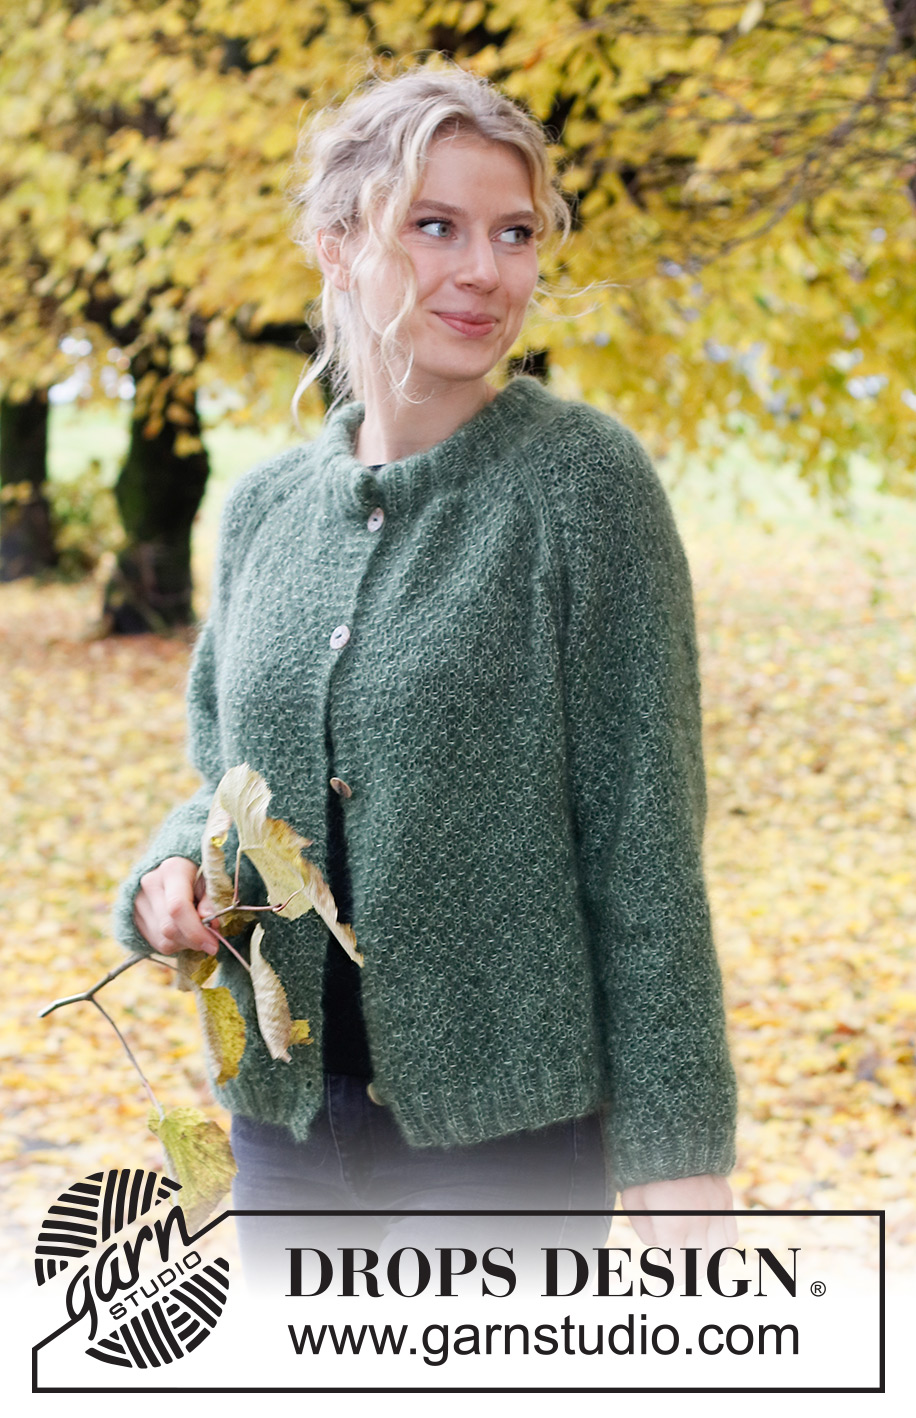
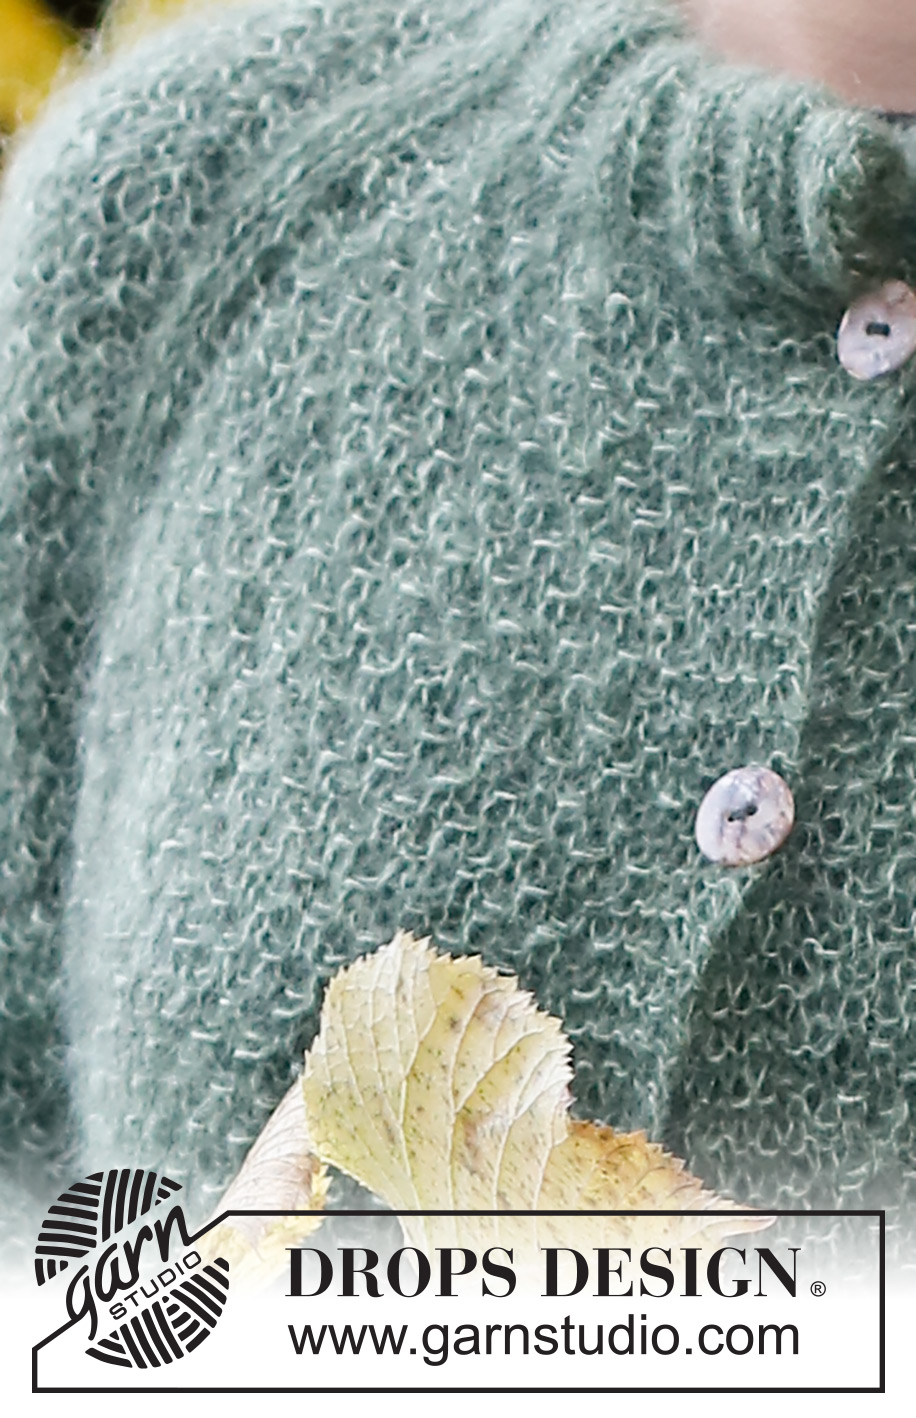
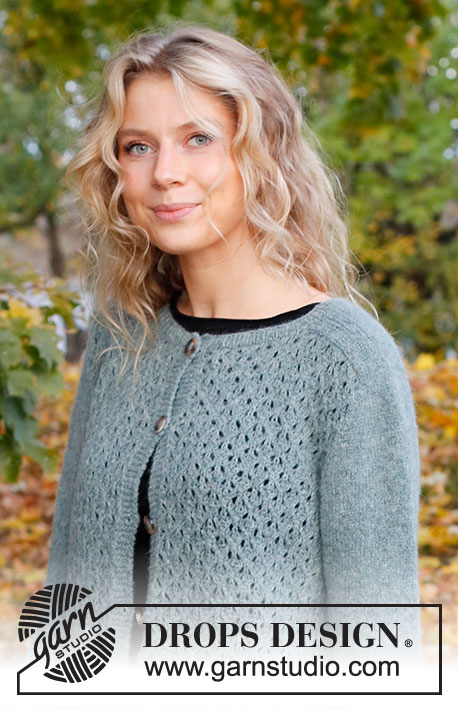
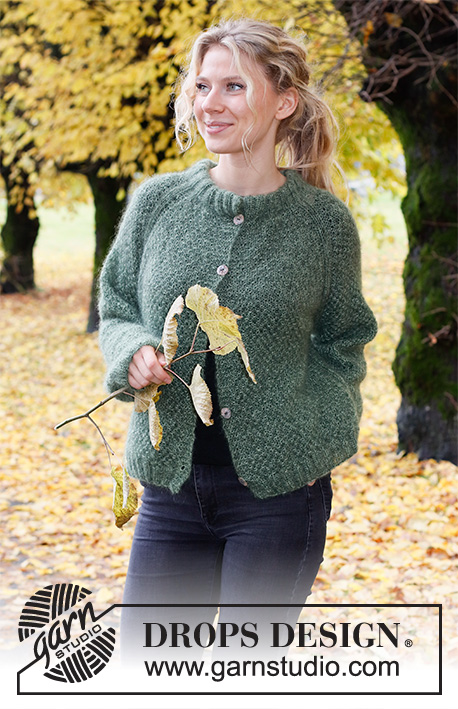
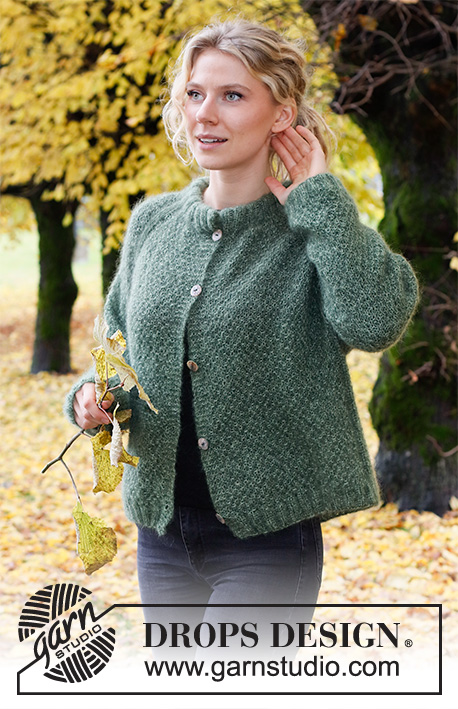
Hyde Park Cardigan#hydeparkcardigan |
|||||||
 |
 |
||||||
Knitted jacket in 2 strands DROPS Kid-Silk. Piece is knitted top down with raglan, moss stitch and double neck edge. Size XS – XXL.
DROPS 226-10 |
|||||||
|
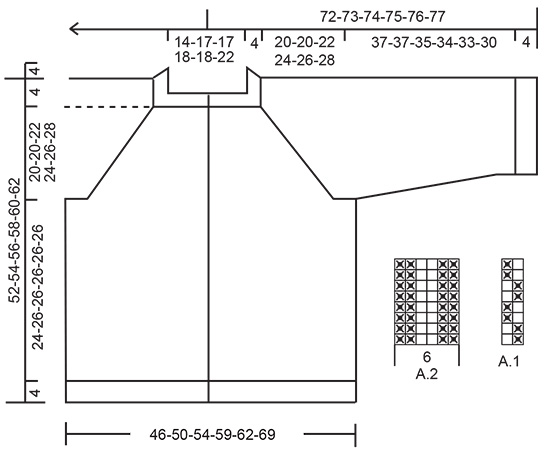
---------------------------------------------------------- EXPLANATION FOR THE PATTERN: ---------------------------------------------------------- GARTER STITCH (back and forth): Knit all rows. 1 ridge vertically = knit 2 rows. PATTERN: See diagrams A.1 and A.2. Diagrams show all rows in pattern seen from the right side. INCREASE TIP (evenly): To calculate how to increase evenly, count the number of stitches to be increased (e.g. 14 stitches) , and divide number by stitches of increases to be done (e.g. 2) = 7. In this example increase by making 1 yarn over after every 7th stitch. On next row work yarn overs twisted to avoid holes. RAGLAN: Increase 1 stitch on each side of A.2 in every transition between front/back piece and sleeves (= 8 stitches increased on round). Increase 1 stitch by making 1 yarn over. On next row work yarn overs twisted to avoid holes. Then work the new stitches in A.1 (double moss stitch vertically). DECREASE TIP (applies to mid under sleeves): Decrease 1 stitch on each side of stitch with marker as follows: Work until 3 stitches remain before stitch with marker, knit 2 together, knit 3 (stitch with marker is in the middle of these 3 stitches), slip 1 stitch knitwise, knit 1, pass slipped stitch over stitch worked. CAST-OFF TIP: To avoid a tight cast-off edge when casting off, you may use a larger needle. If this still is too tight make 1 yarn over after approx. every 4th stitch while casting off (cast off yarn overs as stitches). BUTTONHOLES: Decrease for buttonholes on right band (when garment is worn). Decrease from right side when 4 stitches remain on row as follows: Make 1 yarn over, knit the next 2 stitches together, knit the last 2 stitches. On next row (wrong side) knit the yarn over to make a hole. Decrease for first buttonhole on first row from right side after rib in the neck. Then decrease the next 4-4-5-5-6-6 buttonholes, approx. 11-11-9½-10-8½-9 cm apart. ---------------------------------------------------------- START THE PIECE HERE: ---------------------------------------------------------- JACKET - SHORT OVERVIEW OF THE PIECE: Work double neck edge and yoke back and forth on circular needle from mid front, work top down. Now divide yoke for body and sleeves. Work body back and forth on circular needle, top down. Work sleeves in the round on double pointed needles/short circular needle, top down. DOUBLE NECK EDGE: Cast on 84-96-96-100-100-112 stitches (including 1 edge stitch in each side towards mid front) on circular needle size 5 mm with 1 strand in each colour in DROPS Kid-Silk (= 2 strands). Purl 1 row (= wrong side). Switch to circular needle size 4 mm. Work next row as follows from right side: Work 1 edge stitch in GARTER STITCH – read explanation above - * knit 2, purl 2 *, work from *-* until 3 stitches remain, knit 2 and finish with 1 edge stitch in garter stitch. Continue rib like this for 9 cm. The neck edge is later folded double and assembled so that the neck edge is approx. 4 cm. When rib is done, work next row from right side as follows: Remember BUTTONHOLES on right band - read explanation above. Work 5 band stitches in garter stitch, stocking stitch over the next 10-14-14-14-14-18 stitches and increase at the same time 1-0-0-2-3-2 stitches evenly – read INCREASE TIP (= 11-14-14-16-17-20 stitches), work A.2 over the next 6 stitches, work in stocking stitch over the next 6 stitches and increase 1 stitch (= 7 stitches), work A.2 over the next 6 stitches, work in stocking stitch over the next 18-22-22-26-26-30 stitches and increase at the same time 5-7-7-7-9-11 stitches evenly (= 23-29-29-33-35-41 stitches), work A.2 over the next 6 stitches, work in stocking stitch over the next 6 stitches and increase 1 stitch (= 7 stitches), work A.2 over the next 6 stitches, work in stocking stitch over the next 10-14-14-14-14-18 stitches and increase at the same time 1-0-0-2-3-2 stitches evenly (= 11-14-14-16-17-20 stitches), work 5 band stitches in garter stitch = 93-105-105-113-117-129 stitches. Work 1 row in pattern from wrong side (purl yarn overs twisted). Insert 1 marker after band at beginning of row mid front, measure yoke from this marker! YOKE: Switch to circular needle size 5 mm. Now work pattern as follows: 5 band stitches in garter stitch, A.1 over the next 11-14-14-16-17-20 stitches (= left front piece), A.2 over the next 6 stitches, A.1 over the next 7 stitches (= sleeve), A.2 over the next 6 stitches, A.1 over the next 23-29-29-33-35-41 stitches (= back piece), A.2 over the next 6 stitches, A.1 over the next 7 stitches (= sleeve), A.2 over the next 6 stitches, A.1 over the next 11-14-14-16-17-20 stitches (= right front piece), 5 band stitches in garter stitch. Continue pattern like this. On next row from right side begin increase for RAGLAN – read explanation above. Increase like this every other row a total of 18-20-23-24-25-27 times = 237-265-289-305-317-345 stitches. REMEMBER THE KNITTING TENSION! Increase on sleeves is now done. Then continue increase on front pieces and back piece 2-1-1-1-2-3 more times (= 18-20-23-24-25-27 stitches increased in each side of sleeves and 20-21-24-25-27-30 stitches increased towards raglan on front pieces and back piece) = 245-269-293-309-325-357 stitches. Continue with A.1 and A.2 until piece measures 20-20-22-24-26-28 cm from marker after the neck edge. Now divide piece for body and sleeves. Work next row as follows: Work the first 39-43-46-49-52-58 stitches (= front piece), slip the next 49-53-59-61-63-67 stitches on a stitch holder for sleeve, cast on 9-9-9-11-11-11 new stitches on needle (= in the side under sleeve), work the next 69-77-83-89-95-107 stitches (= back piece), slip the next 49-53-59-61-63-67 stitches on a stitch holder for sleeve, cast on 9-9-9-11-11-11 new stitches on needle (= in the side under sleeve), work the last 39-43-46-49-52-58 stitches (= front piece). Now finish body and sleeves separately. NOW MEASURE PIECE FROM HERE! BODY: = 165-181-193-209-221-245 stitches. Continue back and forth with band stitches in garter stitch, knit over knit and purl over purl over stitches from A.2, and work A.1 over the remaining stitches on needle. When piece measures 24-26-26-26-26-26 cm from division, work next row from right side as follows: 5 band stitches in garter stitch, knit over the next 31-35-38-41-44-50 stitches and increase at the same time 3-3-4-5-6-8 stitches evenly (= 34-38-42-46-50-58 stitches), purl 2, knit 1, knit over the next 9-9-9-11-11-11 stitches and increase at the same time 3-3-3-5-5-5 stitches evenly (= 12-12-12-16-16-16 stitches), knit 1, purl 2, knit over the next 63-71-77-83-89-101 stitches and increase at the same time 11-11-13-15-17-17 stitches evenly (= 74-82-90-98-106-118 stitches), purl 2, knit 1, knit over the next 9-9-9-11-11-11 stitches and increase at the same time 3-3-3-5-5-5 stitches evenly (= 12-12-12-16-16-16 stitches), knit 1, purl 2, knit over the next 31-35-38-41-44-50 stitches and increase at the same time 3-3-4-5-6-8 stitches evenly (= 34-38-42-46-50-58 stitches), 5 band stitches in garter stitch = 188-204-220-244-260-288 stitches. Switch to circular needle size 4 mm. Now work rib (work 1st from right side) as follows: 5 band stitches in garter stitch, * purl 2, knit 2 *, repeat from *-* until 7 stitches remain, purl 2, 5 band stitches in garter stitch. When rib measures 4 cm, cast off with knit over knit and purl over purl - read CAST-OFF TIP. Jacket measures approx. 52-54-56-58-60-62 cm from shoulder and down. SLEEVES: Slip the 49-53-59-61-63-67 stitches from stitch holder in one side on a short circular needle/double pointed needles size 5 mm and pick in addition up 1 stitch in each of the 9-9-9-11-11-11 stitches cast on in the side under sleeve = 58-62-68-72-74-78 stitches. Insert a marker in the middle new stitch cast on under sleeve. Move markers upwards when working. Use marker later when decreasing under sleeve. Continue in the round with A.1 – adjust to continue pattern over stitches on sleeve. When sleeve measures 4 cm from division, decrease 1 stitch on each side of marker under sleeve - read DECREASE TIP. Decrease like this approx. every 4-4-2-2-2-2 cm 5-6-8-9-9-10 times in total = 48-50-52-54-56-58 stitches. Continue until sleeve measures 37-37-35-34-33-30 cm from division (shorter measurements in the larger sizes because of wider neck and longer yoke). Knit 1 round while increasing 8-6-8-10-8-10 stitches evenly = 56-56-60-64-64-68 stitches. Switch to double pointed needles size 4 mm. Work rib (knit 2/purl 2) in the round for 4 cm. Cast off stitches with knit over knit and purl over purl. Sleeve measures approx. 41-41-39-38-37-34 cm from division. Work the other sleeve the same way. ASSEMBLY: Fold rib at the top of neck down on inside of garment. Fasten rib to get a double folding edge. To avoid a tight neck edge that sticks out it is important to keep the seam elastic. Sew opening towards mid front together on bands with neat little stitches. Sew the buttons on to left band. |
|||||||
Diagram explanations |
|||||||
|
|||||||
 |
|||||||
Have you finished this pattern?Tag your pictures with #dropspattern #hydeparkcardigan or submit them to the #dropsfan gallery. Do you need help with this pattern?You'll find 31 tutorial videos, a Comments/Questions area and more by visiting the pattern on garnstudio.com. © 1982-2026 DROPS Design A/S. We reserve all rights. This document, including all its sub-sections, has copyrights. Read more about what you can do with our patterns at the bottom of each pattern on our site. |
|||||||


With over 40 years in knitting and crochet design, DROPS Design offers one of the most extensive collections of free patterns on the internet - translated to 17 languages. As of today we count 324 catalogues and 12290 patterns translated into English (UK/cm). 12290
We work hard to bring you the best knitting and crochet have to offer, inspiration and advice as well as great quality yarns at incredible prices! Would you like to use our patterns for other than personal use? You can read what you are allowed to do in the Copyright text at the bottom of all our patterns. Happy crafting!
Post a comment to pattern DROPS 226-10
We would love to hear what you have to say about this pattern!
If you want to leave a question, please make sure you select the correct category in the form below, to speed up the answering process. Required fields are marked *.