
Popular categories
Looking for a yarn?


Comments / Questions (33)
![]() Aase Sydness wrote:
Aase Sydness wrote:
Oppskrift drops 227-2 har et diagram A1 Er der video av det? Forstår ikke «stikk Høyre pinne gjennom masken fra forrige rad osv. … =patentmaske?
06.11.2021 - 17:56DROPS Design answered:
Hei Aase. Ikke helt lik diagramikon, men teknikken er den samme. Å stikke høyre pinne gjennom masken fra forrige rad (dvs gjennom masken under neste maske), strikk 1 maske rett og slipp maskene av venstre pinne. Hvordan strikke 1 rett i masken fra forrige omgang mvh DROPS Design
08.11.2021 - 14:18
![]() Gertrud Nyberg wrote:
Gertrud Nyberg wrote:
Förstår inte hur jag ska göra på varven från avigsidan ? På rätsidan stickar jag en vriden rät maska och en vanlig avig maska. Men på avigsidan? Ska jag sticka vriden rät maska och vanlig avig maska där ? Eller?
28.10.2021 - 22:26DROPS Design answered:
Hej Gertrud. De maskor som du stickar vridet räta på rätsidan stickas vridet aviga på avigsidan, och de maskor du stickar vanligt aviga på rätsidan stickar du vanligt räta på avigsidan. (Framkantsmaskorna stickas i rätstickning och A.1 enligt diagram). Mvh DROPS Design
29.10.2021 - 08:06
![]() Gertrud Nyberg wrote:
Gertrud Nyberg wrote:
Jag har löst problemet på mina föregående frågor. Men ska jag sticka vriden rät maska på räta varven? Utom a1 och utom dom fem första antar jag?
27.10.2021 - 20:47DROPS Design answered:
Hej Gertrud. Ja du stickar vridet räta maskor och avigmaskor på rätsidan (förutom framkantsmaskorna som stickas i rätstickning och A.1 som stickas enligt diagram). Mvh DROPS Design
28.10.2021 - 13:54
![]() Gertrud Nyberg wrote:
Gertrud Nyberg wrote:
Hur stickas dom aviga varven på halskanten? Förstår att mönstret a1 ska stickas som det står men dom andra maskorna? Bara avig eller samma som rätsidan?
27.10.2021 - 17:08
![]() Gertrud Nyberg wrote:
Gertrud Nyberg wrote:
Jag har börjat sticka halskanten. Gör exakt efter beskrivning, första varvet avigt , nästa som börjar med 5 räta maskor och det stämmer inte med antalet maskor jag har 107 stycken. Vad är felet?
27.10.2021 - 16:52
![]() Linda wrote:
Linda wrote:
Voor maat xxl moeten 129 opgezet worden, maar als ik alle steken van de dubbele hals optel, kom ik op 139 steken… Wat doe ik verkeerd?
26.10.2021 - 21:10DROPS Design answered:
5 biesst, 1 gedr r, * 1 av, 1 gedr r *, brei van *-* over de vlg 16 st, brei A.1 (= 7 steken), * 1 gedr r, 1 av *, herhaal van *-* over de vlg 12 st, 1 gedr r, brei A.1 (= 7 st), * 1 gedr r, 1 av *, brei van *-* over de vlg 30 st, 1 gedr r, brei A.1 (= 7 st), * 1 gedr r, 1 av *, herhaal van *-* over de vlg 12 st, 1 gedr r, brei A.1 (= 7 st), * 1 gedr r, 1 av *, brei van *-* over de vlg 16 st, 1 gedr r, 5 biesst. = 129 st.
29.10.2021 - 13:18
![]() Marie-France ALTMAYER wrote:
Marie-France ALTMAYER wrote:
N'ayant jamais tricoté de cotes anglaise, j'ai consulté les video, et pour commencer le col ne doit on pas faire le premier rang endroit sur envers Merci
15.10.2021 - 10:58DROPS Design answered:
Bonjour Mme Altmayer, il existe différentes façons de procéder, ici, pour la maille en côtes anglaises de A.1 vous tricotez le 1er rang sur l'endroit, tricotez cette maille à l'endroit - mais vous pouvez tout à fait tricoter d'abord 1 rang envers sur l'envers et continuer au rang suivant sur l'endroit comme indiqué au 1er rang. Bon tricot!
15.10.2021 - 13:27
![]() Marie-France ALTMAYER wrote:
Marie-France ALTMAYER wrote:
Bonjour L'échantillon est il exécuté avec deux fils ?? si oui les deux fils seraient juste utilisés pour le rang de montage du col ?? Merci
13.10.2021 - 15:41DROPS Design answered:
Bonjour Mme Altmayer, ce gilet se tricote avec 1 seul fil DROPS Brushed Alpaca Silk, seul le montage se fait avec 2 fils pour qu'il soit suffisamment souple/élastique (cf cette vidéo) - on coupe ensuite un des deux fils pour continuer avec 1 seul fil. Bon tricot!
13.10.2021 - 16:37
![]() Jannie Wouters wrote:
Jannie Wouters wrote:
In het patroon staat dat aan elke kant van A1 tussen de overgangen van lijf en mouwen een steek gemeerderd moet worden. Dat zijn volgens mij 4 steken meerderen en er staat 8 per naald. Of moet er ook aan weerszijden van A1 , op de rug ook gemeerderd worden, dan zouden het wel 8 steken per naald zijn. Maar… op de rug moet er toch geen raglanmeerdering komen?
05.10.2021 - 10:35DROPS Design answered:
Dag Jannie,
Er moet inderdaad aan weerszijden van A.1 gemeerderd worden, dus aan weerzijden van alle 4 raglanlijnen, dan kom je op 8 steken per meerdernaald.
07.10.2021 - 11:13
![]() Susanne wrote:
Susanne wrote:
Hej - ved dobbelt halskant. Skal alle vrang pinde strikkes vrang over alle masker?
03.10.2021 - 16:44DROPS Design answered:
Hej Susanne. Nej det ska de inte. Du stickar så att mönstret fortsätter på samma sätt (dvs vridd ribb och A1). Mvh DROPS Design
04.10.2021 - 13:58
|
||||||||||
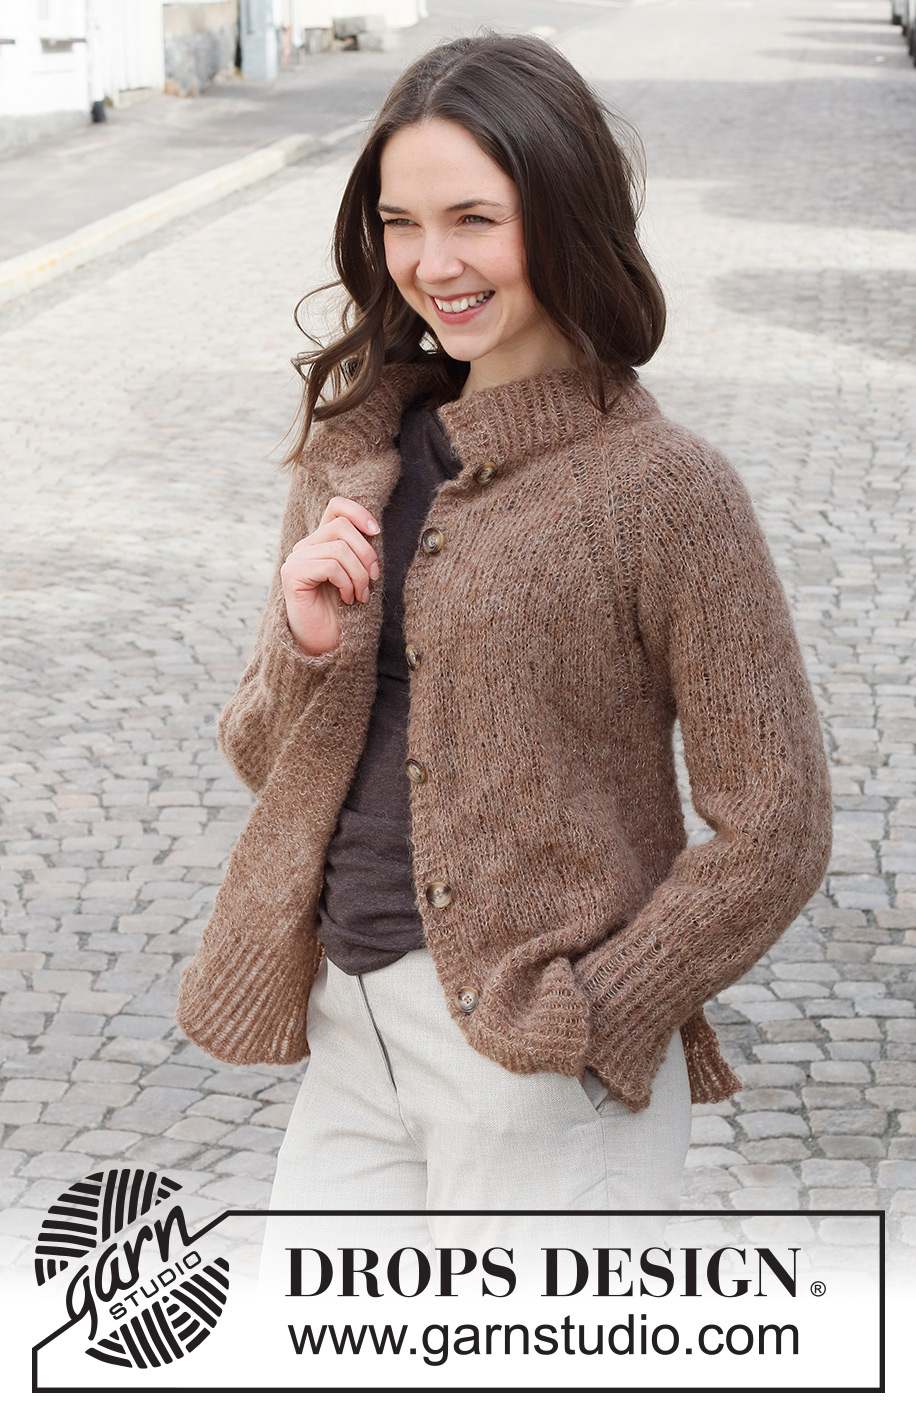
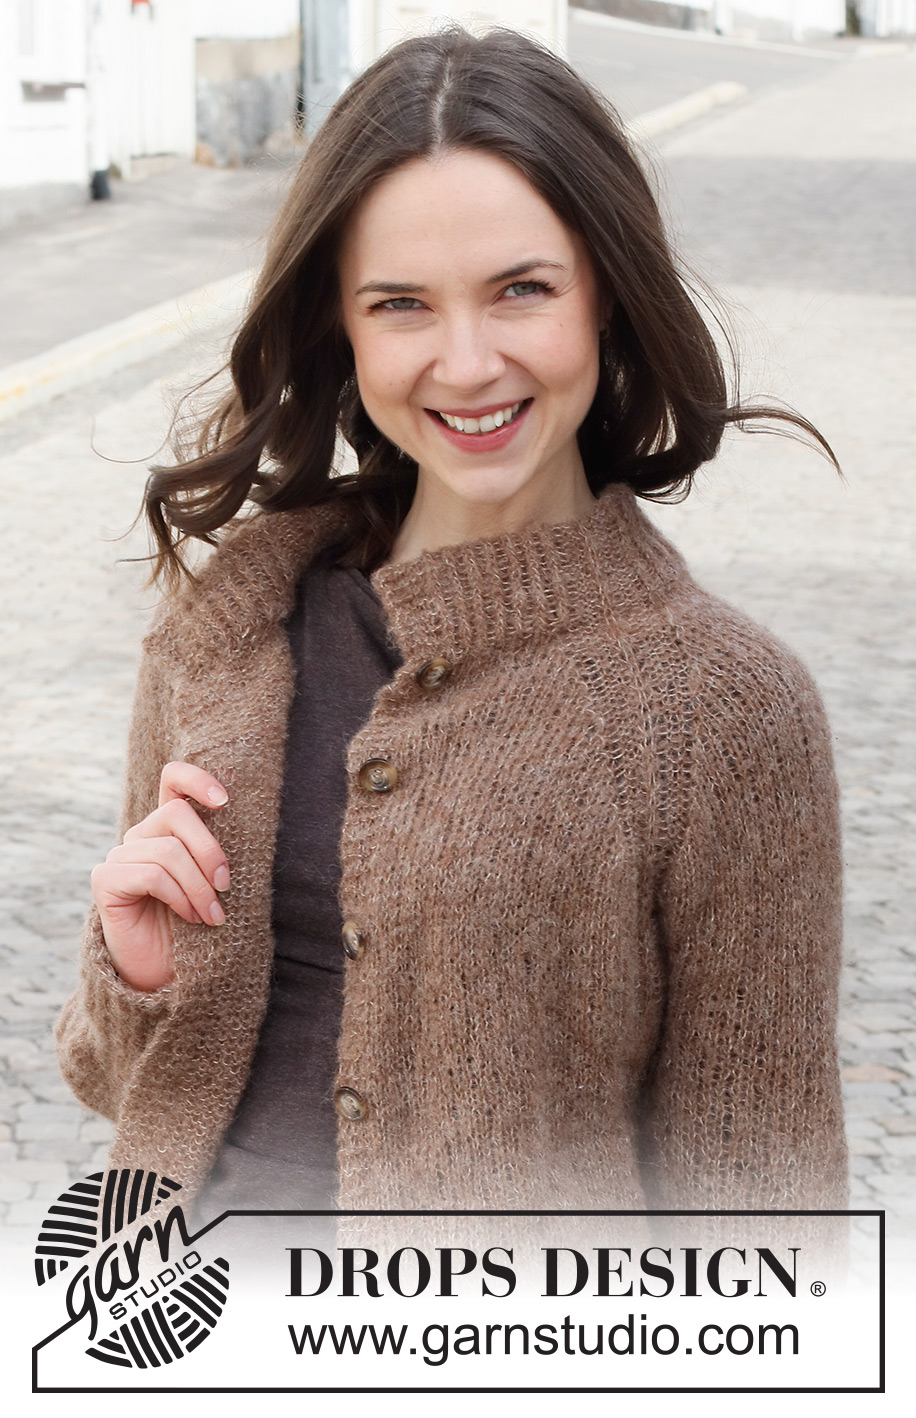
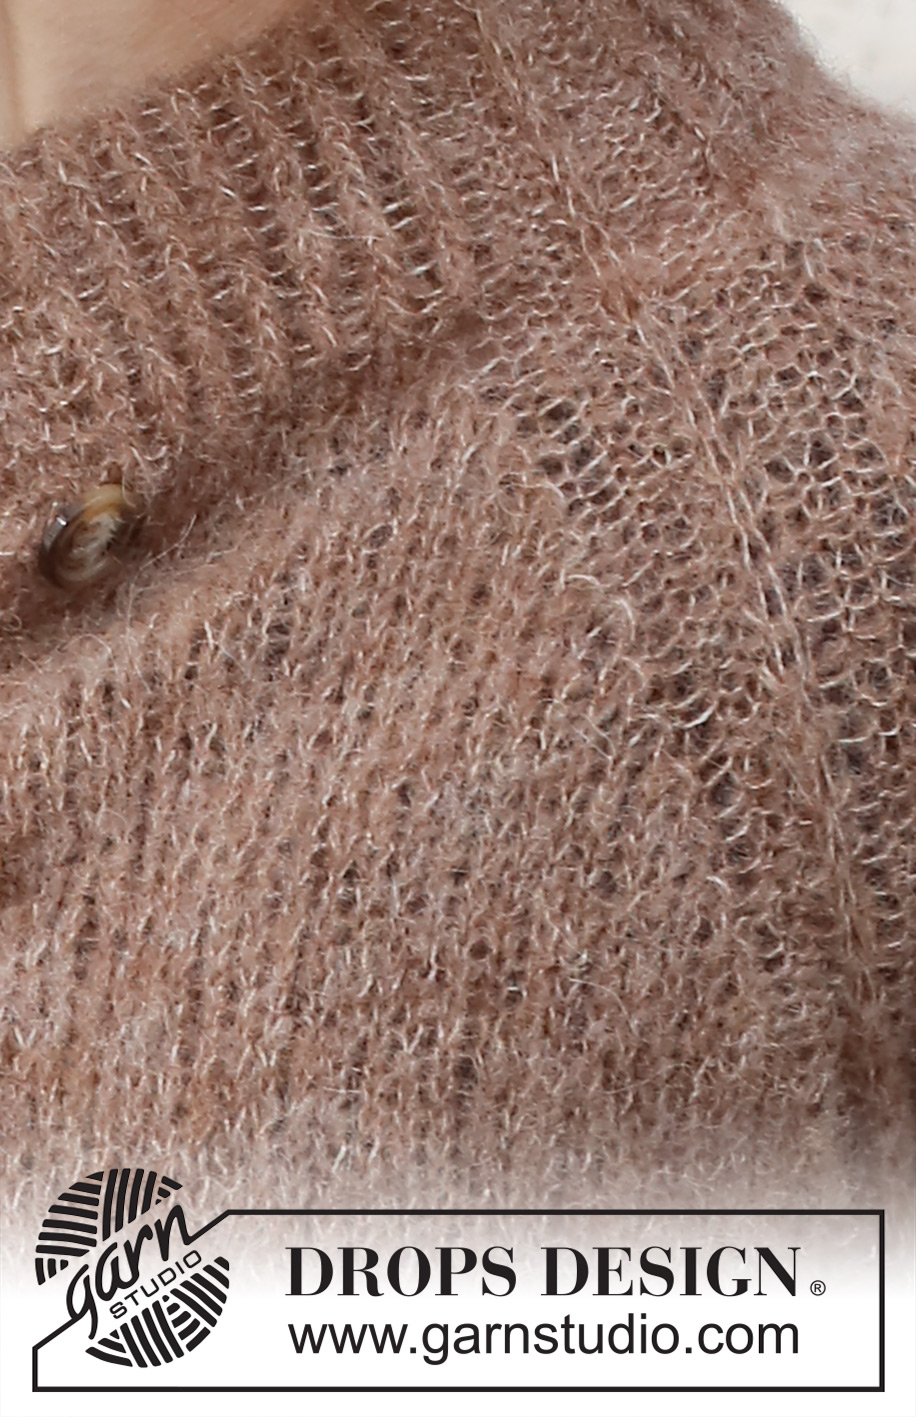
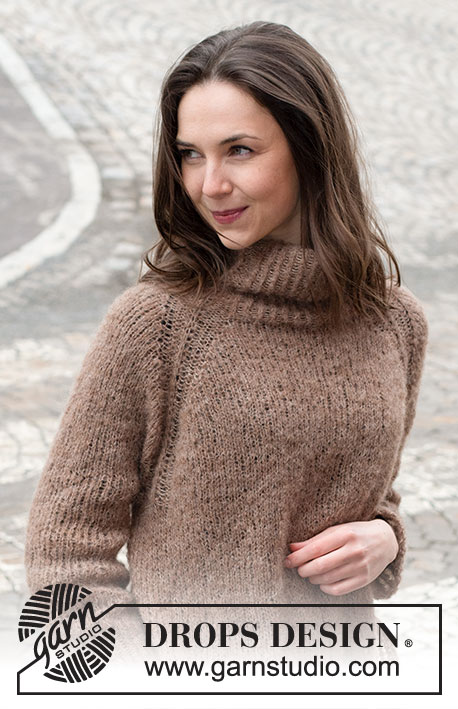
City Stride#citystridecardigan |
||||||||||
 |
 |
|||||||||
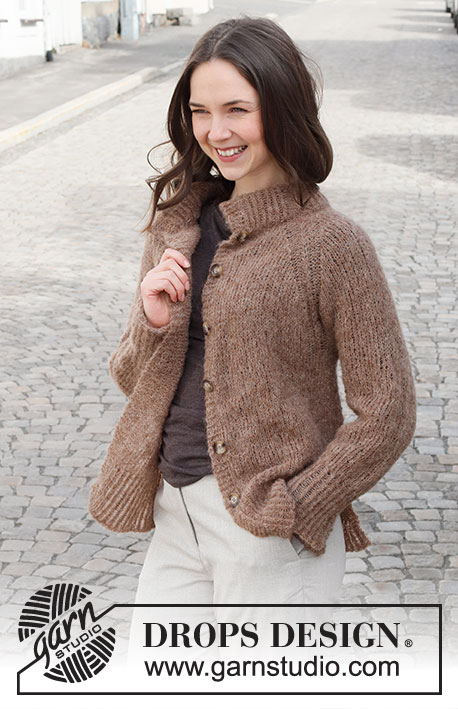
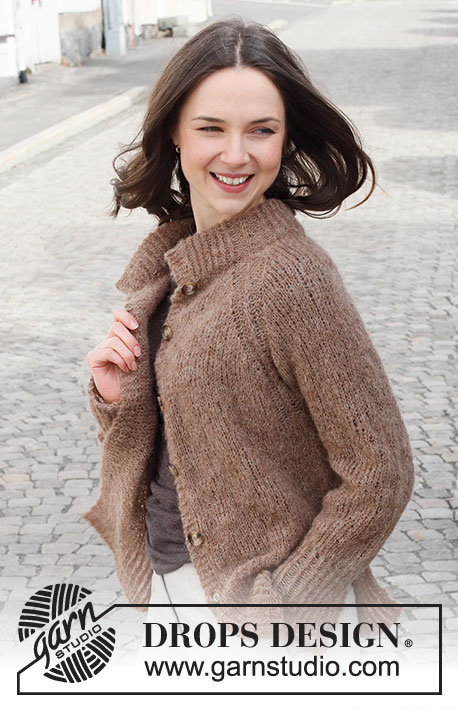
Knitted jacket in DROPS Brushed Alpaca Silk. The piece is worked top down, with raglan, double neck and ribbed raglan-line. Sizes S - XXXL.
DROPS 227-2 |
||||||||||
|
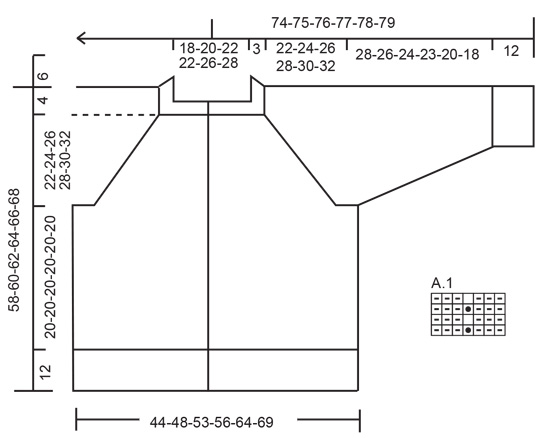
------------------------------------------------------- EXPLANATIONS FOR THE PATTERN ------------------------------------------------------- PATTERN: See diagram A.1. The diagram shows all rows in the pattern from the right side. RIDGE/GARTER STITCH (worked back and forth): Knit all rows. 1 ridge = knit 2 rows. INCREASE TIP (evenly spaced): To work out how to increase evenly, count the total number of stitches on the needle (e.g. 70 stitches) minus the front band stitches (= 4 stitches) and divide the remaining stitches by the number of increases to be made (e.g. 7) = 9.4. In this example, increase by making 1 yarn over after each 9th stitch. On the next row purl the yarn overs twisted to avoid holes. BUTTONHOLES: Work buttonholes on the right band (when the garment is worn). Work from the right side when there are 3 stitches left on the row as follows: Make 1 yarn over, knit 2 together and knit 1. On the next row knit the yarn over to leave a hole. The first buttonhole is worked approx. 1 cm below the neck. Then the other 5-5-5-6-6-6 buttonholes are worked with 9½-9½-10-9-9-9 cm between each one. RAGLAN: Increase 1 stitch on each side of 7 stitches (= A.1) in the transitions between the body and sleeves (= 8 stitches increased on the row). Increase 1 stitch by making 1 yarn over. On the next row purl the yarn overs twisted to avoid holes. Then work the new stitches in stocking stitch. DECREASE TIP (for sleeves): Decrease 1 stitch on either side of the marker thread as follows: Work until there are 3 stitches left before the marker thread, knit 2 together, knit 2 (marker thread sits between these 2 stitches), slip 1 stitch as if to knit, knit 1 and pass the slipped stitch over the knitted stitch (2 stitches decreased). CASTING-OFF TIP: To avoid the cast-off edge being tight you can cast off with a larger size needle. If the edge is still tight, make 1 yarn over after approx. each 4th stitch at the same time as casting off; the yarn overs are cast off as normal stitches. ------------------------------------------------------- START THE PIECE HERE: ------------------------------------------------------- JACKET – SHORT OVERVIEW OF THE PIECE. The neck and yoke are worked back and forth with circular needle, from mid front and top down. The yoke is divided for the body and sleeves and the body is continued back and forth with circular needle as far as the split, when each section is finished separately. The sleeves are worked in the round with double pointed needles/short circular needle, top down. DOUBLE NECK: Cast on 107-107-115-115-129-133 stitches (including 5 band stitches on each side towards mid-front) with circular needle size 4.5 mm and 2 strands Brushed Alpaca Silk. Remove 1 strand and continue with just 1 strand. Purl 1 row from the wrong side. The next row is worked from the right side as follows: 5 band stitches in GARTER STITCH – read description above, knit 1 twisted, * purl 1, knit 1 twisted *, work from *-* over the next 10-10-12-12-16-16 stitches, work A.1 (= 7 stitches), * knit 1 twisted, purl 1 *, repeat from *-* over the next 12 stitches, knit 1 twisted, work A.1, * knit 1 twisted, purl 1 *, work from *-* over the next 20-20-24-24-30-34 stitches, knit 1 twisted, work A.1, * knit 1 twisted, purl 1 *, repeat from *-* over the next 12 stitches, knit 1 twisted, work A.1, * knit 1 twisted, purl 1 *, work from *-* over the next 10-10-12-12-16-16 stitches, knit 1 twisted, 5 band stitches in garter stitch. Continue this rib for 12 cm. The neck will be folded double later. Insert 1 marker after the band at the beginning of the row; the yoke is measured from this marker. YOKE: Change to circular needle size 5.5 mm and work as follows from the right side: 5 band stitches in garter stitch, knit 11-11-13-13-17-17 and decrease 2-1-1-1-2-0 stitches over these stitches (= 9-10-12-12-15-17 stitches), A.1, knit 13 and decrease 3 stitches over these stitches (= 10 stitches), A.1, knit 21-21-25-25-31-35 and decrease 3-1-1-1-1-1 stitches over these stitches (= 18-20-24-24-30-34 stitches), A.1, knit 13 and decrease 3 stitches over these stitches (= 10 stitches), A.1, knit 11-11-13-13-17-17 and decrease 2-1-1-1-2-0 stitches over these stitches (= 9-10-12-12-15-17 stitches), 5 band stitches in garter stitch = 94-98-106-106-118-126 stitches. Remember the BUTTONHOLES on the right band – read description above. Continue the pattern, AT THE SAME TIME, on the next row from the right side begin to increase to RAGLAN – read description above (= 8 stitches increased). Increase every 2nd row (= each row from the right side), a total of 16-18-20-22-25-26 times = 222-242-266-282-318-334 stitches. REMEMBER THE KNITTING TENSION! Continue working without further increases until the piece measures 22-24-26-28-30-32 cm from the marker. Now divide for the body and sleeves as follows: Work the first 37-40-44-46-52-55 stitches as before (= left front piece), place the next 42-46-50-54-60-62 stitches on a thread for the sleeve, cast on 6-6-6-8-8-10 stitches (= in side under sleeve), work the next 64-70-78-82-94-100 stitches (= back piece), place the next 42-46-50-54-60-62 stitches on a thread for the sleeve, cast on 6-6-6-8-8-10 stitches (= in side under sleeve), work the remaining 37-40-44-46-52-55 stitches (= right front piece). BODY: = 150-162-178-190-214-230 stitches. Insert 1 marker in each side, in the middle of the 6-6-6-8-8-10 new stitches under each sleeve. Allow the markers to follow your work onwards; they will be used when dividing for the split. Continue back and forth, with stocking stitch and 5 band stitches in garter stitch on each side until the piece measures 20 cm from the division – finish after a row from the wrong side. There is approx. 12 cm left to finished length; try the jacket on and work to desired length. Now divide the piece at each marker and finish each piece separately. LEFT FRONT PIECE (when the garment is worn): = 40-43-47-50-56-60 stitches. Knit 1 row from the right side and increase 4-5-5-6-6-6 stitches evenly spaced – read INCREASE TIP = 44-48-52-56-62-66 stitches. Purl 1 row from the wrong side with 5 band stitches in garter stitch towards mid-front and 2 stitches in garter stitch towards the split. Change to circular needle size 4.5 mm and work the next row from the right side as follows: 5 band stitches in garter stitch, * knit 1 twisted, purl 1 *, work from *-* until there are 3 stitches left, knit 1 twisted and 2 stitches in garter stitch. From the wrong side the rib is worked as follows: 2 stitches in garter stitch, purl 1 twisted * knit 1, purl 1 twisted *, work from *-* until there are 5 stitches left, 5 band stitches in garter stitch. Continue this rib for 12 cm. Loosely cast off with garter stitch over garter stitch, knit over knit and purl over purl – read CASTING-OFF TIP. The jacket measures approx. 58-60-62-64-66-68 cm from the shoulder down. RIGHT FRONT PIECE: = 40-43-47-50-56-60 stitches. Knit 1 row from the right side and increase 4-5-5-6-6-6 stitches evenly spaced = 44-48-52-56-62-66 stitches. Purl 1 row from the wrong side with 5 band stitches in garter stitch towards mid-front and 2 stitches in garter stitch towards the split. Change to circular needle size 4.5 mm and work the next row from the right side as follows: 2 stitches in garter stitch, * knit 1 twisted, purl 1 *, work from *-* until there are 6 stitches left, knit 1 twisted and 5 band stitches in garter stitch. Continue this rib for 12 cm. Loosely cast off with garter stitch over garter stitch, knit over knit and purl over purl – remember CASTING-OFF TIP. BACK PIECE: = 70-76-84-90-102-110 stitches. Knit 1 row from the right side and increase 7-7-9-9-11-11 stitches evenly spaced = 77-83-93-99-113-121 stitches. Purl 1 row from the wrong side with 2 stitches in garter stitch on each side. Change to circular needle size 4.5 mm and work the next row from the right side as follows: 2 stitches in garter stitch, * knit 1 twisted, purl 1 *, work from *-* until there are 3 stitches left, knit 1 twisted and 2 stitches in garter stitch. Continue this rib for 12 cm. Loosely cast off with garter stitch over garter stitch, knit over knit and purl over purl – remember CASTING-OFF TIP. SLEEVES: Place the 42-46-50-54-60-62 stitches from the thread on the one side of the piece on double pointed needles/short circular needle size 5.5 mm and knit up 1 stitch in each of the 6-6-6-8-8-10 stitches cast on under the sleeve = 48-52-56-62-68-72 stitches. Insert a marker thread in the middle of the new stitches under the sleeve. Work stocking stitch in the round, AT THE SAME TIME when the sleeve measures 4 cm, decrease 2 stitches under the sleeve – read DECREASE TIP. Decrease like this every 7-4-3½-2½-1½-1½ cm a total of 4-5-6-8-9-10 times = 40-42-44-46-50-52 stitches. Continue working until the sleeve measures 28-26-24-23-20-18 cm. Change to double pointed needles size 4.5 mm and work rib (knit 1 twisted, purl 1) for 12 cm. Cast off with knit over knit and purl over purl. The sleeve measures approx. 40-38-36-35-32-30 cm from the division. Work the other sleeve in the same way. ASSEMBLY: Sew the buttons onto the left band. Fold the neck double to the wrong side and sew down. To avoid the neck being tight and rolling outwards, it is important that the seam is elastic. Sew the openings at the ends of the neck with small stitches. |
||||||||||
Diagram explanations |
||||||||||
|
||||||||||
 |
||||||||||
Have you finished this pattern?Tag your pictures with #dropspattern #citystridecardigan or submit them to the #dropsfan gallery. Do you need help with this pattern?You'll find 33 tutorial videos, a Comments/Questions area and more by visiting the pattern on garnstudio.com. © 1982-2026 DROPS Design A/S. We reserve all rights. This document, including all its sub-sections, has copyrights. Read more about what you can do with our patterns at the bottom of each pattern on our site. |
||||||||||


With over 40 years in knitting and crochet design, DROPS Design offers one of the most extensive collections of free patterns on the internet - translated to 17 languages. As of today we count 324 catalogues and 12290 patterns translated into English (UK/cm). 12290
We work hard to bring you the best knitting and crochet have to offer, inspiration and advice as well as great quality yarns at incredible prices! Would you like to use our patterns for other than personal use? You can read what you are allowed to do in the Copyright text at the bottom of all our patterns. Happy crafting!
Post a comment to pattern DROPS 227-2
We would love to hear what you have to say about this pattern!
If you want to leave a question, please make sure you select the correct category in the form below, to speed up the answering process. Required fields are marked *.