
Popular categories
Looking for a yarn?


Comments / Questions (33)
![]() Clare wrote:
Clare wrote:
Hi, I’m having trouble with reverse side of neck rib, is it 5 garter, pearl twisted, knit one, pearl twisted etc or something else, thanks
26.01.2026 - 05:18DROPS Design answered:
Hi Clare, Yes, the stitches which are knitted twisted from the right side will be purled twisted from the wrong side and the purled stitches will be knitted. So you will begin with 5 garter stitches (5 knitted stitches), purl 1 twisted, knit 1, purl 1 twisted, knit 1, etc.. Regards, Drops Team.
27.01.2026 - 06:27
![]() Lise Gauvreau wrote:
Lise Gauvreau wrote:
Faut-il fixer le tricot avant ou après la couture du collet?
02.12.2025 - 16:12DROPS Design answered:
Bonjour Mme Gauvreau, pour ce modèle, la couture pour doubler le col a été faite à la fin. Bon tricot!
02.12.2025 - 17:45
![]() Monica wrote:
Monica wrote:
P.s. detta gäller ju även beskrivningen av kragen. Där står ingenting om aviga maskor på avigsidan.
26.10.2025 - 12:04DROPS Design answered:
Hei Monica. Det er forklart hvordan du strikker 1. pinne på oket, deretter står det: Fortsätt detta mönstret. Så over de maskene du strikket rett fra retten, så må disse strikkes aviga fra avigsidan, slik at det blir slätstickat. Men når det skal strikkes etter diagrammet, må du se på diagramteksten på hvordan diagram ikonene skal strikkes fra avigsidan. mvh DROPS Design
10.11.2025 - 09:52
![]() Monica wrote:
Monica wrote:
Hej! i början på beskrivningen till oket står det "sticka rätmaskor" och sedan: Fortsätt detta mönstret. SAMTIDIGT på nästa varv från rätsidan börjar ökningen till RAGLAN osv. Det innebär ju rätmaskor även på avigsidan, men på bilden syns ju tydligt att koftan är slätstickad. Hur ska jag tyda detta?
25.10.2025 - 18:41DROPS Design answered:
Hei Monica. Første pinne er forklart fra retten , snu, så strikkes det samme mønster, men fra vrangen, se forklaringe til diagram A.1. Rettmaskene strikkes slik at de blir rett sett fra retten, men de 5 framkantsmaskor i hver side strikkes i rätstickning (alla varv stickas räta). Når du skal starte 3. pinne (retten) starter også raglanøkningene. mvh DROPS Design
03.11.2025 - 14:08
![]() Lise Gauvreau wrote:
Lise Gauvreau wrote:
C'est effectivement la longueur des 115 maillles (taille L) + 10 pour les bordures du col que je cherche. Je ne comprends pas les indications du schéma, à cet égard. Pouvez-vous le regarder et me dire où trouver la longueur du col?
27.06.2025 - 14:20DROPS Design answered:
Bonjour Mme Gauvreau, nous n'avons pas cette mesure, mais si votre échantillon est conforme (16 m x 20 rangs jersey = 10 x 10 cm), alors vous obtiendrez les mesures finales du schéma, notez que ces 115 mailles se tricotent en côtes (donc on a besoin de davantage de mailles pour pour la même largeur en jersey) et qu'elles comportent 5 m de bordure devant qui se chevaucheront. Quand le gilet est posé à plat, l'encolure mesure 22 cm - chaque épaule environ 4 cm de hauteur (ces mailles font partie du col). Bon tricot!
27.06.2025 - 17:04
![]() Lise Gauvreau wrote:
Lise Gauvreau wrote:
Bonjour, Je sais que le col mesure 12 cm puisque c'est indiqué dans le patron. Mais quelle doit en être la largeur ou la longueur?
26.06.2025 - 16:39DROPS Design answered:
Bonjour Mme Gauvreau, si vous pensez à la longueur des 107 à 133 mailles du col, c'set une mesure que nous n'avons pas, toutefois, vous trouverez celle de l'encolure pour chaque taille dans le schéma. J'espère que cela pourra vous aider, je ne suis pas bien sûre de la mesure que vous cherchez. Bon tricot!
27.06.2025 - 07:43
![]() Lise Gauvreau wrote:
Lise Gauvreau wrote:
Quelle doit être là longueur du col en taille L, une fois terminé? Le mien me paraît vraiment long, soit 66 cm .
25.06.2025 - 23:29DROPS Design answered:
Bonjour Mme Gauvreau, le col mesure 12 cm dans toutes les tailles, puis il est plié en doublé à la fin; posez votre ouvrage à plat, et retrouvez toutes les mesures pour votre taille dans le schéma - ou si j'ai mal compris votre question, merci de bien vouloir reformuler. Merci pour votre compréhension.
26.06.2025 - 16:16
![]() Lise Gauvreau wrote:
Lise Gauvreau wrote:
Au début de l'empiècement, j'ai sur ma broche 125 mailles (taille L). Les indications du premier rang de l'empiècement ne couvrent que 115 mailles. Qu'est-ce que je fais avec les 10 mailles qui restent?
30.04.2025 - 23:48Lise Gauvreau answered:
Oubliez ma précédente question, je viens de trouver mon erreur. Merci.
01.05.2025 - 01:49
![]() Raffaella wrote:
Raffaella wrote:
Hi I'm knitting the city stride cardigan, I didn't understand if the purl row, made flat, should be done completely the opposite of the knit row and if the twisted knit stitch should be done purlwise. The knit row came out perfect but they are not like doing the purl ones. Thank you very much
08.04.2025 - 09:48DROPS Design answered:
Dear Raffaella, the stitches knitted twisted from the right side will be purled twisted from the wrong side, and the stitches purled from the right side will be knitted from the wrong side., so that you get rib K1 twisted, P1 -as shown at the beginning of this video. Happy knitting!
08.04.2025 - 14:43
![]() Raffaella wrote:
Raffaella wrote:
Ciao, sto iniziando il collo del city stride cardigsn, il punto a dritto ritorto di ripete sul ferro successivo? O devo farlo a rovescio? Grazie mille
05.04.2025 - 15:42DROPS Design answered:
Buongiorno Raffaella, deve continuare con la lavorazione a coste come indicato. Buon lavoro!
10.04.2025 - 16:31
|
||||||||||
City Stride#citystridecardigan |
||||||||||
 |
 |
|||||||||
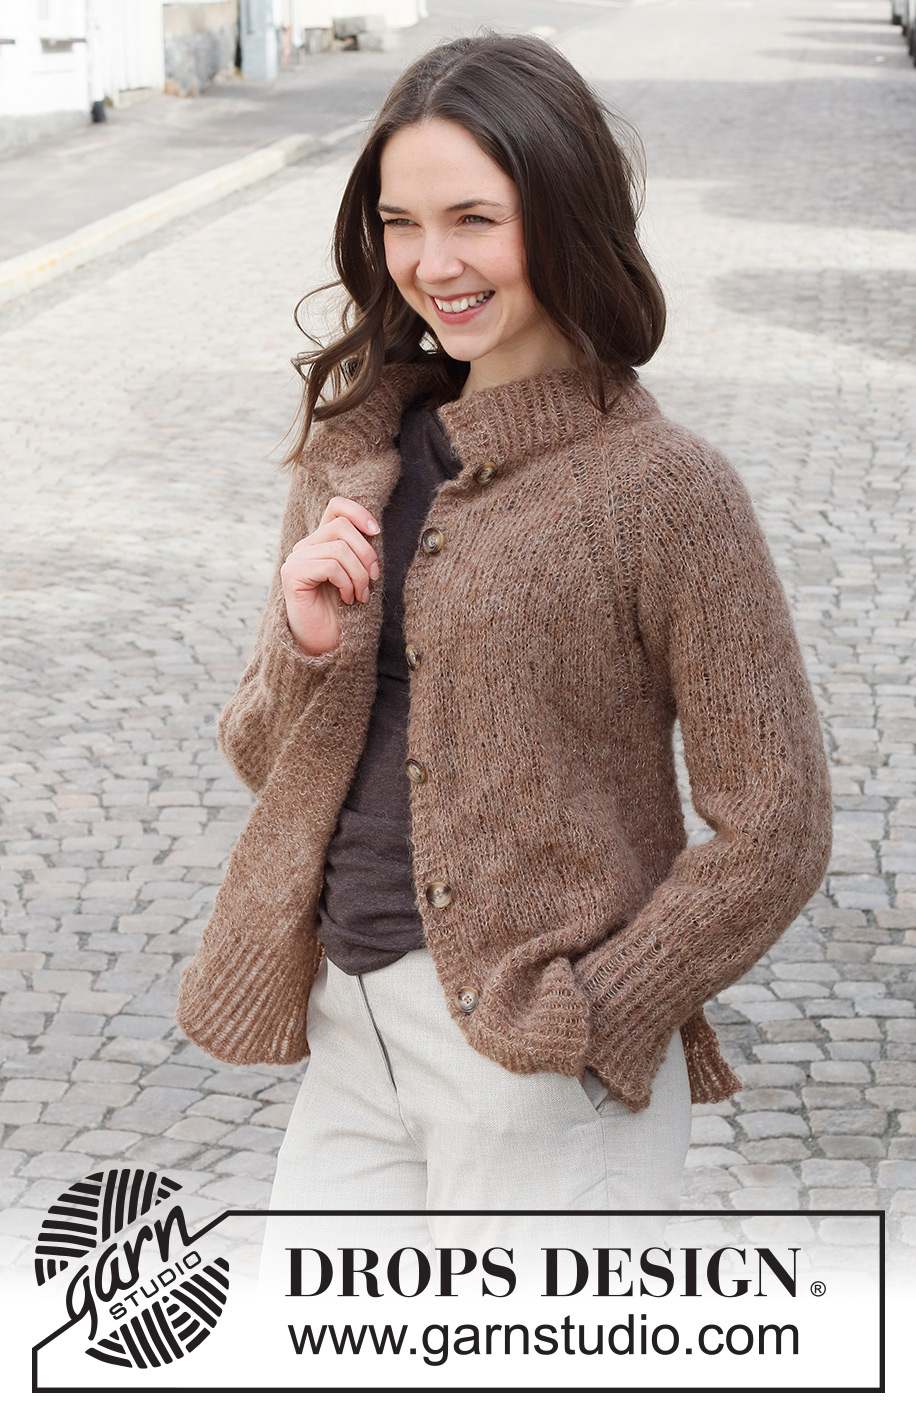
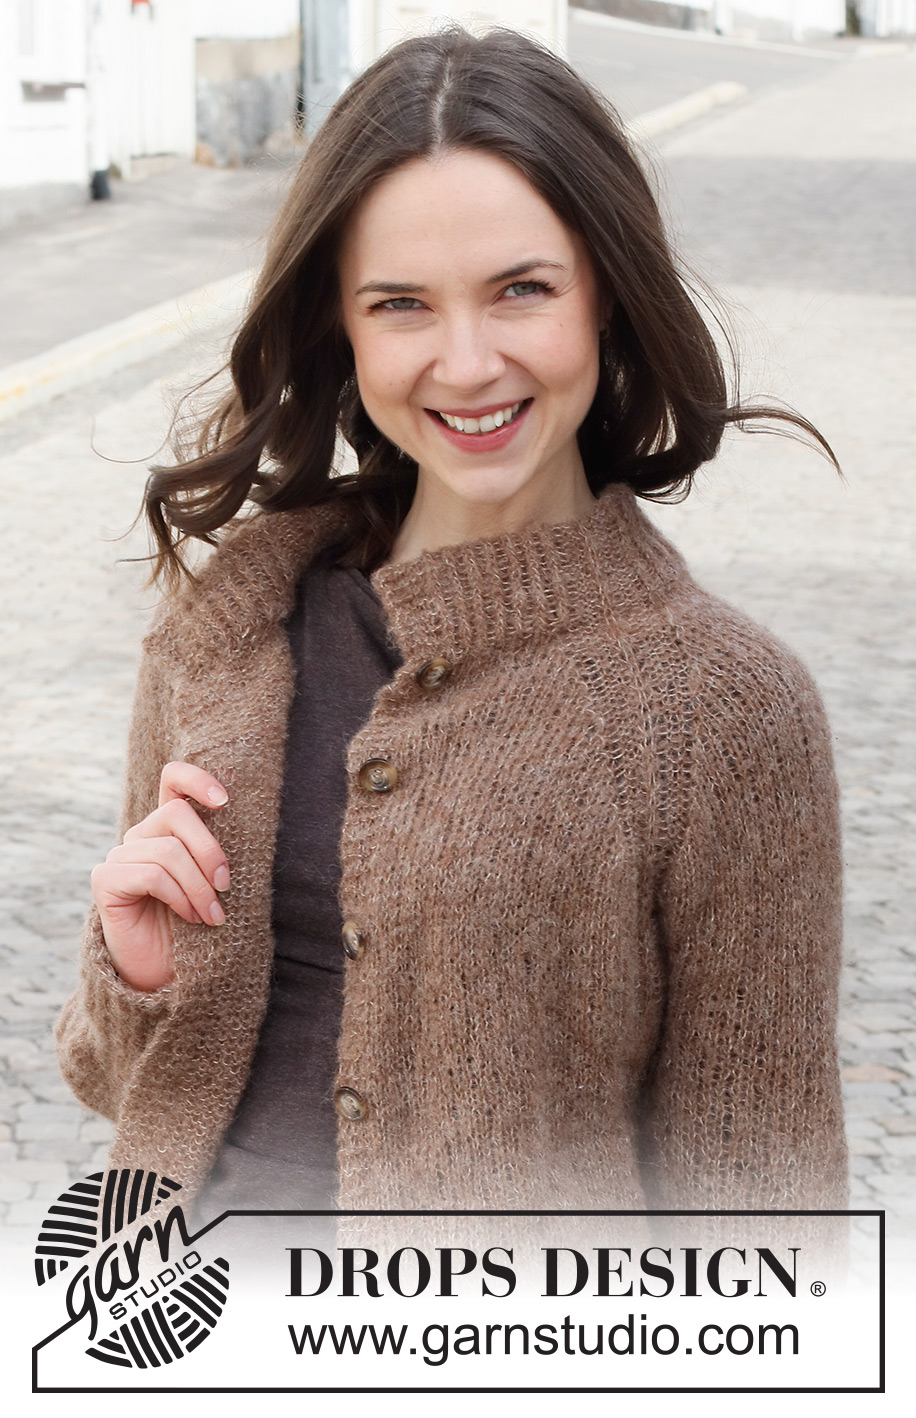
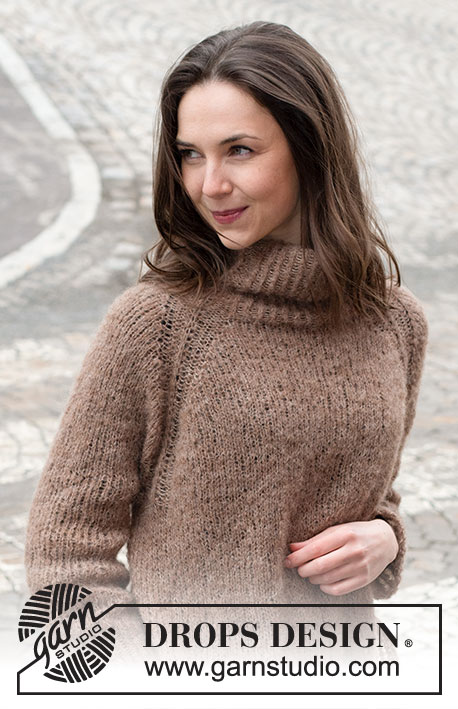
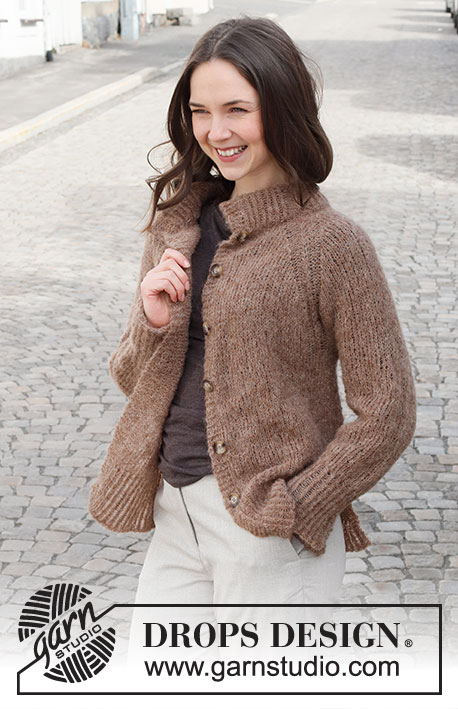
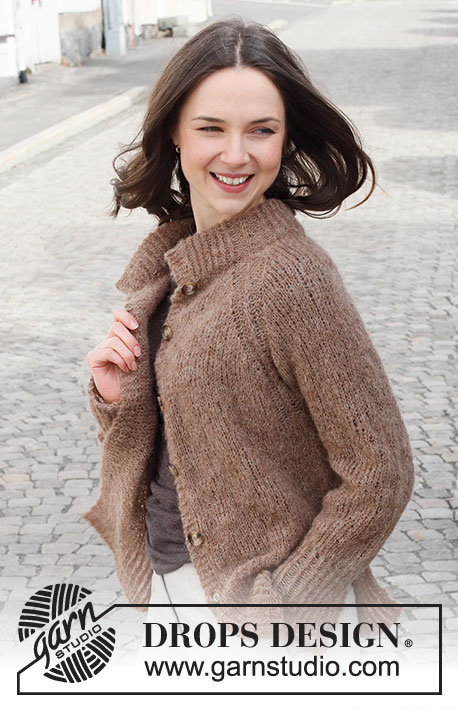
Knitted jacket in DROPS Brushed Alpaca Silk. The piece is worked top down, with raglan, double neck and ribbed raglan-line. Sizes S - XXXL.
DROPS 227-2 |
||||||||||
|
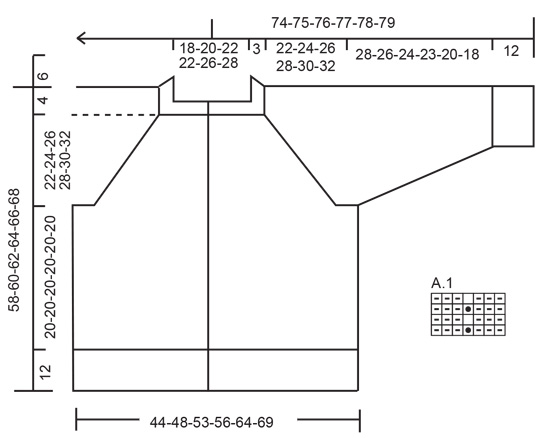
------------------------------------------------------- EXPLANATIONS FOR THE PATTERN ------------------------------------------------------- PATTERN: See diagram A.1. The diagram shows all rows in the pattern from the right side. RIDGE/GARTER STITCH (worked back and forth): Knit all rows. 1 ridge = knit 2 rows. INCREASE TIP (evenly spaced): To work out how to increase evenly, count the total number of stitches on the needle (e.g. 70 stitches) minus the front band stitches (= 4 stitches) and divide the remaining stitches by the number of increases to be made (e.g. 7) = 9.4. In this example, increase by making 1 yarn over after each 9th stitch. On the next row purl the yarn overs twisted to avoid holes. BUTTONHOLES: Work buttonholes on the right band (when the garment is worn). Work from the right side when there are 3 stitches left on the row as follows: Make 1 yarn over, knit 2 together and knit 1. On the next row knit the yarn over to leave a hole. The first buttonhole is worked approx. 1 cm below the neck. Then the other 5-5-5-6-6-6 buttonholes are worked with 9½-9½-10-9-9-9 cm between each one. RAGLAN: Increase 1 stitch on each side of 7 stitches (= A.1) in the transitions between the body and sleeves (= 8 stitches increased on the row). Increase 1 stitch by making 1 yarn over. On the next row purl the yarn overs twisted to avoid holes. Then work the new stitches in stocking stitch. DECREASE TIP (for sleeves): Decrease 1 stitch on either side of the marker thread as follows: Work until there are 3 stitches left before the marker thread, knit 2 together, knit 2 (marker thread sits between these 2 stitches), slip 1 stitch as if to knit, knit 1 and pass the slipped stitch over the knitted stitch (2 stitches decreased). CASTING-OFF TIP: To avoid the cast-off edge being tight you can cast off with a larger size needle. If the edge is still tight, make 1 yarn over after approx. each 4th stitch at the same time as casting off; the yarn overs are cast off as normal stitches. ------------------------------------------------------- START THE PIECE HERE: ------------------------------------------------------- JACKET – SHORT OVERVIEW OF THE PIECE. The neck and yoke are worked back and forth with circular needle, from mid front and top down. The yoke is divided for the body and sleeves and the body is continued back and forth with circular needle as far as the split, when each section is finished separately. The sleeves are worked in the round with double pointed needles/short circular needle, top down. DOUBLE NECK: Cast on 107-107-115-115-129-133 stitches (including 5 band stitches on each side towards mid-front) with circular needle size 4.5 mm and 2 strands Brushed Alpaca Silk. Remove 1 strand and continue with just 1 strand. Purl 1 row from the wrong side. The next row is worked from the right side as follows: 5 band stitches in GARTER STITCH – read description above, knit 1 twisted, * purl 1, knit 1 twisted *, work from *-* over the next 10-10-12-12-16-16 stitches, work A.1 (= 7 stitches), * knit 1 twisted, purl 1 *, repeat from *-* over the next 12 stitches, knit 1 twisted, work A.1, * knit 1 twisted, purl 1 *, work from *-* over the next 20-20-24-24-30-34 stitches, knit 1 twisted, work A.1, * knit 1 twisted, purl 1 *, repeat from *-* over the next 12 stitches, knit 1 twisted, work A.1, * knit 1 twisted, purl 1 *, work from *-* over the next 10-10-12-12-16-16 stitches, knit 1 twisted, 5 band stitches in garter stitch. Continue this rib for 12 cm. The neck will be folded double later. Insert 1 marker after the band at the beginning of the row; the yoke is measured from this marker. YOKE: Change to circular needle size 5.5 mm and work as follows from the right side: 5 band stitches in garter stitch, knit 11-11-13-13-17-17 and decrease 2-1-1-1-2-0 stitches over these stitches (= 9-10-12-12-15-17 stitches), A.1, knit 13 and decrease 3 stitches over these stitches (= 10 stitches), A.1, knit 21-21-25-25-31-35 and decrease 3-1-1-1-1-1 stitches over these stitches (= 18-20-24-24-30-34 stitches), A.1, knit 13 and decrease 3 stitches over these stitches (= 10 stitches), A.1, knit 11-11-13-13-17-17 and decrease 2-1-1-1-2-0 stitches over these stitches (= 9-10-12-12-15-17 stitches), 5 band stitches in garter stitch = 94-98-106-106-118-126 stitches. Remember the BUTTONHOLES on the right band – read description above. Continue the pattern, AT THE SAME TIME, on the next row from the right side begin to increase to RAGLAN – read description above (= 8 stitches increased). Increase every 2nd row (= each row from the right side), a total of 16-18-20-22-25-26 times = 222-242-266-282-318-334 stitches. REMEMBER THE KNITTING TENSION! Continue working without further increases until the piece measures 22-24-26-28-30-32 cm from the marker. Now divide for the body and sleeves as follows: Work the first 37-40-44-46-52-55 stitches as before (= left front piece), place the next 42-46-50-54-60-62 stitches on a thread for the sleeve, cast on 6-6-6-8-8-10 stitches (= in side under sleeve), work the next 64-70-78-82-94-100 stitches (= back piece), place the next 42-46-50-54-60-62 stitches on a thread for the sleeve, cast on 6-6-6-8-8-10 stitches (= in side under sleeve), work the remaining 37-40-44-46-52-55 stitches (= right front piece). BODY: = 150-162-178-190-214-230 stitches. Insert 1 marker in each side, in the middle of the 6-6-6-8-8-10 new stitches under each sleeve. Allow the markers to follow your work onwards; they will be used when dividing for the split. Continue back and forth, with stocking stitch and 5 band stitches in garter stitch on each side until the piece measures 20 cm from the division – finish after a row from the wrong side. There is approx. 12 cm left to finished length; try the jacket on and work to desired length. Now divide the piece at each marker and finish each piece separately. LEFT FRONT PIECE (when the garment is worn): = 40-43-47-50-56-60 stitches. Knit 1 row from the right side and increase 4-5-5-6-6-6 stitches evenly spaced – read INCREASE TIP = 44-48-52-56-62-66 stitches. Purl 1 row from the wrong side with 5 band stitches in garter stitch towards mid-front and 2 stitches in garter stitch towards the split. Change to circular needle size 4.5 mm and work the next row from the right side as follows: 5 band stitches in garter stitch, * knit 1 twisted, purl 1 *, work from *-* until there are 3 stitches left, knit 1 twisted and 2 stitches in garter stitch. From the wrong side the rib is worked as follows: 2 stitches in garter stitch, purl 1 twisted * knit 1, purl 1 twisted *, work from *-* until there are 5 stitches left, 5 band stitches in garter stitch. Continue this rib for 12 cm. Loosely cast off with garter stitch over garter stitch, knit over knit and purl over purl – read CASTING-OFF TIP. The jacket measures approx. 58-60-62-64-66-68 cm from the shoulder down. RIGHT FRONT PIECE: = 40-43-47-50-56-60 stitches. Knit 1 row from the right side and increase 4-5-5-6-6-6 stitches evenly spaced = 44-48-52-56-62-66 stitches. Purl 1 row from the wrong side with 5 band stitches in garter stitch towards mid-front and 2 stitches in garter stitch towards the split. Change to circular needle size 4.5 mm and work the next row from the right side as follows: 2 stitches in garter stitch, * knit 1 twisted, purl 1 *, work from *-* until there are 6 stitches left, knit 1 twisted and 5 band stitches in garter stitch. Continue this rib for 12 cm. Loosely cast off with garter stitch over garter stitch, knit over knit and purl over purl – remember CASTING-OFF TIP. BACK PIECE: = 70-76-84-90-102-110 stitches. Knit 1 row from the right side and increase 7-7-9-9-11-11 stitches evenly spaced = 77-83-93-99-113-121 stitches. Purl 1 row from the wrong side with 2 stitches in garter stitch on each side. Change to circular needle size 4.5 mm and work the next row from the right side as follows: 2 stitches in garter stitch, * knit 1 twisted, purl 1 *, work from *-* until there are 3 stitches left, knit 1 twisted and 2 stitches in garter stitch. Continue this rib for 12 cm. Loosely cast off with garter stitch over garter stitch, knit over knit and purl over purl – remember CASTING-OFF TIP. SLEEVES: Place the 42-46-50-54-60-62 stitches from the thread on the one side of the piece on double pointed needles/short circular needle size 5.5 mm and knit up 1 stitch in each of the 6-6-6-8-8-10 stitches cast on under the sleeve = 48-52-56-62-68-72 stitches. Insert a marker thread in the middle of the new stitches under the sleeve. Work stocking stitch in the round, AT THE SAME TIME when the sleeve measures 4 cm, decrease 2 stitches under the sleeve – read DECREASE TIP. Decrease like this every 7-4-3½-2½-1½-1½ cm a total of 4-5-6-8-9-10 times = 40-42-44-46-50-52 stitches. Continue working until the sleeve measures 28-26-24-23-20-18 cm. Change to double pointed needles size 4.5 mm and work rib (knit 1 twisted, purl 1) for 12 cm. Cast off with knit over knit and purl over purl. The sleeve measures approx. 40-38-36-35-32-30 cm from the division. Work the other sleeve in the same way. ASSEMBLY: Sew the buttons onto the left band. Fold the neck double to the wrong side and sew down. To avoid the neck being tight and rolling outwards, it is important that the seam is elastic. Sew the openings at the ends of the neck with small stitches. |
||||||||||
Diagram explanations |
||||||||||
|
||||||||||
 |
||||||||||
Have you finished this pattern?Tag your pictures with #dropspattern #citystridecardigan or submit them to the #dropsfan gallery. Do you need help with this pattern?You'll find 33 tutorial videos, a Comments/Questions area and more by visiting the pattern on garnstudio.com. © 1982-2026 DROPS Design A/S. We reserve all rights. This document, including all its sub-sections, has copyrights. Read more about what you can do with our patterns at the bottom of each pattern on our site. |
||||||||||


With over 40 years in knitting and crochet design, DROPS Design offers one of the most extensive collections of free patterns on the internet - translated to 17 languages. As of today we count 324 catalogues and 12290 patterns translated into English (UK/cm). 12290
We work hard to bring you the best knitting and crochet have to offer, inspiration and advice as well as great quality yarns at incredible prices! Would you like to use our patterns for other than personal use? You can read what you are allowed to do in the Copyright text at the bottom of all our patterns. Happy crafting!
Post a comment to pattern DROPS 227-2
We would love to hear what you have to say about this pattern!
If you want to leave a question, please make sure you select the correct category in the form below, to speed up the answering process. Required fields are marked *.