
Popular categories
Looking for a yarn?


Comments / Questions (82)
![]() Frauke wrote:
Frauke wrote:
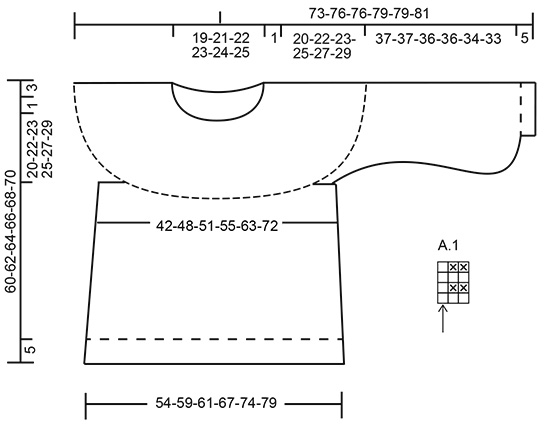
Guten Tag! In der Anleitung ist die Rede von eime Diagramm A1, aus dem das Muster ersichtlich ist. Leider kann ich das Diagramm A1 nirgens in der Anleitung finden. Wo hat es sich versteckt? Lieben Dank & Gruß Frauke
10.12.2019 - 17:52DROPS Design answered:
Liebe Frau Frauke, das Diagram finden Sie neben der Maßskizze, unter der Ärmel - es ist ein kleines Diagram, das über 3 Maschen und 4 Reihen gestrickt wird. Viel Spaß beim stricken!
11.12.2019 - 08:03
![]() Caroline Le Goff wrote:
Caroline Le Goff wrote:
Ou est le diagramme je ne le vois pas ?
10.12.2019 - 12:38DROPS Design answered:
Bonjour Mme Le Goff, vous trouverez le diagramme A.1 à droite du schéma des mesures, juste sous la manche. C'est un petit diagramme de 3 mailles sur 4 rangs. Bon tricot!
10.12.2019 - 13:26
![]() Katie wrote:
Katie wrote:
Hallo, ich habe eine Frage zur Rundpassenzunahme. Wie muss ich die Maschen, die ich zunehme, in der darauffolgenden Reihe stricken? Links oder rechts? Und verstehe ich das richtig, dass sich die Abstände zwischen den "Gräten" dementsprechend immer verbreitern? Ich würde mich sehr über eine Antwort freuen!
18.06.2019 - 18:22DROPS Design answered:
Liebe Katie, die Zunahmen werden krausrechts gestrickt, dh entweder links oder rechts je nach dem Sie bei einer rechte oder einer linke Runde zunehmen. Die Maschenanzahl zwischen den rechten Maschen soll ja zunehmen, die Maschen nehmen Sie in alle 2. Krausrechtsbereich zu, so daß sind es am Ende der Passe die selbe Maschenanzahl in jedem Krausrechtsbereich (= zwischen die rechten Maschen). Viel Spaß beim stricken!
19.06.2019 - 07:00
![]() Mela wrote:
Mela wrote:
Liebes Drops-Team, sehe ich es richtig, dass bei der Rundpasse durch die Zunahme mal rechts und mal links von der rechten Masche die Anzahl der Maschen in den einzelnen A1 unterschiedlich ist? Irgendwann gleicht es sich wieder aus, jedoch wären bei mir in Größe M am Ende der Passenzunahmen das 1. Und 2.A1 je 7 Maschen und das 3. A1 nur 5 Maschen. Ist das richtig so? Auf dem Foto lässt es sich nicht genau erkennen. Vielen Dank und Gruß!
02.06.2019 - 22:23DROPS Design answered:
Liebe Mela, es wird immer in jedem 3. Rapport von A.1 zugenommen, beachten Sie daß Sie immer 13 Maschen pro Zunahmenrunde zunehmen, so haben Sie die richtige Maschenanzahl am Ende der Passe. Viel Spaß beim stricken!
03.06.2019 - 10:30
![]() Liv Eva Bates wrote:
Liv Eva Bates wrote:
Hei, skal det i 4. økning (eller 1. økning på nytt) økes før eller etter siste rettmaske? Turen er før, men der står gjernta 1. til 3. økning så det kan gi inntrykk av øke etter som i første omgang.
23.05.2019 - 14:55DROPS Design answered:
Hei Liv. Du øker vekselsvis før og etter siste masken i A.1. dvs 4. gang du øker økes det før siste masken (1. økning = etter masken, 2. økning = før masken, 3 økning = etter masken). - se øketips 1. Du øker i hver tredje A.1: første økeomgang øker du i den første A.1 og strikker de neste 2 som vanlig (gjenta ut omgangen), andre økeomgang strikkes første A.1 uten øking, så økes det i andre A.1, og tredje A.1 strikkes uten økning (gjenta ut omgangen). Tredje økeomgang strikkes de 2 første A.1 uten øking, og det økes i den tredje A.1 (gjenta ut omgangen). God fornøyelse
24.05.2019 - 07:36
![]() Sandra wrote:
Sandra wrote:
Hur tvättar man denna tröja?
16.04.2019 - 11:51DROPS Design answered:
Hej, du hittar tvättinstruktionerna på insidan av banderollen.
16.04.2019 - 17:57
![]() Irene Andersen wrote:
Irene Andersen wrote:
Hvis man har strikket nedefra og op, hvor mange masker skal der så være på pinden, når det hele samles?
24.03.2019 - 08:25
![]() Heidi wrote:
Heidi wrote:
De lodrette linjer, består de af retmasker eller vrangmasker? Hvor mange masker består en lodret linje af? Går der 1 maske eller 2 masker pr. lodrette linje?
02.03.2019 - 08:52DROPS Design answered:
Hei Heidi. Mener du linjene i mønsteret på bærestykket? Bærestykket strikkes etter diagram A.1 (1 rute = 1 maske. De tomme rutene = rettmasker, rutene med kryss = vrangmasker). De linjene du ser på bildet er rettmasken med pil i A.1. Maskene mellom strikkes i retstrikk. God fornøyelse
04.03.2019 - 13:08
![]() Joe wrote:
Joe wrote:
Vraiment un superbe modèle. Je viens de terminer une adaptation de celui-ci en 10 ans à manches courtes. 3 pelotes ont été utilisées (75 grammes) avec le haut et les manches en 3.5 et le corps en 4. Merci pour toutes ces merveilles
24.02.2019 - 12:12
![]() Joe wrote:
Joe wrote:
Petite précision : c'est le deuxième que je tricote et j'ai utilisé 5 pelotes de 25 grammes soit 125 grammes et non 175 comme indiqué pour une taille S.
17.02.2019 - 10:38
|
||||||||||
Tornade#tornadesweater |
||||||||||
|
|
||||||||||
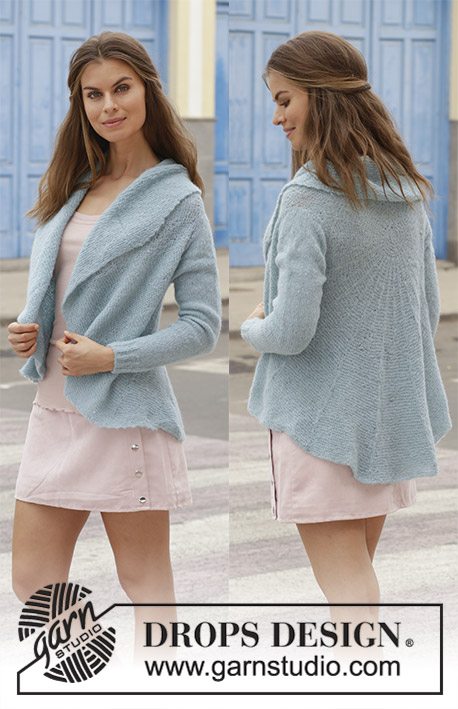
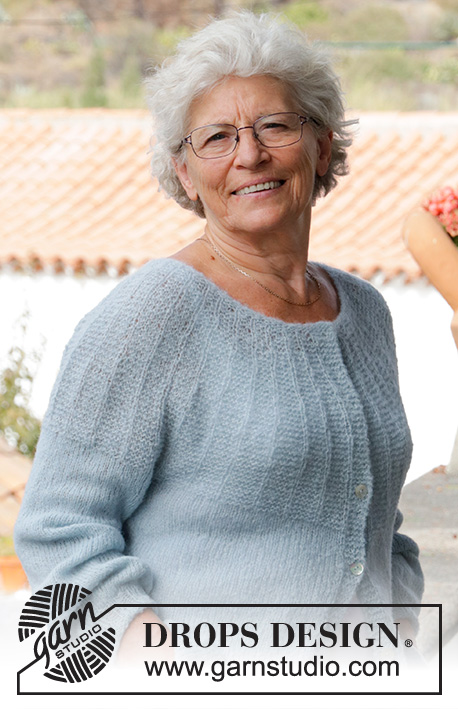
Knitted jumper with garter stitch and round yoke, worked top down. Sizes S - XXXL. The piece is worked in DROPS Brushed Alpaca Silk.
DROPS 188-1 |
||||||||||
|
INFORMATION FOR THE PATTERN: RIDGE/GARTER STITCH (worked in the round): 1 ridge = 2 rounds. Knit 1 round and purl 1 round. PATTERN: See diagram A.1. INCREASE TIP-1 (for round yoke): Increase stitches alternately before and after the last knitted stitch in A.1 – See arrow in diagram. i.e. the first increase is after the last knitted stitch and the second is increased before the last knitted stitch. Increase as follows: Make 1 yarn over between 2 stitches, the yarn over is worked twisted on the next round. Then the increased stitch is worked in garter stitch. In other words for each increased stitch, there will be 1 more stitch in garter stitch in the A.1 you are increasing in. INCREASE TIP-2 (for increases in sides of body and sleeves): Work until there are 2 stitches left before the marker thread, make 1 yarn over, knit 4 stitches (the marker thread sits in the middle of these stitches), make 1 yarn over (= 2 stitches increased). Increase like this at each marker thread. The yarn overs are worked twisted on the next round to avoid holes. DECREASE TIP (for sleeves): Work until there are 3 stitches left before the marker thread, slip 1 stitch as if to knit, knit 1, pass the slipped stitch over the knitted stitch, knit 2 stitches (the marker thread sits in the middle of these stitches), knit the next 2 stitches together (= 2 stitches decreased). ---------------------------------------------------------- JUMPER: The piece is worked in the round, top down. The yoke is worked in the round, then the piece is divided and the sleeves and body are then worked separately in the round. YOKE: Cast on 84-88-94-98-102-104 stitches with circular needle size 4 mm. Work 2 RIDGES – see description above. The round starts mid back. The next round is worked as follows: Knit 16-17-18-19-20-21 stitches and increase 3-4-3-4-3-5 stitches evenly over these stitches (= half back piece), * knit 1, 1 yarn over *, work from *-* over the next 10 stitches (= sleeve = 10 stitches increased), knit 32-34-37-39-41-42 stitches and increase 6-9-6-8-6-10 stitches evenly over these stitches (= front piece), * knit 1, 1 yarn over *, work from *-* over the next 10 stitches (= sleeve = 10 stitches increased), knit 16-17-19-20-21-21 stitches and increase 4-5-3-5-4-5 stitches evenly over these stitches (= half back piece) = 117-126-126-135-135-144 stitches. Change to circular needle size 5 mm. Then work A.1 (= 3 stitches) over all stitches (= 39-42-42-45-45-48 times in width), work the yarn overs twisted to avoid holes. AT THE SAME TIME increase as follows: ROUND YOKE: Increase alternately in every 3rd repeat of A.1 in width every 4th round, i.e. as follows: 1st INCREASE: * Increase 1 stitch – read INCREASE TIP-1, in the first A.1, then work 2 repeats of A.1 in width as before *, work from *-* to end of round = 13-14-14-15-15-16 stitches increased. Work 3 rounds of pattern. REMEMBER THE KNITTING TENSION! 2nd INCREASE: * Work 1 repeat of A.1 as before, increase 1 stitch in the next A.1, work the next repeat of A.1 as before *, work from *-* to end of round = 13-14-14-15-15-16 stitches increased. Work 3 rounds of pattern. 3rd INCREASE: * Work 2 repeats of A.1 as before, increase 1 stitch in the next A.1 *, work from *-* to end of round = 13-14-14-15-15-16 stitches increased. Work 3 rounds of pattern. Repeat 1st to 3rd increase a total of 3-3-3-3-4-4 times (= a total of 9-9-9-9-12-12 increase rounds), then repeat 1st increase, 0-1-1-1-1-1 more time (= a total of 9-10-10-10-13-13 increase rounds), then repeat 2nd increase, 0-0-1-1-0-1 more time (= a total of 9-10-11-11-13-14 increase rounds) = 234-266-280-300-330-368 stitches. Continue with pattern until the piece measures 21-23-24-26-28-30 cm from the cast-on edge. The next round is worked as follows: Knit 31-36-38-42-47-55 stitches (= half the back piece), place the next 54-60-64-66-70-74 stitches on 1 thread (= sleeve), cast on 8-8-10-10-12-12 new stitches on needle, insert 1 marker thread in the middle of these stitches (= in side under sleeve), knit the next 63-73-76-84-95-110 stitches (= front piece), place the next 54-60-64-66-70-74 stitches on 1 thread (= sleeve), cast on 8-8-10-10-12-12 new stitches on needle, insert 1 marker thread in the middle of these stitches (=in side under sleeve), knit 32-37-38-42-48-55 stitches (=half the back piece). Body and sleeves are finished separately. THE PIECE IS NOW MEASURED FROM HERE! BODY: = 142-162-172-188-214-244 stitches. Continue working stocking stitch. When the piece measures 3 cm from where the sleeves were placed on threads, increase 1 stitch on each side of the marker threads (= 4 stitches increased) – read INCREASE TIP-2! Increase like this every 2½-3-3-2½-3-5 cm a total of 10-9-9-10-9-6 times = 182-198-208-228-250-268 stitches. When the piece measures 31-31-32-32-32-32 cm from where the sleeves were placed on threads, work 1 round as before where you increase 2-2-0-0-2-0 stitches evenly on round = 184-200-208-228-252-268 stitches. Change to circular needle size 4 mm. Then work rib (purl 2 / knit 2) for 5 cm. Cast off with knit over knit and purl over purl. Make sure the cast-off edge is not tight; you can cast off with a needle 1 size larger if necessary. The piece measures approx. 36-36-37-37-37-37 cm from where the sleeves and body were separated and a total of 60-62-64-66-68-70 cm from the shoulder. SLEEVE: The piece is worked in the round with double pointed needles/short circular needle. Place the 54-60-64-66-70-74 stitches from the thread on the one side of the piece on double pointed needles size 5 mm and knit up 1 stitch in each of the 8-8-10-10-12-12 stitches cast on under the sleeve, insert 1 marker thread in the middle of these stitches = 62-68-74-76-82-86 stitches. Work stocking stitch. When the piece measures 3 cm from where the sleeve was divided from the body, decrease 1 stitch on each side of the marker thread (= 2 stitches decreased) – read DECREASE TIP! Change to short circular needles when needed. Decrease like this every 3 cm a total of 4-4-5-5-6-6 times = 54-60-64-66-70-74 stitches. Then increase 1 stitch on each side of the marker thread (= 2 stitches increased). Increase like this every 3-3-3-3-2-2 cm a total of 7-6-6-7-7-7 times = 68-72-76-80-84-88 stitches. When the piece measures 37-37-36-36-34-33 cm from where the sleeve was divided from the body, change to double pointed needles size 4 mm and work 1 round where all the stitches are knitted together 2 and 2 = 34-36-38-40-42-44 stitches. Then work rib (= purl 2 / knit 2) AT THE SAME TIME as you increase 2-0-2-0-2-0 stitches evenly on the first round = 36-36-40-40-44-44 stitches. Cast off with knit over knit and purl over purl when piece measures 42-42-41-41-39-38 cm from where the sleeve was divided from the body and a total of 63-65-65-67-67-68 cm from the neck edge. Work the other sleeve in the same way. |
||||||||||
Diagram explanations |
||||||||||
|
||||||||||
 |
||||||||||
Have you finished this pattern?Tag your pictures with #dropspattern #tornadesweater or submit them to the #dropsfan gallery. Do you need help with this pattern?You'll find 27 tutorial videos, a Comments/Questions area and more by visiting the pattern on garnstudio.com. © 1982-2026 DROPS Design A/S. We reserve all rights. This document, including all its sub-sections, has copyrights. Read more about what you can do with our patterns at the bottom of each pattern on our site. |
||||||||||


With over 40 years in knitting and crochet design, DROPS Design offers one of the most extensive collections of free patterns on the internet - translated to 17 languages. As of today we count 324 catalogues and 12290 patterns translated into English (UK/cm). 12290
We work hard to bring you the best knitting and crochet have to offer, inspiration and advice as well as great quality yarns at incredible prices! Would you like to use our patterns for other than personal use? You can read what you are allowed to do in the Copyright text at the bottom of all our patterns. Happy crafting!
Post a comment to pattern DROPS 188-1
We would love to hear what you have to say about this pattern!
If you want to leave a question, please make sure you select the correct category in the form below, to speed up the answering process. Required fields are marked *.