
Popular categories
Looking for a yarn?


Comments / Questions (41)
![]() Turid Gudim Aune wrote:
Turid Gudim Aune wrote:
Ønsker mønster sendt sammen med garnet
11.11.2025 - 19:51
![]() Turid Gudim Aune wrote:
Turid Gudim Aune wrote:
Lnsker mønster sendt sammen med garnet
11.11.2025 - 19:50
![]() Íris Edda wrote:
Íris Edda wrote:
Ég geri prjónafestu 21x28 og passa prjónar nr.3 1/2 hjá mér. En samt næ ég ekki nærri því að klára bekkinn á þessari peysu fyrir stærð 3/4 ára. Gat klárað útaukningu þá var bekkurinn orðin 15. cm. Þannig að þið þurfið að skoða þetta munstur aðeins betur. Ég prjóna ekki of fast og ekki of laust.
13.07.2025 - 11:50
![]() Íris Edda Jónsdóttir wrote:
Íris Edda Jónsdóttir wrote:
ER ekki að fatta, Er að prjóna á 3/4 ára. Munstureining A1, hvar á ég að stoppa eða á ég að sleppa einhverri umferð í munstrinu svo ég nái að hafa bekkinn 15.cm fyrir þennan aldur?
10.07.2025 - 14:04DROPS Design answered:
Blessuð Íris Edda. Athugaðu prjónfestuna hjá þér. DROPS SOKKAPRJÓNAR OG HRINGPRJÓNAR (40 og 60 cm) NR 4 – eða þá stærð sem þarf til að 21 lykkja x 28 umferðir með sléttprjóni verði 10 x 10 cm. ATH: Til að lengdin á berustykki verði rétt er mjög mikilvægt að prjónfestan passi á hæðina. Gangi þér vel.
11.07.2025 - 11:04
![]() Maria Burgos wrote:
Maria Burgos wrote:
Muchas gracias por los modelos me parecen geniales e hice varios. Lastima que en Argentina no tenemos Drops. Saludos!
23.02.2025 - 16:31
![]() Barbara wrote:
Barbara wrote:
Ich würde diesen Pullover gerne mit dem Garn Nepal stricken. Gibt es dazu eine Umrechnung? Das Kind trägt Größe 122/128 und für die ältere Schwester habe ich den Pullover „Oktober Dream“in S gestrickt. Der hat ja ein ähnliches Muster. Ich habe noch Wolle übrig und würde etwas dazu kaufen und diesen Pullover stricken. Würde es passen, wenn ich mit dem dickeren Garn nach den Angaben für die Größe 110/116 stricke. Ich bin dankbar für jeden Tipp. Herzliche Grüße, Barbara
18.02.2025 - 21:40DROPS Design answered:
Liebe Barbara, hier finden Sie Pullover für 122/128, von oben nach unten gestrickt und mit einer Rundpasse und einer Wolle der Garngruppe C (wie Nepal), das kann Ihnen vielleicht helfen, dieses Modell anzupassen. Sonnst können Sie auch je nach Ihrer eigenen Maschenprobe die Anleitung umrechnen. Viel Spaß beim Stricken!
19.02.2025 - 07:45
![]() Renate wrote:
Renate wrote:
Ich habe den Kunderpulli für meine Enkelin gestrickt. Das Originalgarn lief leicht durch die Finger. Die Anleitung war perfekt, so dass das Ergebnis wirklich sehr gelungen ist. Gern stricke ich jetzt noch einen Pulli für mich. Danke
17.01.2025 - 21:03
![]() Tina wrote:
Tina wrote:
Hvad betyder 14 rapporter?
19.11.2024 - 12:20DROPS Design answered:
Hej Tina. Det är en upprepning av diagrammet 14 gånger på bredden, du kan läsa mer om det här. Mvh DROPS Design
19.11.2024 - 14:38
![]() Miriam wrote:
Miriam wrote:
Ich stricke Größe 12 Jahre, die Passe ist fast fertig, als nächstes kommt die Runde in der die Maschen für die Ärmel (je 62) stillgelegt werden. Ich verstehe nicht was damit gemeint ist, dass ich 6 Maschen (unterm Arm) neu anschlagen soll. Was ist hier gemeint, wie geht das? Danke für Tipps!
07.10.2024 - 22:55DROPS Design answered:
Liebe Miriam, schauen Sie mal diese Lektion, ab Bild 9 zeigen wir wie man die Verteilung bearbeitet und wie diese Maschen unter die Ärmel angeschlagen werden (siehe auch Video / Lektion). Viel Spaß beim Stricken!
08.10.2024 - 07:41
![]() Carine wrote:
Carine wrote:
When you say to do an elevation at the back do you mean we have to do German short rows?
13.09.2024 - 16:58DROPS Design answered:
Dear Carine, the elevation of the back is done with short rows, the pattern does not specify what type of short rows. We generally suggest thightening the yarn when turning and/or picking up the thread before the next stitch and knit together with the last stitch, but you can also use German short rows, if that is what you prefer. Happy Knitting!
15.09.2024 - 02:20
|
||||||||||||||||||||||
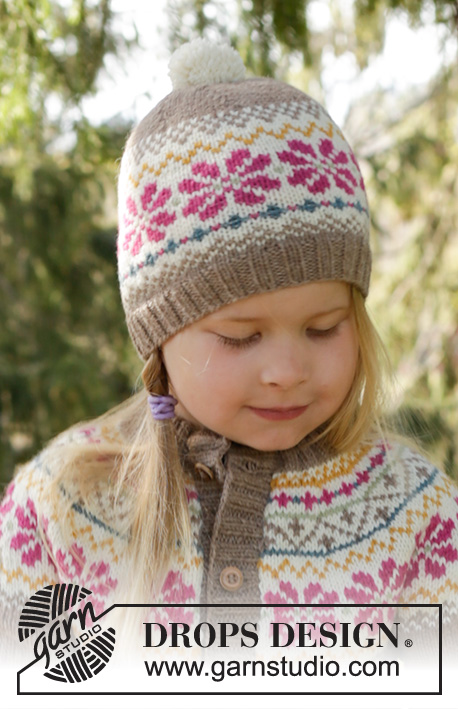
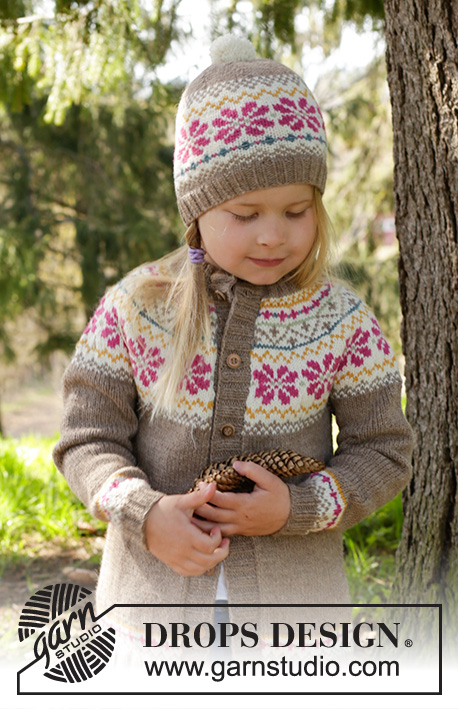
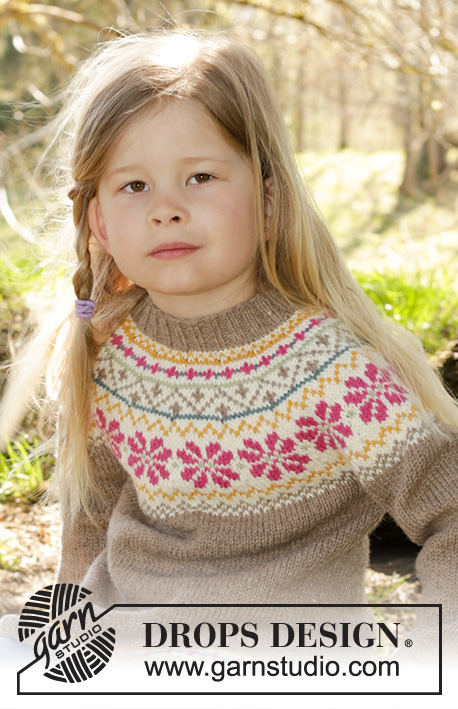
Prairie Fairy Jumper#prairiefairyjumper |
||||||||||||||||||||||
 |
 |
|||||||||||||||||||||
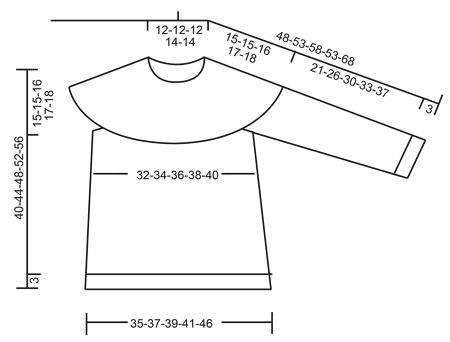
Knitted jumper with round yoke and Nordic pattern in DROPS Lima. Size children 3-12 years.
DROPS Children 27-8 |
||||||||||||||||||||||
|
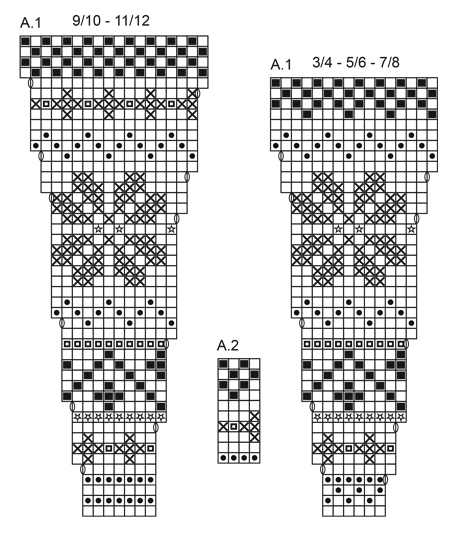
PATTERN: See diagrams A.1 and A.2. The diagrams are worked in stocking st. See diagram for correct size. KNITTING TIP: To avoid the knitting tension to tighten when working pattern, it is important not to tighten the strands on back side of piece. Switch to a higher needle no when working pattern if the pattern is somewhat tight. -------------------------------------------------------- JUMPER: Worked in the round, top down. YOKE: Cast on 84-88-92-96-100 sts on a short circular needle size 3 mm with beige. Insert 1 marker at beg of round (= mid back). Work rib = K 2/P 2 for 3-3-4-4-5 cm (= neck edge). Switch to a short circular needle size 4 mm. K 1 round while at the same time adjusting no of sts to 78-84-90-98-105. Then work an elevation at the back in stocking st as follows: K 8 sts past marker, turn, tighten yarn and P 16 sts on return, turn, tighten yarn and K 24 sts, turn, continue by working 8 sts more on every turn until a total of 48-48-64-64-80 sts have been worked, turn and K 1 round until marker mid back again. Then work A.1 (= 13-14-15-14-15 repetitions in width) - see diagram for size. READ KNITTING TIP! REMEMBER THE KNITTING TENSION Switch to a longer circular needle when needed. When A.1 has been worked, there are 208-224-240-252-270 sts on needle. Work 0-1-2-0-1 cm with beige. Piece now measures approx. 15-16-17-17-18 cm mid front (measured without rib in the neck). Continue piece with beige and in stocking st. First work 1 round while AT THE SAME TIME inc 4-4-4-12-10 sts evenly = 212-228-244-264-280 sts. Work next round as follows: Work 31-33-35-37-39 sts, slip the next 44-48-52-58-62 sts on 1 stitch holder for sleeve (without working them first), cast on 6 new sts, work 62-66-70-74-78 sts (= front piece), slip the next 44-48-52-58-62 sts on 1 stitch holder for sleeve (without working them first), cast on 6 new sts, work 31-33-35-37-39 sts. BODY: = 136-144-152-160-168 sts. NOW MEASURE PIECE FROM HERE! Insert 1 marker in each side, in the middle of the 6 new sts that were cast on. Continue in stocking st. When piece measures 3 cm, inc 1 st on each side of markers (= 4 sts inc). Inc every 7-9-10-12-13 cm 3 times in total = 148-156-164-172-180 sts. Continue to work until piece measures 19-23-26-29-32 cm. Work A.2. Switch to circular needle size 3 mm. K 1 round while AT THE SAME TIME inc 16 sts evenly = 164-172-180-188-196 sts. Then work rib K 2, P 2. Work rib for 3 cm. Cast off with K over K and P over P. SLEEVE: Slip sts from one stitch holder on double pointed needles size 4 mm, cast in addition on 6 sts mid under sleeve (insert 1 marker in the middle of these sts) = 50-54-58-64-68 sts. NOW MEASURE PIECE FROM HERE! Work in stocking st in the round with beige. When sleeve measures 2 cm, dec 1 st on each side of marker. Repeat dec every 4½-3½-4-3-3½ cm 5-7-7-10-10 times in total = 40-40-44-44-48 sts. When sleeve measures 18-23-27-30-34 cm, work diagram A.2, then switch to double pointed needles size 3 mm. Work rib = K 2/P 2 for 3 cm, then cast off with K over K and P over P. Work the same way over the sts on the other stitch holder. ASSEMBLY: Sew the openings under the sleeves. |
||||||||||||||||||||||
Diagram explanations |
||||||||||||||||||||||
|
||||||||||||||||||||||
 |
||||||||||||||||||||||
 |
||||||||||||||||||||||
Have you finished this pattern?Tag your pictures with #dropspattern #prairiefairyjumper or submit them to the #dropsfan gallery. Do you need help with this pattern?You'll find 26 tutorial videos, a Comments/Questions area and more by visiting the pattern on garnstudio.com. © 1982-2026 DROPS Design A/S. We reserve all rights. This document, including all its sub-sections, has copyrights. Read more about what you can do with our patterns at the bottom of each pattern on our site. |
||||||||||||||||||||||


With over 40 years in knitting and crochet design, DROPS Design offers one of the most extensive collections of free patterns on the internet - translated to 17 languages. As of today we count 324 catalogues and 12290 patterns translated into English (UK/cm). 12290
We work hard to bring you the best knitting and crochet have to offer, inspiration and advice as well as great quality yarns at incredible prices! Would you like to use our patterns for other than personal use? You can read what you are allowed to do in the Copyright text at the bottom of all our patterns. Happy crafting!
Post a comment to pattern DROPS Children 27-8
We would love to hear what you have to say about this pattern!
If you want to leave a question, please make sure you select the correct category in the form below, to speed up the answering process. Required fields are marked *.