
Popular categories
Looking for a yarn?


Comments / Questions (18)
![]() Roos wrote:
Roos wrote:
Er staat ‘ brei tot de mouw 35 cm meet. Wat bedoelen jullie dan met: ‘er is ongeveer 30 cm tot de halslijn?????
10.12.2025 - 19:30DROPS Design answered:
Dag Roos,
Daarmee wordt bedoeld dat je op dat punt nog ongeveer 30 cm moet breien tot je bij de hals bent.
10.12.2025 - 19:36
![]() Catharina wrote:
Catharina wrote:
Ik ben bezig met de pas van deze trui. Er staat dat ik na markeerdraden 1 en 3 en voor markeerdraden 2 en 4 moet minderen. Markeerdraden 1 en 3 zijn aan de voor- en achterkant. Toch staat er ‘minder alleen op de mouwen’. Hoe moet ik dit begrijpen?
02.12.2025 - 21:18DROPS Design answered:
Dag Catharina,
Je hebt in totaal 4 raglanlijnen en dus 4 markeerdraden. De markeerdraden zitten dus allemaal tussen de mouw en het pand. Aan de ene kant van de markeerdraad zit je op het pand en aan de andere kant van de markeerdraad zit je op de mouw.
09.12.2025 - 20:58
![]() Bente wrote:
Bente wrote:
I want to knit this lovely sweater with long sleeves. The pattern says arm length 14 cm. How many cm should I lengthen the arm?
23.10.2025 - 14:55DROPS Design answered:
Unfortunately, we can't customize patterns to personal wishes. Perhaps you could compare it to a current garment that you have and adjust the sleeve length based on that.
23.10.2025 - 17:50
![]() Bodil Andersson wrote:
Bodil Andersson wrote:
Jag förstår inte mönstret efter avmaskning för hals med 3 maskor 1 gång, 2 maskor 1 gång och 1 maska 3 ggr. Då har jag 14 maskor + 14 maskor på framstycket, 14 maskor + 14 maskor på varje ärm samt 66 maskor på bakstycket, toralt 122 maskor. Hur gör jag på sadelaxel 2? Hälsningar Bodil Andersson
20.03.2025 - 10:28DROPS Design answered:
Hej Bodil. Har du sett att vi har flera videor som visar hur man stickar sadelaxel som kanske kan vara till hjälp? Du hittar de här. Mvh DROPS Design
21.03.2025 - 13:50
![]() Michelle wrote:
Michelle wrote:
Hoe kan ik dit patroon in het nederlands vertaald krijgen 🫣
26.12.2024 - 17:41DROPS Design answered:
Dag Michelle,
Direct naast (of onder op mobiele weergave) zit een dropdown waar je een andere taal kunt kiezen.
01.01.2025 - 17:19
![]() Joanna wrote:
Joanna wrote:
Dzień dobry, mam wątpliwości jak zacząć karczek. Czy dobrze rozumiem, że markery umieszczone mają być jedno oczko od każdego z brzegów przodu i tyłu? Przerabiać „ do środka tyłu”, ale gdzie zacząć? Najpierw napisane jest „przerobić 44 następnych oczek” ( rozmiar L), a jednocześnie poniżej napisane jest „zacząć dokładnie za markerem 1”. Czyli co poprzedza 44 oczka ? Bardzo proszę o dokładny opis pierwszych 2 okrążeń. Dziękuję za pomoc
05.12.2024 - 09:47DROPS Design answered:
Witaj Joanno, jak wszystkie części zostaną przełożone na druty, przerób na prawo do środka tyłu i nałóż marker na drut (ma mieć inny kolor niż 4 kolejne na ramionach). Teraz zacznij przerabiać od środka tyłu i przerób 44 oczka, nałóż marker na drut (marker jest włożony między 2 oczkami, nie w oczko), dalej przerabiaj jak we wzorze. Pozdrawiamy!
05.12.2024 - 11:34
![]() Solveig Hallum wrote:
Solveig Hallum wrote:
Er det riktig at det bare strikkes 25 cm fra og med vrangbord til felling under arm? Det er veldig lite og ser ikke slik ut på modellen. Mvh Solveig
14.10.2024 - 14:38DROPS Design answered:
Hej Solveig, ja i den mindste størrelse bliver det 25 cm. Se også måleskitsen nederst i opskriften :)
16.10.2024 - 15:13
![]() Barbara wrote:
Barbara wrote:
Hallo, ich würde mir eine Anleitung für einen klassischen Damenpullover Gr. 32 oder Gr. 34 mit eingesetzten Langarmärmeln wünschen. Mein Problem ist die richtige Abnahme bei der Armkugel und so könnte ich auch Wollreste verarbeiten wenn ich die Teile einzeln stricke. Oder gibt es bei euch ein Modell (Raglanärmel bzw. Rundstricken ist leider nicht geeignet) Danke und lG aus Wien, Barbara
15.09.2024 - 17:46
![]() Marike Pae wrote:
Marike Pae wrote:
I skriver at denne trøje strikkes i 3 tråde kids-silke. Vil det så sige at der skal købes 3 gange mere garn end der er givet i opskriften, dvs 3x 10 garnnøgler på 25 gr for str M, eller har jeg misforstået noget? Bh Marike
01.09.2024 - 13:57DROPS Design answered:
Hei Marike. Garnmengden som er oppgitt er den totale garnmengde det brukes med 3 tråder. I str. M trenger du 275 gram (11 nøster av 25 gram). mvh DROPS Design
02.09.2024 - 14:13
![]() Wil wrote:
Wil wrote:
Dankjewel Drops team !
07.08.2024 - 11:26
|
|
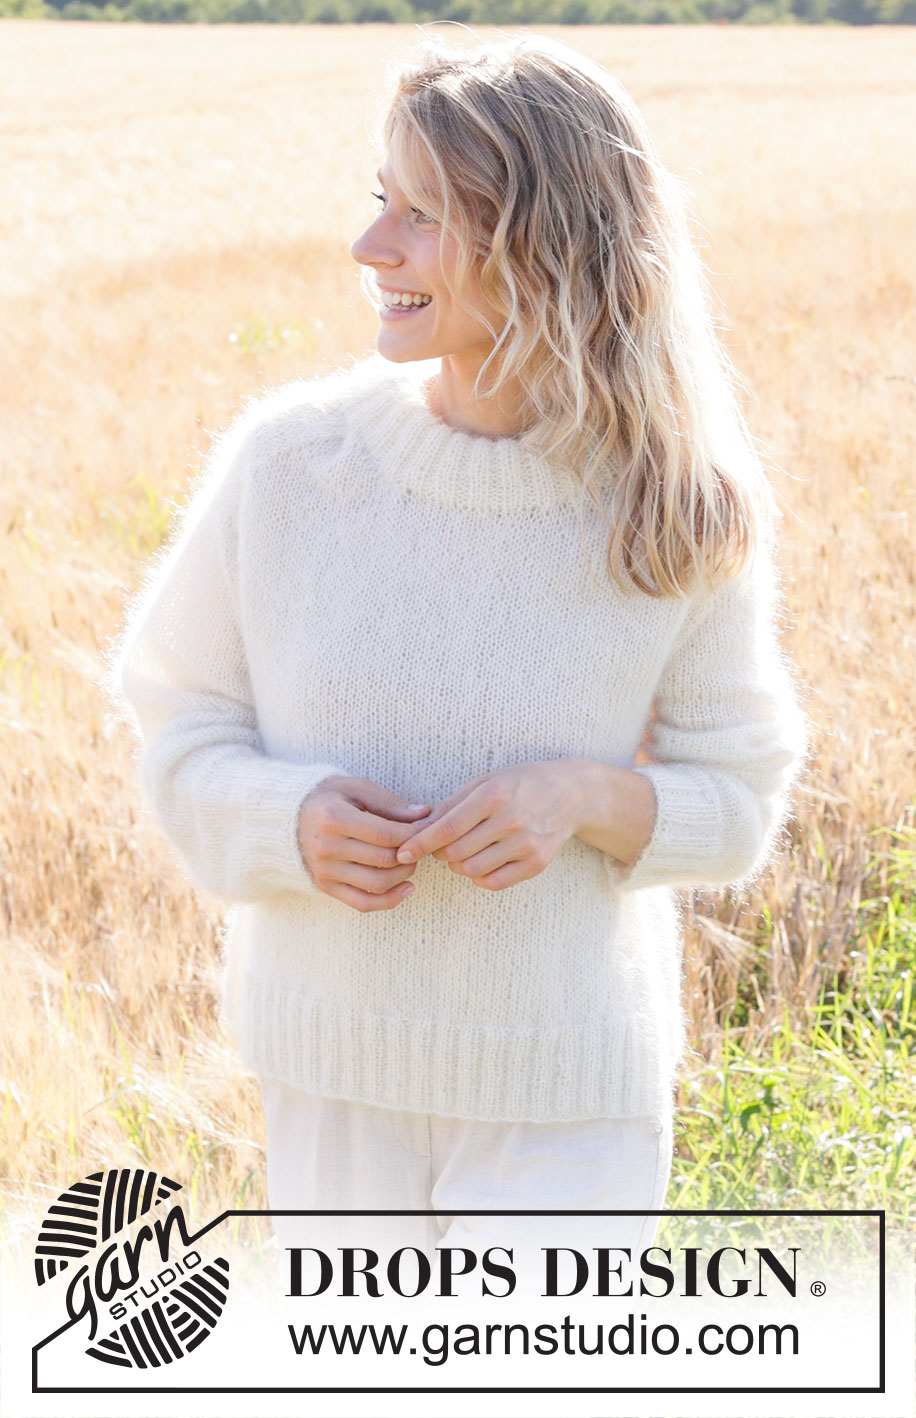
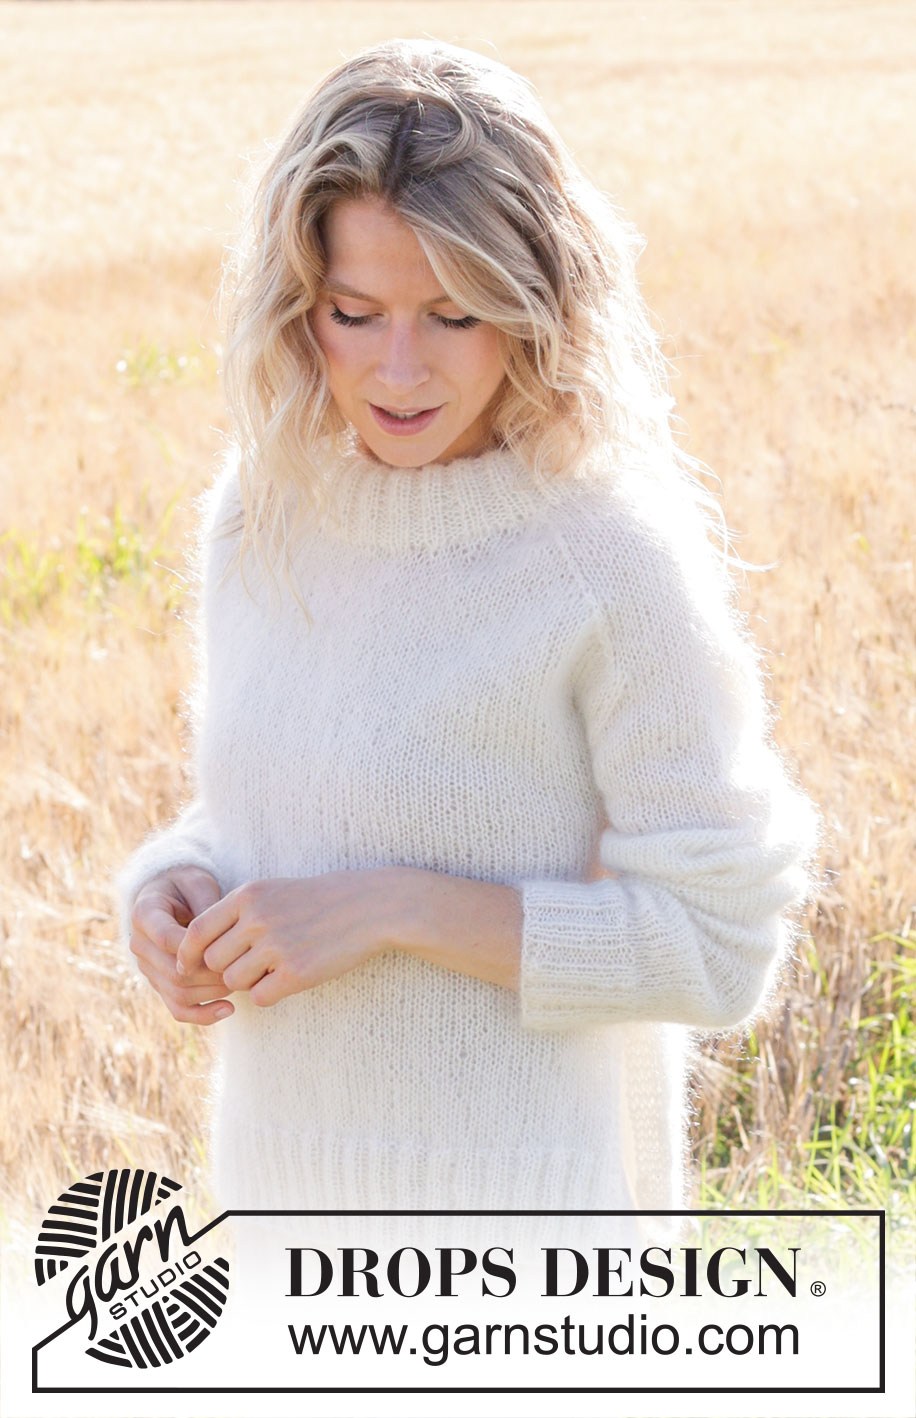
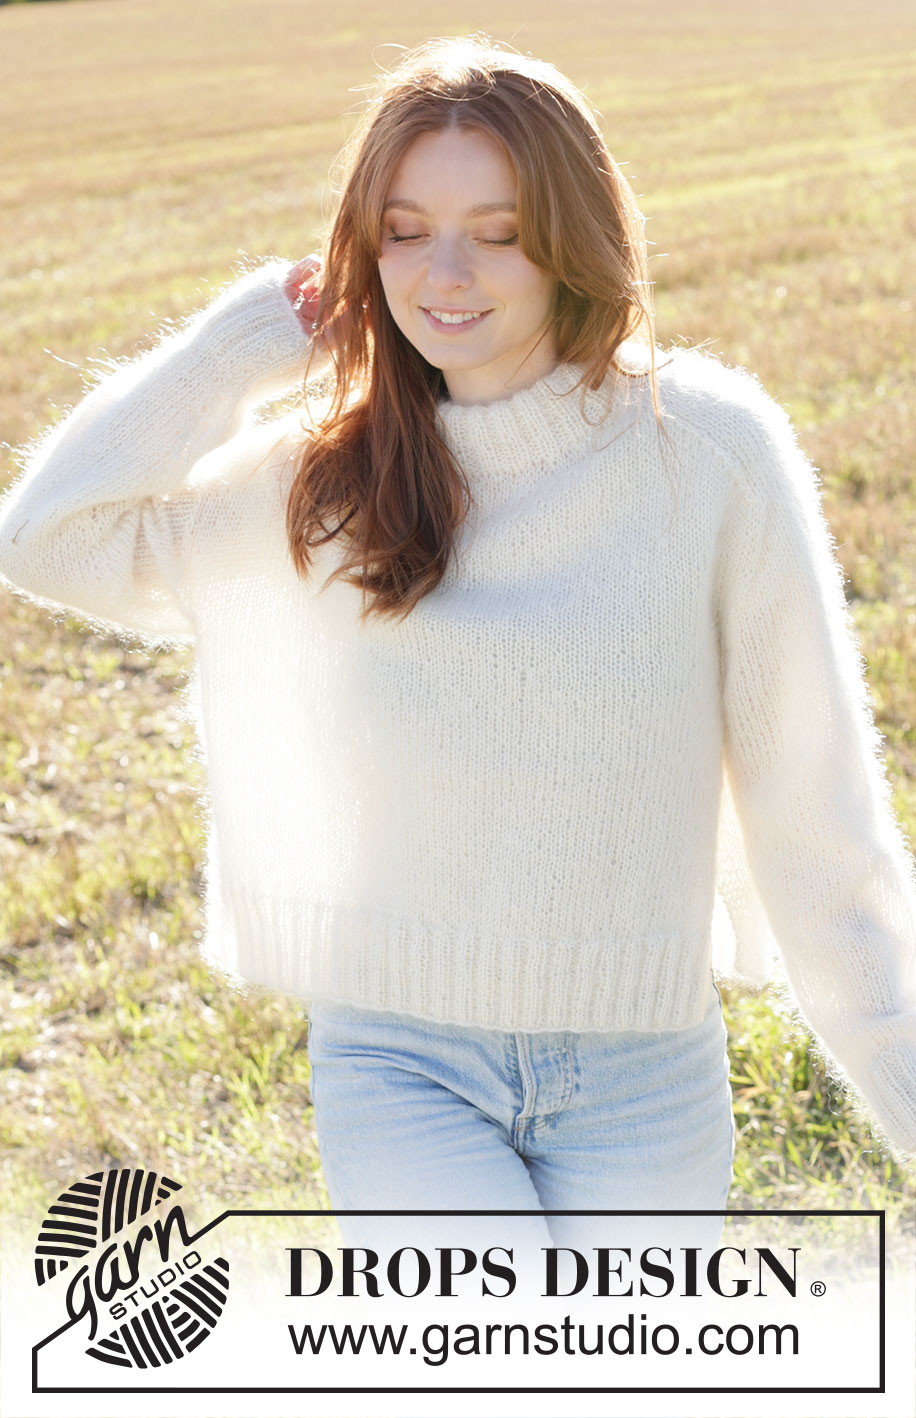
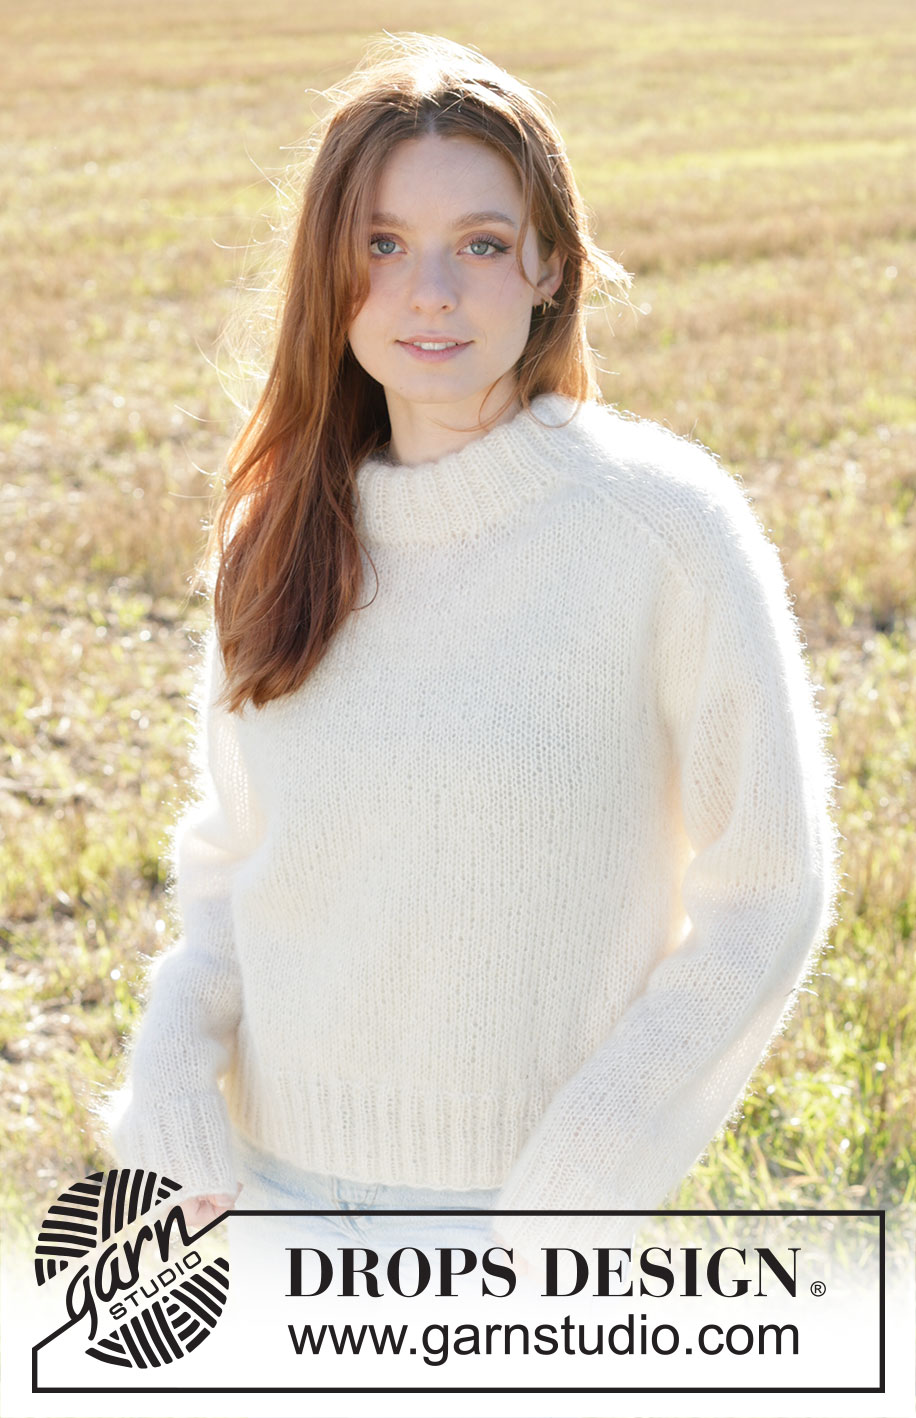
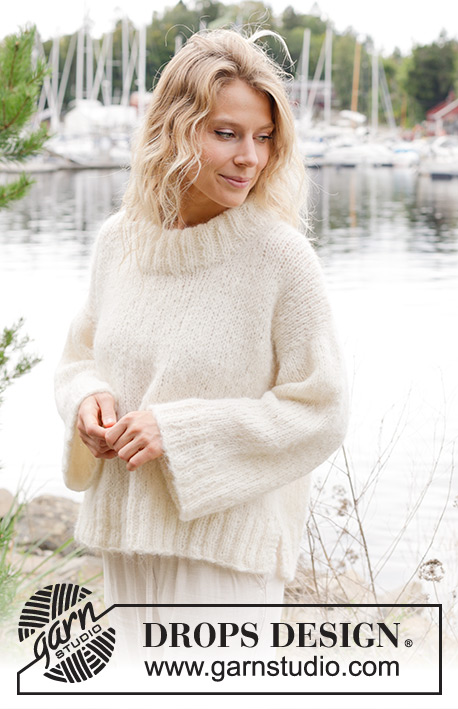
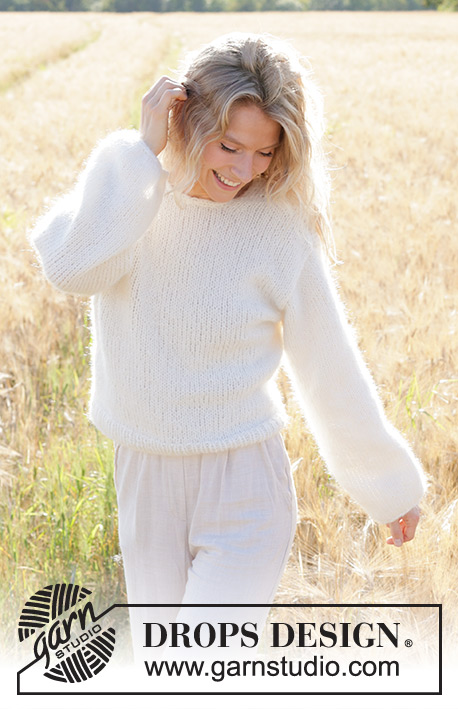
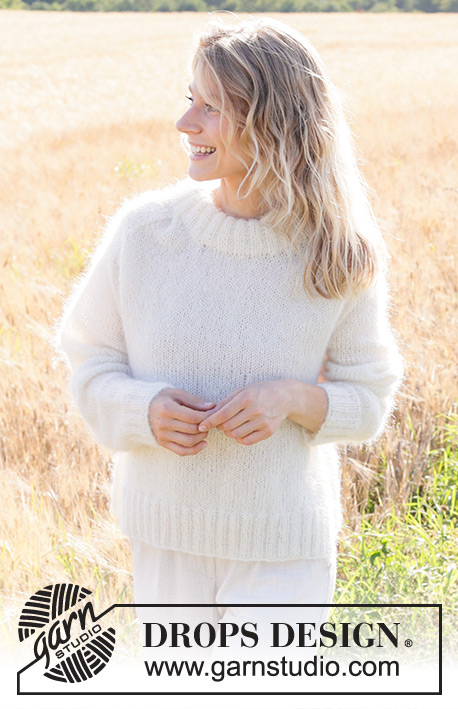
Moonrise Sweater#moonrisesweater |
|
 |
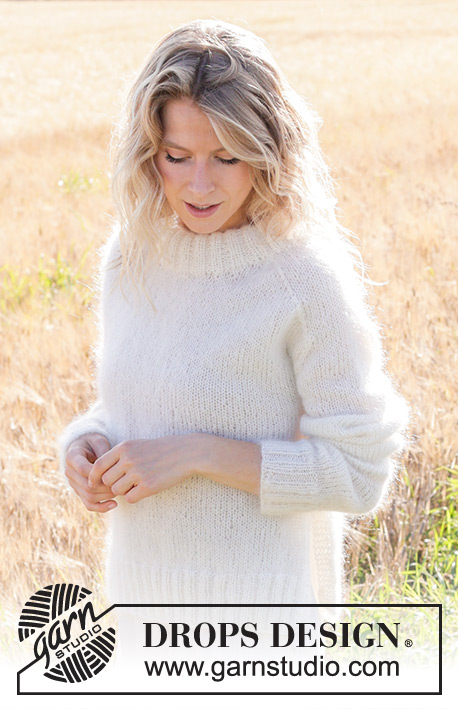 |
Knitted jumper in 3 strands DROPS Kid-Silk. The piece is worked bottom up with saddle shoulders, double neck and split in sides. Sizes XS - XXL.
DROPS 250-8 |
|
|
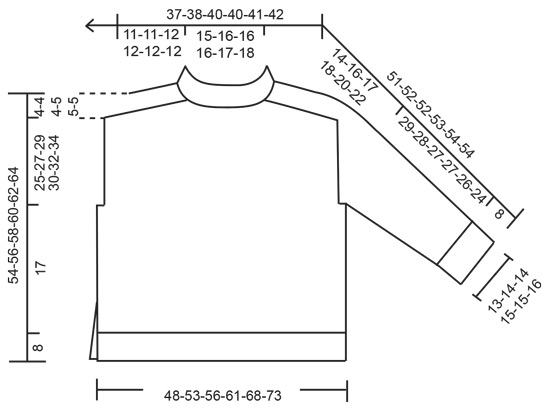
------------------------------------------------------- EXPLANATIONS FOR THE PATTERN: ------------------------------------------------------- GARTER STITCH (worked back and forth): Knit all rows, from both the right and wrong side. 1 ridge in height = knit 2 rows. DECREASE TIP-1 (for saddle shoulders): All decreases are worked from the right side! BEFORE MARKER: Work until there are 3 stitches left before the marker, knit 3 together (= 2 stitches decreased). AFTER MARKER: Slip 1 stitch knit-wise, knit 2 together, pass slipped stitch over knitted-together stitches (= 2 stitches decreased). DECREASE TIP-2 (for sleeves): All decreases are worked from the right side! BEFORE MARKER: Work until there are 2 stitches left before the marker, knit 2 together (= 1 stitch decreased). AFTER MARKER: Slip 1 stitch knit-wise, knit 1, pass slipped stitch over knitted stitch (= 1 stitch decreased). INCREASE TIP (for sleeves): Start 1 stitch before the marker-thread, make 1 yarn over, knit 2 (marker-thread sits between these 2 stitches), 1 yarn over. On the next round knit the yarn overs twisted to avoid holes (2 increased stitches). Then work the new stitches in stocking stitch. ------------------------------------------------------- START THE PIECE HERE: ------------------------------------------------------- JUMPER – SHORT OVERVIEW OF THE PIECE: The pattern uses both long and short needles; start with the length which fits the number of stitches and change when necessary. The piece is worked bottom up. The front and back pieces are worked separately, back and forth as far as the armholes. The sleeves are worked in the round, bottom up as far as the armholes, then placed on the same circular needle as the front and back pieces. The yoke is continued in the round, decreasing for the saddle shoulders and sleeves. The double neck is worked in rib. The side seams are sewn together to finish. BACK PIECE: Cast on 106-118-126-134-150-162 stitches with circular needle size 3.5 mm and 3 strands DROPS Kid-Silk. Purl 1 row from the wrong side. Then work as follows from the right side: 4 edge stitches in garter stitch, knit 2, purl 2 *, work from *-* until there are 6 stitches left, knit 2 and 4 edge stitches in garter stitch. Continue this rib back and forth for 8 cm. Change to circular needle size 5.5 mm. Purl 1 row from the wrong side and decrease 30-34-36-36-42-46 stitches evenly spaced – do not decrease over the edge stitches = 76-84-90-98-108-116 stitches. Continue with stocking stitch and 4 edge stitches in garter stitch on each side. REMEMBER THE KNITTING TENSION! Work until the piece measures 25 cm, with the next row from the right side. Cast off 3-3-4-4-5-5 stitches for the armholes at the beginning of the next 2 rows = 70-78-82-90-98-106 stitches. Cut the strand. Lay the piece to one side. FRONT PIECE: Cast on and work in the same way as the back piece. SLEEVES: The sleeves are worked in the round. Cast on 56-60-60-64-64-68 stitches with double pointed needles size 3.5 mm and 3 strands DROPS Kid-Silk. Work rib (knit 2, purl 2) for 8 cm. Knit 1 round and decrease 14-16-14-18-16-18 stitches evenly spaced = 42-44-46-46-48-50 stitches. Insert 1 marker-thread at the beginning of the round (= mid-under sleeve). Allow the thread to follow your work onwards, it is used when increasing under the sleeves. Change to needle size 5.5 mm and work stocking stitch. When the sleeve measures 11-10-11-11-12-11 cm, increase 1 stitch on each side of the marker-thread – read INCREASE TIP. Repeat this increase every 4½-4-2½-2-1½-1½ cm a total of 6-7-9-12-13-13 times = 54-58-64-70-74-76 stitches. Work until the sleeve measures 37-36-35-35-34-32 cm. There is approx. 25-27-29-30-32-34 cm to the neckline – try the sleeve on and work to desired length. Cast off 6-6-8-8-10-10 stitches under the sleeve (i.e., 3-3-4-4-5-5 stitches on each side of the marker-thread) = 48-52-56-62-64-66 stitches. Cut the strand. Lay the piece to one side. YOKE: Now place the front piece, back piece and sleeves on the same circular needle and continue in the round with stocking stitch. AT THE SAME TIME, on the first round insert 4 markers between 2 stitches, which are used when decreasing on the sleeves and saddle shoulders – allow the markers to follow your work onwards: Work to the middle of the back piece. Work the next 39-41-43-44-45-47 stitches (= ½ back piece), insert marker-1 here, work 40-48-52-64-72-78 stitches (= sleeve), insert marker-2 here, work 78-82-86-88-90-94 stitches (= front piece), insert marker-3 here, work 40-48-52-64-72-78 stitches (= sleeve), insert marker-4 here, work to marker-1 (= ½ back piece). There are 40-48-52-64-72-78 stitches between markers 1 and 2 and between markers 3 and 4 (= sleeves). There are 78-82-86-88-90-94 stitches between markers 2 and 3 and between markers 4 and 1 (= front/back pieces). Start the round straight after marker-1 and work stocking stitch in the round for 1-0-0-1-0-0 cm, AT THE SAME TIME on the next round begin decreasing for the sleeves as follows: SLEEVE DECREASES-1: Read the next section before continuing! On the next round decrease 8 stitches on the sleeves as follows: Decrease 2 stitches AFTER markers 1 and 3 and decrease 2 stitches BEFORE markers 2 and 4 – read DECREASE TIP-1. Decrease only on the sleeves (the number of stitches on the front and back pieces remains the same). Decrease like this every 2nd round a total of 0-1-2-7-8-9 times = 236-252-260-248-260-272 stitches. SLEEVE DECREASES -2: On the next round, decrease 4 stitches on the sleeves as follows. Decrease 1 stitch AFTER markers 1 and 3 and decrease 1 stitch BEFORE markers 2 and 4 – read DECREASE TIP-2. Only decrease on the sleeves (the number of stitches on the front and back pieces remains the same). Decrease like this every 2nd round a total of 13-15-15-10-12-13 times = 184-192-200-208-212-220 stitches (there are 14-14-14-16-16-16 stitches left on each sleeve). The piece measures approx. 14-16-17-18-20-22 cm from where the pieces were joined. Now work the saddle shoulders. SADDLE SHOULDERS-1: On the next round decrease 8 stitches as follows: Decrease 2 stitches BEFORE markers 1 and 3 and decrease 2 stitches AFTER markers 2 and 4 – remember DECREASE TIP-1. Only decrease on the front and back pieces (the number of stitches on the sleeves remains the same). Decrease like this every 2nd round a total of 4-4-5-5-5-5 times = 152-160-160-168-172-180 stitches. The piece measures approx. 44-46-47-48-50-52 cm from the cast-on edge. Make sure the next round is a round without decreases. Knit 1 round and cast off the middle 18-22-22-24-26-30 stitches on the front piece for the neckline – NOTE! Work to the end of the round and cut the strand. You now continue back and forth from mid-front, working the first row from the right side as follows: AT THE SAME TIME decrease for the neckline and the saddle shoulders. Read both sections before continuing. NECKLINE: Cast off for the neck at the beginning of each row as follows: 3 stitches 1 time, 2 stitches 1 time and 1 stitch 3 times on each side. SADDLE SHOULDERS-2: Continue decreasing 8 stitches for the saddle shoulders on each row from the right side 7-7-7-7-7-7 more times, a total of 11-11-12-12-12-12 times, with the last row worked from the right side. AFTER THE LAST DECREASE: There are 62-66-66-72-74-78 stitches (14-14-14-16-16-16 stitches on each sleeve, zero stitches on the front piece and 34-38-38-40-42-46 stitches on the back piece). The yoke measures approx. 25-27-29-30-32-34 cm from the join, the jumper measures approx. 54-56-58-60-62-64 cm from the shoulder. Cut the strand. DOUBLE NECK: Move the beginning of the round to mid-back by placing worked stitches on the right needle back on the left needle. Use circular needle size 3.5 mm and work stocking stitch as far as the neckline, knit up 34-38-38-40-42-46 stitches along the neck line, then stocking stitch to mid-back = 96-104-104-112-116-124 stitches. Work rib in the round (knit 2, purl 2) at the same time, on the first round decrease 4-8-8-8-8-12 stitches evenly spaced = 92-96-96-104-108-112 stitches (the stitch count should be divisible by 4). Work rib for 11 cm, cast off a little loosely. Fold the neck double to the inside and fasten down with a couple of stitches. ASSEMBLY: Sew the side seams, starting by the armhole and sewing in the outermost loop of the outermost stitch so the seam is flat. Leave a split at the bottom on each side of desired length (you will have 8 garter stitches down each side seam). Sew together the openings under each sleeve. |
|
 |
|
Have you finished this pattern?Tag your pictures with #dropspattern #moonrisesweater or submit them to the #dropsfan gallery. Do you need help with this pattern?You'll find 36 tutorial videos, a Comments/Questions area and more by visiting the pattern on garnstudio.com. © 1982-2026 DROPS Design A/S. We reserve all rights. This document, including all its sub-sections, has copyrights. Read more about what you can do with our patterns at the bottom of each pattern on our site. |
|


With over 40 years in knitting and crochet design, DROPS Design offers one of the most extensive collections of free patterns on the internet - translated to 17 languages. As of today we count 324 catalogues and 12290 patterns translated into English (UK/cm). 12290
We work hard to bring you the best knitting and crochet have to offer, inspiration and advice as well as great quality yarns at incredible prices! Would you like to use our patterns for other than personal use? You can read what you are allowed to do in the Copyright text at the bottom of all our patterns. Happy crafting!
Post a comment to pattern DROPS 250-8
We would love to hear what you have to say about this pattern!
If you want to leave a question, please make sure you select the correct category in the form below, to speed up the answering process. Required fields are marked *.