
Popular categories
Looking for a yarn?


Comments / Questions (74)
![]() Mariel Zaiser wrote:
Mariel Zaiser wrote:
Excelente sitio. Modelos exquisitos, explicaciones claras, garantía de éxito en cada proyecto.
01.08.2024 - 16:37
![]() Sabine Schmitt wrote:
Sabine Schmitt wrote:
Welche Größe trägt das Modell auf dem Foto?
07.05.2024 - 12:22DROPS Design answered:
Liebe Frau Schmitt, meistens tragen unsere Modelle entweder eine Größe S oder eine Größe M, aber um die beste passende Größe zu finden, messen Sie am besten einen ähnlichen Pullover den Sie gerne haben und vergleichen Sie mit der Maßskizze. Hier lesen Sie mehr. Viel Spaß beim Stricken!
07.05.2024 - 13:37
![]() Elodie wrote:
Elodie wrote:
Bonjour, une fois les 30 rangs des diagrammes tricotés, comment procéder pour continuer le motif? Merci !
28.01.2024 - 06:23DROPS Design answered:
Bonjour Élodie, vous continuez à augmenter comme avant et tricotez les augmentations d'abord en jersey jusqu'à ce qu'il y ait suffisamment de mailles pour tricoter une torsade. Bon tricot!
29.01.2024 - 12:07
![]() Alice Kloss wrote:
Alice Kloss wrote:
Ich habe gerade die Blende mit 88 Maschen gestrickt, nun möchtel ich die Maschen für die Ärmel und das Vorder und Rückenteil aufteilen. Hierfür sind meiner Meinung nach zu wenig Maschen in der Anleitung genannt, 2x5 für die Ärmel und 2x 25 für jeweils das Vorder-und Rückenteil, ergibt 60 Maschen. Können Sie mir bitte helfen. Vielen Dank
16.01.2024 - 10:07DROPS Design answered:
Liebe Frau Kloss, es sind aber dazu bei der letzten Runde von der Halsblende Machen zugenommen (1 Masche auf jede Ärmel + 11 Maschen beim Vorder- und Rückenteil), dazu sind die 7 Maschen A.1 für den Raglan, so sind es: 5(+1 für die Ärmel)+7 M A.1+25 M (+11 für das Vorderteil)+ 7M A.1+ 5(+1 für die Ärmel)+ 7 M A.1+25 M (+11 für das Rückenteil) + 7 M A.1=88(+24 Zunahmen = 112 M). Viel Spaß beim stricken!
17.01.2024 - 08:33
![]() Antonella wrote:
Antonella wrote:
Mi sembra che il diagramma sia sbagliato. Il simbolo di triangolo nero dovrebbe significare mettere una maglia sul ferro ausiliario sul davanti ( e non sul dietro) del lavoro altrimenti non si forma il motivo
16.12.2023 - 20:19DROPS Design answered:
Buongiorno Antonella, grazie per la segnalazione: abbiamo corretto la legenda. Buon lavoro!
19.12.2023 - 08:59
![]() Jz wrote:
Jz wrote:
In previous answer you misunderstood my question/comment. When I used 16 stitches, I got only 9 cm in length instead of required 10cm. Based on explanation in Design I should switch to smaller needle. I think that I should switch to larger needle. …… NOTE Needle size is only a guide. If you get too many stitches on 10 cm, change to a larger needle size. If you get too few stitches on 10 cm, change to a smaller needle size. ……
17.11.2023 - 14:31DROPS Design answered:
Dear JZ, if you get 9 cm with 16 sts, this means approx 18 sts for 10 cm, you have too many stitches for 10 cm, and your stitches too small you should try again with larger needles. Read more here. Happy knitting!
20.11.2023 - 09:00
![]() Jz wrote:
Jz wrote:
NOTE: Needle size is only a guide. If you get too many stitches on 10 cm, change to a larger needle size. If you get too few stitches on 10 cm, change to a smaller needle size. I think it should be just opposite.. if gauge asks 16st for 10cm but I get only 9cm using 16st (to few) - I would choose larger needle. Explanation is just opposite. Maybe I read it incorrectly.
16.11.2023 - 22:29DROPS Design answered:
Hi Jz, If you have 9 sts on your 10 cm swatch (instead of 16), your stitches are too big, so you need a smaller needle size to correct this. Happy knitting!
17.11.2023 - 06:44
![]() Ingrid De Kegel wrote:
Ingrid De Kegel wrote:
Dag Drops Design, Voor de opmerking van de Zweden in verband met de fout in het telpatroon heb ik de oplossing gevonden denk ik. Als ik A3B als het begin brei, dan 4 keer A3A, en dan A3C als het einde, dan klopt de stekentelling. Dus A3B moet A3A genoemd worden en A3A moet A3B genoemd worden, een kleine vergissing . Klopt mijn theorie?
16.09.2023 - 15:00DROPS Design answered:
Dag Ingrid,
Bedankt! Er was inderdaad een fout gemaakt met de benaming van de patronen en het is inmiddels aangepast.
05.10.2023 - 06:23
![]() Deraze Isabelle wrote:
Deraze Isabelle wrote:
Comment connaitre le nombre de pelotes pour une taille XL sur votre site(14 pelotes pour 38-40,aiguilles 5). merci.
13.09.2023 - 11:59DROPS Design answered:
Bonjour Mme Deraze, vous trouverez toujours la quantité nécessaire indiquée, au poids, pour chaque taille, dans l'en-tête du modèle, autrement dit, il faut ici en XL 1050 g DROPS Nepal/50 g la pelote = 21 pelotes en taille XL. Utilisez notre convertisseur si vous souhaitez utiliser une autre alternative. Bon tricot!
13.09.2023 - 13:21
![]() Kristina wrote:
Kristina wrote:
Det måste stå fel i beskrivningen när det gäller A3A+B och C. Det går inte ihop. Har nu repat flera gånger. Stickar i S.
04.09.2023 - 15:46DROPS Design answered:
Hei Kristina Oppskriften er oversendt til design avd. slik at de kan dobbeltsjekke og evnt komme med en rettelse. mvh DROPS Design
11.09.2023 - 14:23
|
|||||||||||||
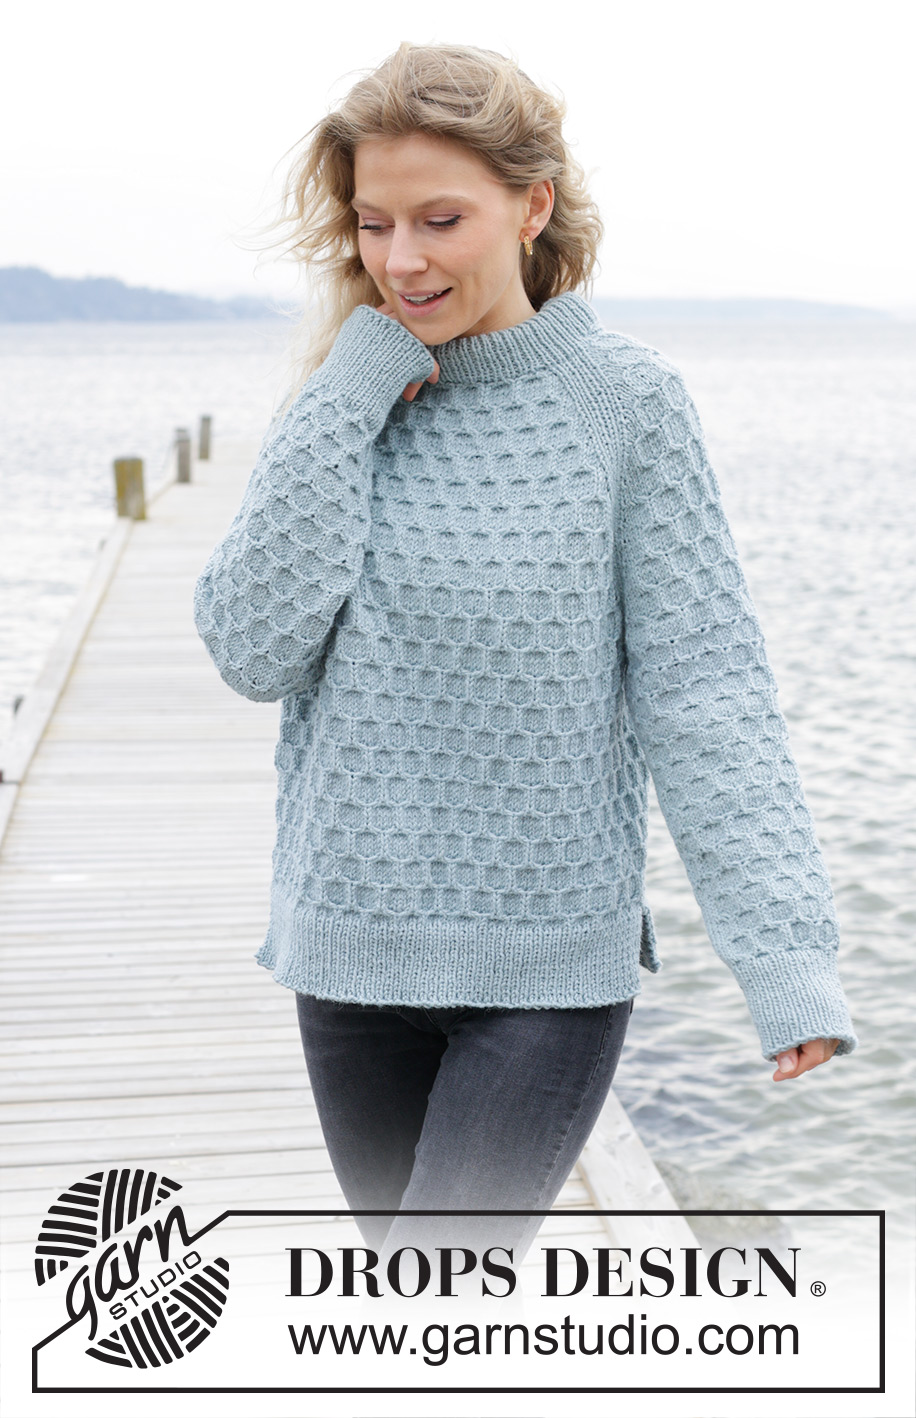
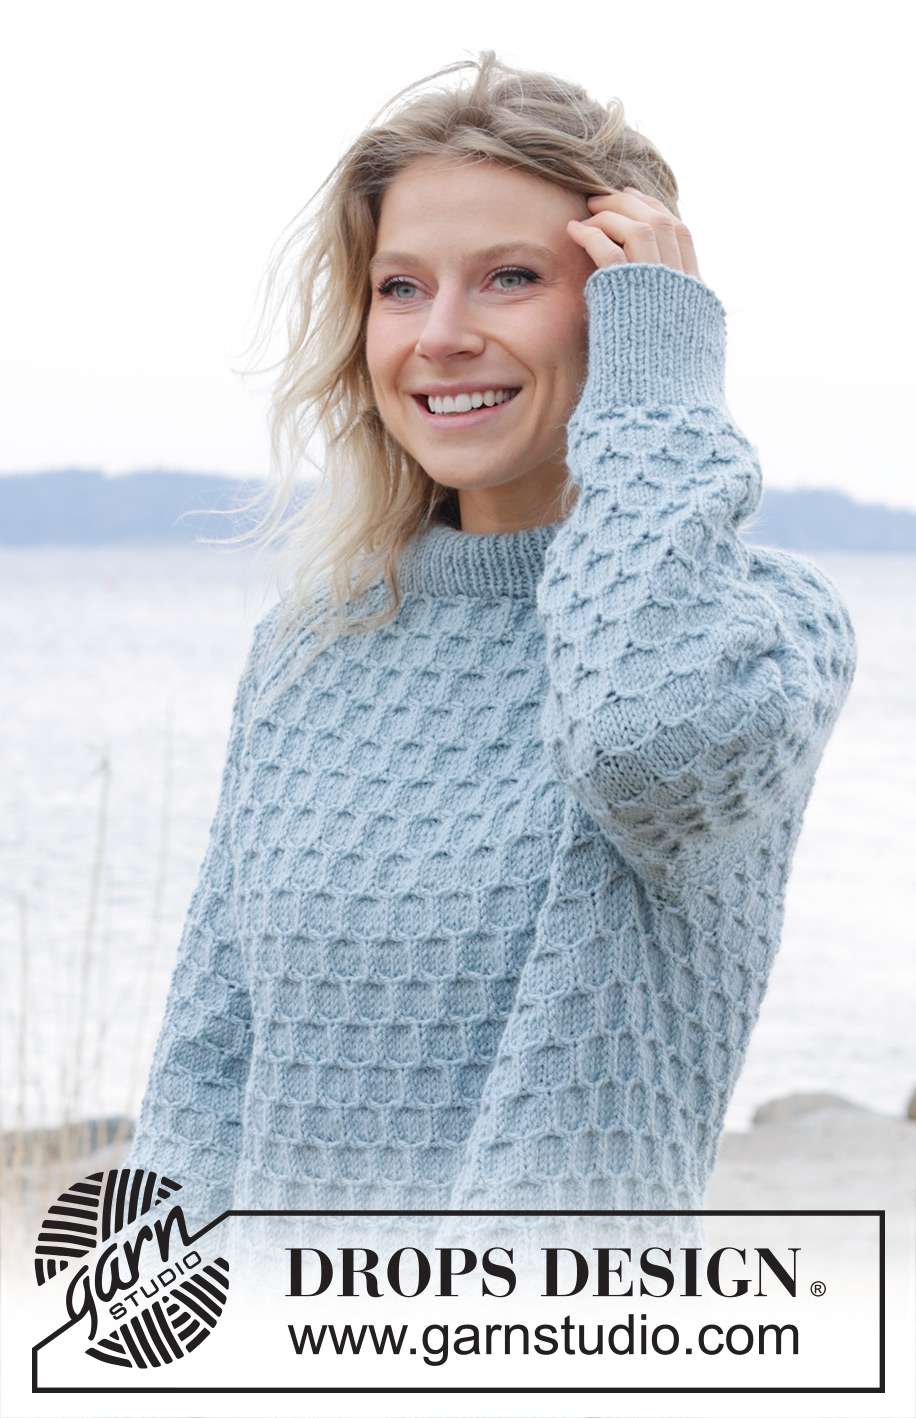
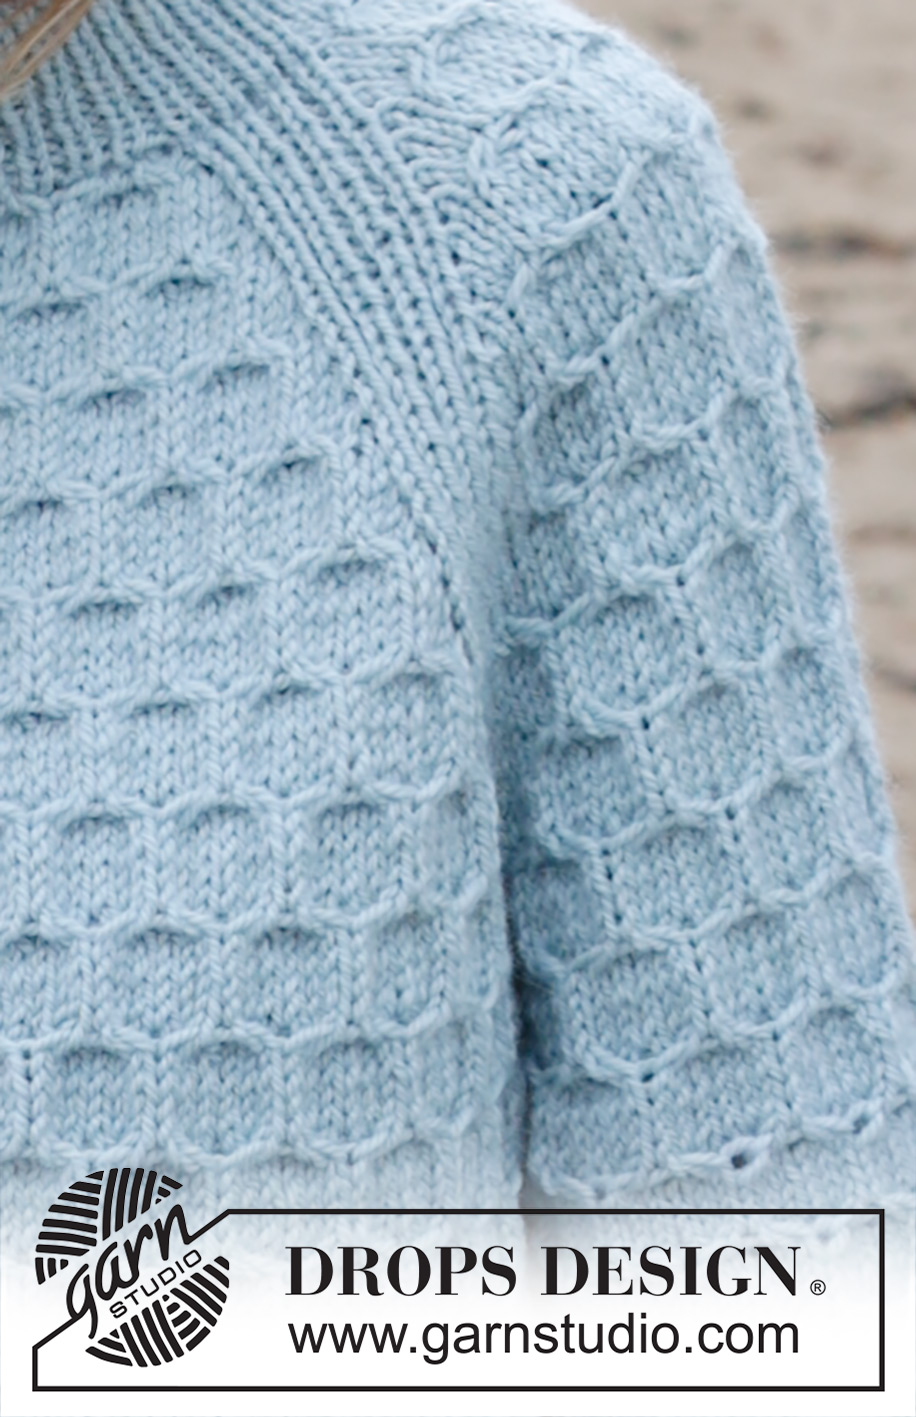
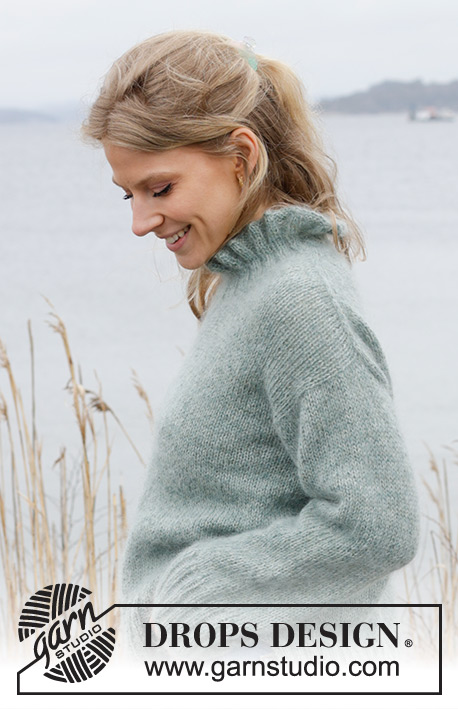
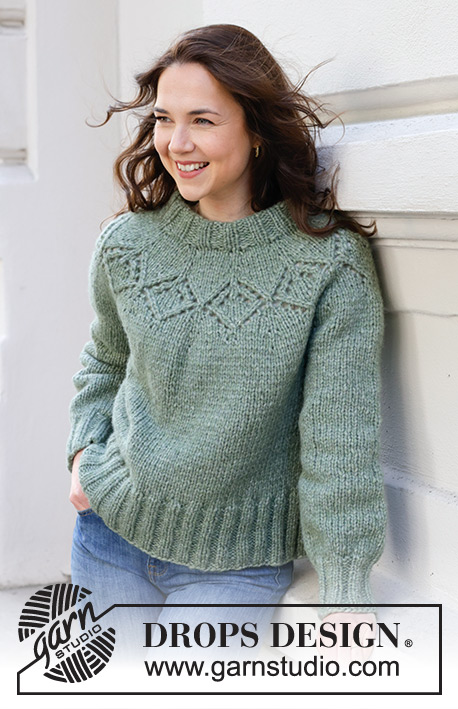
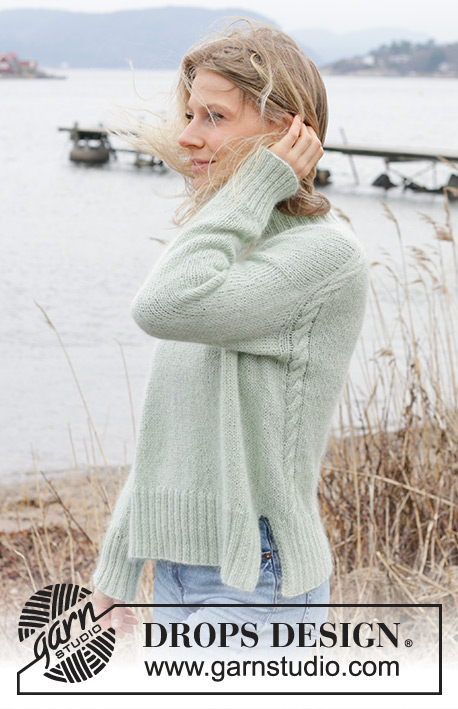
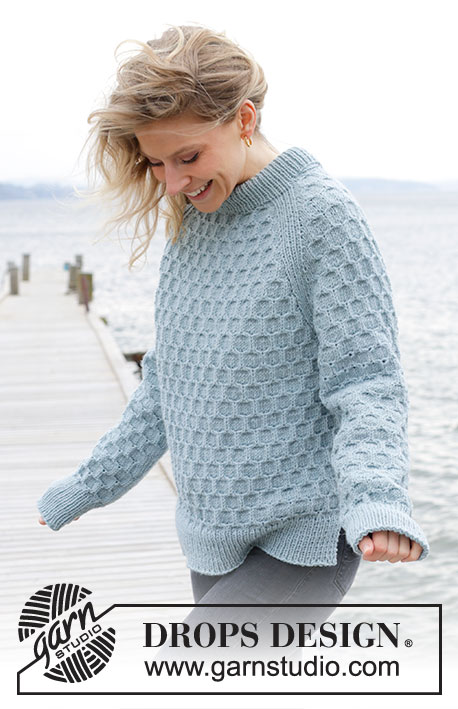
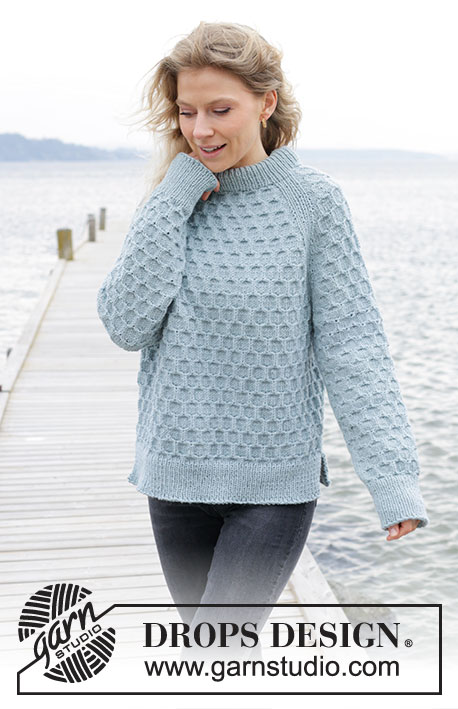
Mermaid Bay#mermaidbaysweater |
|||||||||||||
 |
 |
||||||||||||
Knitted jumper in DROPS Nepal. The piece is worked top down with double neck, raglan, bee-cube pattern and split in sides. Sizes S - XXXL.
DROPS 245-1 |
|||||||||||||
|
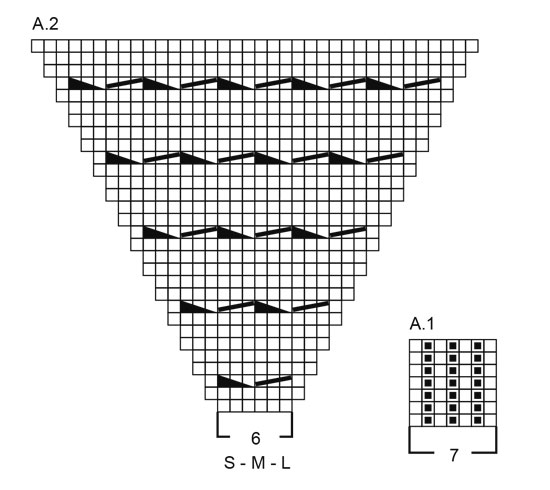
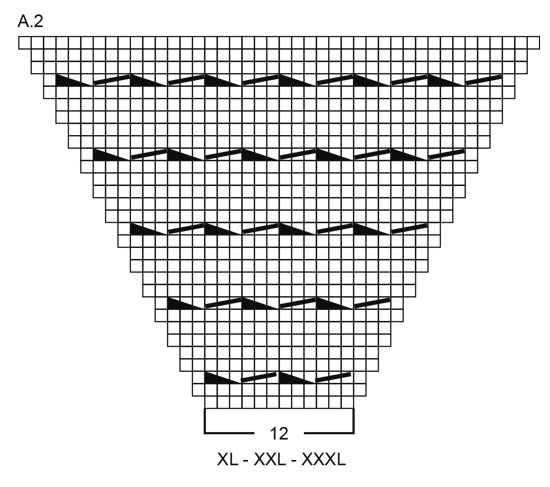
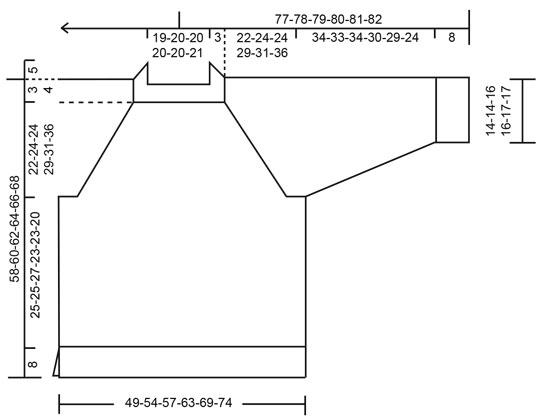
------------------------------------------------------- EXPLANATIONS FOR THE PATTERN: ------------------------------------------------------- GARTER STITCH (worked back and forth): Knit all rows. 1 ridge = knit 2 rows. INCREASE TIP (evenly spaced): Increase 1 stitch by making 1 yarn over, which is worked twisted on the next round/row to avoid a hole. PATTERN: See diagrams A.1 to A.3. Choose diagram for your size (applies to A.2). As you increase for raglan, work the new stitches into the pattern as shown in the diagrams, i.e., work the stitches in stocking stitch until they fit into the pattern (with 3 or 6 stitches). RAGLAN: Increase 1 stitch by making 1 yarn over before/after A.1 in each transition between body and sleeves. The yarn overs are then worked as follows on the next round: AFTER A.1: Knit the back loop (yarn over twists to the left). No hole. BEFORE A.1: Slip the yarn over knit-wise, place it back on the left needle the other way around, knit the front loop (yarn over twists to the right). No hole. DECREASE TIP (for sleeves): Decrease 1 stitch on each side of the marker-thread as follows: Work until there are 3 stitches left before the marker-thread, knit 2 together, knit 2 (marker-thread sits between these 2 stitches), slip 1 stitch knit-wise, knit 1 and pass the slipped stitch over the knitted stitch (2 stitches decreased). ------------------------------------------------------- START THE PIECE HERE: ------------------------------------------------------- JUMPER – SHORT OVERVIEW OF THE PIECE: The neck and yoke are worked in the round with circular needle, from the right back shoulder and top down. The yoke is divided for body and sleeves and the body is continued in the round with circular needle as far as the split, then the pieces are finished separately, back and forth with circular needle. The sleeves are worked in the round with short circular needle/double pointed needles. DOUBLE NECK: Cast on 84-88-88-96-96-100 stitches with DROPS Nepal, using short circular needles size 4 and 5 mm held together. Remove the needle size 5 mm keeping stitches on the needle size 4 mm (this gives you an elastic cast-on edge). Work rib in the round (purl 1, knit 1) for 11 cm. Fold the neck double to the inside and work 1 more round of rib, working every 4th stitch together with its corresponding stitch on the cast-on edge. You now have a double neck. Insert 1 marker in the round – it is used to measure the yoke. Read INCREASE TIP and work the next round as follows: Knit 5-5-5-7-7-7 and increase 1-1-1-5-5-5 stitches evenly over these stitches (= sleeve), work A.1 (the stitches in A.1 should match the rib), knit 23-25-25-27-27-29 and increase 7-11-11-9-9-7 stitches evenly over these stitches (= front piece), work A.1, knit 5-5-5-7-7-7 and increase 1-1-1-5-5-5 stitches evenly over these stitches (= sleeve), work A.1, knit 23-25-25-27-27-29 and increase 7-11-11-9-9-7 stitches evenly over these stitches (back piece), work A.1 = 100-112-112-124-124-124 stitches. REMEMBER THE KNITTING TENSION! YOKE: Change to circular needle size 5 mm and work as follows: Increase 1 stitch for RAGLAN – read description above, A.2 (sleeve), increase 1 stitch for raglan, A.1, increase 1 stitch for raglan, A.3A, work A.3B, 3-4-4-4-4-4 times, A.3C (front piece), increase 1 stitch for raglan, A.1, increase 1 stitch for raglan, A.2 (sleeve), increase 1 stitch for raglan, A.1, increase 1 stitch for raglan, A.3A, work A.3B, 3-4-4-4-4-4 times, A.3C (back piece), increase 1 stitch for raglan, A.1 (= 8 increased stitches). Continue this pattern and increase for raglan before/after each A.1 every 2nd round a total of 18-21-21-15-18-24 times (including the first increase described) = 244-280-280-244-268-316 stitches – NOTE: Work the increased stitches into the pattern as described in PATTERN above. Continue to increase for raglan every 2nd round but every 2nd increase is only on the front and back pieces, i.e., increase on the front and back pieces every 2nd round and on the sleeves every 4th round (alternately 4 and 8 increased stitches). Increase like this 12-12-12-24-24-24 times on the front and back pieces and 6-6-6-12-12-12 times on the sleeves. You have increased a total of 30-33-33-39-42-48 times on the front and back pieces and 24-27-27-27-30-36 times on the sleeves. There are 316-352-352-388-412-460 stitches and the yoke measures approx. 22-24-24-29-31-36 cm from the marker. If the piece is shorter than this, continue working without further increases to the correct length. On the next round work pattern and decrease 1 stitch in each A.1 by knitting twisted together stitches 3 and 4 (4 stitches decreased on the round) = 312-348-348-384-408-456 stitches. On the next round divide for the body and sleeves in the middle of each A.1, (with 3 stitches belonging to the sleeves and the other 3 stitches belonging to the front/back piece. Start 3 stitches before the beginning of the round in the middle of the last repeat of A.1, place the first 60-66-66-72-78-90 stitches on a thread for the sleeve, cast on 6-6-12-12-18-18 stitches (in side under sleeve), work 96-108-108-120-126-138 stitches as before (front piece – NOTE: Stitches in A.1 now worked in A.3), place the next 60-66-66-72-78-90 stitches on a thread for the sleeve, cast on 6-6-12-12-18-18 stitches (in side under sleeve), work the last 96-108-108-120-126-138 stitches as before (back piece – stitches in A.1 now worked in A.3). The body and sleeves are finished separately. The piece is now measured from here. BODY: = 204-228-240-264-288-312 stitches. Insert 1 marker-thread in the middle of the 6-6-12-12-18-18 stitches cast on under each sleeve. Allow the threads to follow your work onwards – they are used when working the split in each side. Work A.3B in the round – continue with the correct round in the diagram following on from the yoke. When the body measures 25-25-27-23-23-20 cm from the division, place the first 102-114-120-132-144-156 stitches on circular needle size 4 mm (front piece), leave the last 102-114-120-132-144-156 stitches (back piece) on needle size 5 mm. FRONT PIECE: = 102-114-120-132-144-156 stitches. Knit 1 row from the right side and increase 3 stitches evenly spaced = 105-117-123-135-147-159 stitches. Work as follows from the wrong side: 1 GARTER STITCH – read description above, * purl 1, knit 1 *, work from *-* until there are 2 stitches left, purl 1 and 1 garter stitch. Continue this rib back and forth for 8 cm. Cast off – you can sew Italian cast-off if you wish. The jumper measures approx. 58-60-62-64-66-68 cm from the shoulder. BACK PIECE: Place the 102-114-120-132-144-156 stitches on circular needle size 4 mm and work in the same way as the front piece. SLEEVES: Place the 60-66-66-72-78-90 stitches from the thread on the one side of the piece on short circular needle/double pointed needles size 5 mm and knit up 1 stitch in each of the new stitches cast on under the sleeve = 66-72-78-84-96-108 stitches. Insert a marker-thread in the middle of the 6-6-12-12-18-18 stitches under the sleeve. Work A.3B in the round (continue with the correct round in the diagram following on from the yoke). When the sleeve measures 4-4-4-3-3-3 cm, decrease 2 stitches mid-under the sleeve – read DECREASE TIP (stitches which do not fit into the pattern are worked in stocking stitch). Decrease like this every 10-5-5-3-2-1 cm a total of 3-6-6-9-12-18 times = 60-60-66-66-72-72 stitches. Continue working until the sleeve measures 34-33-34-30-29-24 cm from the division (or to desired length. There is approx. 8 cm left). Change to double pointed needles size 4 mm and work rib (knit 1, purl 1) for 8 cm. Cast off in the same way as on the front and back pieces. The sleeve measures approx. 42-41-42-38-37-32 cm from the division. Work the other sleeve in the same way. |
|||||||||||||
Diagram explanations |
|||||||||||||
|
|||||||||||||
 |
|||||||||||||
 |
|||||||||||||
 |
|||||||||||||
 |
|||||||||||||
Have you finished this pattern?Tag your pictures with #dropspattern #mermaidbaysweater or submit them to the #dropsfan gallery. Do you need help with this pattern?You'll find 34 tutorial videos, a Comments/Questions area and more by visiting the pattern on garnstudio.com. © 1982-2026 DROPS Design A/S. We reserve all rights. This document, including all its sub-sections, has copyrights. Read more about what you can do with our patterns at the bottom of each pattern on our site. |
|||||||||||||


With over 40 years in knitting and crochet design, DROPS Design offers one of the most extensive collections of free patterns on the internet - translated to 17 languages. As of today we count 324 catalogues and 12290 patterns translated into English (UK/cm). 12290
We work hard to bring you the best knitting and crochet have to offer, inspiration and advice as well as great quality yarns at incredible prices! Would you like to use our patterns for other than personal use? You can read what you are allowed to do in the Copyright text at the bottom of all our patterns. Happy crafting!
Post a comment to pattern DROPS 245-1
We would love to hear what you have to say about this pattern!
If you want to leave a question, please make sure you select the correct category in the form below, to speed up the answering process. Required fields are marked *.