Comments / Questions (131)
![]() Peggy Newfield wrote:
Peggy Newfield wrote:
Hi - Never mind my previous question. I just found the answer in Q/A on 14.05.2025 - question from Gillian Foster. There's the explanation of the extra 4 stitches that I didn't understand - I had been putting the markers in between stitches. I'm all set now! Lovely pattern. Thanks
29.12.2025 - 18:17DROPS Design answered:
Good luck :) Enjoy! Happy knitting!
30.12.2025 - 14:06
![]() Peggy Newfield wrote:
Peggy Newfield wrote:
I am doing this pattern for 1-3 months. I cast on 93 stitches and knit the neck ribbing. On the first row of patterns, I found that I had 4 extra stitches at the end of the row just before the cardigan edge 6 garter stitches. I went back and added up the stitches required by this pattern for the first row and came up with 89 stitches being required - the difference between this and the original cast on of 93 stitches looks like it matches with my 4 extra stitches. Can you help with this? Thanks!
29.12.2025 - 18:11DROPS Design answered:
Hi Peggy, happy that you have found an answer to your question. Happy knitting!
30.12.2025 - 14:05
![]() Lise wrote:
Lise wrote:
Jeg forstår simpelthen ikke jeres svar!!! Jeg prøver lige igen: Jeg har nu strikket alle udtagninger og er nu igang med den sidste del inden ærmerne og kroppen deles. På p 5 skal jeg ifølge diagrammet fortsat skubbe mønsteret 1 m i a1, a2 og a4. Er det korrekt? Hvordan tilpasser jeg i så fald diagrammet???? For jeg kommer jo til at mangle masker i diagrammet.
16.12.2025 - 09:02DROPS Design answered:
Hej Lise, du skal ikke skubbe mønsteret, mønsteret skal passe over hinanden, så det ser ud som det du allerede har strikket. Vi beskriver bare hvilke masker som hører til ryg og forstykke og hvilke som hører til ærmerne :)
05.01.2026 - 14:06
![]() Lise wrote:
Lise wrote:
Jeg har vist fundet en løsning på mine ovenstående spørgsmål: når jeg er færdig med udtagning på for-og bagstykket, strikker jeg efter anvisningen, der følger, så kun a1, a2 og a5 strikkes. Men på. 5 driller. Jeg ender med 4 masker inden ærmet. Skal jeg "tilpasse" denne bort, så den efterhånden "strikkes op"? Men på den måde mister jeg jo masker i det samlede regnskab...Åh, det er IKKE en letlæselig opskrift! Jeg har lige trevlet op for 5. eller 6. gang 😅. Mvh Lise
09.12.2025 - 07:38DROPS Design answered:
Hei Lise. Om man finner sin egen løsning så vil det lønne seg å ha det maskeantallet som er skrevet i oppskriften, slik at mønstret / diagrammene vil stemme. Selv om du har trevlet opp en del ganger, håper jeg du ikke gir opp. Det er en meget flott genser. Gledelig jul :) mvh DROPS Design
15.12.2025 - 13:16
![]() Lise wrote:
Lise wrote:
Tillæg til mit spørgsmål: Og mønsteret passer ikke, når man undlader at tage ud: der kommer til at mangle masker... Mvh Lise
08.12.2025 - 16:24DROPS Design answered:
Hei Lise. Man må øke de masker som det er forklart i oppskriften / vist i diagrammene ellers så vil ikke oppskriften stemme. mvh DROPS Design
15.12.2025 - 13:12
![]() Lise wrote:
Lise wrote:
Hej. Jeg er færdig med at tage ud på for- og bagstykkerne og skal nu kun strikke raglanudtagningerne på ærmerne. Men på p 7 på A3 og A4 er der 2 mørke masker. Er det kun raglanudtagningen - altså den sidste og første maske, jeg ikke skal strikke eller er det begge de mørke omslag på både A3 og A4, jeg ikke skal strikke? Håber mit spørgsmål giver mening? Mvh Lise
07.12.2025 - 08:06DROPS Design answered:
Hei Lise. Om du mener de sorte firkantene på 5. pinne i diagram A.2, A.3 og A.5 der det mangler masker, så ser du de igjen på 5. pinne i diagram A.1, A.2 og A.4. (diagrammene går sammen). mvh DROPS Design
15.12.2025 - 12:04
![]() Bernadette wrote:
Bernadette wrote:
I have 20 stitches too many.
09.11.2025 - 19:54
![]() Bernadette wrote:
Bernadette wrote:
When A.3 and A.4 have been worked 2-2-3-3-3 times in height, the increases are finished on the front and back pieces; continue increasing only on the sleeves as explained above. Continue the pattern on the front and back pieces, but without further increases. Please tell me how I prevent making further increases in the body?
09.11.2025 - 10:57DROPS Design answered:
Hi bernadette, The first/final yarn overs on alternate rows in the diagrams are the yarn overs which give you increases. Do not work these yarn overs (but continue with the other yarn overs for the lace pattern) and you will not increase on the body. Regards, Drops Team.
12.11.2025 - 06:59
![]() Paulinska wrote:
Paulinska wrote:
Hallo, ich stricke das Jäckchen in der Größe 92. Ich bin jetzt bei dem Schritt nach den Zunahmen. Man soll A1 über 7 Maschen stricken. Was bedeutet das genau für die 5. Reihe? 2 zusammen, rechts, Umschlag, rechts, Umschlag, rechts, 2 zusammen? Schöne Grüße!
26.10.2025 - 21:34DROPS Design answered:
Liebe Paulinska, beim letzten Symbol der 5. Reihe stricken Sie 3 Maschen überzogen zusammen, d.h. hier nehmen Sie die 1. Masche von A.2 hinzu (A.2 folgt ja in der Reihe auf A.1) - wie Sie in A.2 sehen, ist dort als 1. Masche ein schwarzes Kästchen in der 5. Reihe, was "keine Masche" bedeutet, denn diese Masche haben Sie bereits bei A.1 durch das Zusammenstricken der 3 Maschen mitgestrickt. Viel Spaß beim Weiterstricken!
26.10.2025 - 22:28
![]() Ann-Marie wrote:
Ann-Marie wrote:
När jag stickar A1 och A2 och ska gör omtaget (hål) stickar jag en rät maska före och efter
06.10.2025 - 11:07DROPS Design answered:
Hej Ann-Marie. Det beror på vilket varv du är på. Är det en vit ruta innan och efter så gör du det. Mvh DROPS Design
06.10.2025 - 14:31
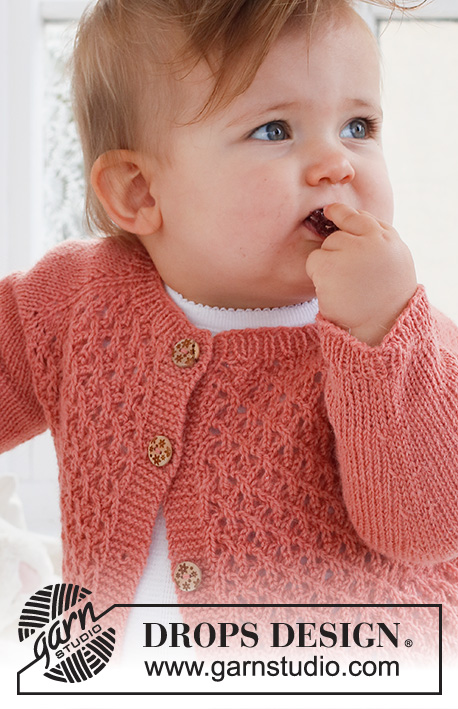
Cotswolds Cardigan#cotswoldscardigan |
||||||||||||||||||||||
 |
 |
|||||||||||||||||||||
Knitted jacket for baby in DROPS Flora. The piece is worked top down, with raglan and lace pattern. Sizes 0 – 2 years.
DROPS Baby 43-2 |
||||||||||||||||||||||
|
------------------------------------------------------- EXPLANATIONS FOR THE PATTERN: ------------------------------------------------------- RIDGE/GARTER STITCH (worked back and forth): Knit all rows. 1 ridge = knit 2 rows. PATTERN: See diagrams A.1 to A.5. The diagrams show all rows in the pattern from the right side. BUTTONHOLES: Work buttonholes on the right band (when the garment is worn). Work from the right side when there are 4 stitches left on the row as follows: Make 1 yarn over, knit 2 together and knit 2. On the next row (wrong side), knit the yarn over to leave a hole. The first buttonhole is worked right after the neck. Then work the other 4 buttonholes with approx. 4½-4½-5-5½-6 cm between each one. RAGLAN: All increases are worked from the right side! On the front and back pieces the increases are included in the diagram. Increase as follows on the sleeves: Increase 1 stitch after markers 1 and 3. Knit the marker-stitch, make 1 yarn over. Increase 1 stitch before markers 2 and 4. Work as far as the marker-stitch and make 1 yarn over, knit the marker-stitch. On the next row purl the yarn overs twisted to avoid holes! Repeat this increase every row from the right side a total of 10-12-14-16-17 times. DECREASE TIP (for sleeves): Decrease 1 stitch on either side of the marker as follows: Work until there are 3 stitches left before the marker, knit 2 together, knit 2 (marker sits between these 2 stitches), slip 1 stitch as if to knit, knit 1 and pass the slipped stitch over the knitted stitch. ------------------------------------------------------- START THE PIECE HERE: ------------------------------------------------------- JACKET – SHORT OVERVIEW OF THE PIECE. The neck and yoke are worked back and forth with circular needle, top down. The yoke is divided for body and sleeves and the body continued back and forth with circular needle. The sleeves are worked in the round with double pointed needles. NECK: Cast on 93-93-93-111-111 stitches with circular needle size 2.5 mm and DROPS Flora. Purl 1 row from the wrong side with 6 band stitches in GARTER STITCH – read description above, on each side. Then work rib as follows: 6 band stitches in garter stitch, * knit 1, purl 1 *, work from *-* until there are 7 stitches left, knit 1 and 6 band stitches in garter stitch. Work this rib for 2 cm. Change to circular needle size 3 mm. YOKE: Work the BUTTONHOLE on the right band – read description above! On the first row from the right side insert 4 markers and work as follows: Front piece: 6 band stitches in garter stitch, work A.1, then A.2 0-0-0-1-1 time, A.3. Sleeve: Insert marker 1 in the next stitch, work 12 stitches in stocking stitch and increase 4 stitches evenly over these stitches, insert marker 2 in the next stitch. Back piece: Work A.4, A.2 3-3-3-4-4 times, then A.3. Sleeve: Insert marker 3 in the next stitch, work 12 stitches in stocking stitch and increase 4 stitches evenly over these stitches, insert marker 4 in the next stitch. Front piece: Work A.4, A.2 0-0-0-1-1 time, A.5 and 6 band stitches in garter stitch. Continue this pattern on the next row from right side start to increase for sleeve – read description above. REMEMBER THE KNITTING TENSION! When A.1 to A.5 are completed, work the next row from the right side as follows: 6 band stitches in garter stitch, work A.1, A.2 1-1-1-2-2 times, A.3, work stocking stitch and increase as before over the sleeve as far as marker 2, work A.4, A.2 5-5-5-6-6 times, A.3, work stocking stitch and increase as before over the sleeve as far as marker 4, work A.4, A.2 1-1-1-2-2 times, A.5 and 6 band stitches in garter stitch. Repeat this pattern in height. Each time A.3 and A.4 are repeated in height, there is room for 1 more repeat of A.2 on the front pieces and 2 more repeats on the back piece. When A.3 and A.4 have been worked 2-2-3-3-3 times in height, the increases are finished on the front and back pieces; continue increasing only on the sleeves as explained above. Continue the pattern on the front and back pieces, but without further increases. When all the increases are finished there are 189-197-229-255-259 stitches. Now work pattern as follows: 6 band stitches in garter stitch, A.1 over 7 stitches, A.2 3-3-4-5-5 times, work 37-41-45-49-51 stitches in stocking stitch, A.2 9-9-11-12-12 times, work 37-41-45-49-51 stitches in stocking stitch, A.2 3-3-4-5-5 times, A.5 and 6 band stitches in garter stitch. Continue this pattern. When you work round 5 in A.2 on the back piece, knit the first stitch in the first repeat, the last stitch in the last repeat is worked over the first stitch on the sleeve. When the piece measures 12-13-14-15-16 cm from the cast-on edge, divide for the body and sleeves as follows: 6 band stitches in garter stitch, work 25-25-31-37-37 stitches as before, place the next 37-41-45-49-51 stitches on a thread for the sleeve, cast on 6 stitches under the sleeve, work 54-54-66-72-72 stitches, place the next 37-41-45-49-51 stitches on a thread for the sleeve, cast on 6 stitches under the sleeve, work 24-24-30-36-36 stitches as before and 6 band stitches in garter stitch. BODY: = 127-127-151-169-169 stitches. Continue back and forth as follows: 6 band stitches in garter stitch, work A.1, A.2 until there are 12 stitches left, work A.5 and 6 band stitches in garter stitch. When the piece measures 9-12-13-15-17 cm from the division, increase 20-20-22-26-26 stitches evenly spaced on the next row from the right side (do not increase over the bands) = 147-147-173-195-195 stitches. Change to circular needle size 2.5 mm and work rib from the wrong side as follows: 6 band stitches in garter stitch, * purl 1, knit 1 *, work from *-* until there are 7 stitches left, purl 1 and 6 band stitches in garter stitch. Continue this rib for 3 cm. Cast off. The jacket measures approx. 24-28-30-33-36 cm from the shoulder down. SLEEVES: Place the 37-41-45-49-51 stitches from the thread on the one side of the piece on double pointed needles size 3 mm and knit up 1 stitch in each of the 6 stitches cast on under the sleeve = 43-47-51-55-57 stitches. Insert a marker thread in the middle of the new stitches under the sleeve. Start at the marker and work stocking stitch in the round for 1 cm. Now decrease 2 stitches under the sleeve – read DECREASE TIP. Decrease like this every 2½-2-2-2-2½ cm a total of 3-5-6-7-8 times = 37-37-39-41-41 stitches. When the sleeve measures 10-12-15-16-22 cm from the division increase 5 stitches evenly spaced = 42-42-44-46-46 stitches. Change to double pointed needles size 2.5 mm and work rib (knit 1, purl 1) for 3 cm. Cast off with knit over knit and purl over purl. The sleeve measures approx. 13-15-18-19-25 cm from the division. Work the other sleeve in the same way. ASSEMBLY: Sew the buttons onto the left band. |
||||||||||||||||||||||
Diagram explanations |
||||||||||||||||||||||
|
||||||||||||||||||||||
 |
||||||||||||||||||||||
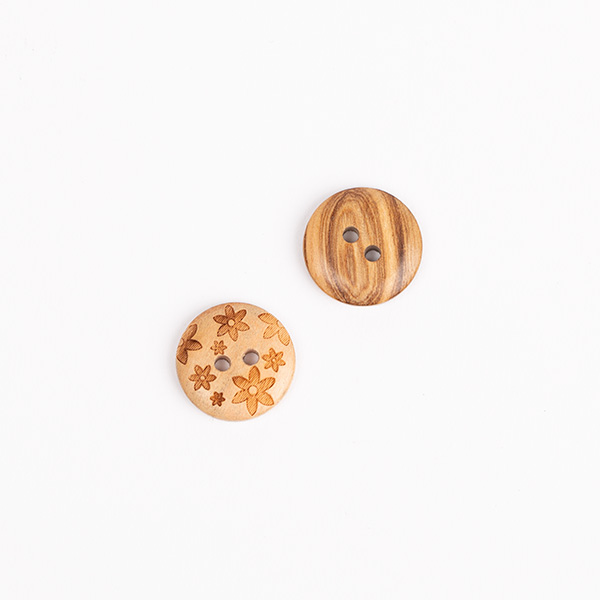
Have you finished this pattern?Tag your pictures with #dropspattern #cotswoldscardigan or submit them to the #dropsfan gallery. Do you need help with this pattern?You'll find 30 tutorial videos, a Comments/Questions area and more by visiting the pattern on garnstudio.com. © 1982-2026 DROPS Design A/S. We reserve all rights. This document, including all its sub-sections, has copyrights. Read more about what you can do with our patterns at the bottom of each pattern on our site. |
||||||||||||||||||||||


Post a comment to pattern DROPS Baby 43-2
We would love to hear what you have to say about this pattern!
If you want to leave a question, please make sure you select the correct category in the form below, to speed up the answering process. Required fields are marked *.