
Popular categories
Looking for a yarn?


Comments / Questions (19)
![]() Natalia GonzalezRehahn wrote:
Natalia GonzalezRehahn wrote:
Ich verstehe nicht, warum die Blende in zwei Teilen gestrickt und dann im Nacken zusammen genäht wird. Kann man nicht die Blendenmaschen von rechts unten bis durchgehend links unten auf einmal aufnehmen und die Blende in einem Stück arbeiten? Im Voraus vielen Dank.
01.02.2023 - 10:22
![]() Natalia GonzalezRehahn wrote:
Natalia GonzalezRehahn wrote:
Ich verstehe nicht, warum die Blende in zwei Teilen gestrickt und dann im Nacken zusammen genäht wird. Kann man nicht die Blendenmaschen von rechts unten bis durchgehend links unten auf einmal aufnehmen und die Blende in einem Stück arbeiten? Im Voraus vielen Dank.
01.02.2023 - 10:22DROPS Design answered:
Liebe Frau GonzalezRehahn, es würde dann sehr viele Maschen aufgefassen, aber gerne können Sie die Maschen von den beiden Blenden nuf auf einmal auffassen und stricken - beachten Sie, nur daß die Maschenanzahl das Bündchen passt. Viel Spaß beim stricken!
01.02.2023 - 14:18
![]() Sophie wrote:
Sophie wrote:
Hej! Ingen fråga om mönster, men...Har stickat denna jättefina kofta i Andes garn; vågar jag tvätta den i maskin på hand/ulltvätt? Centrifugera? Den är ganska tung. Vänligen Sophie.
19.01.2023 - 11:33DROPS Design answered:
Hei Sophie. Anbefaler å følge vaskeanvisningen. Håndvask, maks 30°C. Press/klem ut vannet og legg det flatt til tørk, men unngå å tørke plagget på underlag som suger til seg fuktighet, som for eksempel frottéhåndklær. Da kan plagget miste sin naturlige elastisitet. Om du ikke må vaske plagget, kan det fint bare henges ut til lufting, Andes er nærmest selvrensende. mvh DROPS Design
23.01.2023 - 08:28
![]() Nelleke wrote:
Nelleke wrote:
Kan ik ook de halsboord en voorpandboorden meteen eraan vast breien? In plaats van los op het eind?
12.09.2022 - 13:42DROPS Design answered:
Dag Nelleke,
Dat zou kunnen, maar daarvoor zijn nogal wat aanpassingen nodig in het patroon en helaas is het voor ons niet mogelijk om patronen aan te passen naar persoonlijke wensen. Misschien kun je een patroon vinden die dat wel heeft.
14.09.2022 - 12:02
![]() Deb H wrote:
Deb H wrote:
Are the yarn quantities correct for this pattern?
05.05.2022 - 11:59DROPS Design answered:
Dear Deb H, the yarn quantities are right - remember to check your gauge first: 10 stitches x 14 rows stocking stitch = 10 x10 cm - read more here; Should you like to use any other yarn, remember to use our yarn converter. Happy knitting!
05.05.2022 - 15:15
![]() Derya wrote:
Derya wrote:
Hi, in the marker insterting section there is a mistake. I am working with 38 stiches. 2 first stiches + next 8 stiches + next 14 stiches + 8 stiches + last 2 stiches =34 stiches. Could it be 2 + 8 + 18 + 8 + 2?
10.01.2022 - 16:29DROPS Design answered:
Dear Derya, you insert the markers in the next stitch, not between the stitches. So 34 + the 4 stitches with the markers = 38 stitches. Happy knitting!
10.01.2022 - 19:47
![]() Mdlenka wrote:
Mdlenka wrote:
Dobrý den, máte tam chybu (odstavec TRUP): "Ve výši 5 cm od průramků přidáme 1 oko na každé straně značky - viz TIP - UJÍMÁNÍ-1." Správně je "viz TIP - PŘIDÁVÁNÍ-1".
28.11.2021 - 02:43DROPS Design answered:
Dobrý den, Mdlenko, děkujeme za upozornění - opraveno! Hezký den! Hana
29.11.2021 - 07:09
![]() Marica wrote:
Marica wrote:
Salve, per la prima taglia, dice di aumentare per i davanti 1 m ogni 4 ferri per 5 volte , ottenendo così 7 m per ciascun davanti e per i raglan 1 m ogni 2 ferri per 15 volte; peró la parte sbieca dello scollo risulterà piuttosto corta mentre nella foto e nel disegno lo scollo sembra terminare alla stessa altezza della fine degli aumenti dei raglan. Poi quando si separano le maniche dice di lavorare le prime 22 m del davanti, ma come si arriva a 22m con 5 aumenti +2 m iniziali? Grazie
17.11.2021 - 23:29DROPS Design answered:
Buongiorno Marica, è arrivata al numero di 166 maglie alla fine degli aumenti? Buon lavoro!
20.11.2021 - 12:27
![]() Marica wrote:
Marica wrote:
Salve, nella spiegazione per la orima taglia, dice di aumentare per i davanti 1 m ogni 4 ferri per 5 volte , e per i raglan 1 m ogni 2 ferri per 15 volte; in questo modo peró la parte sbieca dello scollo risulterà piuttosto corta mentre nella foto e nel disegno cin le misure lo scollo sembra terminare alla stessa altezza della fine degli aumenti dei raglan. Firse non ho capito qualcosa?
17.11.2021 - 23:17DROPS Design answered:
Buongiorno Monica, gli aumenti per il raglan continuano dopo la fine degli aumenti per il collo. Buon lavoro!
20.11.2021 - 12:25
|
|
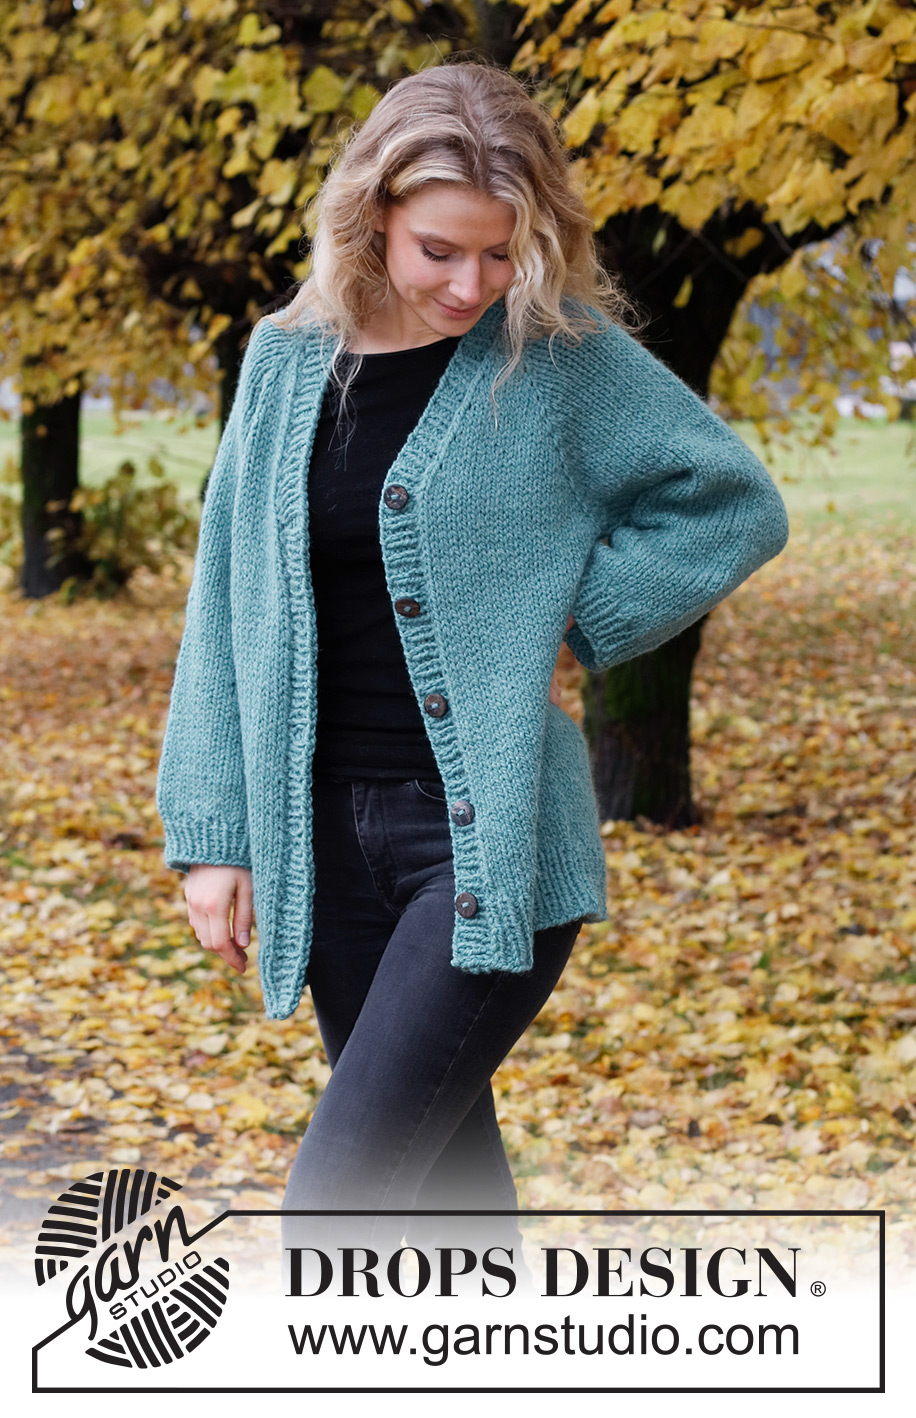
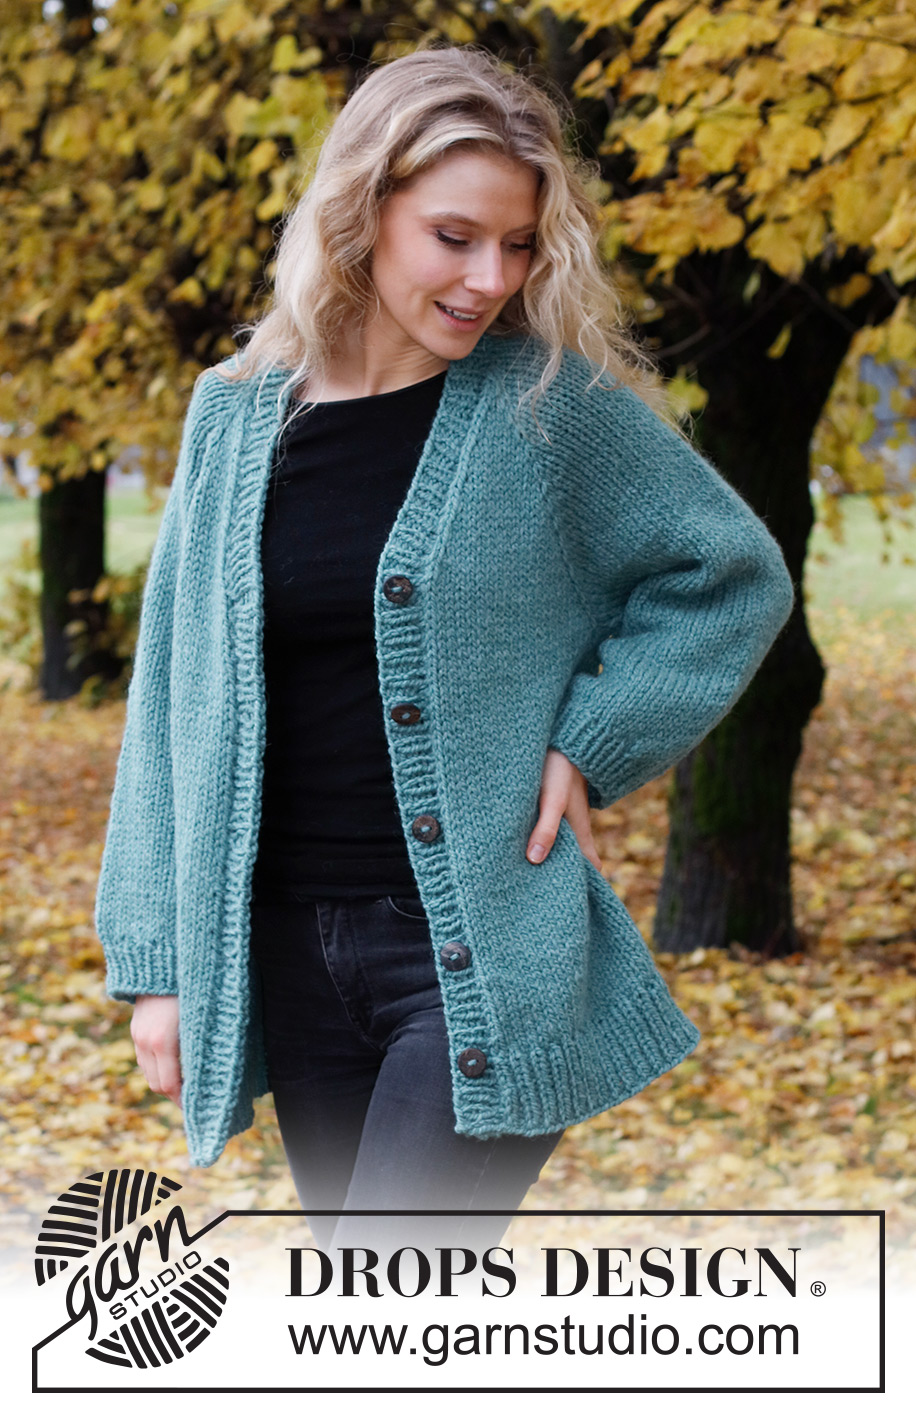
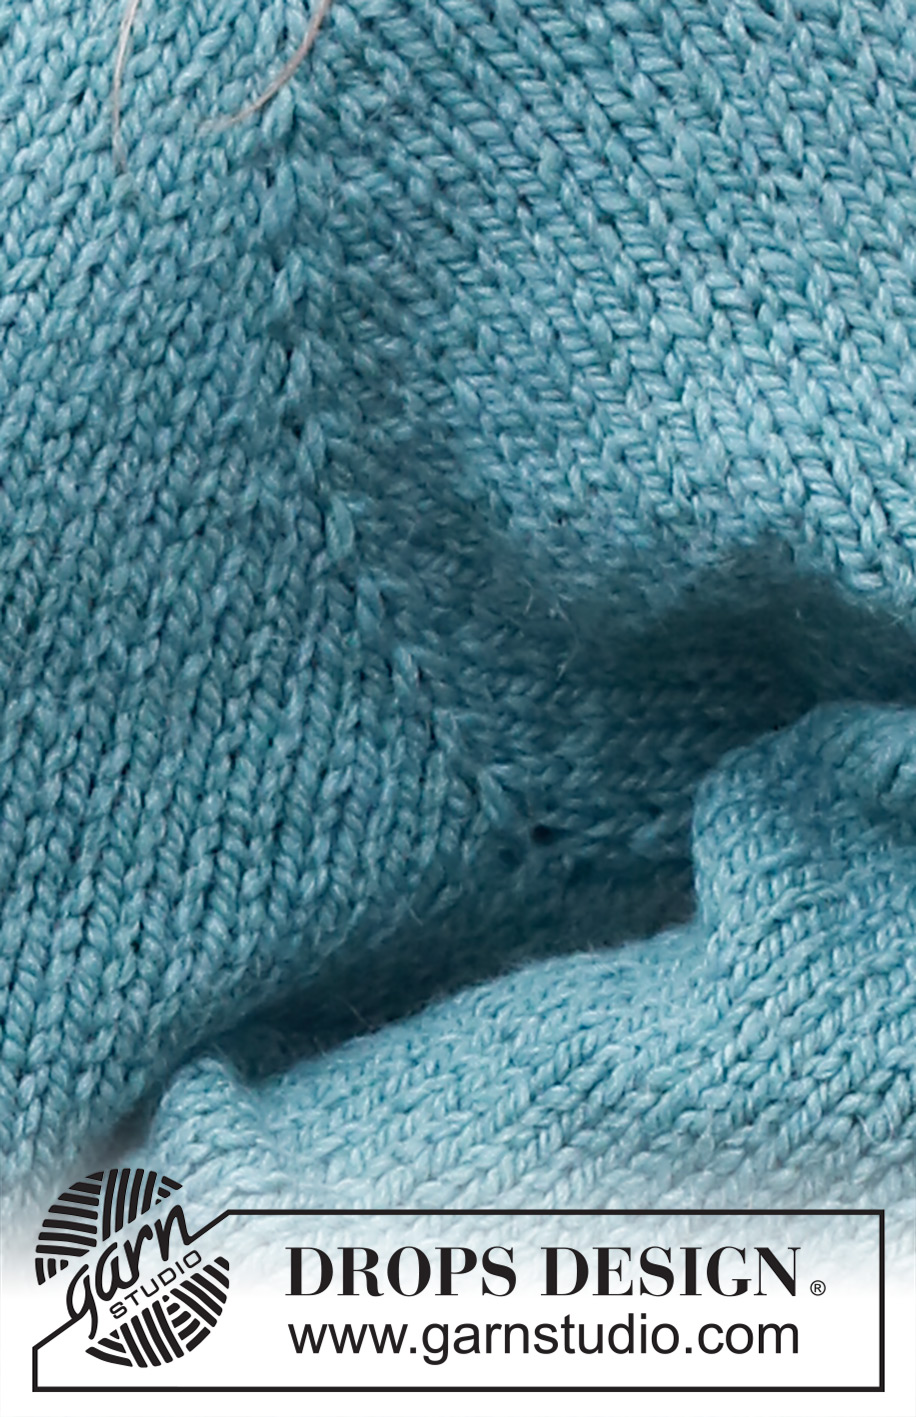
Water Point#waterpointjacket |
|
 |
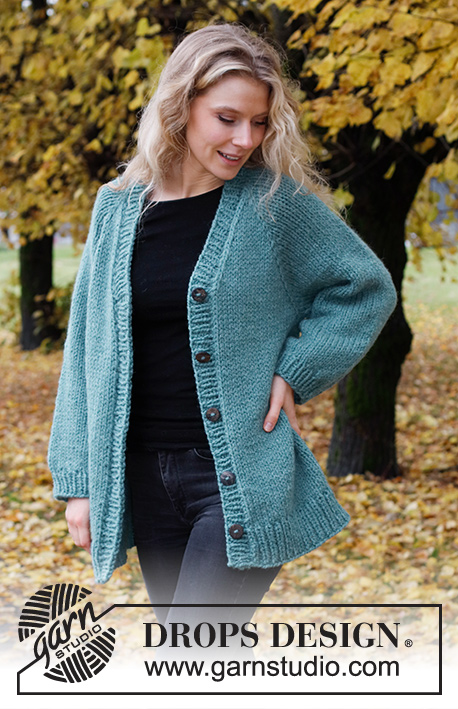 |
Knitted jacket in DROPS Andes. Piece is knitted top down with raglan and V-neck. Size XS – XXL.
DROPS 226-44 |
|
|
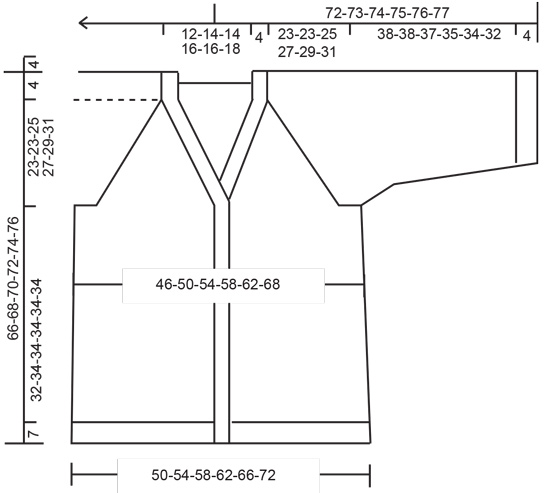
---------------------------------------------------------- EXPLANATION FOR THE PATTERN: ---------------------------------------------------------- GARTER STITCH (back and forth): Knit all rows. 1 ridge vertically = knit 2 rows. INCREASE TIP-1 (applies to sides of body): All increases are done from the right side! Work until 2 stitches remain before marker thread, make 1 yarn over, knit 4 (marker thread is in the middle of these 4 stitches), make 1 yarn over. On next row purl yarn overs twisted to avoid holes. Then work the new stitches in stocking stitch. INCREASE TIP-2 (evenly): To calculate how to increase evenly, use the total number of stitches on row (e.g. 102 stitches), minus edge stitches (e.g. 2 stitches) and divide the remaining stitches by number of increases to be done (e.g. 5) = 20. In this example increase by making 1 yarn over after every 20th stitch. On next row work yarn overs twisted to avoid holes. RAGLAN: All increases are done from the right side. Increase 1 stitch on each side of stitch with marker (= a total of 8 stitches increased on row): Increase 1 stitch by making 1 yarn over. On next row purl yarn overs twisted to avoid holes. Then work the new stitches in stocking stitch. DECREASE TIP (applies to mid under sleeves): Decrease 1 stitch on each side of marker thread as follows: Work until 3 stitches remain before marker thread and knit 2 together, knit 2 (marker thread is between these 2 stitches), slip 1 stitch knitwise, knit 1, pass slipped stitch over stitch worked. CAST-OFF TIP: To avoid a tight cast-off edge when casting off, you may use a larger needle. If this still is too tight make 1 yarn over after approx. every 6th stitch while casting off (cast off yarn overs as stitches). ---------------------------------------------------------- START THE PIECE HERE: ---------------------------------------------------------- JACKET - SHORT OVERVIEW OF THE PIECE: Work yoke back and forth on circular needle from mid front, work top down. Now divide yoke for body and sleeves. Work body back and forth on circular needle. Work sleeves in the round on double pointed needles/a short circular needle. Work bands at the end. YOKE: Cast on 36-38-38-40-40-42 stitches on circular needle size 9 mm with DROPS Andes. Purl 1 row from wrong side. Insert a marker after 18-19-19-20-20-21 stitches (= mid back on back piece), measure yoke from this marker! Now insert 4 markers in the piece without working the stitches. Insert markers in a stitch between body and sleeves: Skip the 2 first stitches, insert a marker in next stitch, skip the next 8 stitches, insert a marker in next stitch, skip the next 12-14-14-16-16-18 stitches, insert a marker in next stitch, skip the next 8 stitches, insert a marker in next stitch. 2 stitches remain on round after last marker. Now work in stocking stitch back and forth with 1 edge stitch in GARTER STITCH in each side – read explanation above, at the same time on first row begin increase for raglan and on third row begin increase for V-neck – increase as explained below. REMEMBER THE KNITTING TENSION! RAGLAN: On first row increase for RAGLAN – read explanation above. Increase like this every other row 15-15-17-18-19-21 times in total. V-NECK: On third row begin increase for V-neck. Increase as follows from right side: 1 edge stitch in garter stitch, knit 1, make 1 yarn over, work until 2 stitches remain on needle, make 1 yarn over, knit 1, 1 edge stitch in garter stitch. On next row purl yarn overs twisted to avoid holes. Increase like this every 4th row 5-6-6-7-7-8 times in total. When all increases for raglan and V-neck are done, there are 166-170-186-198-206-226 stitches on row. Work until piece measures 23-23-25-27-29-31 cm from marker mid back. Now divide piece for body and sleeves as follows: Work the first 22-23-25-27-28-31 stitches (= front piece), slip the next 40-40-44-46-48-52 stitches on a stitch holder for sleeve, cast on 4-6-6-6-8-8 new stitches on needle (= in the side under sleeve), work the next 42-44-48-52-54-60 stitches (= back piece), slip the next 40-40-44-46-48-52 stitches on a stitch holder for sleeve, cast on 4-6-6-6-8-8 new stitches on needle (= in the side under sleeve) and work the last 22-23-25-27-28-31 stitches. Now finish body and sleeves separately. NOW MEASURE PIECE FROM HERE! BODY: = 94-102-110-118-126-138 stitches. Insert 1 marker thread in the middle of the new stitches cast-on in the side under the sleeves (= 2-3-3-3-4-4 new stitches on each side of marker thread). Move the marker threads upwards when working; they should be used for increase later in the sides. Continue with stocking stitch and 1 edge stitch in garter stitch in each side towards mid front. When piece measures 5 cm from division, increase 1 stitch on each side of marker thread in each side - read INCREASE TIP-1. Repeat increase when piece measures 15 cm = 102-110-118-126-134-146 stitches. Work until piece measures 32-34-34-34-34-34 cm from division. Knit 1 row from right side while increasing 5-5-7-7-9-9 stitches evenly - read INCREASE TIP-2 = 107-115-125-133-143-155 stitches. Switch to circular needle size 7 mm. Work rib follows (begin from wrong side): 1 edge stitch in garter stitch, (purl 1/knit 1) until 2 stitches remain, purl 1, 1 edge stitch in garter stitch. Continue back and forth like this until rib measures 7 cm. Cast off with knit over knit and purl over purl and garter stitch over garter stitch, read CAST-OFF TIP. Jacket measures approx. 66-68-70-72-74-76 cm from shoulder and down. SLEEVES: Slip the 40-40-44-46-48-52 stitches from stitch holder in one side on a short circular needle/double needles size 9 mm and pick in addition up 1 stitch in each of the 4-6-6-6-8-8 new stitches cast on in the side under sleeve = 44-46-50-52-56-60 stitches. Insert a marker thread in the middle of the new stitches under sleeve (= 2-3-3-3-4-4 new stitches on each side of marker thread). Move the marker thread upwards when working - marker threads should be used for decrease mid under sleeve. Continue in the round in stocking stitch. When piece measures 2 cm, decrease 1 stitch on each side of marker thread under sleeve - read DECREASE TIP. Decrease like this every other row 6-6-8-8-10-11 times in total, then every 4th row 1 time in total in all sizes = 30-32-32-34-34-36 stitches. Work until sleeve measures 35-35-34-32-31-29 cm (shorter measurements in the larger sizes because of longer yoke). Switch to double pointed needles size 7 mm. Work rib (knit 1/purl 1) in the round for 4 cm. Cast off with knit over knit and purl over purl - remember CAST-OFF TIP. Sleeve measures 39-39-38-36-35-33 cm from division. Work the other sleeve the same way. RIGHT BAND: Begin from right side at the bottom on right front piece with circular needle size 7 mm and DROPS Andes. Pick up 93-109 stitches inside 1 edge stitch in garter stitch along right front piece and up to mid back on back piece (number of stitches must be divisible by 2 + 1 stitch). Purl 1 row from wrong side – increase with yarn over right were first decrease for V-neck begun by working as follows: * Purl 1, make 1 yarn over *, work from *-* 2 times (= 2 stitches increased) – on next row work yarn overs twisted to avoid holes. Now work rib as follows from right side: Work 1 edge stitch in garter stitch, * knit 1, purl 1 *, work from *-* until 2 stitches remain on needle, knit 1 and finish with 1 edge stitch in garter stitch. Continue rib back and forth like this until band measures 1½-2 cm. Now decrease for 5 buttonholes evenly in all sizes. Place top buttonholes approx. 1 cm below were decrease for V-neck began, and bottom buttonhole approx. 7 cm from bottom edge. 1 buttonhole = make 1 yarn over and work 2 stitch together. Continue with rib until band measures approx. 4 cm. Cast off stitches with knit over knit and purl over purl. LEFT BAND: Begin from right side mid back of neck with circular needle size 7 mm and DROPS Andes. Pick up 93-109 stitches inside 1 edge stitch in garter stitch along edge and down along left front piece (number of stitches must be divisible by 2 + 1 stitch). Purl 1 row from wrong side – increase with yarn over right were first decrease for V-neck begun by working as follows: * Purl 1, make 1 yarn over *, work from *-* 2 times (= 2 stitches increased) – on next row work yarn overs twisted to avoid holes. Now work rib as follows from right side: Work 1 edge stitch in garter stitch, * knit 1, purl 1 *, work from *-* until 2 stitches remain on needle, knit 1 and finish with 1 edge stitch in garter stitch. Continue rib back and forth like this until band measures approx. 4 cm - adjust length according to right band. Cast off stitches with knit over knit and purl over purl. ASSEMBLY: Sew the buttons on to left band. Sew band together mid back. |
|
 |
|
Have you finished this pattern?Tag your pictures with #dropspattern #waterpointjacket or submit them to the #dropsfan gallery. Do you need help with this pattern?You'll find 32 tutorial videos, a Comments/Questions area and more by visiting the pattern on garnstudio.com. © 1982-2026 DROPS Design A/S. We reserve all rights. This document, including all its sub-sections, has copyrights. Read more about what you can do with our patterns at the bottom of each pattern on our site. |
|


With over 40 years in knitting and crochet design, DROPS Design offers one of the most extensive collections of free patterns on the internet - translated to 17 languages. As of today we count 324 catalogues and 12290 patterns translated into English (UK/cm). 12290
We work hard to bring you the best knitting and crochet have to offer, inspiration and advice as well as great quality yarns at incredible prices! Would you like to use our patterns for other than personal use? You can read what you are allowed to do in the Copyright text at the bottom of all our patterns. Happy crafting!
Post a comment to pattern DROPS 226-44
We would love to hear what you have to say about this pattern!
If you want to leave a question, please make sure you select the correct category in the form below, to speed up the answering process. Required fields are marked *.