
Popular categories
Looking for a yarn?


Comments / Questions (29)
![]() Cynthia wrote:
Cynthia wrote:
I don't understand how this finished piece ends up measuring 54 centimeters (for S) from the shoulder to the hem if the pattern says to continue for 17 cm in stockinette and then 8 cm ribbing. I'm almost positive I didn't mess up before splitting for sleeves and yet I end up about 10 centimeters short. I added 2 additional centimeters also. I'm in the middle of the ribbing and will have to frog it to lengthen the body.
06.02.2025 - 00:21
![]() Philippine Cochet wrote:
Philippine Cochet wrote:
Bonjour, J'aimerais réaliser ce modèle cependant j'aimerais faire une taille un peu oversize. Normalement je porte du S (je fais 1m62). Le modèle est-il déjà oversize ou vaut-il mieux que je prévois de le faire en M ? Je vous remercie, Bonne journée
31.01.2025 - 14:19DROPS Design answered:
Bonjour Mme Cochet, mesurez un vêtement similaire que vous avez et dont vous aimez la taille et comparez ces mesures à celles du schéma du bas de page pour choisir la taille correspondante ou faire les ajustements nécessaires. Retrouvez plus d'infos ici. Bon tricot!
31.01.2025 - 16:06
![]() Juliana wrote:
Juliana wrote:
Another question, I began the cast on using 8mm drops needles, and drops snow yarn for size S. I made the gauge swatch, it was perfect. So I did continental cast on 45 stitches (I tried on both 60 cm and 40 cm cable), and it was too tight to be able to knit in the round on my needles. I can't figure out what I'm doing wrong to begin the sweater. Any tips appreciated!
24.01.2025 - 23:13DROPS Design answered:
Dear Juliana, sometimes the cast on edge may be a little too tight. To avoid this you can use a larger needle to cast on and then change to your main needle so that you can work the stitches more easily. Remember that the gauge swatch is for stocking stitch with 9mm needles (since the 8mm needles are used for the rib edges only, so the gauge won't fully match the one calculated) Happy knitting!
25.01.2025 - 23:05
![]() Ariana wrote:
Ariana wrote:
Novice question here, I love this pattern, but my yarn belongs in category D (120m/100g) or 7 ish wpi. Would I still be able to make this pattern work? Or should I make some adjustments?
14.01.2025 - 17:14DROPS Design answered:
Dear Ariana, if you don't get the correct tension, ie 10 sts x 14 rows stocking stitch = 10 x 10 cm, you might have to make a new search for a jumper matching your tension - find for ex. all jumpers yarn group D here - but note that you can also check with your own tension. Happy knitting!
15.01.2025 - 08:12
![]() Juliana wrote:
Juliana wrote:
Hello! - first regarding the following section " When the rib measures 4 cm = 1½", increase 7-8-8-8-9-9 stitches by increasing every other purl-2 section to purl-3 – read INCREASE TIP-1 = 49-53-53-56-60-60 stitches. Increase 1 stitch at the end of a purled section by making 1 yarn over. " Do we make 1 yarn over after the third purl stitch or before we make the third purl stitch ? Second, "On the next round purl the yarn overs twisted" is this referring to the twisted purl? Thanks!
14.01.2025 - 16:13DROPS Design answered:
Dear Juliana, for increasing, you can do it either way, it will not influence the look of the final sweater much. I would increase before the last purl stitch though. As for the yarnovers, you should purl them in a way that the "legs" of the stitch corsses each other, tus filling out the whole created by the yarnover. Happy Knitting!
14.01.2025 - 16:30
![]() Micha wrote:
Micha wrote:
Size XS "After the last increase to raglan there are 138 sts on needle. Cont. working w/out further inc. until piece measures 20cm = 8" from marker." How do I continue making decorative holes w/out increasing? The sample image shows holes all the way to the base of the sleeve. If I continue knitting now, the holes will stop early.
29.12.2024 - 22:56DROPS Design answered:
Dear Micha, usually the increases should practically end right at the 20 cm / 8 " mark; you might need to work just a few extra rows without holes, which won't be too noticeable. However, if you have many rows left or you want to work holes in these few last rows as well you can continue the increases, but adjusting the number of stitches. For example, work as follows starting right before each raglan line: knit 2 together, 1 yarn over, raglan-line, 1 yarn over, slip 1 stitch knitwise, knit 1, pass slipped stitch over knitted stitch. This way you will continue with the holes while keeping the same number of stitches in the row. Happy knitting!
30.12.2024 - 23:52
![]() Friedl wrote:
Friedl wrote:
Het werk telt 66 steken voor maat S wanneer de markeringen voor de raglan worden ingevoegd. Er staat na 12, 8, 23, 8 en 11 steken over. Als je dit optelt kom je aan 62 steken, maar je moet er 66 hebben?
26.11.2024 - 15:56DROPS Design answered:
Dag Friedl,
Je voegt de markeerdraden in de steken en niet tussen de steken, vandaar het verschil van 4 steken.
28.11.2024 - 20:01
![]() Perly Ekman wrote:
Perly Ekman wrote:
Hej, får inte riktigt ihop matematikeni oket och dess höjd, beräkningar utifrån stl. M: 10cm ska motsvara 14varv = ca 0.7cm per varv Så vid slutet av halskanten har vi 8cm + 0.7cm för sista varvet räta, 13 upprepningar av slätstickning vv/ ökningar vv blir 26 varv = strax över 18cm, så totalt ca 27cm men i nästa steg ska vi sticka rätstickning tills arbetet mäter 24cm?
13.11.2024 - 15:26
![]() Roni Axelrod wrote:
Roni Axelrod wrote:
I haven’t knitted top down yet. Are the instructions easy to follow?
22.10.2024 - 00:25DROPS Design answered:
Hi Roni, As a first knit-top-down pattern, working raglan is perhaps not the easiest (maybe a round yoke with even increases would be easier). But if you are an experienced knitter, then you should be able to follow the pattern. Happy crafting!
22.10.2024 - 06:31
![]() Francesca wrote:
Francesca wrote:
DROPS Design answered: Buongiorno Francesca, ha seguito le istruzioni di lavaggio riportate sull'etichetta? Può provare a lavorare con Wish o Andes. Buon lavoro! Buongiorno Garnstudio, ma sulla vostra etichetta non ci sono le istruzioni di lavaggio….dove si trovano?
07.04.2024 - 08:13DROPS Design answered:
Buonasera Francesca, a questo link può trovare le istruzioni per la cura dei filati. Buon lavoro!
01.05.2024 - 21:56
|
|
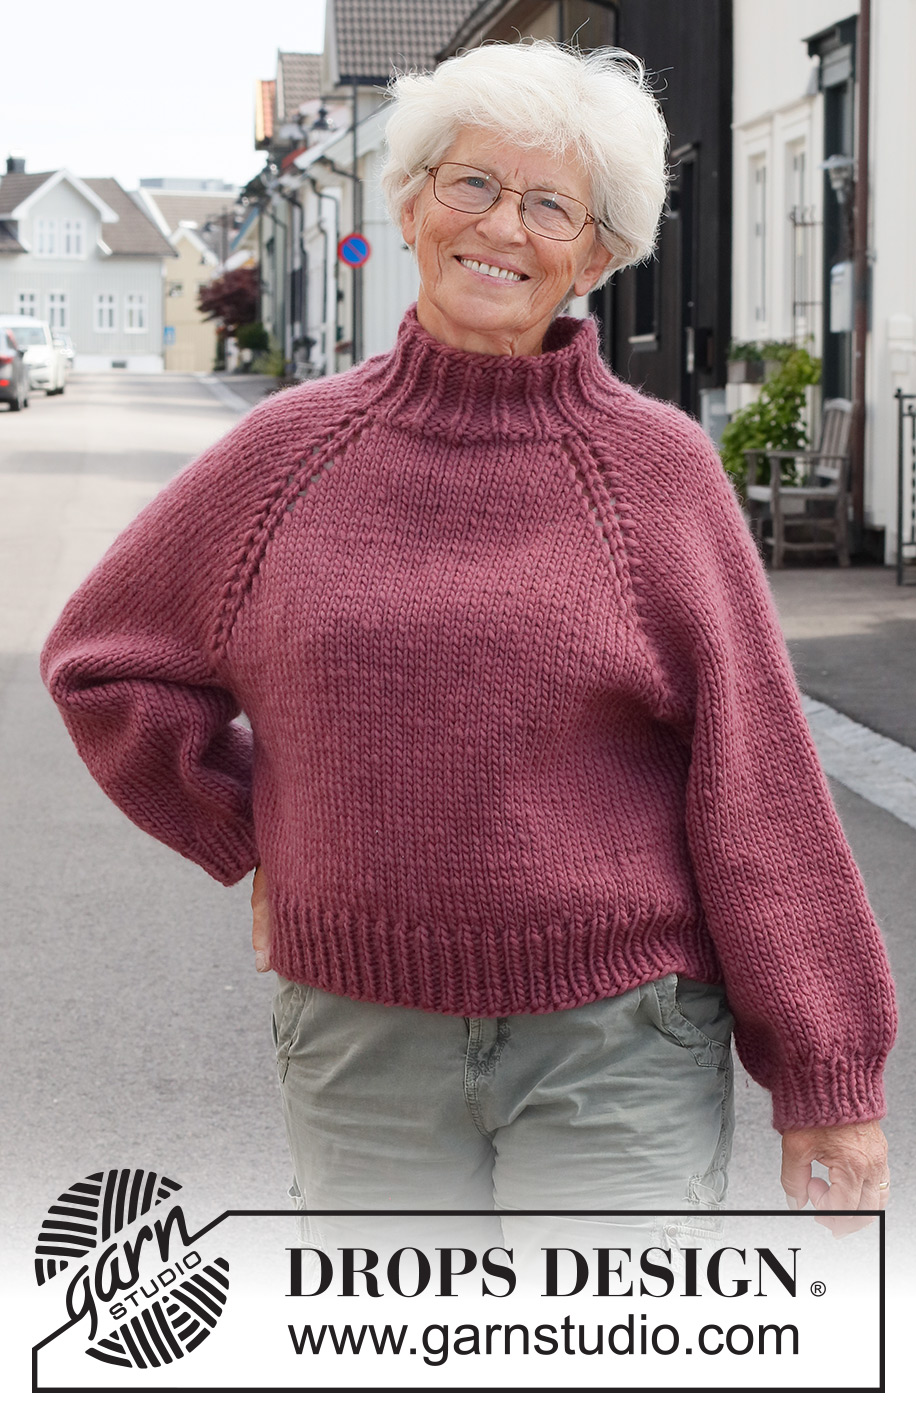
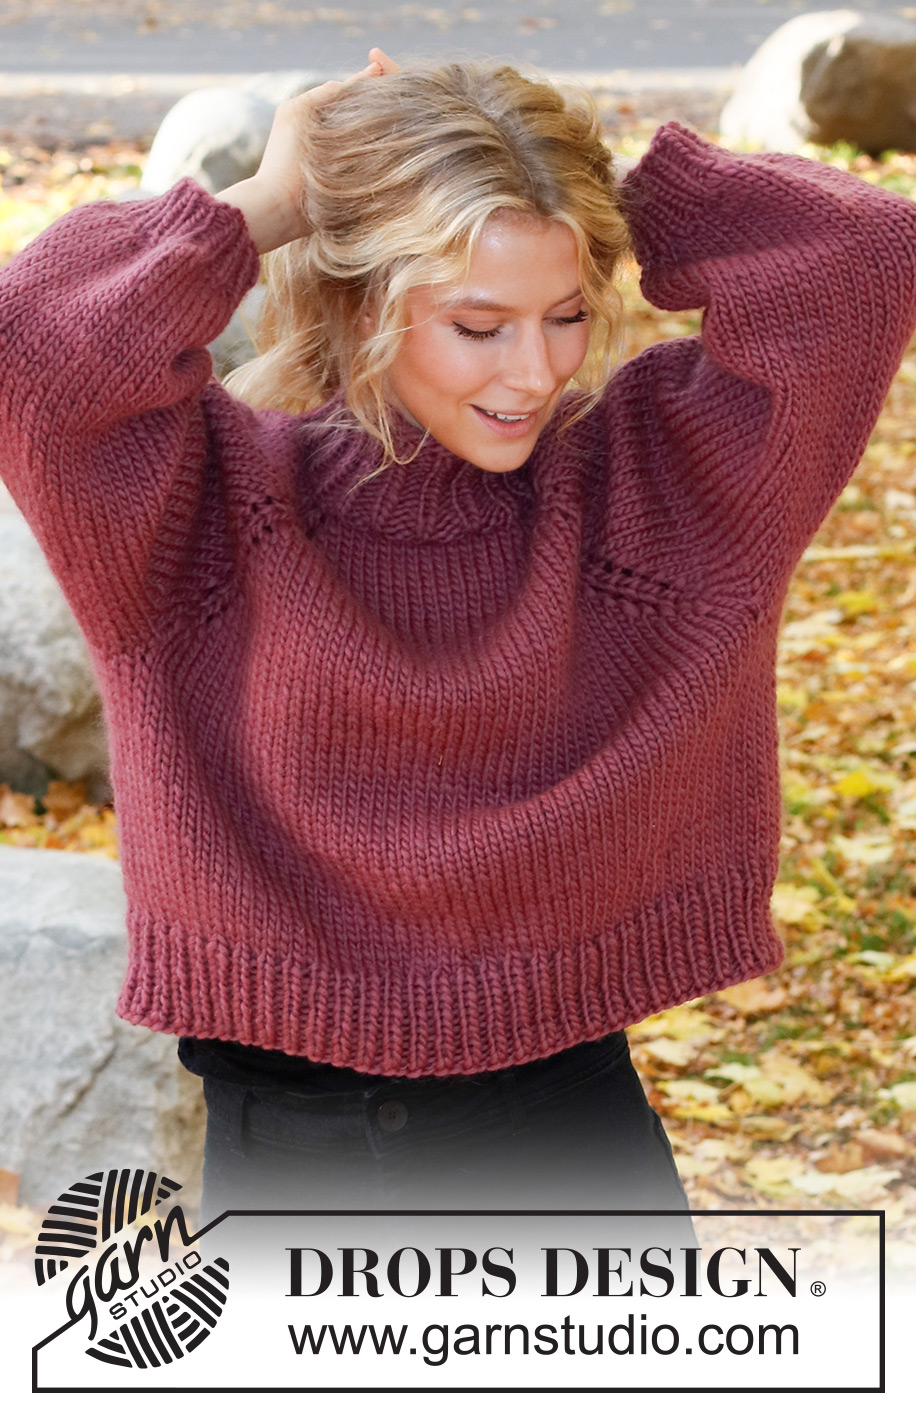
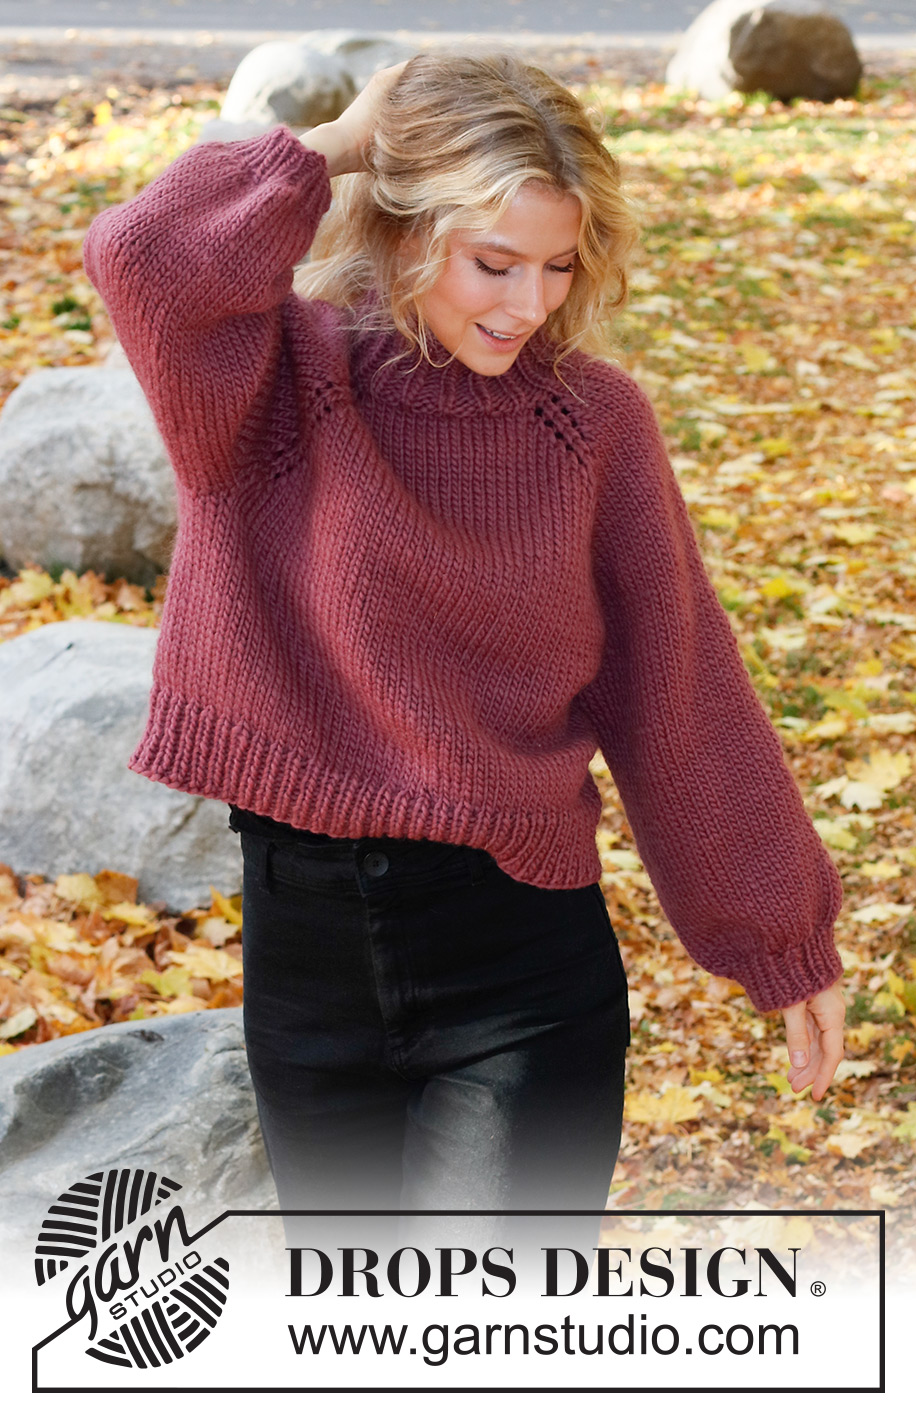
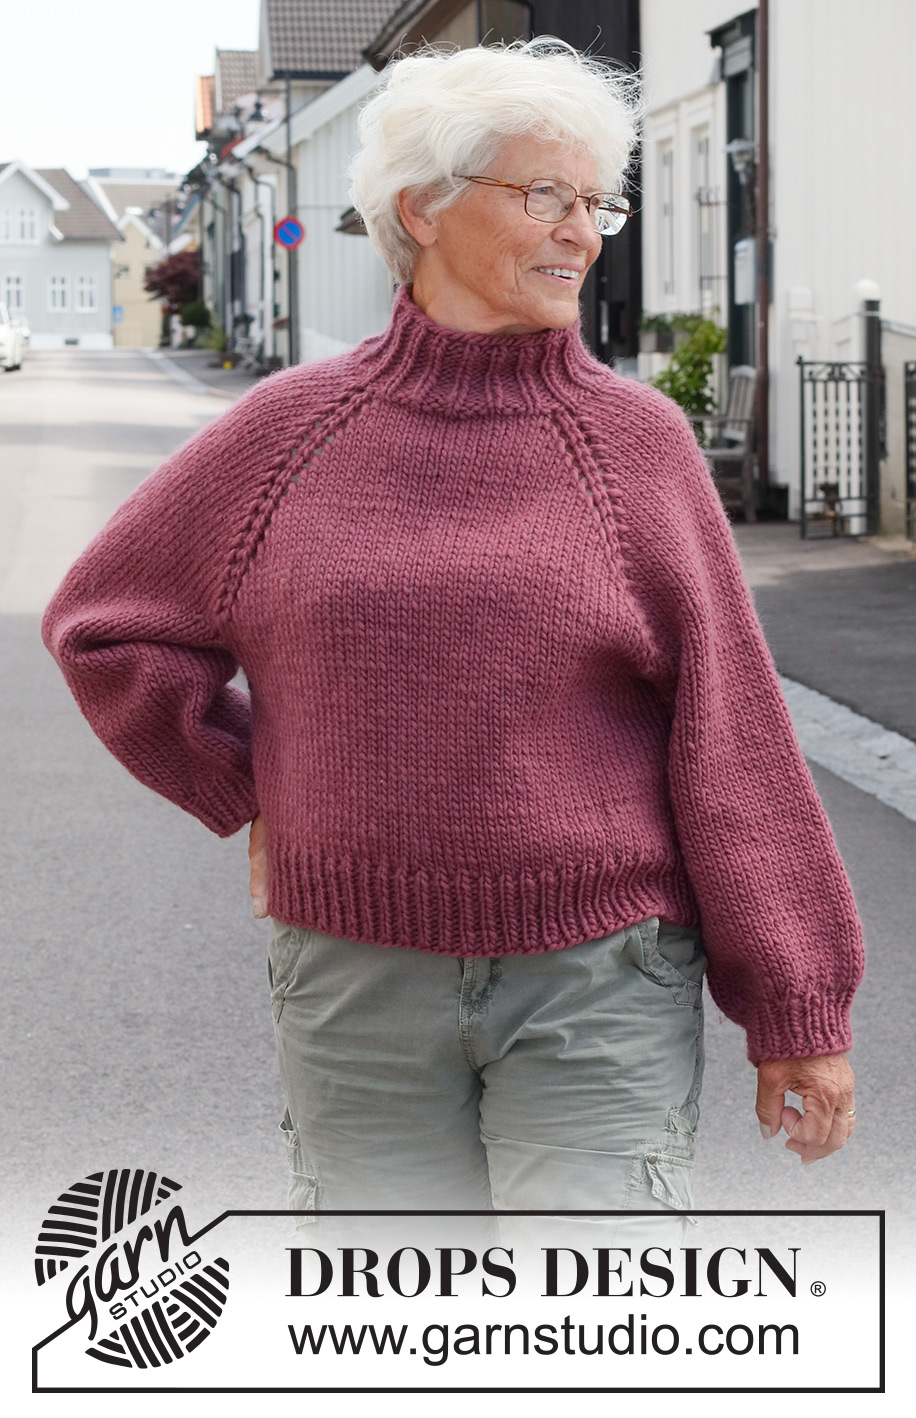
Crisp Cranberry#crispcranberrysweater |
|
 |
 |
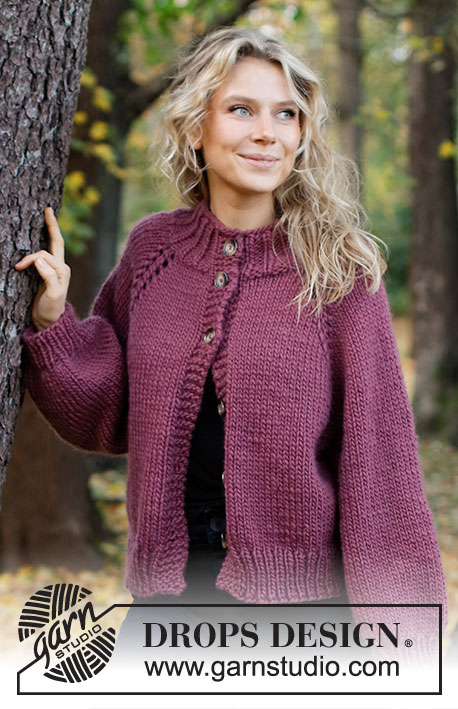
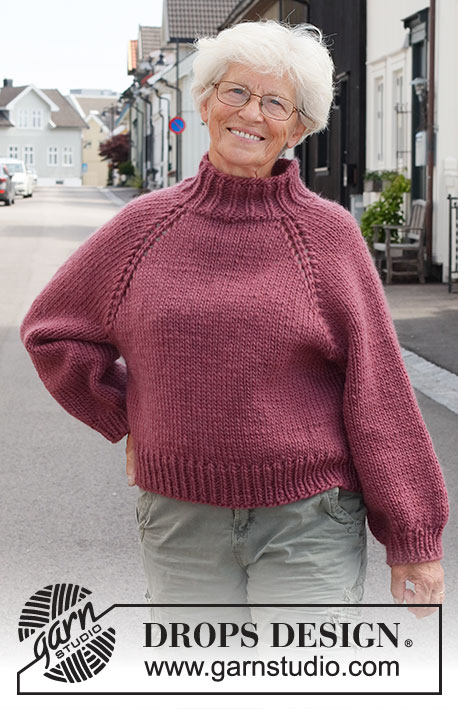
Knitted jumper in DROPS Snow. The piece is worked top down with raglan, balloon sleeves and broad, ribbed edging. Sizes XS - XXL.
DROPS 226-37 |
|
|
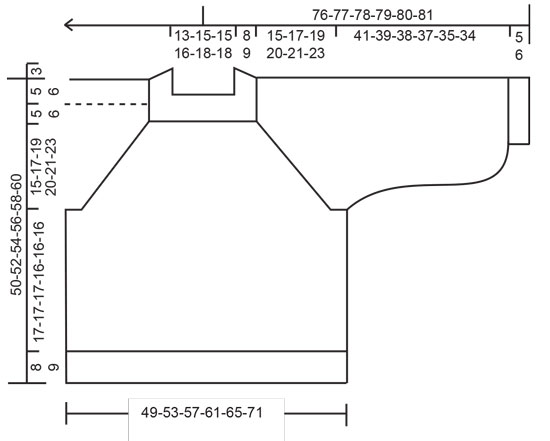
------------------------------------------------------- EXPLANATIONS FOR THE PATTERN: ------------------------------------------------------- INCREASE/DECREASE TIP (evenly spaced): To work out how to increase/decrease evenly, count the total number of stitches on needle (e.g. 60 stitches) and divide by the number of increases/decreases to be made (e.g. 6) = 10. In this example, increase by making 1 yarn over after each 10th stitch. On the next round knit the yarn overs twisted to avoid holes. When decreasing, knit together each 10th and 11th stitch. INCREASE TIP-1 (for neck): Increase 1 stitch at the end of a purled section by making 1 yarn over. On the next round purl the yarn overs twisted to avoid holes. NOTE: In sizes S, M, XL and XXL there is an odd number of purled sections – in these sizes it is necessary to increase in the 2 last purled sections at the end of the round the first time you increase. RAGLAN: Increase 1 stitch on each side of 1 stocking stitch (raglan-stitch), in each transition between the front/back pieces and the sleeves (= 8 stitches increased on an increase-round). Increase 1 stitch by making 1 yarn over. On the next round knit the yarn overs to make holes. The new stitches are then worked in stocking stitch. DECREASE TIP (for sleeves): Decrease as follows before the marker thread: Work until there are 3 stitches left before the marker thread, knit 2 together, 1 stocking stitch (1 stitch decreased). Decrease as follows after the marker thread: 1 stocking stitch, slip 1 stitch as if to knit, knit 1, pass the slipped stitch over the knitted stitch (= 1 stitch decreased). INCREASE TIP-2 (for sleeves): Increase as follows before the marker thread: Start 1 stitch before the marker thread, 1 yarn over, 1 stocking stitch (= 1 stitch increased). Increase as follows after the marker thread: 1 stocking stitch, 1 yarn over (= 1 stitch increased). On the next round knit the yarn overs twisted to avoid a hole. The new stitches are then worked in stocking stitch. CASTING-OFF TIP: To avoid the cast-off edge being tight you can cast off with a larger size needle. If the edge is still tight, make 1 yarn over after approx. each 8th stitch at the same time as casting off; the yarn overs are cast off as normal stitches. ------------------------------------------------------- START THE PIECE HERE: ------------------------------------------------------- JUMPER – SHORT OVERVIEW OF THE PIECE: The neck and yoke are worked in the round with circular needle, top down from mid back. The yoke is divided for body and sleeves and the body continued in the round with circular needle. The sleeves are worked in the round with short circular needle/double pointed needles, top down. NECK: Cast on 42-45-45-48-51-51 stitches with short circular needle size 8 mm and DROPS Snow. Knit 1 round. Then work rib in the round (knit 1, purl 2). When the rib measures 3 cm, insert 1 marker in the middle of the round (= mid-front) – the piece is measured from this marker! When the rib measures 4 cm, increase 7-8-8-8-9-9 stitches by increasing every other purl-2 section to purl-3 – read INCREASE TIP-1 = 49-53-53-56-60-60 stitches. When the rib measures 7-7-7-7-8-8 cm, increase the remaining purl-2 sections to purl-3 = 56-60-60-64-68-68 stitches. When the rib measures 8-8-8-8-9-9 cm, knit 1 round where you increase 2-6-6-6-6-6 stitches evenly spaced – read INCREASE/DECREASE TIP = 58-66-66-70-74-74 stitches. Now work the yoke as described below. YOKE: Change to circular needle size 9 mm. Insert 4 markers in the piece, without working the stitches. These markers are used when increasing to raglan. Count 10-12-12-12-13-13 stitches (= approx. ½ back piece), insert 1 marker in the next stitch (= raglan-stitch), count 8-8-8-10-10-10 stitches (= sleeve), insert 1 marker in the next stitch (= raglan-stitch) count 19-23-23-23-25-25 stitches (= front piece), insert 1 marker in the next stitch (= raglan-stitch), count 8-8-8-10-10-10 stitches (= sleeve), insert 1 marker in the next stitch (= raglan-stitch). There are 9-11-11-11-12-12 stitches left after the last raglan-stitch (= approx. ½ back piece). Work stocking stitch in the round, AT THE SAME TIME on the first round increase to RAGLAN on each side of the 4 raglan-stitches – read description above. Increase to raglan every 2nd round a total of 10-11-13-14-14-16 times. REMEMBER THE KNITTING TENSION! After the last increase to raglan there are 138-154-170-182-186-202 stitches on the needle. Continue working without further increases until the piece measures 20-22-24-25-27-29 cm from the marker on the neck. Now divide the piece for the body and sleeves on the next round as follows: Work the first 22-24-26-28-29-32 stitches (= approx. ½ back piece), place the next 26-30-34-36-36-38 stitches on a thread for the sleeve, cast on 6-6-6-6-8-8 new stitches (= in side under sleeve), work the next 43-47-51-55-57-63 stitches (= front piece), place the next 26-30-34-36-36-38 stitches on a thread for the sleeve, cast on 6-6-6-6-8-8 new stitches (= in side under sleeve), work the last 21-23-25-27-28-31 stitches (= approx. ½ back piece). Body and sleeves are finished separately. THE PIECE IS NOW MEASURED FROM HERE! BODY: = 98-106-114-122-130-142 stitches. Continue in the round with stocking stitch until the piece measures 17-17-17-16-16-16 cm from the division. There is approx. 8-8-8-9-9-9 cm left to finished length; try the jumper on and work to desired length. Change to circular needle size 8 mm. Work rib (knit 1, purl 1) for 8-8-8-9-9-9 cm. Cast off with knit over knit and purl over purl – read CASTING-OFF TIP! The jumper measures approx. 50-52-54-56-58-60 cm from the shoulder down. SLEEVES: Place the 26-30-34-36-36-38 stitches from the thread on the one side of the piece on double pointed needles/short circular needle size 9 mm and knit up 1 stitch in each of the 6-6-6-6-8-8 stitches cast on under the sleeve = 32-36-40-42-44-46 stitches. Insert a marker thread in the middle of the 6-6-6-6-8-8 stitches under the sleeve. Allow the thread to follow your work onwards; it will be used when decreasing and increasing under the sleeve. Start the round at the marker thread and work stocking stitch in the round. When the sleeve measures 3 cm from the division, decrease 1 stitch before the marker thread – read DECREASE TIP. When the sleeve measures 6 cm from the division, decrease 1 stitch after the marker thread. Repeat the decrease before the marker thread when the sleeve measures 9 cm and after the thread when the sleeve measures 12 cm from the division = 28-32-36-38-40-42 stitches. When the sleeve measures 16 cm from the division, increase 1 stitch before the marker thread – read INCREASE TIP-2. Increase alternately before and after the thread every 2 cm a total of 10-8-6-6-6-6 times = 38-40-42-44-46-48 stitches. Continue working until the sleeve measures 41-39-38-37-35-34 cm from the division (shorter measurements in larger sizes due to wider neck and longer yoke). There is approx. 5-5-5-6-6-6 cm left to finished length; try the jumper on and work to desired length. Knit 1 round where you decrease 12-12-12-12-14-14 stitches evenly spaced – remember the INCREASE/DECREASE TIP = 26-28-30-32-32-34 stitches. Change to double pointed needles size 8 mm and work rib (knit 1, purl 1) for 5-5-5-6-6-6 cm. Cast off with knit over knit and purl over purl – remember CASTING-OFF TIP! The sleeve measures approx. 46-44-43-43-41-40 cm from the division. Work the other sleeve in the same way. |
|
 |
|
Have you finished this pattern?Tag your pictures with #dropspattern #crispcranberrysweater or submit them to the #dropsfan gallery. Do you need help with this pattern?You'll find 32 tutorial videos, a Comments/Questions area and more by visiting the pattern on garnstudio.com. © 1982-2026 DROPS Design A/S. We reserve all rights. This document, including all its sub-sections, has copyrights. Read more about what you can do with our patterns at the bottom of each pattern on our site. |
|


With over 40 years in knitting and crochet design, DROPS Design offers one of the most extensive collections of free patterns on the internet - translated to 17 languages. As of today we count 324 catalogues and 12290 patterns translated into English (UK/cm). 12290
We work hard to bring you the best knitting and crochet have to offer, inspiration and advice as well as great quality yarns at incredible prices! Would you like to use our patterns for other than personal use? You can read what you are allowed to do in the Copyright text at the bottom of all our patterns. Happy crafting!
Post a comment to pattern DROPS 226-37
We would love to hear what you have to say about this pattern!
If you want to leave a question, please make sure you select the correct category in the form below, to speed up the answering process. Required fields are marked *.