
Popular categories
Looking for a yarn?


Comments / Questions (2)
![]() Melanie wrote:
Melanie wrote:
Hallo, ich habe eine Frage bezüglich Diagramm A.2 für die Mütze. Dort steht "1 Masche links in Hin-Reihen, 1 Masche rechts in Rück-Reihen mit grau (diese Runde/Reihe mit derselben Nadelstärke wie das Rippenmuster stricken)" und "1 Masche links in Hin-Reihen, 1 Masche rechts in Rück-Reihen mit natur" aber die Mütze wird ja lediglich rund gestrickt, nicht vor und zurück. Wie gehe ich da vor?
20.04.2018 - 13:34DROPS Design answered:
Liebe Melanie, dh diese Reihe stricken Sie für die Mütze links (= Hin-Reihen da Sie in der Runde stricken) mit derselben Nadelstärke wie das Rippenmuster. Viel Spaß beim stricken!
20.04.2018 - 14:57
![]() H Martin wrote:
H Martin wrote:
Is there steeking in the yoke of this pattern?
20.10.2017 - 16:07DROPS Design answered:
Dear Mrs Martin, there are no steek stitches here, you will work the jacket from the top down, back and forth. Happy knitting!
20.10.2017 - 16:13
|
|||||||||||||||||||||||||||||||
Andean Caravan Jacket#andeancaravanjacket |
|||||||||||||||||||||||||||||||
 |
 |
||||||||||||||||||||||||||||||
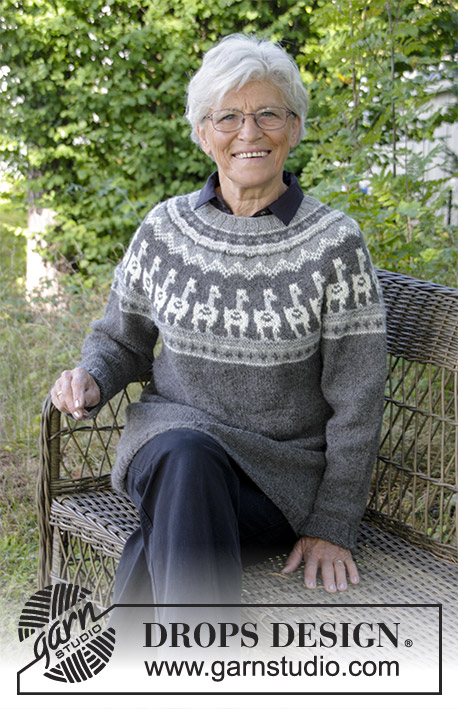
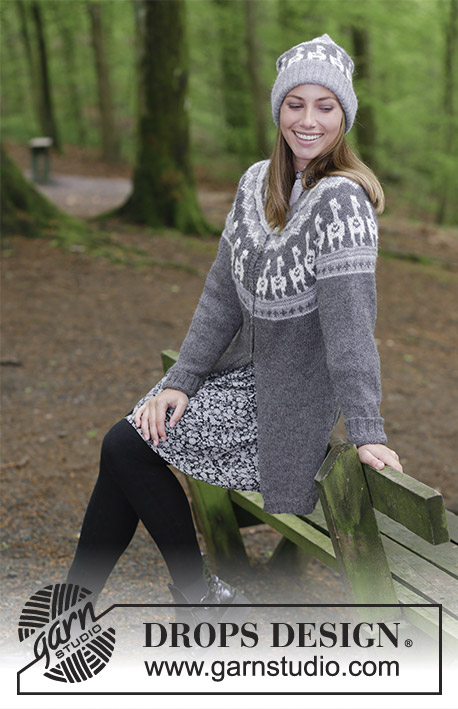
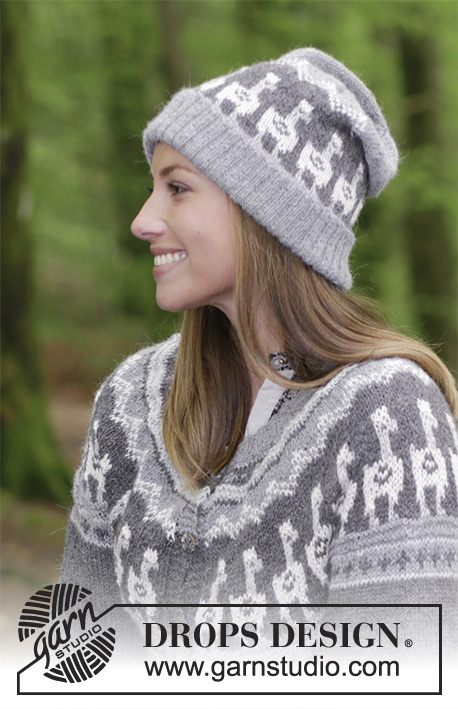
Knitted jumper with round yoke, llama / alpaca, multi-coloured pattern and A-shape, knitted top down. The piece is worked in DROPS Puna. Sizes S - XXXL.
DROPS 184-19 |
|||||||||||||||||||||||||||||||
|
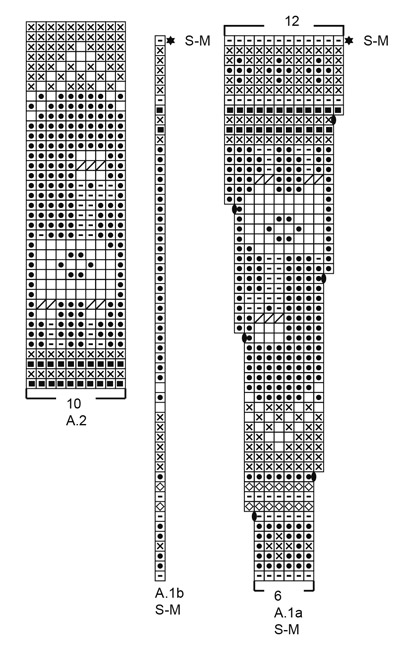
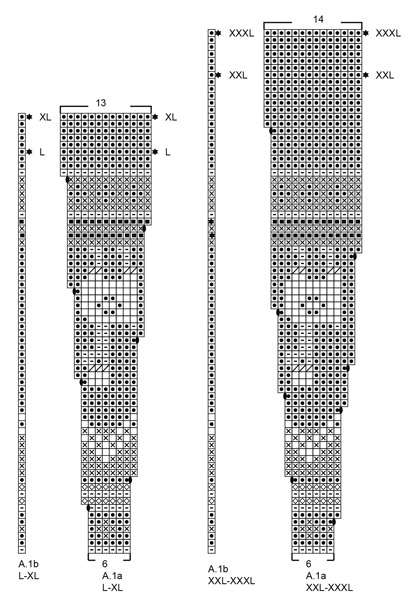
INFORMATION FOR THE PATTERN: RIDGE/GARTER STITCH (worked back and forth): 1 ridge = Knit 2 rows. RIDGE/GARTER STITCH (worked in the round): 1 ridge = 2 rounds. Knit 1 round and purl 1 round. PATTERN: Jacket: See diagram A.1. Choose diagram for your size. The whole diagram is worked in stocking stitch apart from the colour marked purl from the right side, knit from the wrong side. The diagram shows all the rows in the pattern seen from the right side. Hat: See diagram A.2. INCREASE TIP-1 (for increasing evenly): To work out how to increase evenly, count the total number of stitches on the needle (e.g. 112 stitches), minus the bands (e.g. 10 stitches) and divide the remaining stitches by the number of increases to be made (e.g. 37) = 2.8. In this example, you increase alternately after every 2nd and 3rd stitches (do not increase over the bands). Increase 1 stitch by making 1 yarn over, on the next row work the yarn overs twisted to avoid holes. KNITTING TIP-1 (for the knitting tension): To avoid the knitting tension becoming tighter when working pattern, it is important that the strands at the back of the piece do not pull. You can use a larger size needle when working pattern if this is a problem. KNITTING TIP-2 (for bands): On the rows with pattern border with 2 colours work the background colour in the border over the 5 band stitches in each side. INCREASE TIP-2 (for sides of body): All increases are worked from the right side! Start 2 stitches before the marker thread, make 1 yarn over, knit 4 (marker thread sits in middle of these 4 stitches), make 1 yarn over (= 2 stitches increased). On the next row purl the yarn overs twisted to avoid holes. DECREASE TIP (for mid under sleeve): Start 3 stitches before marker thread, knit 2 together, knit 2 (marker thread sits in middle of these 2 stitches), slip 1 stitch as if to knit, knit 1, pass the slipped stitch over the knitted stitch (= 2 stitches decreased). BUTTONHOLES: Work buttonholes on right band (when the garment is worn). Work from the right side when there are 3 stitches left on needle as follows: Make 1 yarn over, knit the next 2 stitches together and knit the last stitch. On the next row knit the yarn over so there is a hole. The first buttonhole is worked when the rib in the neck measures approx. 1½-2 cm. Then work the other 7-7-7-8-8-8 buttonholes with approx. 8-8-8-7½-7½-8 cm between each. ---------------------------------------------------------- JACKET: The piece is worked back and forth with circular needle from mid front and is worked top down. The sleeves are worked in the round with double pointed needles, top down. YOKE: Cast on 112-116-120-128-128-136 stitches with circular needle size 3.5 mm and grey. Purl 1 row from the wrong side. Then work the next row as follows from the right side: Work 5 band stitches in GARTER STITCH - see description above, * knit 2, purl 2 *, work from *-* until there are 7 stitches left on the row, knit 2 and 5 stitches in garter stitch. Continue rib in this way for 3 cm - remember BUTTONHOLES on right band - see description above. Then purl 1 row from the wrong side (band stitches are worked in garter stitch) where you increase 37-39-41-45-45-43 stitches evenly on row - read INCREASE TIP-1 = 149-155-161-173-173-179 stitches. Change to circular needle size 4 mm. The next row is worked as follows from the right side: Work 5 band stitches in garter stitch, work according to diagram A.1a until there are 6 stitches left on the row (= 23-24-25-27-27-28 repeats of 6 stitches), work A.1b (= 1 stitch) and 5 band stitches in garter stitch - read PATTERN, KNITTING TIP-1 and KNITTING TIP-2 above. REMEMBER THE KNITTING TENSION! Work up to and including the row marked with a star in the diagram for your size, the piece should measure approx. 20-20-21-23-25-27 cm (if it does not, continue with dark grey to right length). There are now 287-299-336-362-389-403 stitches on the needle. Work 1 row where the number of stitches is adjusted to 283-299-339-363-383-407 stitches. Continue working with dark grey to finished length. The next row is worked as follows: Knit 43-44-50-54-58-63 stitches (= front piece), place the next 60-66-74-78-80-82 stitches on a thread for sleeve, cast on 10-12-12-12-14-16 new stitches (= mid under sleeve), work 77-79-91-99-107-117 stitches (= back piece), place the next 60-66-74-78-80-82 stitches on a thread for sleeve, cast on 10-12-12-12-14-16 stitches (= mid under sleeve) and knit 43-44-50-54-58-63 stitches (= front piece). Body and sleeves are finished separately. THE PIECE IS NOW MEASURED FROM HERE! BODY: = 183-191-215-231-251-275 stitches. Insert 1 marker thread 48-50-56-60-65-71 stitches in from each side (= 87-91-103-111-121-133 stitches between marker threads on back piece). Allow the marker threads to follow your work onwards. Work stocking stitch back and forth with 5 band stitches in garter stitch in each side. When the piece measures 4 cm increase 2 stitches in each side - read INCREASE TIP-2. Increase in this way every 4½.cm a total of 9 times in all sizes = 219-227-251-267-287-311 stitches. When the piece measures 41-43-44-44-44-44 cm purl 1 row from the wrong side where you increase 13-9-9-13-13-17 stitches evenly on row = 232-236-260-280-300-328 stitches. Change to circular needle size 3.5 mm and work as follows from the right side: Work 5 band stitches in garter stitch, * knit 2, purl 2 *, work from *-* until there are 7 stitches on the row, knit 2 and work 5 band stitches in garter stitch. Continue the rib in this way for 3 cm. Cast off with knit over knit and purl over purl - make sure the cast off edge is not tight. SLEEVE: Place the 60-66-74-78-80-82 stitches from the thread in the one side of the piece on double pointed needles/short circular needle size 4 mm and in addition knit up 1 stitch in each of the 10-12-12-12-14-16 stitches cast on under the sleeve = 70-78-86-90-94-98 stitches on needle. Insert 1 marker thread at the beginning of the round (= mid under sleeve). Work stocking stitch in the round with dark grey. When the piece measures 2 cm decrease 2 stitches mid under sleeve - read DECREASE TIP above. Decrease in this way every 3-2½-2-2-1½-1½ cm a total of 12-15-18-19-20-21 times = 46-48-50-52-54-56 stitches. When the sleeve measures 41-41-42-40-39-38 cm (shorter measurements in larger sizes because of longer yoke) knit 1 round where you increase 2-4-2-4-2-4 stitches evenly on round = 48-52-52-56-56-60 stitches. Change to double pointed needles size 3.5 mm and work rib (= knit 2 / purl 2) for 4 cm. Cast off with knit over knit and purl over purl. ASSEMBLY: Sew the buttons onto the left band. ---------------------------------------------------------- HAT: The hat is worked in the round with circular needle. Change to double pointed needles when necessary. Cast on 152-164 stitches with circular needle size 3 mm and grey. Purl 1 round. Then work rib (= knit 2 / purl 2) until the piece measures 10 cm. Change to circular needle size 4 mm and knit 1 round where you decrease 52-54 stitches evenly on round = 100-110 stitches. Now work diagram A.2 over all stitches (= 10-11 times in width). When A.2 is finished, work stocking stitch with grey to finished length. When the piece measures 24-25 cm decrease 4-2 stitches evenly on next round = 96-108 stitches. Now insert 6 markers in the piece with 16-18 stitches between them. Now start to decrease. Decrease 1 stitch after each marker by knitting together the 2 stitches after the marker. Decrease in this way every 2nd round a total of 10-10 times = 36-48 stitches and then every round a total of 2-3 times = 24-30 stitches. On the next round knit all stitches together 2 and 2 = 12-15 stitches, repeat the last round = 6-8 stitches. Cut the strand, pull it through the remaining stitches, tighten and fasten well. The hat measures a total of 32-33 cm including the rib. Turn the rib edge up on the outside so that the edge measures approx.6 cm. |
|||||||||||||||||||||||||||||||
Diagram explanations |
|||||||||||||||||||||||||||||||
|
|||||||||||||||||||||||||||||||
 |
|||||||||||||||||||||||||||||||
 |
|||||||||||||||||||||||||||||||
 |
|||||||||||||||||||||||||||||||
Have you finished this pattern?Tag your pictures with #dropspattern #andeancaravanjacket or submit them to the #dropsfan gallery. Do you need help with this pattern?You'll find 36 tutorial videos, a Comments/Questions area and more by visiting the pattern on garnstudio.com. © 1982-2026 DROPS Design A/S. We reserve all rights. This document, including all its sub-sections, has copyrights. Read more about what you can do with our patterns at the bottom of each pattern on our site. |
|||||||||||||||||||||||||||||||


With over 40 years in knitting and crochet design, DROPS Design offers one of the most extensive collections of free patterns on the internet - translated to 17 languages. As of today we count 324 catalogues and 12290 patterns translated into English (UK/cm). 12290
We work hard to bring you the best knitting and crochet have to offer, inspiration and advice as well as great quality yarns at incredible prices! Would you like to use our patterns for other than personal use? You can read what you are allowed to do in the Copyright text at the bottom of all our patterns. Happy crafting!
Post a comment to pattern DROPS 184-19
We would love to hear what you have to say about this pattern!
If you want to leave a question, please make sure you select the correct category in the form below, to speed up the answering process. Required fields are marked *.