
Popular categories
Looking for a yarn?


Comments / Questions (33)
![]() Beate wrote:
Beate wrote:
Liebes Drops-Design-Team, ich stricke gerade dieses tolle Modell. Ich frage mich jedoch, ob nach Fertigstellung der einzelnen Teile und vor dem Zusammennähen, diese gespannt oder gedämpft werden dürfen/können. Vielen Dank im Voraus für eine Rückmeldung.
21.02.2018 - 21:44DROPS Design answered:
Liebe Beate, einige Strickerinnen spannen gerne jedes Teil vor dem Zusammennähen und andere spannen lieber fertige Strickstück, machen Sie das einfach wie Sie gewöhnt sind. Viel Spaß beim stricken!
22.02.2018 - 08:50
![]() Jayne Bradbury wrote:
Jayne Bradbury wrote:
I am having some trouble understanding why the pattern tells me to increase on the back when the diagram clearly shows the back going in at the waist. Seems like I should be decreasing rather than increasing. Help!
16.02.2018 - 15:58DROPS Design answered:
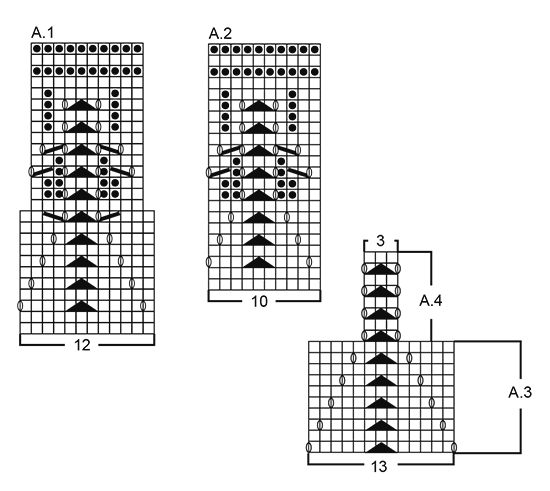
Dear Mrs Bradbury, the decreases at the bottom of body are made while working diagram A.1, then work diagram A.2 and increase on each side. Happy knitting!
16.02.2018 - 16:36
![]() Marianna Di Labio wrote:
Marianna Di Labio wrote:
Io dopo i giri di legaccio me le ritrovo tutte a rovescio... devo creare io la prima alternanza dir/rov.... sono un pò arrugginita!!!!!!
17.10.2017 - 16:28
![]() Marianna Di Labio wrote:
Marianna Di Labio wrote:
Ciao, il vs sito è molto glamour.... ho riniziato da poco, dopo 25 anni di sospensione, era rimasta ai giornali!!!! scusatemi ma nelle spiegazioni, non capisco dopo i 4 giri di legaccio, all'inizio del diagramma A.1... come lavorare i primi due ferri, 1m a dir. sul dir e una maglia rov. sul rov ???? Grazie!!!!!
17.10.2017 - 16:14DROPS Design answered:
Buonasera Marianna. Lavorando avanti e indietro sui ferri, deve lavorare il primo ferro del diagramma A1 a diritto, il secondo a rovescio in modo che risultino 2 ferri a maglia rasata. Buon lavoro!
17.10.2017 - 16:45
![]() Turid Ormberg wrote:
Turid Ormberg wrote:
Er i gang med å strikke hele genseren på rundpinne, får ikke splitt i sidene da, men det går greit. Morsomt prosjekt.
08.10.2017 - 09:28
![]() Yvonne wrote:
Yvonne wrote:
Dank je, dat heb ik inderdaad Al gedaan.A1 zonder de mindering. Tot ik aan de gewenste lengte kom voor de taille. Bovendien brei ik voor en achterpand tegelijk op de rondbreinaald,
31.07.2017 - 09:08
![]() Yvonne wrote:
Yvonne wrote:
Ik zou de onderkant graag langer breien, kan ik A1+ n A2 breien zonder de mindering?
28.07.2017 - 11:52DROPS Design answered:
Hoi Yvonne, Bedoel je dat je de totale lengte van de panden groter wilt hebben? In dat geval kun je 1 (of meerdere) herhalingen van A.2 in de hoogte extra doen, voordat je begint met meerderen in de zijnaden.
30.07.2017 - 20:37
![]() Leonie Verweij wrote:
Leonie Verweij wrote:
Ik ben met het achterland bezig en moet na 12 cm gaan meerderen staat erin. Dit is op taillehoogte als ik de tekening bekijk zou ik moeten minderen. Kloppen deze meerderingen?
27.05.2017 - 19:01DROPS Design answered:
Hallo Esthter, Ja, dat klopt. Op een hoogte van 12 cm vanaf de onderkant zit de taille en vanaf daar moet je dus meerderen. Als het goed is heb je reeds A.1 in de hoogte gebreid, in het telpatroon A.1 zitten de mindereingen vanaf de onderkant naar de taille toe verwerkt.
29.05.2017 - 13:28
![]() Tina wrote:
Tina wrote:
Hej Er der nogen grund til at forstykke og bagstykke ikke blot strikkes rundt i stedet for frem og tilbage? Hilsen Tina
01.04.2017 - 11:21DROPS Design answered:
Hej Tina, du kan godt strikke blusen rundt, men husk slidsen hvis du vil have den :)
03.04.2017 - 14:42
![]() Mariolina wrote:
Mariolina wrote:
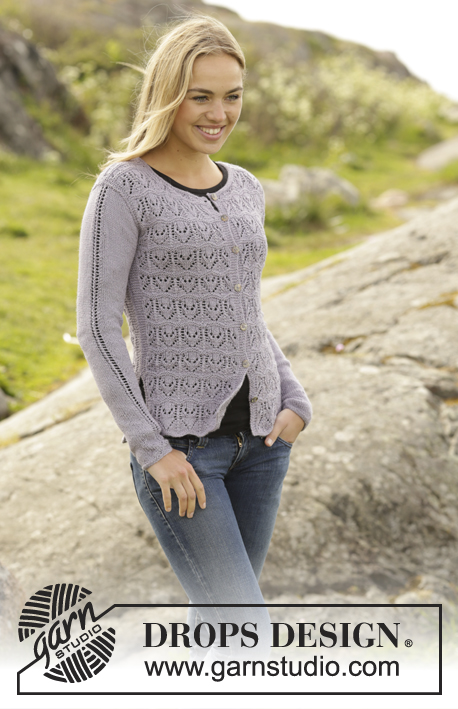
Io vorrei comunque fare il modello con i bottoni sul davanti. Grazie!
15.02.2017 - 13:02DROPS Design answered:
Buongiorno Mariolina. A questo link trova il modello con i bottoni. Buon lavoro!
15.02.2017 - 13:19
|
|||||||||||||||||||
Erendis#erendissweater |
|||||||||||||||||||
|
|
|||||||||||||||||||
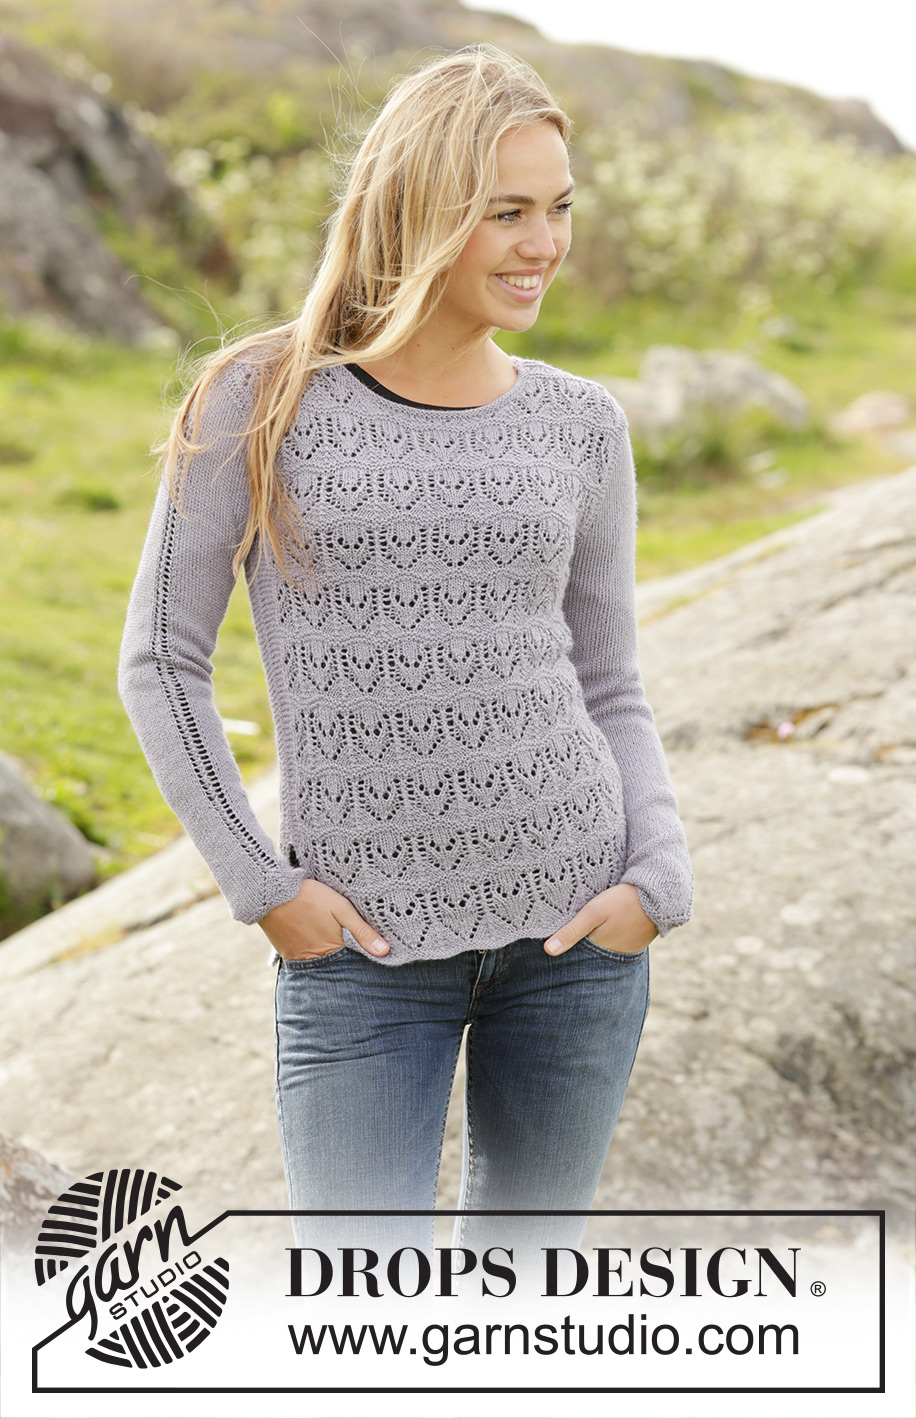
Knitted DROPS jumper in garter st with lace pattern in ”BabyAlpaca Silk”. Size: S - XXXL.
DROPS 172-13 |
|||||||||||||||||||
|
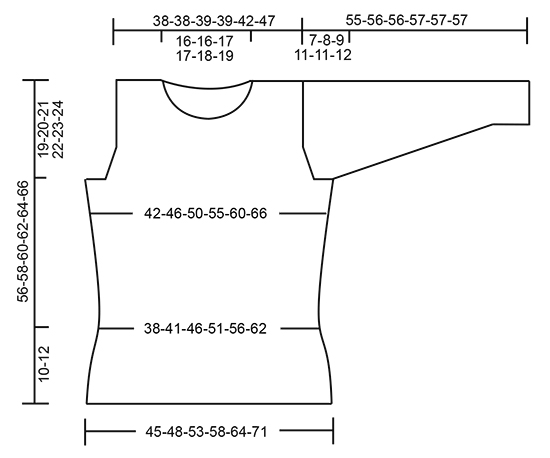
GARTER ST (back and forth): K all rows. 1 ridge = 2 rows K. GARTER ST (worked in the round): 1 ridge = 2 rounds. * K 1 round and P 1 round *, repeat from *-*. PATTERN: See diagrams A.1 to A.4. The diagrams show all rows in pattern seen from RS. INCREASE TIP-1 (applies to sides of body): Inc 1 st inside 3 edge sts in garter st. Inc 1 st by making 1 YO, on next row K YO twisted to avoid holes (work inc sts in garter st). INCREASE TIP-2 (applies to mid under sleeve): Inc 2 sts mid under sleeve as follows: Beg 2 sts before marker, make 1 YO, K 4 (marker is in the middle of these 4 sts), make 1 YO (= 2 sts inc). On next round K YOs twisted to avoid holes. DECREASE TIP: Dec 1 st inside 2 edge sts in garter st. All dec are done from RS! Dec as follows before 2 edge st: Beg 2 sts before the 2 edge sts and K 2 tog. Dec as follows after 2 edge sts: Slip 1 st as if to K, K 1, psso. ---------------------------------------------------------- JUMPER: Work front and back piece back and forth on circular needle in sections. Work sleeves in the round on double pointed needles/short circular needle. BACK PIECE: Cast on 103-111-121-133-147-163 sts on circular needle size 3 mm with BabyAlpaca Silk. Work 2 ridges in GARTER ST - see explanation above. Switch to circular needle size 3.5 mm and work next row from RS as follows: Work 3-7-12-18-19-21 sts in garter st, work pattern according to diagram A.1 over the next 96-96-96-96-108-120 sts (= 8-8-8-8-9-10 repetitions of 12 sts), work first st in A.1 and finish with 3-7-12-18-19-21 sts in garter st. Continue pattern like this. When A.1 has been worked one time vertically, there are 87-95-105-117-129-143 sts on needle. Then work pattern according to diagram A.2 the same way with 3-7-12-18-19-21 sts in garter st in each side (repeat A.2 upwards). REMEMBER THE KNITTING TENSION When piece measures 12 cm, inc 1 st in each side - READ INCREASE TIP-1 (= 2 sts inc). Inc like this every 5-5-5½-6-8-8 cm 5-5-5-5-4-4 times in total = 97-105-115-127-137-151 sts. When piece measures 37-38-39-40-41-42 cm, cast off the first 3-3-4-6-7-9 sts at beg of the next 2 rows for armholes. Now dec for armhole as follows - READ DECREASE TIP: Size S + M: Dec 1 st each side every 4th row (i.e. every other row from RS) a total of 2-6 times. Size L + XL + XXL + XXXL: Dec 1 st each side every other row (i.e. every row from RS) a total of 9-13-13-13 times. When dec for armhole are done, 87-87-89-89-97-107 sts remain on needle. Continue A.2 as before with 3-3-4-4-3-3 sts in garter st in each side. When piece measures 54-56-58-60-62-64 cm, cast off the middle 33-33-35-35-37-39 sts for neck and finish each shoulder separately. Continue to cast off for neck at beg of every row from neck as follows: Cast off 1 st 2 times = 25-25-25-25-28-32 sts remain on shoulder - NOTE: Work sts that do not fit the pattern towards the neck in stocking st when dec. After neck dec continue pattern as before with 1 edge st in garter st towards neck and 3-3-4-4-3-3 sts in garter st towards armhole until 2 rows remain before piece measures approx. 56-58-60-62-64-66 cm. K 1 row from RS and K 1 row from WS before loosely casting off with K from RS. Repeat on the other shoulder. FRONT PIECE: Cast on and work as on back piece until piece measures 50-52-53-55-56-58 cm. Now slip the middle 21-21-23-23-23-25 sts on 1 stitch holder for neck (work them before slipping them on stitch holder to avoid cutting the yarn). Finish each shoulder separately. AT THE SAME TIME continue to cast off for neck at beg of every row from neck as follows: Cast off 2 sts 3 times and 1 st 2-2-2-2-3-3 times = 25-25-25-25-28-32 sts remain on shoulder - NOTE: Work sts that do not fit the pattern towards the neck in stocking st when dec. After neck dec continue pattern as before with 1 edge st in garter st towards neck and 3-3-4-4-3-3 sts in garter st towards armhole until 2 rows remain before piece measures 56-58-60-62-64-66 cm - adjust according to back piece. K 1 row from RS and K 1 row from WS before loosely casting off with K from RS. SLEEVE: Work in the round on double pointed needles, switch to a short circular needle when there are enough sts. Cast on 43-45-47-51-53-55 sts on double pointed needles size 3 mm with BabyAlpaca Silk. Work 2 ridges in GARTER ST - see explanation above. Switch to double pointed needles size 3.5 mm, work next round as follows: 15-16-17-19-20-21 sts in stocking st, A.3 (= 13 sts), 15-16-17-19-20-21 sts in stocking st. Continue pattern like this. When A.3 has been worked 1 time vertically, work A.4 over the middle 3 sts until finished measurements (continue the other sts in stocking st). AT THE SAME TIME when sleeve measures 10-10-10-9-9-9 cm, insert 1 marker at beg of round (= mid under sleeve). On next round inc 2 sts mid under sleeve 16-19-21-22-24-25 times in total – READ INCREASE TIP-2 as follows: In size S: On every 7th round, in size M: On every 6th round, in size L + XL: On every 5th round, in size XXL: Alternately on every 4th and 5th round and size XXXL: On every 4th round = 75-83-89-95-101-105 sts. When piece measures 48-48-47-46-46-45 cm, cast off the middle 6 sts under sleeve and work sleeve cap back and forth until finished measurements on circular needle. Continue in stocking st and with A.4 over the middle 3 sts and cast off for sleeve cap in each side as follows: Cast off 3 sts 0-1-1-1-1-1 time, 2 sts 3-3-3-4-4-5 times and 1 st 3-3-3-5-6-6 times in each side, then cast off 2 sts in each side until piece measures 54-55-55-56-56-56 cm, then cast off 3 sts 1 time in each side. Cast off the remaining sts, sleeve measures approx. 55-56-56-57-57-57 cm. Knit another sleeve the same way. ASSEMBLY: Sew shoulder seams inside cast-off edge with grafting/kitchener stitches so that there are 2 ridges on top of shoulder. Sew side seams – sew edge to edge in outer loops of edge sts from armhole and down but stop when approx. 10-12 cm remain in each side (= vent). Place sleeves in under edge in garter st in each side and fasten neatly with small stitches (edge in garter st in armhole should be on the outside of sleeve). NECK EDGE: Pick up from RS approx. 98 to 120 sts (incl sts on stitch holder at the front) on circular needle size 3 mm. P 1 round, K 1 round and P 1 round. Loosely cast off. |
|||||||||||||||||||
Diagram explanations |
|||||||||||||||||||
|
|||||||||||||||||||
 |
|||||||||||||||||||
 |
|||||||||||||||||||
Have you finished this pattern?Tag your pictures with #dropspattern #erendissweater or submit them to the #dropsfan gallery. Do you need help with this pattern?You'll find 31 tutorial videos, a Comments/Questions area and more by visiting the pattern on garnstudio.com. © 1982-2026 DROPS Design A/S. We reserve all rights. This document, including all its sub-sections, has copyrights. Read more about what you can do with our patterns at the bottom of each pattern on our site. |
|||||||||||||||||||


With over 40 years in knitting and crochet design, DROPS Design offers one of the most extensive collections of free patterns on the internet - translated to 17 languages. As of today we count 324 catalogues and 12290 patterns translated into English (UK/cm). 12290
We work hard to bring you the best knitting and crochet have to offer, inspiration and advice as well as great quality yarns at incredible prices! Would you like to use our patterns for other than personal use? You can read what you are allowed to do in the Copyright text at the bottom of all our patterns. Happy crafting!
Post a comment to pattern DROPS 172-13
We would love to hear what you have to say about this pattern!
If you want to leave a question, please make sure you select the correct category in the form below, to speed up the answering process. Required fields are marked *.