
Categorías populares
¿Buscas un hilo?


Comentarios / Preguntas (168)
Debbie escribió:
I understand where the markers are placed but what I don't understand is how you can knit 2 tog. when there is only one stitch before the marker because this is the beginning of the round
21.10.2014 - 16:07DROPS Design respondió:
Dear Debbie, to decrease 1 st before marker, work until 2 sts remain before marker and work K2 tog, so that you will work last st on round tog with 1st st next round at the beg of round. Happy knitting!
21.10.2014 - 17:07Debbie escribió:
My problem is with the decrease round. You say to decrease 1 stitch before the first marker by knitting 2 together but the 1st stitch before the marker is the beginning of the round (beginning ofA3 pattern). I am not sure how I should be decreasing.
20.10.2014 - 22:17DROPS Design respondió:
Dear Debbie, markers are place here to work the dec for toe, 1st marker will be between 1st and 2nd st in A.3, and you will dec 1st before 1st marker (see next paragraph where decreases are explained). Happy knitting!
21.10.2014 - 09:58
![]() Bev escribió:
Bev escribió:
What is meant by A.a in the pattern. It is mentioned after working in the round after A.2 has ben worked 1 time vertically. " work A.a until piece measures 61/2/ 71/2, 81/2 inches. I have read over this pattern multiple times and I cannot find what this refers to. Please respond as I am at that point in the construction
20.10.2014 - 02:56DROPS Design respondió:
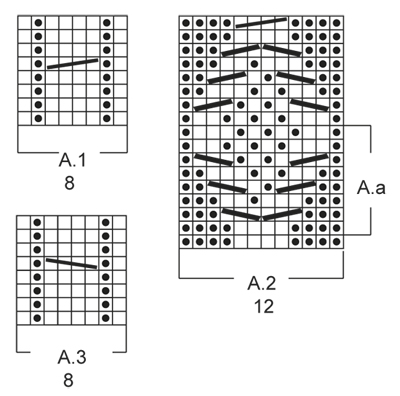
Dear Bev, when you have worked diagram A.2 1 time vertically (all rows in diagram), start again on 2nd row in A.2 working the A.a part (framed on the side). Happy knitting!
20.10.2014 - 10:37
![]() Barb escribió:
Barb escribió:
I am having trouble going from straight to in the round. Could you tell me exactly where in the pattern Is the first stitch in the beginning of the round and are the 12 stitches in chart A2 all worked together? Sorry if this is obvious but I just can't get my head around this.
14.10.2014 - 18:04DROPS Design respondió:
Dear Barb, when working straight, row from RS starts and ends with P4, join in the round on a RS row casting on 4 sts between the first and last P4 = you get P12 for the upper foot. Rounds will then start there (after cast on), continue then in the round in pattern as before and work A.2 over the P12 (end of round). Happy knitting!
15.10.2014 - 08:33
![]() Debbie escribió:
Debbie escribió:
Do you have a video for this slipper?
14.10.2014 - 16:31DROPS Design respondió:
Dear Debbie, you will find all relevant videos to these slippers under the tab "videos" at the right side of the picture. Remember you can ask any question here or contact your DROPS store for any individual assistance. Happy knitting!
14.10.2014 - 16:57
![]() Debbie escribió:
Debbie escribió:
What do you mean by work one row vertically?
12.10.2014 - 19:58DROPS Design respondió:
Dear Debbie, when it says "When A.2 has been worked 1 time vertically" it means you have to work 1 time in height all rows of diagram A.2. Happy knitting!
13.10.2014 - 10:12
![]() Debbie Clarke escribió:
Debbie Clarke escribió:
When you say to cast on 4 stitches and then work them, are the purled or knitted? Also I am not sure where you should join for in the round. Is the start of the round before or after the 4 stitches?
12.10.2014 - 17:27DROPS Design respondió:
Dear Mrs Clarke, the 4 sts are cast on at the end of a row from RS and then continue in the round - beg of round will be then after the new 4 sts. Happy knitting!
13.10.2014 - 10:03
![]() Sue escribió:
Sue escribió:
I love the pictures but your patterns are so hard to follow! They are not clearly written. Maybe if you write it out by rows instead of a paragraph?
06.09.2014 - 14:33
![]() Corinna escribió:
Corinna escribió:
Hallo liebes Drops Team, wenn im Muster A2 steht: "1 M auf eine Hilfsnadel hinter die Arbeit legen, 2 M re, 1 M li/re von der Hilfsnadel" bzw. "2 M auf eine Hilfsnadel vor die Arbeit legen, 1 M li/re, 2 M re von der Hilfsnadel" was ist dann mit li/re gemeint. Woher weiß ich, ob ich links oder rechts stricken soll? Vielen Dank vorab :)
20.08.2014 - 22:22DROPS Design respondió:
Liebe Corinna, das ergibt sich aus dem Muster. Sie stricken die M so, wie sie erscheinen. Also je nachdem, ob Sie eine linke oder rechte M auf die Hilfsnadel gelegt haben, stricken Sie diese links oder rechts.
21.08.2014 - 09:30
![]() Johanna escribió:
Johanna escribió:
I finished my pair a few weeks ago and I love them! My husband wants me to make a pair for him and two friends have asked for the pattern, so that they can make their own =) It seems like Drops have created another winner!
07.08.2014 - 14:48
|
|||||||||||||||||||
Celtic Dancer#celticdancerslippers |
|||||||||||||||||||
 |
 |
||||||||||||||||||
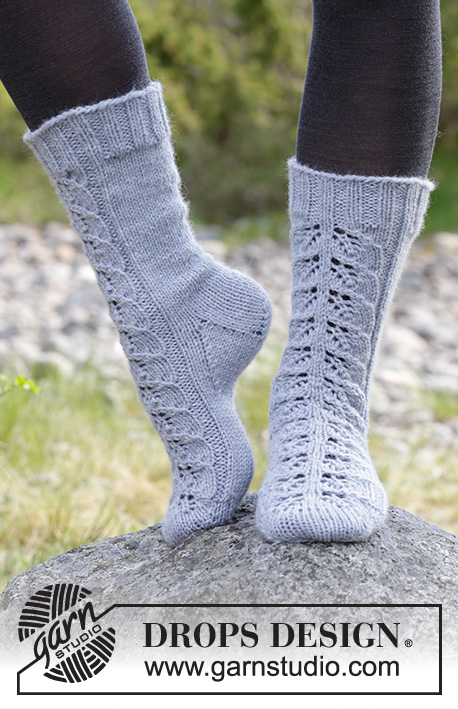
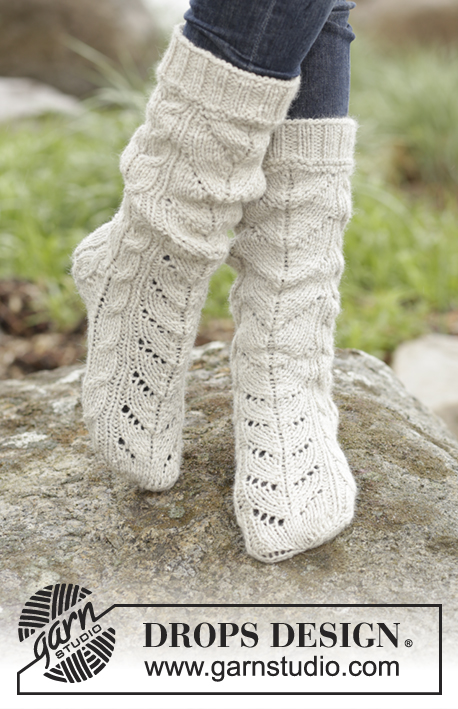
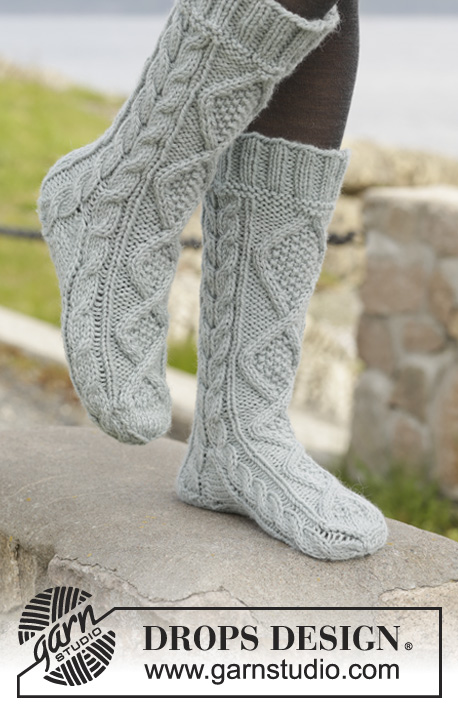
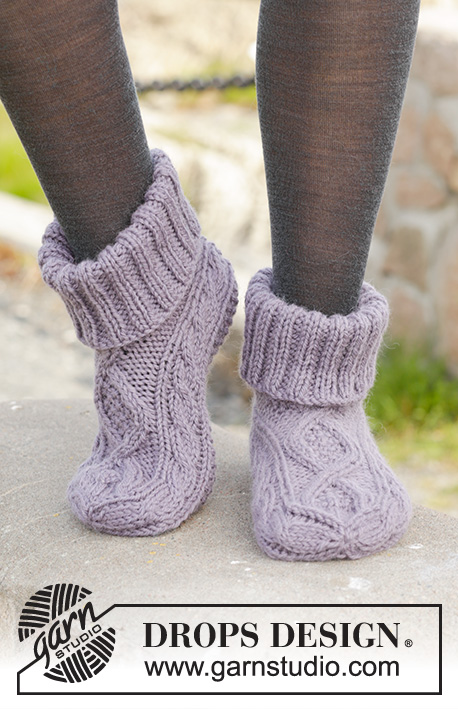
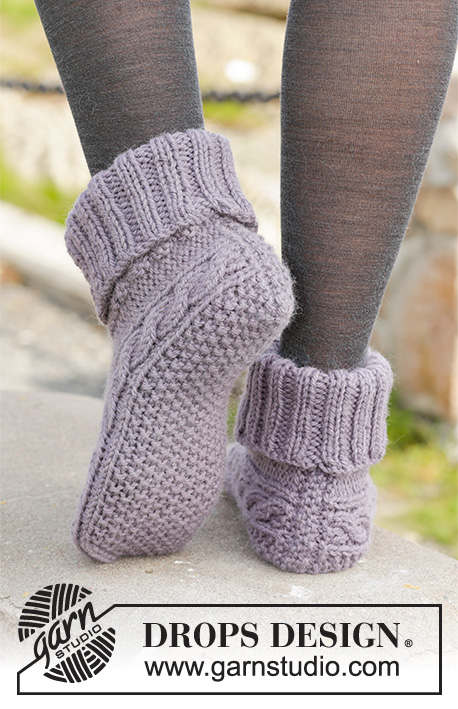
Pantuflas de punto DROPS con torsadas, en “Nepal”. Talla: 35 – 43.
DROPS 156-55 |
|||||||||||||||||||
|
PATRÓN: Ver diagramas A.1-A.3. Los diagramas muestran el patrón visto por el LD. TIP PARA DISMINUCIÓN: Dism 1 pt antes del marcapuntos de la manera sig: tejer 2 pjd. Dism 1 pt después del marcapuntos de la manera sig: tejer 2 pts juntos retorcidos de derecho (es decir, insertar la ag por atrás de los pts en vez de por delante). PT MUSGO (de ida y vuelta en la ag): Tejer todas las hileras de derecho. 1 surco = 2 hileras tejidas de derecho. PT DE ARROZ: Hilera/vuelta 1: * 1d, 1r *, repetir de *a*. Hilera/vuelta 2: derecho sobre revés y revés sobre derecho. Repetir la 2ª hilera/vuelta. TIP PARA MEDIR: Medir en el centro de la torsada de A.1/A.3. ---------------------------------------------------- PANTUFLA: Tejida de ida y vuelta a partir del centro de la parte de atrás. Mon 33-33-35 pts en ag tamaño 5 mm con Nepal (dejar que el cabo de hilo sea de aprox 20 cm; usado para el ensamblaje). Tejer 1 surco en PT MUSGO – ver explicación arriba y, AL MISMO TIEMPO, en la última hilera, aum 4 pts distribuidos equitativamente = 37-37-39 pts. Después tejer de la manera sig, por el LD: 4r, A.3 (= 8 pts), 13-13-15 pts en PT DE ARROZ – ver explicación arriba, A.1 (= 8 pts), terminar con 4r. Continuar el patrón de esta manera, tejer los pts reveses de derecho por el LR. Repetir A.1 y A.3 hasta el fin. RECUERDA MANTENER LA MISMA TENSIÓN DE TEJIDO DE LA MUESTRA! Cuando la pieza mida 10½-11½-13 cm – ver TIP PARA MEDIR arriba, tejer de la manera sig por el LD: 4r, A.3, 13-13-15 pts en pt de arroz, A.1, 4r, mon 4 nuevos pts, tejer los primeros 4 pts, la vta comienza aquí = 41-41-43 pts. Ahora tejer la pieza en redondo en ag de doble punta. Tejer el patrón como antes, pero ahora tejer A.2 (= 12 pts) sobre los 4 pts reveses en cada lado de la pieza y los 4 nuevos pts. Cuando A.2 ha sido tejido 1 vez verticalmente, tejer A.a hasta que la pieza mida 17-19-22 cm. Ahora tejer en pt jersey sobre los pts de A.a, o comenzar en pt jersey un poco antes. Continuar A.1 y A.3 hasta el fin. Ahora insertar 4 marcapuntos en la pieza de la manera sig: Tejer A.3 pero insertar el 1er marcapuntos entre el 1º y 2º pt y el 2º marcapuntos entre el 7º y 8º pt de A.3, tejer en pt de arroz como antes, tejer A.1 pero insertar el 3er marcapuntos entre el 1º y 2º pt y el 4º marcapuntos entre el 7º y 8º pt de A.1, tejer los pts restantes de derecho (= 14 pts en el empeine, 15-15-17 pts en la planta del pie y 6 pts en cada lado de la pieza). Ahora dism para la punta del pie, en la vta sig, de la manera sig: Dism 1 pt después del 2º marcapuntos y 1 pt antes del 3er marcapuntos en la planta del pie 0-0-1 vez en total – LEER TIP PARA DISMINUCIÓN arriba, tejer los pts restantes = 14 pts en el empeine y 15 pts en la planta del pie (= 41 pts en total). En la vta sig, dism de la manera sig: Dism 1 pt antes del 1er y 3er marcapuntos y 1 pt después del 2º y 4º marcapuntos (= 4 dism en total). Repetir las dism en cada vta 6 veces en total. AL MISMO TIEMPO, en la última dism, tejer los pts de la torsada de A.1 y A.3 de la manera sig: 2 pts juntos retorcidos de derecho, 2 pjd. Después de todas las dism, hay 13 pts en la ag. La pieza mide aprox 20-22-25 cm. Cortar el hilo y pasarlo a través de los pts restantes, fruncir y rem. ENSAMBLAJE: Doblar la orilla de montaje en dos (= centro de la parte de atrás), usar el cabo de hilo del inicio para coser con puntos cuidados en el centro de la parte de atrás. ORILLA: Tejer la orilla en redondo en ag de doble punta alrededor de la abertura de la pantufla. Levantar 50-50-54 pts en ag de doble punta tamaño 4 mm con Nepal. Tejer 1 vta de revés. Después tejer 1 vta de derecho y, AL MISMO TIEMPO, aum 10 pts distribuidos equitativamente = 60-60-64 pts. Tejer en resorte = 2d/2r hasta que la pieza mida aprox 12-13-14 cm. Rem los pts con derecho sobre derecho y revés sobre revés. Doblar la orilla en dos. Tejer la otra pantufla. |
|||||||||||||||||||
Explicaciones del diagrama |
|||||||||||||||||||
|
|||||||||||||||||||
 |
|||||||||||||||||||
¿Terminaste este patrón?Entonces, etiqueta tus fotos con #dropspattern #celticdancerslippers o envíalas a la galería #dropsfan. ¿Necesitas ayuda con este patrón?Encontrarás 22 videos tutoriales, un espacio para comentarios/preguntas y más visitando la página del patrón en garnstudio.com © 1982-2026 DROPS Design A/S. Todos los derechos reservados. Este documento, incluyendo todas sus sub-secciones, está protegido por los derechos de autor (copyright). Lee más acerca de lo que puedes hacer con nuestros patrones en la parte de abajo de cada patrón de nuestro sitio. |
|||||||||||||||||||


Con más de 40 años en el diseño de modelos de punto y de ganchillo, DROPS Design ofrece una de las más vastas colecciones de patrones gratuitos en el internet - traducidos en 17 idiomas. Al día de hoy, contamos con 324 catálogos y 12290 patrones - de los cuales 11685 están traducidos en español.
Nosotros trabajamos con mucho esmero para brindarte lo mejor que las labores de punto y ganchillo tienen para ofrecer,inspiración y consejos, así como hilos de magnífica calidad a precios increíbles! Te gustaría usar nuestros patrones para otro fin además del uso personal? Puedes leer acerca de lo que estás permitida a hacer en el texto de Copyright en la parte de abajo de todos nuestros patrones. Felices labores!
Escribe un comentario sobre DROPS 156-55
¡Nos encantaría saber qué piensas acerca de este patrón!
Si quieres escribir una pregunta referente al patrón, por favor asegúrate de elegir la categoría correcta en el formulario debajo, para acelerar el proceso de respuesta. Los campos obligatorios están marcados con un *.