
Popular categories
Looking for a yarn?


Comments / Questions (78)
![]() Karina Remming wrote:
Karina Remming wrote:
Hej - jeg kan simplethen ikke forstå ærmet. Hvor strikkes M5? 74 masker i begynd er jo kun til det beskrevne mønster M.4, M.2, M.3, M.2, M.1, M.2, M.3, M.2, M.4. Og udtagningen...hvordan kan det nogen sinde gå op med M2 og så efterfølgende M4... ... og hvilken M2? Jeg kan slet ikke få det til at gå op.
21.01.2019 - 13:12
![]() Sigrún wrote:
Sigrún wrote:
Eruð þið með kuppskriftina af sömupeysunni en kvenna ? svo það sé sami hálskragi og á kvennapeysunni ?
11.01.2019 - 17:48DROPS Design answered:
Blessuð Sigrún. Ég er ekki alveg viss um hver spurningin er en þessi peysa er gefin upp fyrir dömur og herra. Lykkjufjöldinn í () er fyrir herra. Virðist vera sami kragi á báðum peysum.
19.01.2019 - 12:22
![]() Birte Jakobsen wrote:
Birte Jakobsen wrote:
Der må være noget galt med str har strikket str large til en ung mand der normalt bruger str large ,men den var alt for stor så jeg måtte desværre pille det hele op når man ser på andre opskrifter med samme garn ,er der meget mindre masker Mvh Birte Jakobsen
04.01.2019 - 22:51DROPS Design answered:
Hei Birthe. Denne modellen er noe romsligere enn de nyere modellene våre, men målskissen nederst på siden stemmer overens med strikkefasthet og maskeantall. Vi råder alltid til å se på målskissen ved valg av størrelse så man er sikker på at målene passer til mottakker. Om du ønsker modellen smalere kan du strikke en mindre størrelse, men for eksempel beholde lengden til M/L. God fornøyelse
07.01.2019 - 07:58
![]() Karina Remming wrote:
Karina Remming wrote:
Syntes at diagrammet er svært at læse da det er utydeligt og småt. Er det muligt at få en bedre version?
14.12.2018 - 14:51DROPS Design answered:
Hei Karina. Vi skal få lastet opp et tydeligere diagram snarlig. God fornøyelse
17.12.2018 - 14:29
![]() Pat wrote:
Pat wrote:
In the M.1 correction, Miossec asked this in 2011 and if I understood the answer (I do read French some), was told it could just be knit as per the chart instead of having a cable worked over 4 stitches which is what the correction says. Which is right and if it is actually supposed to be cabled, do you hold the cable needle to the front or the back? IOW which direction does the cable twist?
09.03.2018 - 22:09DROPS Design answered:
Dear Pat, in the original pattern (Norwegian) you are working first row in diagram as shown, ie without any cables on row 1, you can work this cable on first row in M.1 (cross sts as next cables in M.1) if you like to or just do not work it and start cabling with row 3. Happy knitting!
12.03.2018 - 08:19
![]() Pat wrote:
Pat wrote:
I'm sorry, I've done cabling and I've done raglan and I don't understand this pattern at all. I am having to rewrite it completely because the pattern to be established ONLY works after you finish increasing and there's no way I will be able to keep the pattern working right without the rewrite. That's aside from the sizing issue.
09.03.2018 - 15:30
![]() Dinah wrote:
Dinah wrote:
Hi! Ich habe zwei Fragen zur Raglanpasse: "Stricken Sie 5-6-8 (8-9) . bevor Sie mit dem Abketten anfangen. Danach, bei jeder R., auf beiden Seiten der Markierungsfäden 1 M. x 51-52-53 (53-55) abk." Zum ersten Satz, sind damit Runden gemeint, bevor man mit den Raglanabnahmen beginnt? Zum zweiten Satz, wird wirklich in jeder kommenden Runde (später Reihe) für den Raglan abgenommen? Vielen Dank für die Hilfe.
01.11.2017 - 00:46DROPS Design answered:
Liebe Dinah, Passe wird zuerst in der Runde gestrickt, dann hin und zurück. Wenn 8 Raglanabnahmen übrig sind, legen Sie die mittleren Maschen für Halsausschnitt still. Dann wird es hin und zurück gestrickt, mit Raglanabnahmen wie zuvor (aber nur Hinreihen abnehmen) und gleichzeitig werden Maschen für den Hals abgekettet. Viel Spaß beim stricken!
01.11.2017 - 09:13
![]() Pat wrote:
Pat wrote:
Drops 52-7 and 52-8 are sooooo gorgeous but too big. I need about 100 cm which is more like my 40 inches measurement. I am going to try taking out some stitches of m5 at the underarm of the sleeve and body. If you want to know the results send me an email to reply to. It could be a bust but I would look ridiculous wearing this sweater as the pattern stands.
26.10.2017 - 17:56
![]() Marianne Wittke wrote:
Marianne Wittke wrote:
Verstehe ich die Anleitung richtig, dass in Runden gestrickt wird? Mich irritiert nur, dass die Abkürzung "R." für Reihe und nicht "Rd." für Runde benutzt wird und auf beiden Seiten(bei Runden?) je 4 Maschen für das Armloch abgekettet werden sollen. Ich hoffe Sie können mir das verdeutlichen. Mit freundlichem Gruß M.Wittke
24.10.2017 - 11:51DROPS Design answered:
Liebe Frau Wittke, Rumpfteil wird bis die Armlöcher in der Runde gestrickt, dann werden die Ärmel auch in der Runde gestrickt und endlich wird die Passe zuerst in der Runde bis zum Halsauschnitt dann hin und zurück gestrickt. Die Seiten von dem Rumpfteil sind wo die Markierer eingesetzt werden. Viel Spaß beim stricken!
24.10.2017 - 13:27
![]() Portocala wrote:
Portocala wrote:
Bonjour, N'y aurait-il pas une erreur avec l'explication des manches? Il y a deux fois M2 après le premier M3, est-ce normal? Merci beaucoup pour votre aide
12.12.2016 - 09:34DROPS Design answered:
Bonjour Mme Portocola, effectivement, il y avait un M2 en trop dans la manche, la correction a été faite, merci. Bon tricot!
12.12.2016 - 10:40
|
|||||||||||||||||||||||||
Comforting Cables |
|||||||||||||||||||||||||
 |
 |
||||||||||||||||||||||||
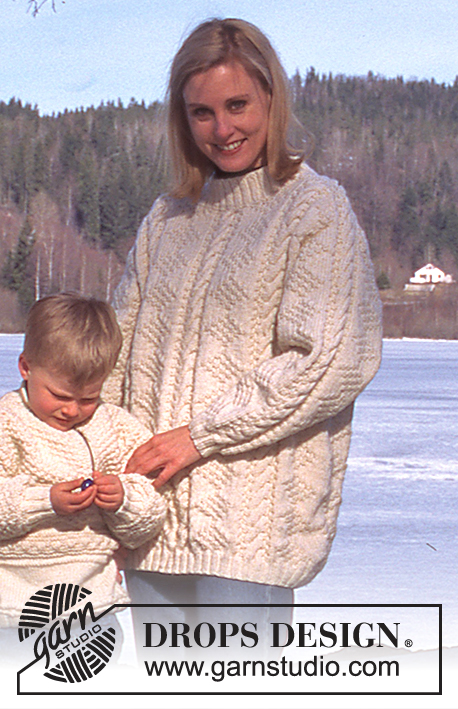
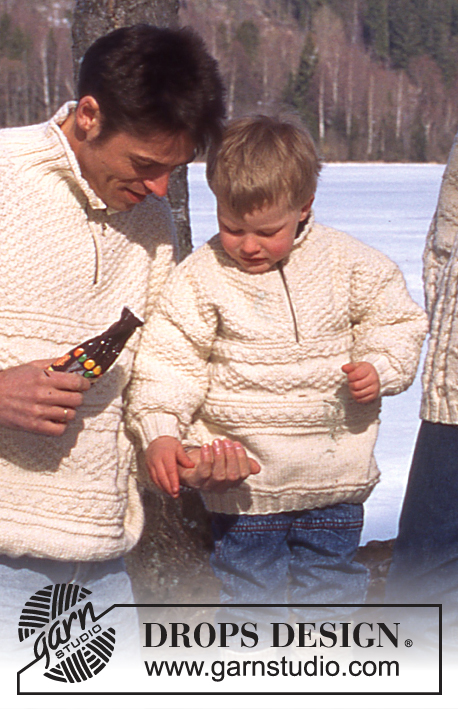
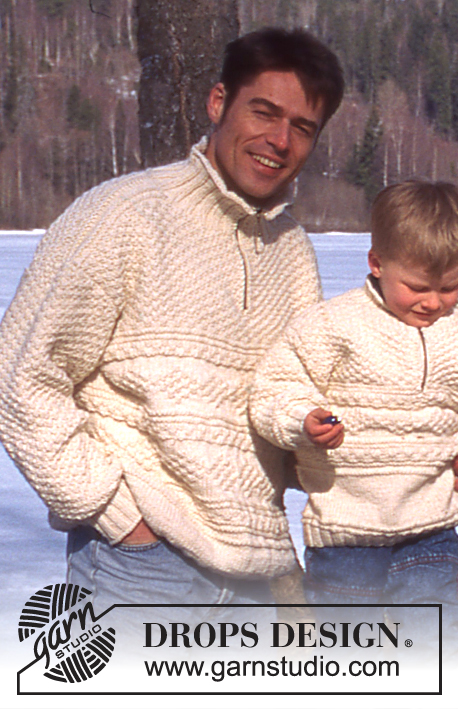
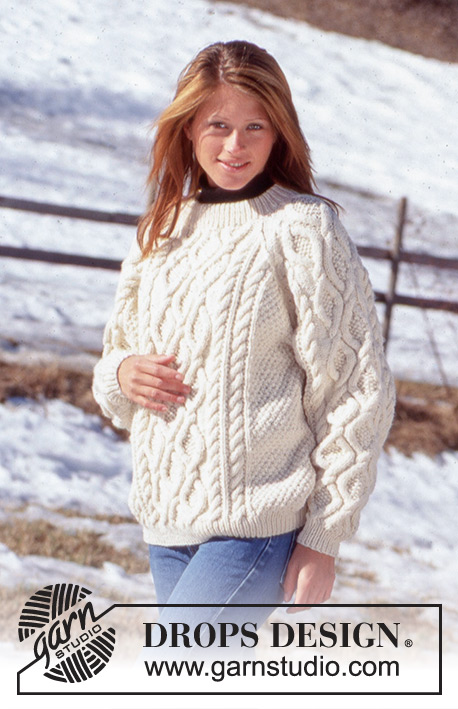
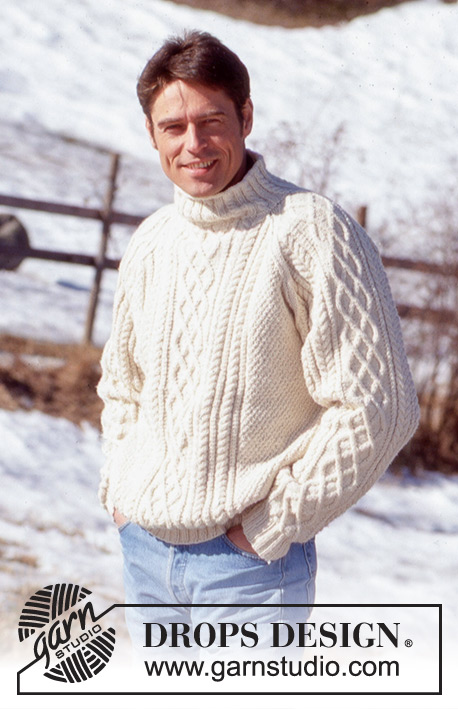
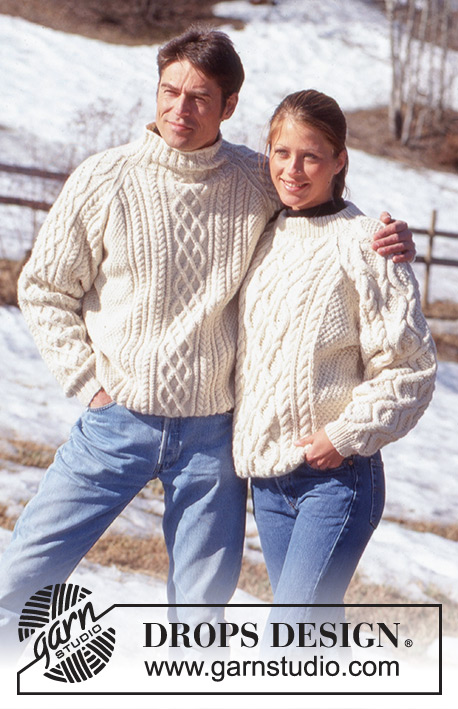
DROPS Raglan Sweater for men in Karisma Superwash
DROPS 52-7 |
|||||||||||||||||||||||||
|
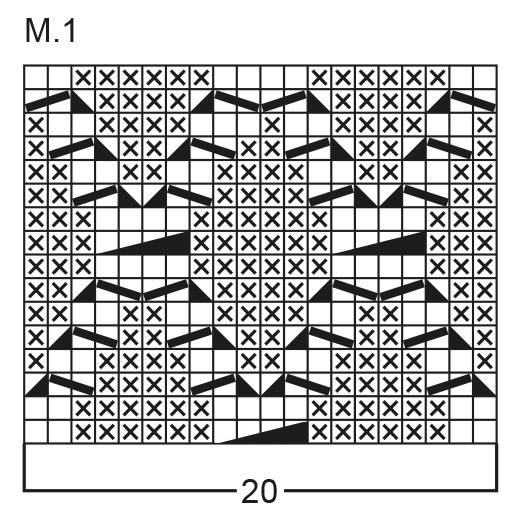
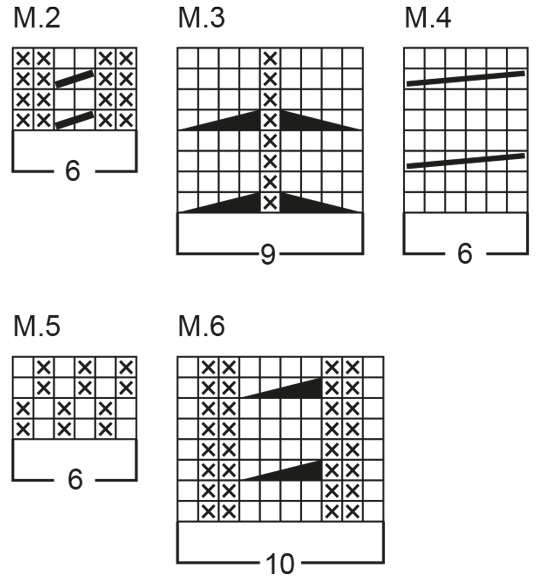
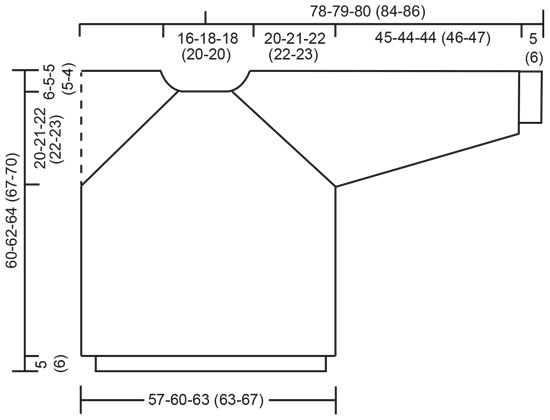
Gauge: 21 sts and 28 rows on larger needle in Pattern 5 = 10 x 10 cm NOTE: row gauge is very important during raglan shaping -- if your gauge is not correct your armhole sizing will not be correct. Rib: * knit 2, purl 2 *. Repeat from * - *. Pattern: See charts (1 chart = 1 repeat). The chart is showing every row in pattern from the right side. Note: On 1st row of M1, after K2, P6; make a cable over following 4 sts. Rib: *knit 2, purl 2*. Repeat from * - *. BODY: Numbers in () = men's sizes. Cast on 188-192-200 (200-208) sts on smaller circular needles; join and place a marker at the join. Knit rib for 5-5-5 (6-6) cm - on the last row inc 88-96-100 (100-108) sts evenly distributed on the row = 276-288-300 (300-316) sts. Change to larger circular needles and establish the pattern as follows (start at the marker): 26-29-32 (32-36) sts of Pattern 5, Pattern 2, Pattern 4, Pattern 2, Pattern 3, Pattern 2, Pattern 1 (this is the center front panel), Pattern 2, Pattern 3, Pattern 2, Pattern 4, Pattern 2, 26-29-32 (32-36) sts of Pattern 5, place a marker for the side, 26-29-32 (32-36) sts of Pattern 5, Pattern 2, Pattern 4, Pattern 2, Pattern 3, Pattern 2, Pattern 1, Pattern 2, Pattern 3, Pattern 2, Pattern 4, Pattern 2, 26-29-32 (32-36) sts of Pattern 5. When the work measures 34-36-37 (40-43) cm bind off 2 sts on each side of each marker for armholes = 134-140-146 (146-154) sts for front and back. Put the work aside. Sleeves: Cast on 52-52-52 (56-56) sts on smaller double pointed needles; join and place a marker at the join. Knit rib for 5-5-5 (6-6) cm - on the last row inc 22-22-22 (18-18) sts evenly distributed on the row = 74-74-74 (74-74) sts. Change to larger double-pointed needles and establish the pattern as follows: Pattern 4, Pattern 2, Pattern 3, Pattern 2, Pattern 1, Pattern 2, Pattern 3, Pattern 2, Pattern 4. Knit the pattern as established and at the same time inc 1 st each side of marker every 4th row 27-27-29 (29-29) times = 128-128-132 (132-132) sts. Knit the first 6 increases in Pattern 2 and the remaining increases in Pattern 5. When the work measures 50-49-49 (52-53) cm, bind off 2 sts each side of marker and put the work aside = 124-124-128 (128-128) sts. Body: Put the sleeves in on the same circular needles as the body where 4 sts have been bind off = 516-528-548 (548-564) sts on needle. Put a marker in each transition between the sleeves and body = 4 markers. Continue pattern but knit the first stitch on either side of the markers in stockinette stitch (= 2 sts stockinette stitch in the transitions from body to sleeve). Knit 5-6-8 (8-9) rows then begin raglan shaping. Raglan shaping: Read the next section in its entirety before knitting! There are 8 decreases per row (1 stitch on each side of the 2 sts in stockinette stitch). Make the decreases as follows: Before the 2 sts stockinette stitch: Right side: K 2 tog. Wrong side: slip 2 sts, put them back on the left needle twisted (one by one), purl the 2 twisted sts together After the 2 sts stockinette stitch: Right side: slip 1, knit 1, pass the slipped stitch over (psso). Wrong side: purl 2 tog. Dec 1 st each side of each marker every row 51-52-53 (53-55) times. When 8 decreases remain bind off for the neck in the front at the same time with the raglan shaping as follows: Put the center 20-24-28 (28-32) sts on on a stitch holder, then knit the rest back and forth on needle. Then bind off at each neck edge every other row: 2 sts 1 time, 1 st 2 times. After the last decrease row 80-80-88 (88-84) sts remain on the needle. The sweater's measurement up to the shoulder = 60-62-64 (67-70) cm. Put the sts from the stitch holder back on the needle and pick up 10 sts on either side of the neck shaping = 120-124-136 (136-136) sts on needle. Change to smaller circular needles and knit 1 row, purl 1 row, knit 1 row and at the same time increase or decrease to 120-120-130 (130-140) sts evenly distributed on the row. Knit Pattern 6 for 9 cm - finish on 1st or 5th row of pattern, then 1 row *K 2 tog* across. Purl 1 row and bind off. Assembly: Sew the 4 sts at underarm together. |
|||||||||||||||||||||||||
Diagram explanations |
|||||||||||||||||||||||||
|
|||||||||||||||||||||||||
 |
|||||||||||||||||||||||||
 |
|||||||||||||||||||||||||
 |
|||||||||||||||||||||||||
Have you finished this pattern?Tag your pictures with #dropspattern or submit them to the #dropsfan gallery. Do you need help with this pattern?You'll find 27 tutorial videos, a Comments/Questions area and more by visiting the pattern on garnstudio.com. © 1982-2026 DROPS Design A/S. We reserve all rights. This document, including all its sub-sections, has copyrights. Read more about what you can do with our patterns at the bottom of each pattern on our site. |
|||||||||||||||||||||||||


With over 40 years in knitting and crochet design, DROPS Design offers one of the most extensive collections of free patterns on the internet - translated to 17 languages. As of today we count 325 catalogues and 12298 patterns translated into English (UK/cm).
We work hard to bring you the best knitting and crochet have to offer, inspiration and advice as well as great quality yarns at incredible prices! Would you like to use our patterns for other than personal use? You can read what you are allowed to do in the Copyright text at the bottom of all our patterns. Happy crafting!
Post a comment to pattern DROPS 52-7
We would love to hear what you have to say about this pattern!
If you want to leave a question, please make sure you select the correct category in the form below, to speed up the answering process. Required fields are marked *.