DROPS Children 49 · Lots of new kid designs!
Product image DROPS Alpaca Bouclé yarn
DROPS Alpaca Bouclé
80% Alpaca, 15% Wool, 5% Polyamide
from 3.60 £ /50g
Product image DROPS Kid-Silk yarn
DROPS Kid-Silk
75% Mohair, 25% Silk
from 4.60 £ /25g
Get the yarn to make this pattern from 36.40£.

The yarn cost is calculated from the pattern’s smallest size and the yarn’s cheapest product type. Looking for an even better price? You might find it on the DROPS Deals!

DROPS AW2425

Nimbus Haze

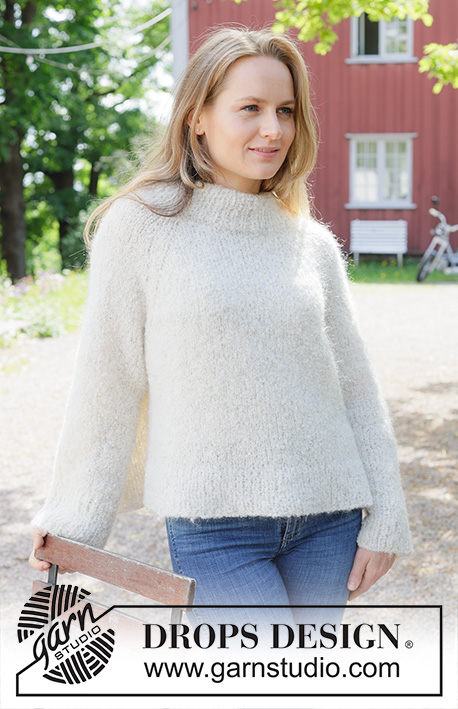
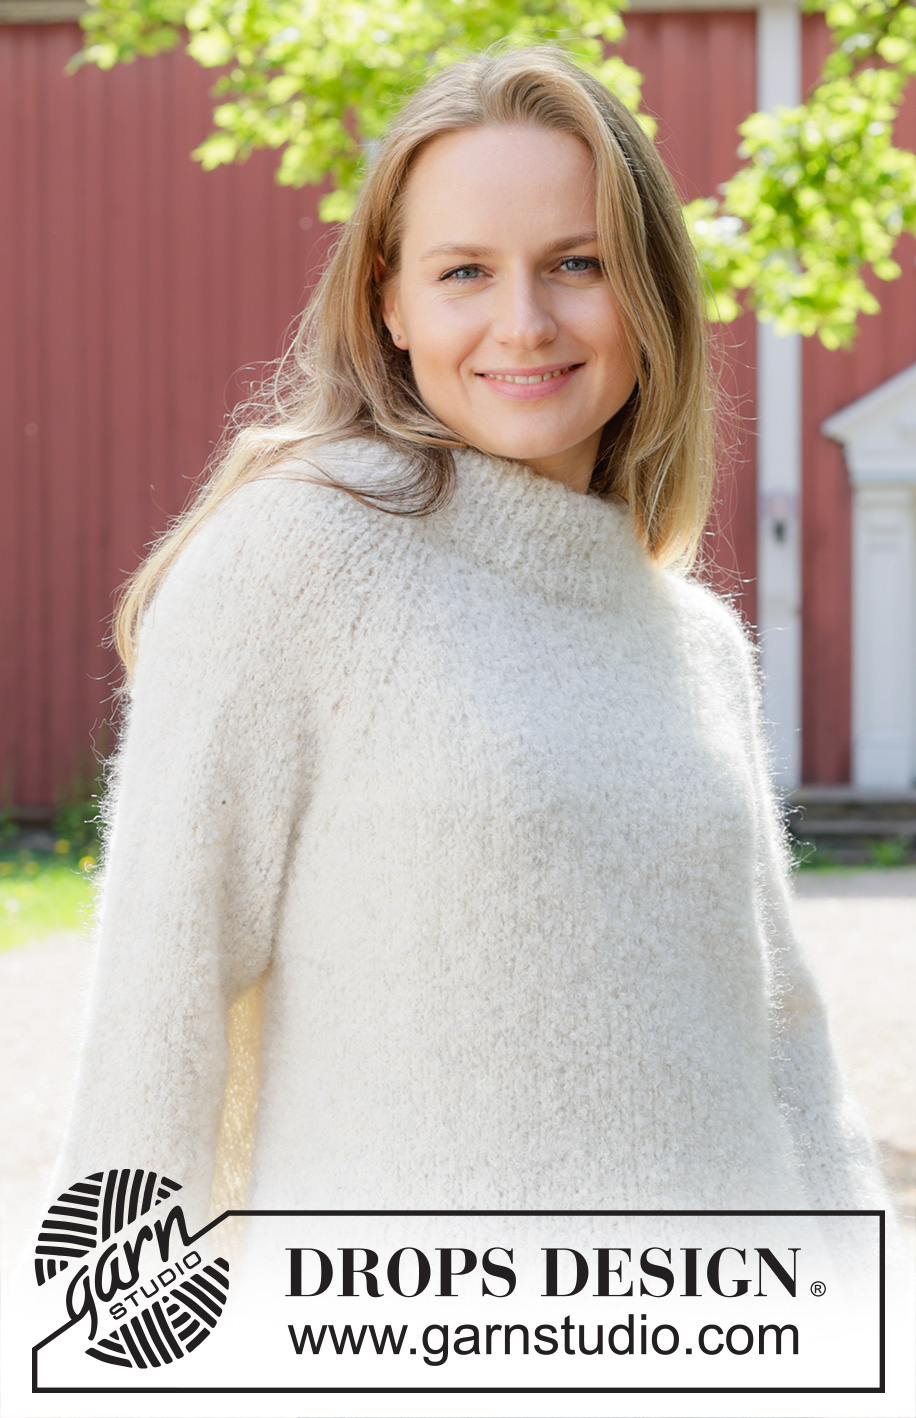
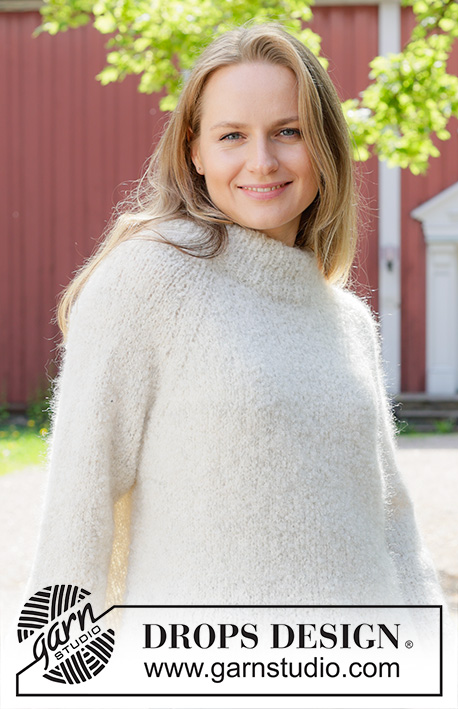
Knitted jumper in DROPS Alpaca Bouclé and DROPS Kid-Silk. Piece is knitted top down with raglan and vents in the sides. Size: S - XXXL

Highlight Size:
DROPS 252-33

#nimbushazesweater

DROPS design: Pattern ab-160
Yarn group C + A or D
----------------------------------------------------------

SIZE:
S - M - L - XL - XXL - XXXL

YARN:
DROPS ALPACA BOUCLÉ from Garnstudio (belongs to yarn group C)
250-300-300-350-350-400 g colour 0100, off white
DROPS KID-SILK from Garnstudio (belongs to yarn group A)
100-100-100-125-125-150 g colour 44, moonshine

NEEDLES:
DROPS CIRCULAR NEEDLE SIZE 7 mm: Length 40 and 80 cm.
DROPS CIRCULAR NEEDLE SIZE 5 mm: Length 40 and 80 cm.
DROPS DOUBLE POINTED NEEDLES SIZE 7 mm
DROPS DOUBLE POINTED NEEDLES SIZE 5 mm
The technique MAGIC LOOP can be used – you then only need circular needle of 80 cm in each size.

KNITTING TENSION:
13 stitches in width and 16 rows vertically in stocking stitch and 1 strand of each quality needle size 7 mm = 10 x 10 cm.
NOTE! Remember that needle size is only a suggestion. If you have too many stitches on 10 cm switch to larger needles. If you have too few stitches on 10 cm switch to smaller needles.

-------------------------------------------------------

Alternative Yarn – See how to change yarns here
Yarn Groups A to F – Use the same pattern and change the yarn here
Yarn usage using an alternative yarn – Use our yarn converter here

-------------------------------------------------------

You might also like...

Product image DROPS Alpaca Bouclé
DROPS Alpaca Bouclé
80% Alpaca, 15% Wool, 5% Polyamide
from 3.60 £ /50g
Product image DROPS Kid-Silk yarn
DROPS Kid-Silk
75% Mohair, 25% Silk
from 4.60 £ /25g
Get the yarn to make this pattern from 36.40£.

The yarn cost is calculated from the pattern’s smallest size and the yarn’s cheapest product type. Looking for an even better price? You might find it on the DROPS Deals!

Pattern instructions

NOTE: This pattern is written in British English. All measurements in charts are in cm. Convert from cm to inches here. There are different terms for crocheting in British and American English. If this pattern includes crochet, convert "crochet terms" here. See this pattern in American English here..
----------------------------------------------------------

EXPLANATION FOR THE PATTERN:

----------------------------------------------------------

GARTER STITCH (when working back and forth):
Knit on all rows, i.e. knit from right side and knit from wrong side.
1 ridge vertically = knit 2 rows.

RAGLAN:
Increase 1 stitch by making 1 yarn over, on next round knit yarn over twisted to avoid holes. Then work the new stitches in stocking stitch.

DECREASE TIP (applies to mid under sleeves):
Decrease 1 stitch on each side of marker thread as follows: Work until 3 stitches remain before marker thread, knit 2 together, knit 2 (marker thread is between these 2 stitches), slip 1 stitch knitwise, knit 1, pass slipped stitch over stitch worked.

----------------------------------------------------------

START THE PIECE HERE:

----------------------------------------------------------

JUMPER - SHORT OVERVIEW OF THE PIECE:
In this pattern needles of different length have been used, begin with fitting length for number of stitches and switch as needed.
Work neck edge and yoke in the round on circular needle from right shoulder back, and work top down. When yoke is done, divide piece for body and sleeves. Work body down wards in the round on circular needle while putting the sleeves aside. Then work sleeves downwards in the round on needle. Fold the neck edge double against the wrong side and fasten.

NECK EDGE:
Cast on 72-76-80-80-88-92 stitches on circular needle size 7 mm with DROPS Alpaca Bouclé and DROPS Kid-Silk (= 2 strands). Switch to circular needle size 5 mm (cast on on a larger needle to get an elastic cast-on edge).
Work rib in the round = knit 1/purl 1) for 14 cm. The neck edge is later folded in towards wrong side and assembled to form a neck edge of approx. 7 cm.
Beginning of round is at right shoulder at the back. Insert 1 marker after the first 26-27-28-28-30-31 stitches on round (= approx. mid front), measures piece from this marker.

YOKE:
Switch to circular needle size 7 mm and work like this, work all stitches in stocking stitch:
Work 1 stitch, increase 1 stitch for RAGLAN – read explanation above, work 13 stitches (= sleeve), increase 1 stitch for raglan, work 3 stitches (= raglan stitches), increase 1 stitch for raglan, work 17-19-21-21-25-27 stitches (= front piece), increase 1 stitch for raglan, work 3 stitches (= raglan stitches), increase 1 stitch for raglan, work 13 stitches (= sleeve), increase 1 stitch for raglan, work 3 stitches (= raglan stitches), increase 1 stitch for raglan, work 17-19-21-21-25-27 stitches (= back piece), increase 1 stitch for raglan, work 2 stitches. NOTE! Work the 3 stitches in each raglan line over knit 1, purl 1, knit 1 from rib.
Work in stocking stitch in the round while AT THE SAME TIME increasing for raglan on each side of the 3 raglan stitches every other round 2-3-6-6-7-7 times in total = 88-100-128-128-144-148 stitches (= 8 stitches increased on every increase round). Remember to follow the knitting tension!
Then continue increase as follows:
Increase for raglan on every other round on front piece and back piece, but on sleeves increase only on every 4th round (= alternately 4 and 8 stitches increased), repeat this increase 18-18-16-18-18-18 in total times on front piece and back piece and 9-9-8-9-9-9 times on sleeves.
After last increase there are 196-208-224-236-252-256 stitches on needle. Work until piece measures approx. 25-26-28-30-31-32 cm from marker mid front.
Now divide yoke for body and sleeves.

DIVIDING FOR BODY AND SLEEVES:
AT THE SAME TIME as next round is worked divide yoke for body and sleeves as follows: Slip the first 37-39-43-45-47-47 stitches on a thread for sleeve, cast on 6-6-8-10-12-16 new stitches on needle (= in the side mid under sleeve), work 61-65-69-73-79-81 stitches in stocking stitch (= front piece), slip the next 37-39-43-45-47-47 stitches on a thread for sleeve, cast on 6-6-8-10-12-16 new stitches on needle (= in the side mid under sleeve), and work in stocking stitch over the last 61-65-69-73-79-81 stitches (= back piece). Finish body and sleeves separately.

BODY:
= 134-142-154-166-182-194 stitches. Insert 1 marker thread in each side on body, in the middle of the 6-6-8-10-12-16 stitches cast on under each sleeve and move the marker threads when working, use the marker threads when piece is divided for vents in each side.
Work in the round with stocking stitch until piece measures 39-41-43-44-46-48 cm from marker mid front.
Now divide the piece for a vent in each side of body, divide at the marker threads by setting the stitches from back piece on hold and working stitch from front piece back and forth on needle as explained below.

FRONT PIECE:
= 67-71-77-83-91-97 stitches. On next row (= right side) begin rib while AT THE SAME TIME increasing 16-18-18-20-22-24 stitches evenly on needle = 83-89-95-103-113-121 stitches, work as follows:
Continue with circular needle size 5 mm, work 2 stitches in GARTER STITCH - read explanation above, work rib (= knit 1/purl 1 - remember increase) until 3 stitches remain, knit 1 and 2 stitches in garter stitch.
When rib measures 8-8-8-9-9-9 cm cast off. Jumper measures 47-49-51-53-55-57 cm from marker mid front and approx. 52-54-56-58-60-62 cm from the top of shoulder.

BACK PIECE:
Work as on front piece.

SLEEVES:
Slip 37-39-43-45-47-47 sleeve stitches from one thread on to circular needle size 7 mm and pick in addition up 1 stitch in each of the 6-6-8-10-12-16 stitches cast on under sleeve = 43-45-51-55-59-63 stitches.
Insert 1 marker thread in the middle of the 6-6-8-10-12-16 new stitches under sleeve - round begins at the marker thread.
Work in stocking stitch in the round on needle - AT THE SAME TIME when sleeve measures 3 cm from division, decrease mid under sleeve – read DECREASE TIP and decrease as follows: Decrease 2 stitches every 14-9-5½-4½-3-2½ cm 3-4-6-7-9-10 times in total = 37-37-39-41-41-43 stitches.
Work until sleeve measures 36-35-33-32-31-30 cm from division.
Switch to double pointed needles size 5 mm and work rib (= knit 1/purl 1) while AT THE SAME TIME increasing 7-7-7-9-9-9 stitches evenly on 1st round = 44-44-46-50-50-52 stitches.
When piece measures 6 cm cast off. Sleeve measures approx. 42-41-39-38-37-36 cm from division.

ASSEMBLY:
Fold rib at the top of neck down on inside of garment. Fasten rib to get a double neck edge. To avoid a tight neck edge that sticks out it is important to keep the seam elastic.

Diagram

Diagram measurements for DROPS 252-33

Each of our patterns has specific tutorial videos to help you.

Do you have a question? See a list of frequently asked questions (FAQ)

Knitting tension is what determines the final measurements of your work, and is usually measured per 10 x 10 cm. It is provided like so: number of stitches in width x number of rows in height - eg: 19 stitches x 26 rows = 10 x 10 cm.

The knitting tension is very individual; some people knit/crochet loosely while others work tightly. You adjust the knitting tension with the needle size, which is why the suggested needle size is only meant as a guide! You need to adjust this (up or down) to ensure that YOUR knitting tension matches the knitting tension provided in the pattern. If you work with a different knitting tension than provided you will have a different yarn consumption, and your work will have different measurements than what the pattern suggests.

The knitting tension also determines which yarns can replace each other. As long as you achieve the same knitting tension you can replace one yarn with another.

See DROPS lesson: How to measure your tension/gauge

See DROPS video: How to make a gauge tension swatch

The required amount of yarn is provided in grams, eg: 450 g. To calculate how many balls you’ll need you first need to know how many grams are in 1 ball (25g, 50g or 100g). This information is available if you click on the individual yarn quality on our pages. Divide the amount required with the amount of each ball. For example, if each ball is 50g (the most common amount), the calculation will be as follows: 450 / 50 = 9 balls.

The important thing when changing from one yarn to another is that the knitting/crochet tension remains the same. This is so that the measurements of the finished piece will be the same as on the sketch provided. It is easier to achieve the same knitting tension using yarns from the same yarn group. It is also possible to work with multiple strands of a thinner yarn to achieve the knitting tension of a thicker one. Please try our yarn converter. We recommend you to always work a test swatch.

Please NOTE: when changing yarn the garment might have a different look and feel to the garment in the photo, due to individual properties and qualities of each yarn.

See DROPS lesson: Can I use a different yarn than the one mentioned in the pattern?

All our yarns are categorised into yarn groups (from A to F) according to thickness and knitting tension – group A contains the thinnest yarns and group F the thickest. This makes it easier for you to find alternative yarns to our patterns, should you wish to switch yarn. All yarns within the same group have a similar knitting tension and can easily replace each other. However, different yarn qualities have different structures and properties which will give the finished work a unique look and feel.

Click here for an overview of the yarns in each yarn group

At the top of all our patterns you’ll find a link to our yarn calculator, which is a helpful tool should you wish to use a different yarn than suggested. By filling in the yarn quality you wish to replace, the amount (in your size) and number of strands, the calculator will present good alternative yarns with the same knitting tension. Additionally it will tell you how much you’ll require in the new qualities and whether you’ll need to work with multiple strands. Most skeins are 50g (some are 25g or 100g).

If the pattern is worked with multiple colours, every colour will have to be calculated separately. Similarly, if the pattern is worked with several strands of different yarns (for example 1 strand Alpaca and 1 strand Kid-Silk) you will have to find alternatives for each, individually.

Click here to see our yarn calculator

Since different yarns have different qualities and textures we have chosen to keep the original yarn in our patterns. However, you can easily find options among our available qualities by using our yarn calculator, or simply pick a yarn from the same yarn group.

It is possible that some retailers still have discontinued yarns in stock, or that someone has a few skeins at home that they would like to find patterns for.

The yarn calculator will provide both alternative yarn as well as required amount in the new quality.

If you think it's hard to decide what size to make, it can be a good idea to measure a garment you own already and like the size of. Then you can pick the size by comparing those measures with the ones available in the pattern's size chart.

You'll find the size chart at the bottom of the pattern.

See DROPS lesson: How to read size chart

The needle size provided in the pattern serves only as a guide, the important thing is to follow the knitting tension. And since knitting tension is very individual, you will have to adjust the needle size to ensure that YOUR tension is the same as in the pattern – maybe you’ll have to adjust 1, or even 2 needle sizes, up or down to achieve the correct tension. For this, we recommend that you work test swatches.

Should you work with a different knitting tension than the one provided, the measurements of the finished garment might deviate from the measurement sketch.

See DROPS lesson: How to measure your tension/gauge

See DROPS video: How to make a tension/gauge swatch

Working a garment top-down provides more flexibility and room for personal adjustment. For example it is easier to try the garment on while working, as well as making adjustments to length of yoke and shoulder caps.

The instructions are carefully explaining every step, in the correct order. Diagrams are adjusted to the knitting direction and are worked as usual.

The diagram depicts all rows/rounds, and every stitch seen from the right side. It is read from bottom to top, from right to left. 1 square = 1 stitch.

When working back and forth, every other row is worked from the right side and every other row is worked from the wrong side. When working from the wrong side, the diagram will have to be worked reversed: from left to right, knit stitches are purled, purl stitches are knit etc.

When working in the round every round is worked from the right side and the diagram are worked from right to left on all rounds.

See DROPS lesson: How to read knitting diagrams

The diagram depicts all rows/rounds, and every stitch seen from the right side. It is worked from bottom to top, from right to left.

When working back and forth every other row is worked from the right side: from right to left and every other row is worked from the wrong side: from left to right.

When working in the round, every row in the diagram are worked from the right side, from right to left.

When working a circular diagram you start in the middle and work your way outwards, counter clockwise, row by row.

The rows usually start with a given number of chain stitches (equivalent to the height of the following stitch), this will either be depicted in the diagram or explained in the pattern.

See DROPS lesson: How to read crochet diagrams

Instructions for working several diagrams after each other on the same row/round, will often be written like so: “work A.1, A.2, A.3 a total of 0-0-2-3-4 times". This means you work A.1 once, then A.2 is worked once, and A.3 is repeated (in width) the number of times provided for your size – in this case like so: S = 0 times, M = 0 times, L=2 times, XL= 3 times and XXL = 4 times.

The diagrams are worked as usual: begin with the first row in A.1, then work the first row in A.2 etc.

See DROPS lesson: How to read knitting diagrams

See DROPS lesson: How to read crochet diagrams

The total width of the garment (from wrist-to-wrist) will be larger in the larger sizes, despite the actual sleeves being shorter. The larger sizes have longer sleeve caps and wider shoulders, so there will be a good fit in all sizes.

The measurement sketch/schematic drawing provides information regarding the full length of the garment. If it’s a jumper or a jacket the length is measured from the highest point on the shoulder closest to the neckline, and straight down to the bottom of the garment. It is NOT measured from the tip of shoulder. Similarly, the length of yoke is measured from the highest point on the shoulder and down to where yoke is split into body and sleeves.

On a jacket measures are never taken along bands, unless specifically stated. Always measure inside band stitches when measuring the length.

See DROPS lesson: How to read a schematic drawing

Diagrams are often repeated on the round or in height. 1 repeat is the diagram the way it appears in the pattern. If it says to work 5 repeats of A.1 in the round, then you work A.1 a total of 5 times after/next to each other in the round. If it says to work 2 repeats of A.1 vertically/in height you work the entire diagram once, then begin again at the start and work the entire diagram one more time.

Chain stitches are slightly narrower than other stitches and to avoid working the cast-on edge too tight, we simply chain more stitches to begin with. The stitch count will be adjusted on the following row to fit the pattern and measurement sketch.

The rib edge is more elastic and will contract slightly compared to, for example, stocking stitch. By increasing before the rib edge, you avoid a visible difference in width between the rib edge and the rest of the body.

It’s very easy to cast off too tightly, and by making yarn overs while casting off (and simultaneously casting these off) you avoid a too tight cast off edge.

See DROPS video: How to bind off with yarn overs (yo)

To achieve an even increase (or decrease) you can increase on, for example: every 3rd and 4th row alternately, like so: work 2 rows and increase on the 3rd row, work 3 rows and increase on the 4th. Repeat this until the increase is complete.

See DROPS lesson: Increase or decrease 1 st on every 3rd and 4th row alternately

Should you prefer to work in the round instead of back and forth, you may of course adjust the pattern. You’ll need to add steeks mid-front (usually 5 stitches), and follow the instructions. When you would normally turn and work from the wrong side, simply work across the steek and continue in the round. At the end you’ll cut the piece open, pick up stitches to work bands, and cover the cut edges.

See DROPS video: How to knit steeks and cut open

Should you prefer to work back and forth instead of in the round, you may of course adjust the pattern so you work the pieces separately and then assemble them at the end. Divide the stitches for the body in 2, add 1 edge stitch in each side (for sewing) and work the front and back pieces separately.

See DROPS lesson: Can I adapt a pattern for circular needles into straight needles?

Pattern repeats can vary slightly in the different sizes, in order to get the correct proportions. If you’re not working the exact same size as the garment in the photo, yours might deviate slightly. This has been carefully developed and adjusted so that the complete impression of the garment is the same in all sizes.

Make sure to follow instructions and diagrams for your size!

If you have found a pattern you like which is available in women’s size it’s not very difficult to convert it to men’s size. The biggest difference will be the length of sleeves and body. Start working on the women size that you think would fit across the chest. The additional length will be worked right before you cast off for the armhole/sleeve cap. If the pattern is worked top-down you can add the length right after the armhole or before the first decrease on sleeve.

Regarding additional yarn amount, this will depend on how much length you add, but it is better with a skein too many than too few.

All yarns will have excess fibres (from production) that might come off as lint or shedding. Brushed yarns (ie hairier yarns) have more of these loose, excess fibres, causing more shedding.

Shedding also depends on what is worn under or over the garment, and whether this pulls at the yarn fibres. It’s therefore not possible to guarantee that there will be no shedding

Below are some tips on how to get the best result when working with hairier yarns:

1. When the garment is finished (before you wash it) shake it vigorously so the looser hairs come off. NOTE: do NOT use a lint roller, brush or any method that pulls at the yarn.

2. Place the garment in a plastic bag and put it in your freezer - the temperature will cause the fibres to become less attached to each other, and excess fibres will come off easier.

3. Leave in the freezer for a few hours before taking it out and shaking it again.

4. Wash the garment according to the instructions on the yarn label.

Pilling is a natural process that happens to even the most exclusive of fibers. It's a natural sign of wear and tear that is hard to avoid, and that is most visible in high friction areas of your garment like a sweater's arms and cuffs.

You can make your garment look as new by removing the pilling, using a fabric comb or a pill/lint remover.

Still can't find the answer you need? Then scroll down and leave your question so one of our experts can try to help you. This will be done normally within 5 to 10 working days.
In the meantime, you can read the questions and answers that others have left to this pattern or join the DROPS Workshop on Facebook to get help from fellow knitters/crocheters!
Have you finished this pattern?
Tag your pictures with #dropspattern #nimbushazesweater or submit them to the #dropsfan gallery.

Post a comment to pattern DROPS 252-33

We would love to hear what you have to say about this pattern!

If you want to leave a question, please make sure you select the correct category in the form below, to speed up the answering process. Required fields are marked *.

Comments / Questions (10)

country flag Debbie G wrote:

Thank you for your last detailed explanation. That helped a lot. I would've never figured it out without your help!

19.03.2025 - 00:08

country flag Debbie G wrote:

Hi, I'm confused. I went to my local shop and they are a confused as well. We don't understand your increase totals. Can I ask the question another way? If so --Am I correct in assuming rows 1-4 will basically repeat? Maybe can you provide more detail row, by row for 4 rows, with total stitch count at the end of each row? I don't want to frog this project because I love the sweater design! I also have left my email address if you'd rather email me.

16.03.2025 - 23:25

DROPS Design answered:

Dear Debbie, first round: increase 8 stitches (2 stitches for each sleeve, 2 stitches for the front piece, 2 stitches for the back piece). 2nd round: No increases. 3rd round: like 1st round. 4th round: like 2nd round. Work like this until you have worked a total of 2 to 7 (depending on the size) increase rounds. Now, you increase for the back/front as before but for the sleeve once every 4th round: First round: increase 8 stitches as before. 2nd round: no increases. 3rd round: increase 2 stitches for front piece, 2 stitches for the back piece (= 4 stitches increased). 4th round: No increases. Repeat these 4 rounds 9 times in total. Happy knitting!

16.03.2025 - 23:57

country flag DEBBIE G wrote:

Follow on to Rania's question. When I calculate the # stitches for the increases from 88 stitches (size SM), I end up with too many st. I'm figuring: R1: Incr F&B raglan (Total 92 st). R2: Incr 0. R3: Incr F&B raglan (96 st.). R4: Incr Sleeve raglan + F&B (104 st) and so on. 18x for F&B and 9 for Sleeves would take me 36 rows with a total of 232 st. This is way off from the pattern. Help!

13.03.2025 - 17:44

DROPS Design answered:

Dear Debbie, at the beg you get 17 sts for front & back piece and increase then for raglan a total of 2 sts 2 times then 2 sts 18 times= 57 sts ; for sleeves there are 13 sts + 2 sts 2 times + 2 sts 4 times = 35 sts, so that you have 57 x 2 (front and back pieces) + 35 x2 (sleeves) + 3 sts x 4 (raglan sts) = 196 sts in total. Note that you will increase 18 times 2 times on back /front pieces but at the same time only 9 times on sleeves: R1 increase 8 sts: as before back/front and sleeves, R3: increase sts: back/front only.Happy knitting!

14.03.2025 - 07:25

country flag DEBBIE G wrote:

Sorry, I hit SEND too fast. To add on to my question. That would mean at the end of the round, since it's 2 stitches of the raglan, I should P1 K1 the last 2 stitches, correct?

12.03.2025 - 01:51

DROPS Design answered:

Dear Debbie, see previous answer, the 3 raglan stitches should be all knitted, but should match the (K1, P1, K1) worked on neck before. Happy knitting!

13.03.2025 - 14:12

country flag DEBBIE G wrote:

I think my question was answered. To be sure: I need to increase AFTER the first stitch in the round and then BEFORE the last 2 stitches at the end of the round. Furthermore, am i to understand that for the 3 raglan stitches I should be doing a K1 P1 K1? If that's the case, it would be easier if the pattern was written that way rather than as a notation.

12.03.2025 - 01:47

DROPS Design answered:

Dear Debbie, that's right you will increase for sleeve after the first stitch of the round and increase at the end of back piece before the last 2 stitches. The 3 raglan stitches are knitted but they should match (K1, P1, K1) from rib on neck before. Happy knitting!

13.03.2025 - 14:09

country flag Debbie G wrote:

I'm on the Yoke and did the first row of increases. Next the pattern says to increase on both sides of the 3 raglan stitches. In my calculation that would = 6 stitches increased. But the pattern says 8 st increased and I can't figure out where the other 2 stitches come from. Please advise

12.03.2025 - 01:04

country flag Judith wrote:

In der Beschreibung zur Passe ist angegeben dass ich an 3 Stellen 3 Raglanmaschen zu stricken habe. Ist dann denn richtig? Muss nicht ein Pullover 4 Raglanlinien haben, so dass man an 4 Stellen je 3 Raglanmaschen stricken müsste. Ich bin leider noch Anfänger und halte mich daher an die Anleitung. Würde mich über eine Antwort freuen

26.11.2024 - 14:52

DROPS Design answered:

Liebe Judith, am Anfang der Runde stricken Sie die 1. Masche von diesen 3 Raglan-Maschen und am Ende der Reihe stricken Sie die 2 letzten von den 3 Raglanmaschen, so beginnen die Runden ca in der Mitte von den Raglanmaschen so sind es insgesamt 4 Mal 3 Raglanmaschen. Viel Spaß beim Stricken!

26.11.2024 - 16:44

country flag Antonella Serio wrote:

Sorry, war ein Denkfehler von mir. Die Anleitung ist richtig ! FG

03.11.2024 - 00:19

country flag Serio Antonella wrote:

Hallo, wenn nach den ersten 28 Maschen 1 Markierer angebracht wird, ist der Rundenbeginn bei mir an der linken hinteren Schulter und nicht wie in der Anleitung vermerkt an der rechten hinteren Schulter. Liegt bei mir ein Denkfehler vor oder muss die Anleitung korrigiert werden? Vielen lieben Dank für eine hoffentlich schnelle Antwort. Herzlichst, Antonella Serio

02.11.2024 - 18:49

country flag Rania Mohamed wrote:

"Increase for raglan on every other round on front piece and back piece, " does this mean every row or in 2nd row

10.10.2024 - 01:41

DROPS Design answered:

Dear Mrs Rania, when increasing on every other round you will increase as follows: *work 1 round with increases, 1 round without increases* and repeat these 2 rounds the number of times required. Happy knitting!

10.10.2024 - 09:27