
Popular categories
Looking for a yarn?


Comments / Questions (32)
![]() Ana wrote:
Ana wrote:
When working A.4 when you increase 36 stitches on next to last row, are the increases at the ends of the row and on either side of the middle stitch included in those 36 stitches? Or do you increase 36 stitches plus the 4 stitches?
03.03.2026 - 15:42DROPS Design answered:
Hi Ana, You increase on either side of the middle stitch at on each side in addition to the 36 increased stitches on this row. Regards, Drops Team.
04.03.2026 - 06:47
![]() Anne Pfeffer wrote:
Anne Pfeffer wrote:
Hallo, lt. Angabe im Text werden in allen Diagrammen Hin- und Rückrunde angegeben. Wenn ich A1 hin rechts und zurück ebenfalls rechts stricke, wird es kraus rechts. Im Bild oben sieht dies jedoch anders (glatt rechts mit einzelnen linken Maschen) aus. Stimmen die Diagramme so? Danke und viele Grüße A. Pfeffer
28.02.2026 - 17:11DROPS Design answered:
Liebe Frau Pfeffer, bei den Rückreihen folgen Sie die Symbolbeschreibung "in Rück-Reihen" so werden die Maschen in A.1 links gestrickt = glatt rechts. Viel Spaß beim Stricken!
02.03.2026 - 09:11
![]() Silvia wrote:
Silvia wrote:
Bei Muster 3A-C habe ich ein Problem. Müsste ich nicht, nach der Mittelmasche, das Muster spiegeln? Vor der Mittelmasche 3A, 3B,3C. Mittelmasche. 3C, 3B, 3A. Und auch das Muster in sich spiegeln (vor d. Mittelmasche 2M re zusammen 1Umschlag / nach d. Mittelmasche 1 Umschlag 1Überzug aus 2 Maschen). Habe gerade einen Knoten im Kopf. Vielen Dank für die Beantwortung.
03.02.2026 - 12:51DROPS Design answered:
Liebe Silvia, das Muster ist in diesem Fall nicht ganz symmetrisch, das wird auch in der Anleitung erwähnt, es fällt aber kaum ins Gewicht. Wenn Sie es dennoch ganz symmetrisch haben wollen, müssten Sie in der Tat das ganze Muster spiegeln. was hier nicht erfolgt ist, damit die Anleitung durch weitere Diagramme nicht zu unübersichtlich wird. Viel Spaß beim Weiterstricken!
03.02.2026 - 14:12
![]() Dumotier wrote:
Dumotier wrote:
Bonjour je suis arrivée au diagramme A3A, Ne faut il pas faire un surjet pour compenser le jeté sinon j'ai une maille en plus à chaque fois Merci de votre réponse
05.01.2026 - 15:06
![]() Maria wrote:
Maria wrote:
Ich verstehe leider nicht, wie die Abnahme funktioniert und würde mich über eine Erklärung freuen. Danke
06.11.2025 - 21:22DROPS Design answered:
Liebe Maria, bitte geben Sie genauer an, welche Abnahme Sie meinen.
07.11.2025 - 10:28
![]() Renate wrote:
Renate wrote:
Hallo liebes Drops-Team. Ich muss meinen vorherigen Kommentar revidieren und mich entschuldigen. Das Tuch konnte ich (mit Hilfe) fertigstellen und bin begeistert. Die Anleitung ist zwar manchmal etwas irreführend aber völlig korrekt. Vielen Dank
15.06.2025 - 08:16
![]() Renate Schmitt wrote:
Renate Schmitt wrote:
Die Anleitung ist nicht gut verständlich und ich zweifle ob die fehlerfrei ist. Eigentlich bin ich geübt. Habe das Projekt mittlerweilen 8x aufgetrennt und gebe nun auf. Schade um die Wolle. Kann ich leider gar nicht empfehlen
26.05.2025 - 21:24DROPS Design answered:
Liebe Frau Schmitt, wie kann man Ihnen helfen? Welches Teil ist für Sie problematisch? Gerne sagen Sie uns mehr, damit wir Ihnen weiterhelfen können.
27.05.2025 - 09:39
![]() Andrea wrote:
Andrea wrote:
Ist es möglich, hier einen Übersetzer bei den Fragen bzw. Kommentaren anzubringen? Ich verstehe leider nicht alle Sprachen und es ist sehr mühsam, alles mit Übersetzern zu googeln!
09.03.2025 - 21:13
![]() Andrea wrote:
Andrea wrote:
Die Erklärungen zum Diagramm sind nicht richtig! Bei A3B sollen in Reihe 3 6 Maschen glatt gestrickt werden - 2 M zusammenstricken - 1 M glatt/1 Umschlag/1 M glatt = 10 Maschen; das sind also 2 Maschen zu viel!!! Was mache ich falsch? Der gleiche Fehler ist auch in A3A. Das Muster sieht nicht so aus, wie auf dem Foto!
09.03.2025 - 21:10DROPS Design answered:
Liebe Andrea, in A.3 wird man keine echte Zunahmen stricken, alle Umschläge werden die Abnahmen ausgleichen/kompensieren, dh jedes mal Sie 1 Umschlag arbeiten, nehmen Sie 1 Masche ab. Viel Spaß beim Stricken!
10.03.2025 - 09:52
![]() Cherblanc wrote:
Cherblanc wrote:
Bonjour je ne comprends pas le diagramme A 3 B. merci . Evelyne
29.01.2025 - 12:52DROPS Design answered:
Bonjour Mme Cherblanc, le diagramme A.3B correspond à la partie du point fantaisie que l'on va répéter entre le début du motif = A.3A et la fin du motif = A.3C. On va faire un jeu de diminutions avec des jetés tricotés torse (cf légende pour savoir comment les tricoter pour que les mailles soient orientées dans le bon sens) = le nombre de mailles reste ainsi le même. Bon tricot!
29.01.2025 - 13:57
|
||||||||||||||||||||||||||||
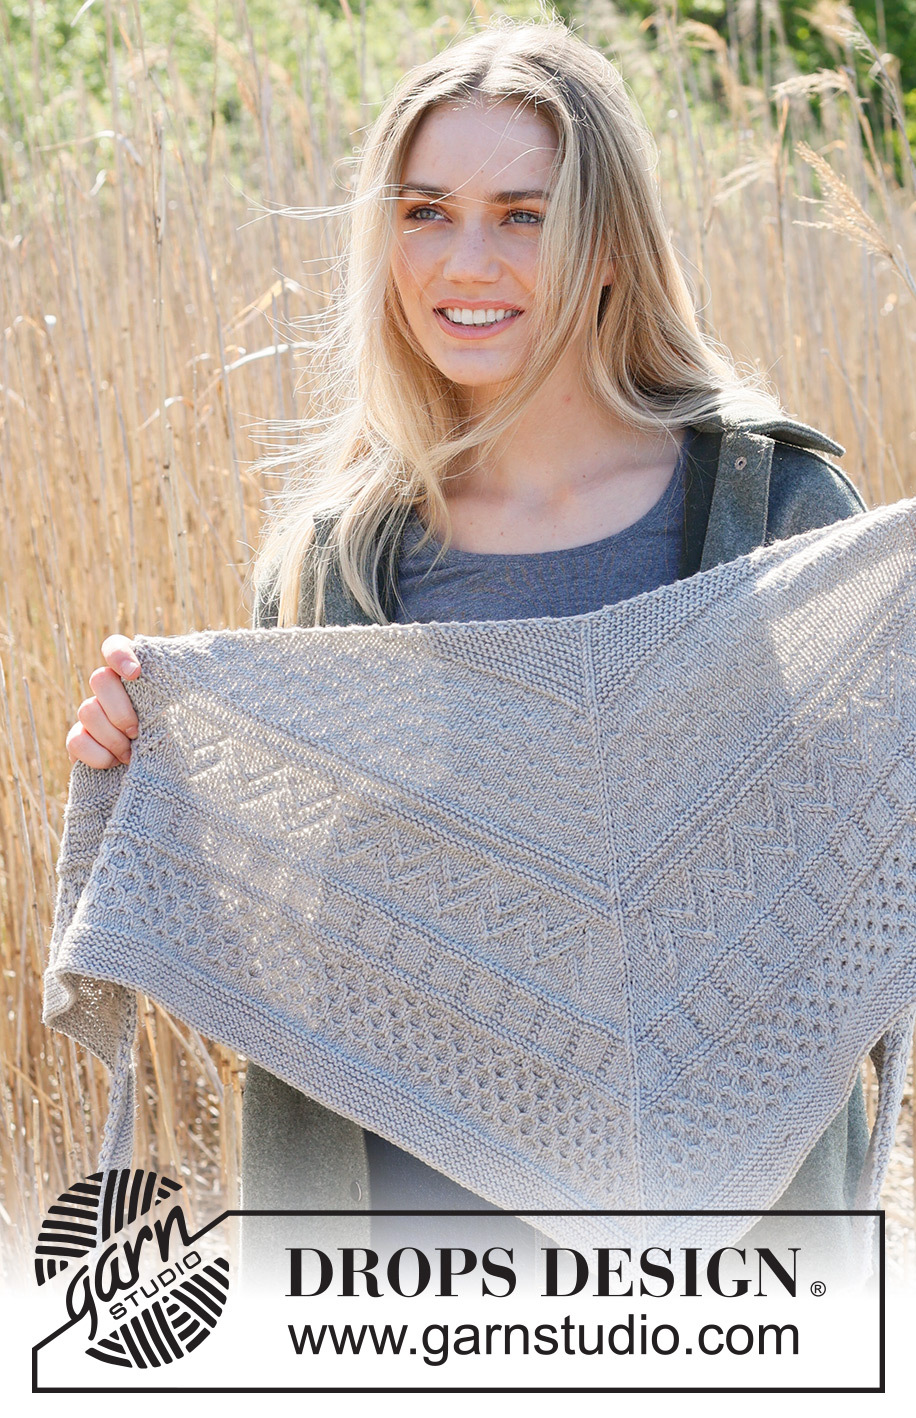
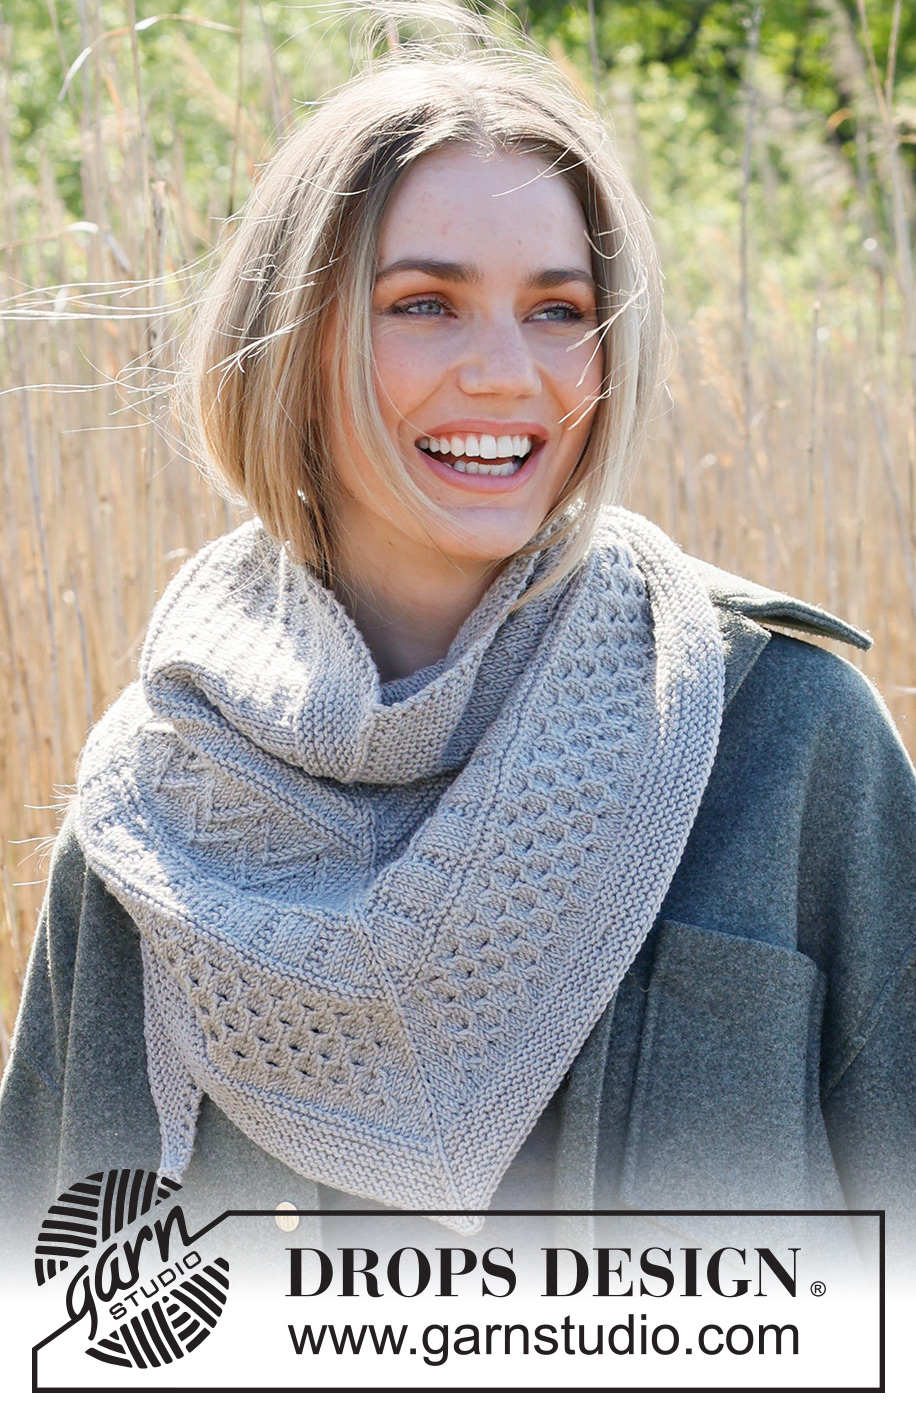
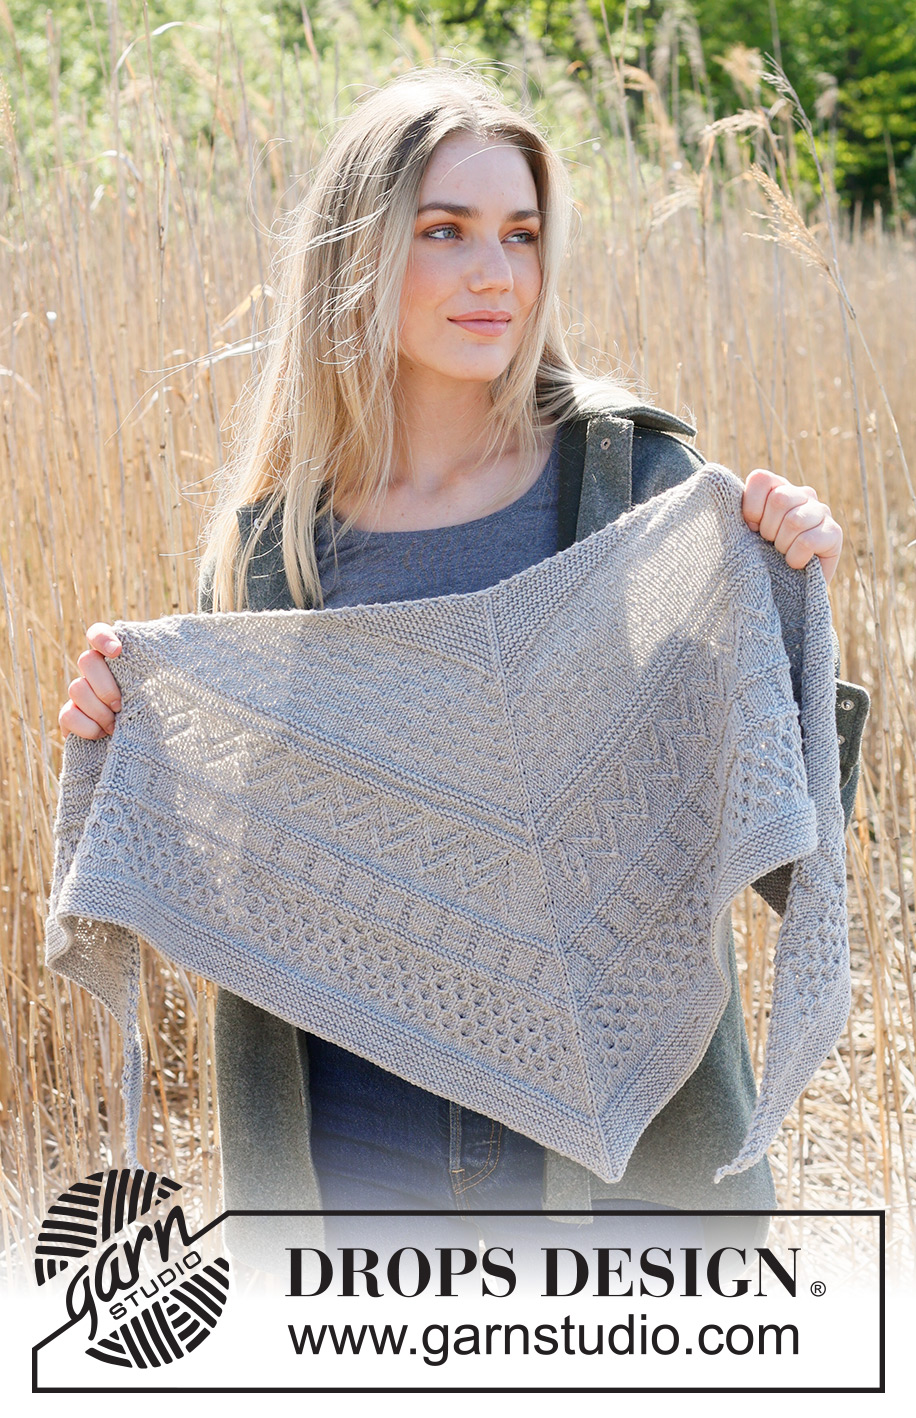
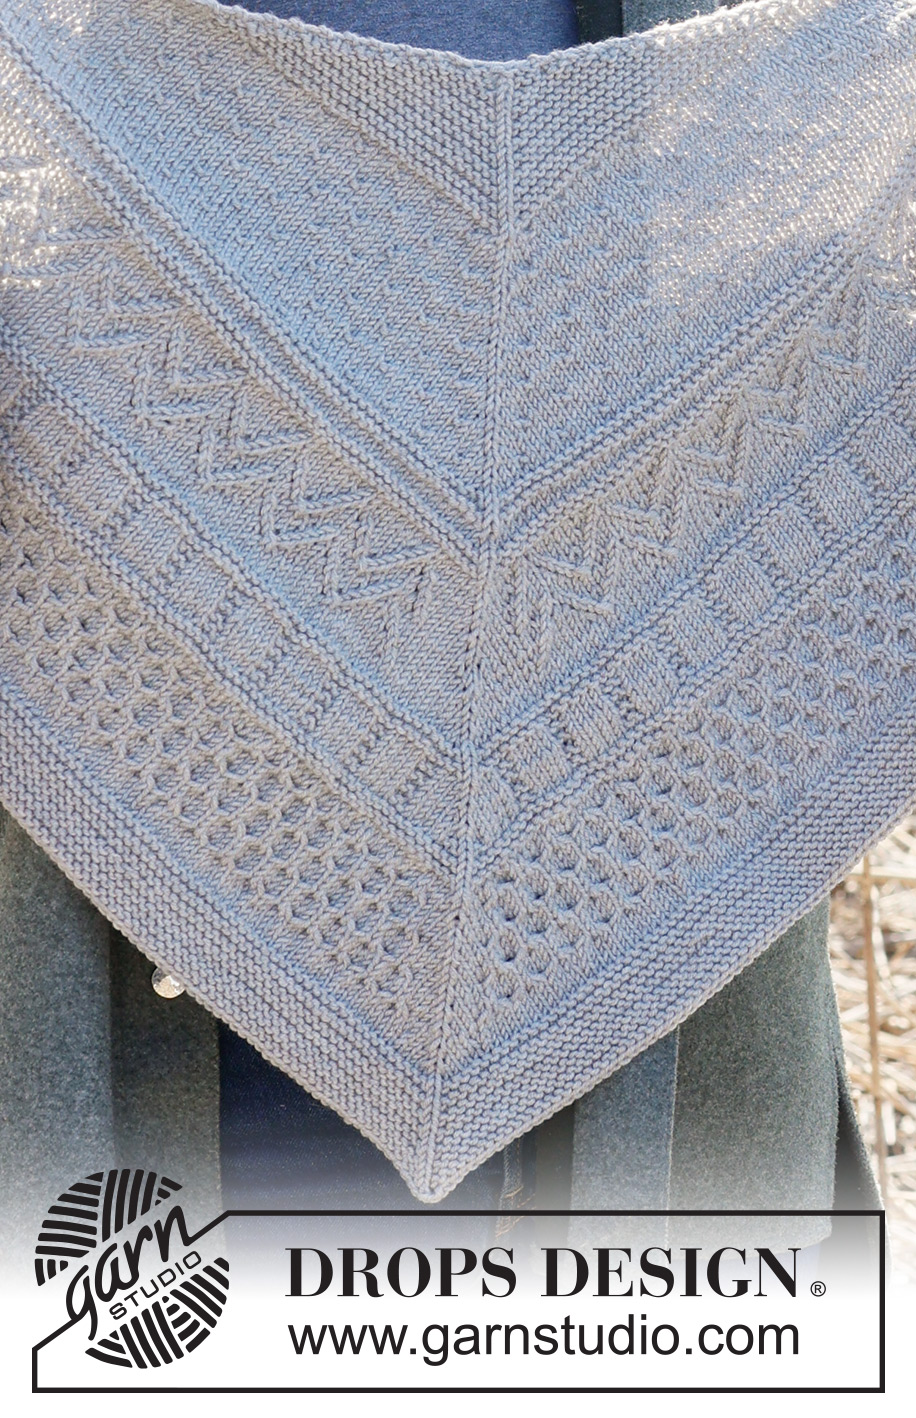
Winter Lines#winterlinesshawl |
||||||||||||||||||||||||||||
 |
 |
|||||||||||||||||||||||||||
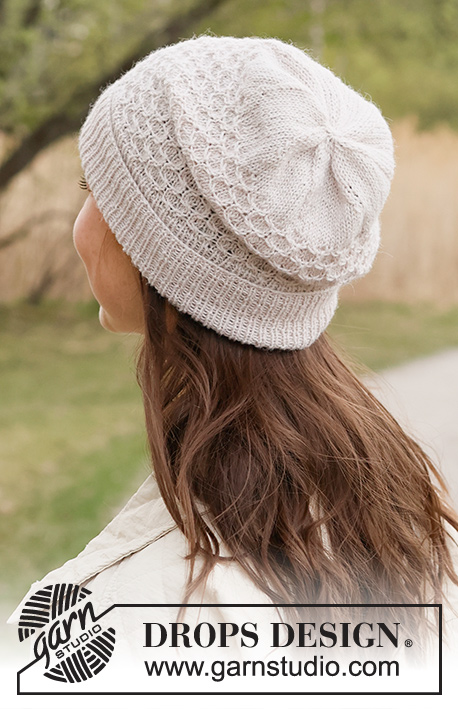
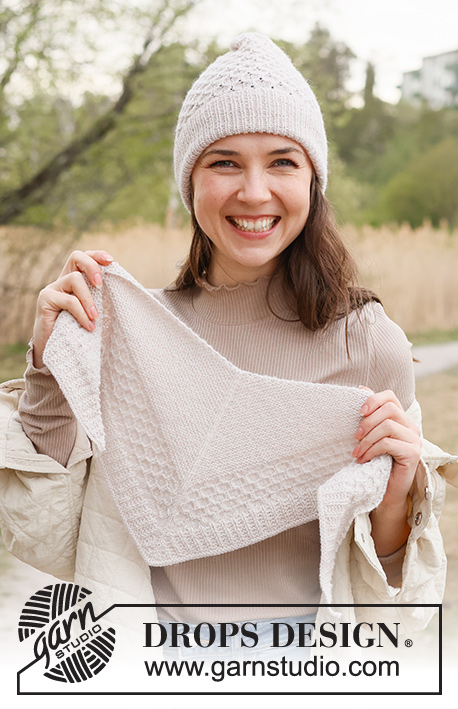
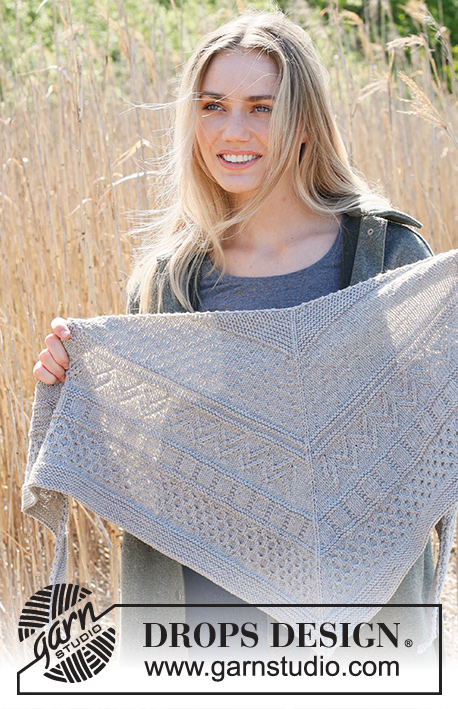
Knitted shawl in DROPS Merino Extra Fine or DROPS Daisy. Piece is knitted top down with relief pattern.
DROPS 234-46 |
||||||||||||||||||||||||||||
|
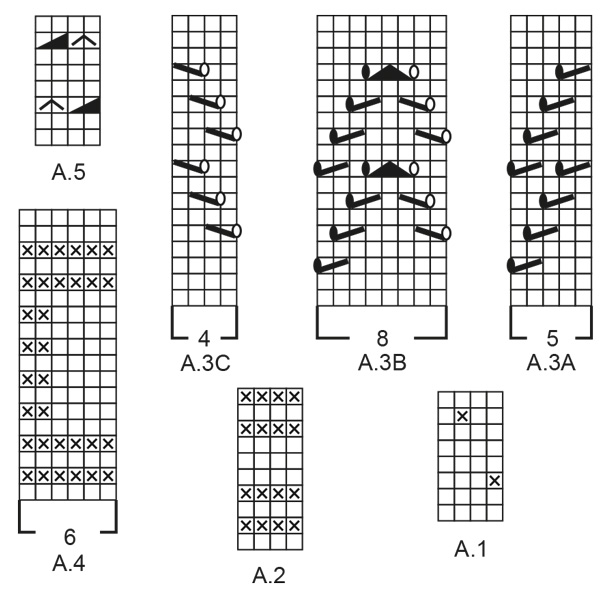
---------------------------------------------------------- EXPLANATION FOR THE PATTERN: ---------------------------------------------------------- GARTER STITCH (back and forth): Knit all rows. 1 ridge vertically = knit 2 rows. PATTERN: See diagrams A.1 to A.5. Diagrams show all rows in pattern seen from the right side. INCREASE TIP-1 (in each side of shawl): Increase from both right side and wrong side! Increase 1 stitch by making 1 yarn over inside outermost stitch in each side. On next row knit/purl yarn over depending on pattern (it should make a hole). INCREASE TIP-2 (the middle of shawl): All increases are done from the right side. Increase by making 1 yarn over on each side of stitch with marker. Work yarn overs as follows – from wrong side: BEFORE STITCH WITH MARKER: Purl yarn over in back loop of stitch. It should not make a hole. AFTER STITCH WITH MARKER: Slip yarn over off left needle and put it back on left needle but the opposite way (insert left needle in from behind when slipping it back on needle). Purl yarn over in front loop of stitch. It should not make a hole. Then work the increased stitches in stocking stitch. ---------------------------------------------------------- START THE PIECE HERE: ---------------------------------------------------------- SHAWL - SHORT OVERVIEW OF THE PIECE: Worked back and forth on circular needle, top down. Because of the number of stitch it might be wise to distribute the stitches on several circular needle of the same size when increasing. SHAWL: Cast on 7 stitches on circular needle size 4 mm with DROPS Merino Extra Fine or DROPS Daisy. Knit 1 row from wrong side. Insert 1 marker in the middle stitch on needle - this is the middle stitch and the middle stitch is worked in stocking stitch until finished measurements. Then work and increase as follows: ROW 1 (= right side): 1 stitch in GARTER STITCH - read explanation above, increase 1 stitch - read INCREASE TIP-1, knit until middle stitch, increase 1 stitch on each side of middle stitch - read INCREASE TIP-2, knit until 1 stitch remains, increase 1 stitch - read INCREASE TIP-1, finish with 1 stitch in garter stitch (= 4 stitches increased). ROW 2 (= wrong side): 1 stitch in garter stitch, increase 1 stitch - remember INCREASE TIP-1, knit until middle stitch (work yarn overs as explained in INCREASE TIP-2), purl middle stitch, knit until 1 stitch remains, increase 1 stitch - remember INCREASE TIP-1, finish with 1 stitch in garter stitch (= 2 stitches increased). Repeat 1st and 2nd row until piece measures 5 cm in knitting direction = approx. 67 stitches on needle. REMEMBER THE KNITTING TENSION! OVERVIEW OF NEXT SECTION: Now work pattern according to diagram as explained below - read the section PATTERN below before continuing. AT THE SAME TIME continue increases the same way as before, i.e. increase 4 stitches from right side and 2 stitches from wrong side the entire piece. PATTERN: Begin each diagram from right side, after increase at the beginning of row. Work diagram as far as you can until middle stitch, work the increased stitches that do not fit the pattern in stocking stitch/garter stitch until middle stitch. Increase on each side of middle stitch as before, work the same number of stitches in stocking stitch/garter stitch after middle stitch, begin diagram so that the pattern is symmetrical on each side of middle stitch (A.3A and A.3C will not be quite symmetrical on each side of middle stitch), work diagram until increase at the end of row. Work the increased stitches in stocking stitch, work the edge stitch in each side in garter stitch and work the middle stitch in stocking stitch. Follow the order of diagrams as explained below. Work A.1 as explained above until piece measures 15 cm in knitting direction and next row is from right side. There are now approx. 151 stitches on needle. Work A.2 as explained above. When A.2 has been worked, there are approx. 181 stitches on needle and next row is worked from right side. Work A.3 as explained above (i.e. work A.3A, work A.3B 10 times in total, A.3C and work any remaining stitches before middle stitch in stocking stitch - after middle stitch work the same number of stitches in stocking stitch as before middle stitch, then work pattern the same way, i.e. A.3A, A.3B 10 times in total, A.3C). When A.3 has been worked, there are approx. 235 stitches on needle and next row is worked from right side. Work A.4 as explained above - at the same time on next to last row increase 36 stitches evenly (18 stitches on each side of middle stitch). When A.4 has been worked, there are approx. 325 stitches on needle and next row is worked from right side. Work A.5 as explained above. Work A.5 2 times in total vertically. After A.5 there are approx. 373 stitches on needle and next row is worked from right side. Work 2 rows in stocking stitch with increases as before and 1 stitch in garter stitch in each side as before - at the same time on first row (right side) decrease 36 stitches evenly (18 stitches on each side of middle stitch) = approx. 343 stitches on needle and next row is worked from right side. Then work 7 ridges in garter stitch back and forth (work middle stitch in stocking stitch), and increase the same way as before. After last row from wrong side there are approx. 385 stitches on needle. Shawl measures approx. 38 cm in knitting direction. Cast off somewhat loosely by knitting from the right side. |
||||||||||||||||||||||||||||
Diagram explanations |
||||||||||||||||||||||||||||
|
||||||||||||||||||||||||||||
 |
||||||||||||||||||||||||||||
Have you finished this pattern?Tag your pictures with #dropspattern #winterlinesshawl or submit them to the #dropsfan gallery. Do you need help with this pattern?You'll find 20 tutorial videos, a Comments/Questions area and more by visiting the pattern on garnstudio.com. © 1982-2026 DROPS Design A/S. We reserve all rights. This document, including all its sub-sections, has copyrights. Read more about what you can do with our patterns at the bottom of each pattern on our site. |
||||||||||||||||||||||||||||


With over 40 years in knitting and crochet design, DROPS Design offers one of the most extensive collections of free patterns on the internet - translated to 17 languages. As of today we count 325 catalogues and 12298 patterns translated into English (UK/cm).
We work hard to bring you the best knitting and crochet have to offer, inspiration and advice as well as great quality yarns at incredible prices! Would you like to use our patterns for other than personal use? You can read what you are allowed to do in the Copyright text at the bottom of all our patterns. Happy crafting!
Post a comment to pattern DROPS 234-46
We would love to hear what you have to say about this pattern!
If you want to leave a question, please make sure you select the correct category in the form below, to speed up the answering process. Required fields are marked *.