
Popular categories
Looking for a yarn?


Comments / Questions (23)
![]() Sophie wrote:
Sophie wrote:
Hej. Enmaskflätan ned till resåren blir otydlig och inte lika snygg uppochner. Hade man stickat nedifrån och upp skulle dessa se bättre ut. Har detta noterats eller är det kanske jag som stickar slarvigt?
24.06.2022 - 03:50DROPS Design answered:
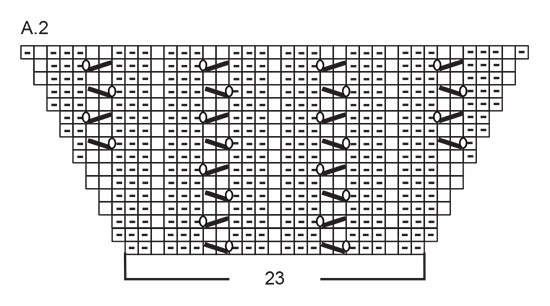
Hei Sophie. Tenker du på den lille fletten som strikkes over Fram-och Bakstyck slik som diagram A.3 viser? Om det strikkes etter beskrivningen vil "flette-masken" vende slik man ser på bildet (jakken er strikkes ovenfra og ned). Prøv å strikk en liten prøvelapp, der du strammer "flette-masken" litt, kanskje det blir litt bedre. mvh DROPS Design
27.06.2022 - 09:04
![]() Adriana Nogueira Dos Santos Lucena wrote:
Adriana Nogueira Dos Santos Lucena wrote:
Parte das costas sobram três pontos além da divisão dos gráficos.Seria 32 pontos para o gráfico + 2 para o raglan. Mas,são 34 pontos na divisão para as costas.
18.06.2022 - 23:34
![]() Kamilla wrote:
Kamilla wrote:
Hej, När jag stickat 16 varv mönster på diagram A1c, A1a och A2, hur fortsätter jag efter det?? Är nybörjare på att sticka mönster. /Kamilla
18.06.2022 - 09:15DROPS Design answered:
Hej Kamilla, mønsteret fortsætter med 2 vrang, hulrækken 3 vrang, 1 ret, 3 vrang og så videre, til du har taget alle masker ud :)
21.06.2022 - 14:32
|
|||||||||||||||||||
Lost in Summer Cardigan#lostinsummercardigan |
|||||||||||||||||||
 |
 |
||||||||||||||||||
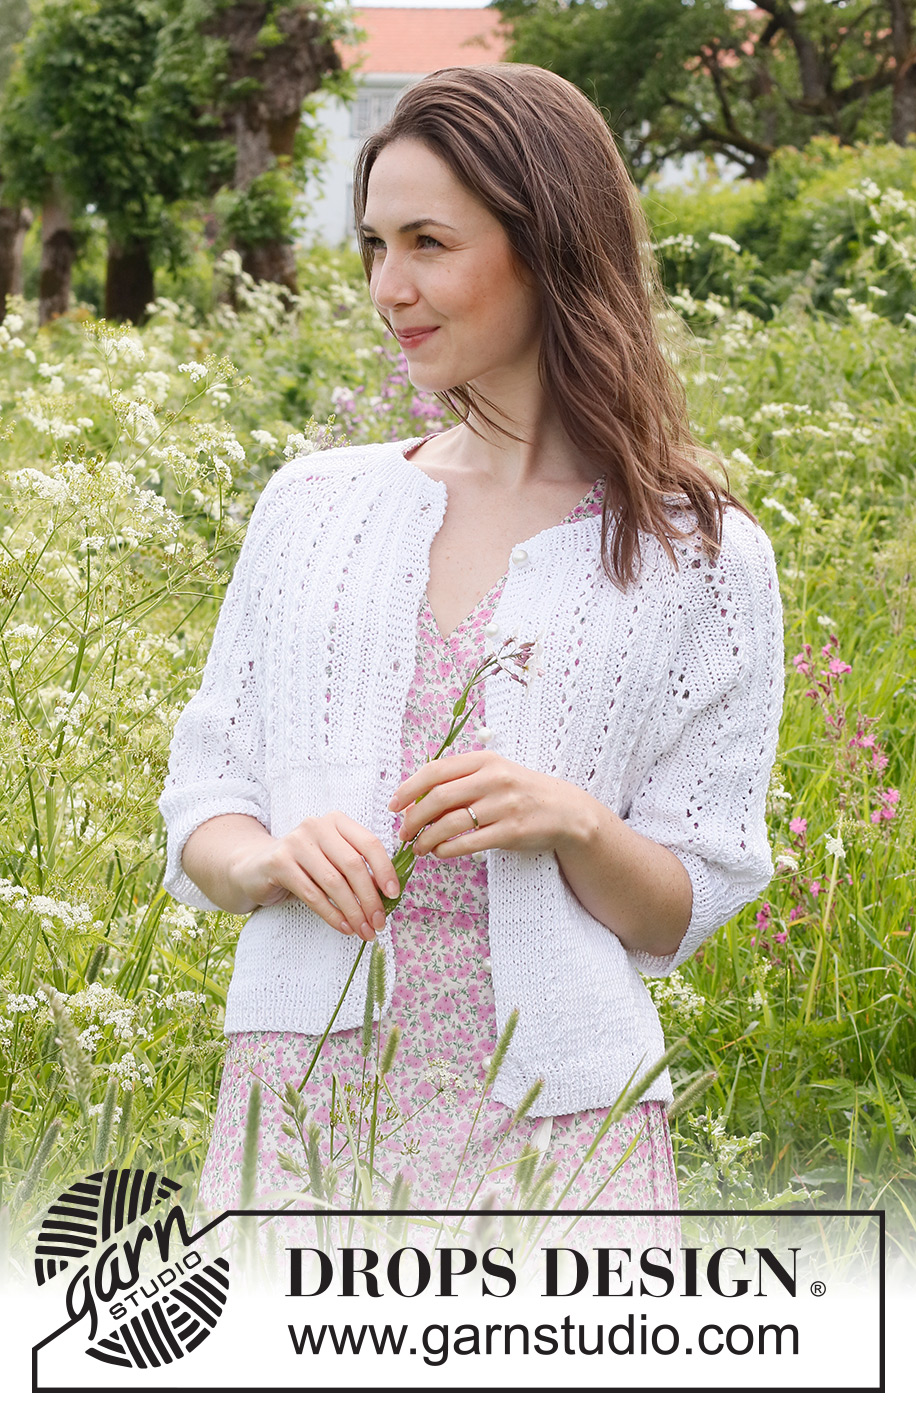
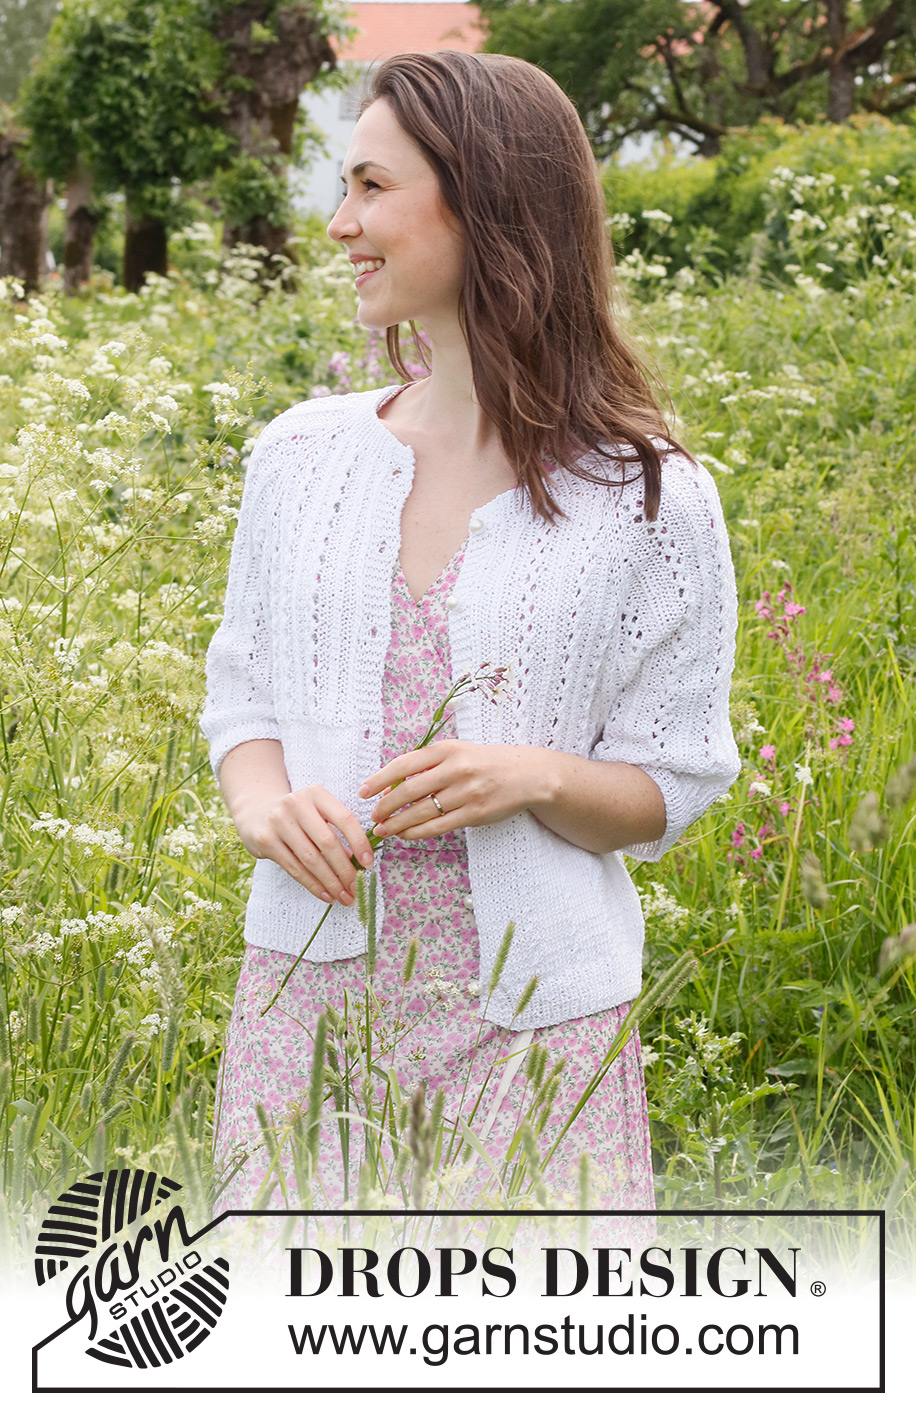
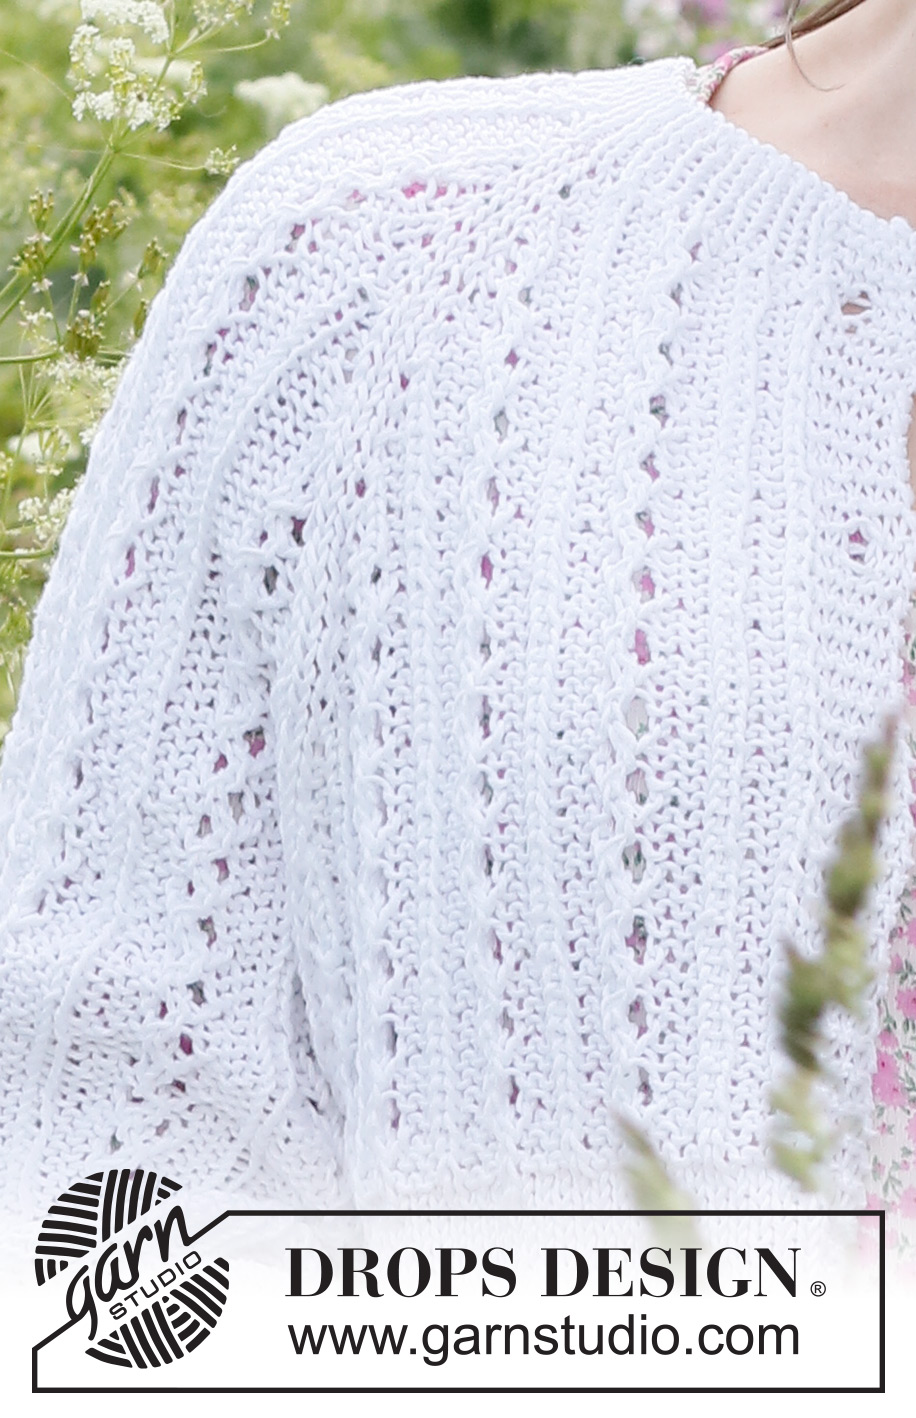
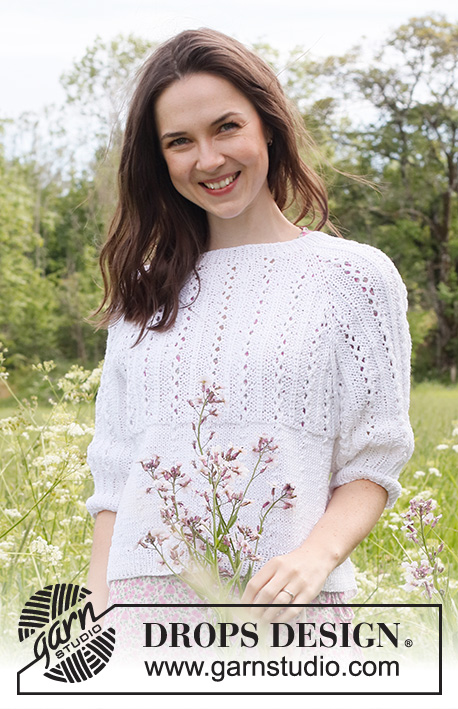
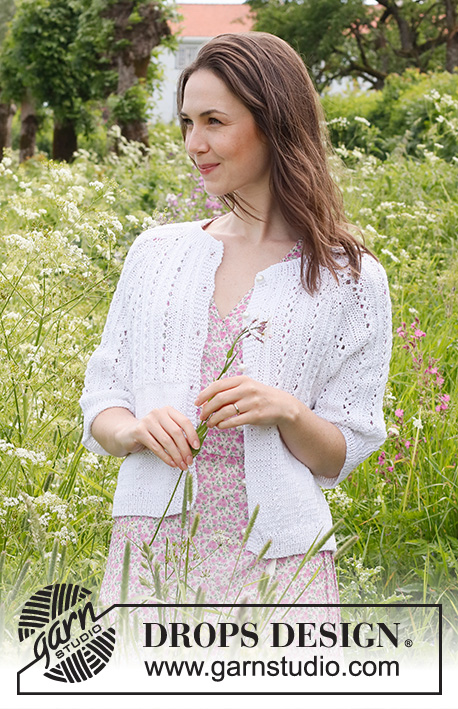
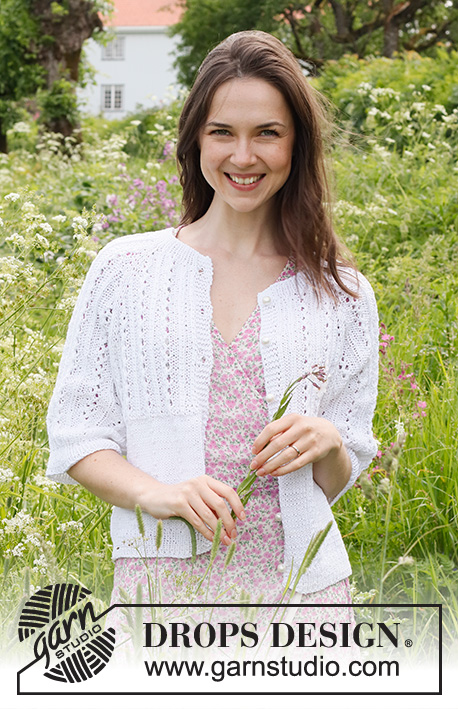
Knitted jacket in DROPS Muskat. The piece is worked top down with raglan, lace pattern and ¾-length sleeves. Sizes S - XXXL.
DROPS 231-50 |
|||||||||||||||||||
|
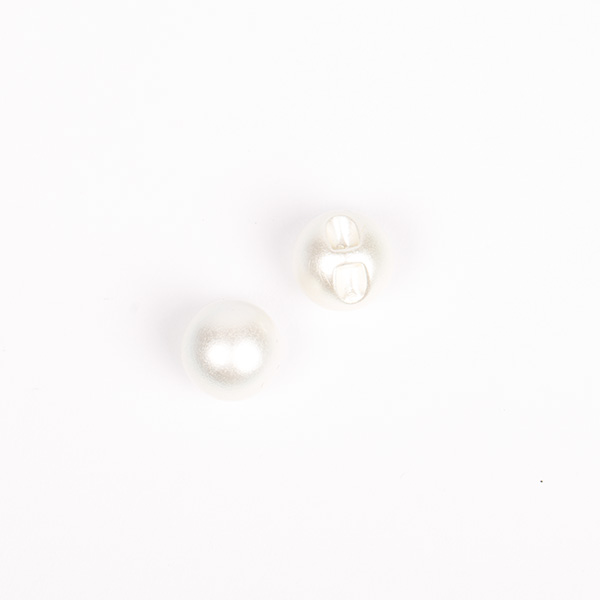
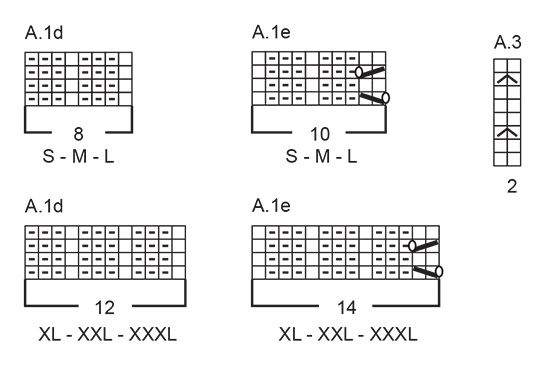
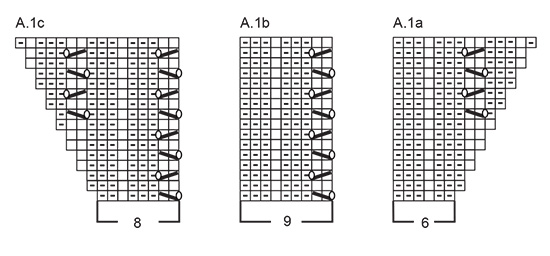
------------------------------------------------------- EXPLANATIONS FOR THE PATTERN: ------------------------------------------------------- RIDGE/GARTER STITCH (worked back and forth): Knit all rows. 1 ridge = knit 2 rows. PATTERN: See diagrams A.1 to A.3. Choose diagram for your size (applies to A.1d and A.1e). The diagrams show all rows in the pattern from the right side. DECREASE TIP (for sleeves): Decrease 1 stitch on either side of the marker thread as follows: Work until there are 3 stitches left before the marker thread, knit 2 together, knit 2 (marker thread sits between these 2 stitches), slip 1 stitch as if to knit, knit 1 and pass the slipped stitch over the knitted stitch. BUTTONHOLES: Work buttonholes on the right band (when the garment is worn). Work from the right side when there are 3 stitches left on the row as follows: Make 1 yarn over, knit 2 together and knit 1. On the next row (wrong side), knit the yarn over to leave a hole. The first buttonhole is worked when the rib on the neck measures 3 cm. Then work the other 5-5-6-6-6-6 buttonholes with approx. 8½-9-8-8½-8½-9 cm between each one. ------------------------------------------------------- START THE PIECE HERE: ------------------------------------------------------- JACKET – SHORT OVERVIEW OF THE PIECE. The neck and yoke are worked back and forth with circular needle top down. The yoke is divided for body and sleeves and the body continued back and forth with circular needle. The sleeves are worked in the round with double pointed needles/short circular needle. NECK: Cast on 115-121-125-129-133-137 stitches with circular needle size 3 mm and DROPS Muskat. Purl 1 row from the wrong side. Work the next row from the right side as follows: 5 band stitches in GARTER STITCH – read description above, * knit 1, purl 1 *, work from *-* until there are 6 stitches left, knit 1 and 5 band stitches in garter stitch. Work this rib back and forth for 3 cm. Knit 1 row from the right side where you increase 13-7-3-16-12-8 stitches evenly spaced (do not increase on the bands) = 128-128-128-145-145-145 stitches. Purl 1 row from the wrong side (the bands are knitted). Insert 1 marker after the band at the beginning of the row; the yoke is measured from this marker. YOKE: Change to circular needle size 4 mm. Insert 4 marker threads without working the stitches and each thread is inserted between 2 stitches: Count 22-22-22-26-26-26 stitches (front piece), insert 1 marker thread before the next stitch, count 25 stitches (sleeve), insert 1 marker thread before the next stitch, count 34-34-34-43-43-43 stitches (back piece), insert 1 marker thread before the next stitch, count 25 stitches (sleeve), insert 1 marker thread before the next stitch. There are 22-22-22-26-26-26 stitches left (front piece). Allow the threads to follow your work onwards. OVERVIEW OF THE NEXT SECTION: You now work pattern and increase to raglan. Read PATTERN and RAGLAN before continuing! PATTERN: Work as follows from the right side: 5 band stitches in garter stitch, A.1d, A.1c, 2 stitches in stocking stitch, A.2, 2 stitches in stocking stitch, A.1a, work A.1b 2-2-2-3-3-3 times, A.1c, 2 stitches in stocking stitch, A.2, 2 stitches in stocking stitch, A.1a, A.1e, 5 band stitches in garter stitch. Continue this pattern back and forth. REMEMBER THE KNITTING TENSION! NOTE: The 4 marker threads sit between 2 stocking stitches. RAGLAN: AT THE SAME TIME on each row from the right side increase 8 stitches to raglan. Increase by making 1 yarn over on each side of the 2 stocking stitches in each transition between body and sleeves. On the next row (wrong side) work the yarn overs twisted to avoid holes. Then work the stitches into A.1a /A.1c and A.2 as shown in the diagrams. Increase to raglan every 2nd row (each row from the right side) a total of 23-26-30-32-37-41 times = 312-336-368-401-441-473 stitches. Continue the pattern without further increases until the yoke measures 20-22-24-26-28-30 cm from the marker on the neck – adjust so the next row is from the wrong side. Divide the yoke for the body and sleeves on the next row as follows: Work 48-52-56-60-67-73 stitches as before (front piece), place the next 65-69-77-85-91-95 stitches on a thread for the sleeve, cast on 6-6-6-8-8-8 stitches, work 86-94-102-111-125-137 stitches (back piece), place the next 65-69-77-85-91-95 stitches on a thread for the sleeve, cast on 6-6-6-8-8-8 stitches, work 48-52-56-60-67-73 stitches (front piece). The body and sleeves are finished separately. The piece is now measured from here! BODY: = 194-210-226-247-275-299 stitches. Work stocking stitch with 5 band stitches in garter stitch on each side, but over the 2 stitches from each row of holes on the yoke, work A.3; you are cabling stitches every 4th row creating lines on the body under each row of holes. Continue like this for 22 cm. Knit 1 row from the right side where you increase 63-69-73-80-88-96 stitches evenly spaced (do not increase on the bands) = 257-279-299-327-363-395 stitches. Change to circular needle size 3 mm. Work rib as follows from the wrong side: 5 band stitches in garter stitch, * purl 1, knit 1 *, work from *-* until there are 6 stitches left, purl 1 and 5 band stitches in garter stitch. Continue this rib for 4 cm. Cast off a little loosely. The jacket measures approx. 50-52-54-56-58-60 cm from the shoulder down. SLEEVES: Place the 65-69-77-85-91-95 stitches from the thread on the one side of the piece on short circular needle/double pointed needles size 4 mm and knit up 1 stitch in each of the 6-6-6-8-8-8 stitches cast on under the sleeve = 71-75-83-93-99-103 stitches. Insert a marker thread in the middle of the 6-6-6-8-8-8 stitches under the sleeve. Allow the thread to follow your work onwards; it will be used when decreasing under the sleeve. Start at the marker thread, knit 3-3-3-4-4-4, work A.2 over the stitches from the yoke and finish with knit 3-3-3-4-4-4. When the sleeve measures 4-4-4-3-3-2 cm, decrease 2 stitches under the sleeve – read DECREASE TIP. Decrease like this every 4-4-4-3-2½-2 cm a total of 2-2-2-3-3-3 times = 67-71-79-87-93-97 stitches. When the sleeve measures 15-13-12-10-9-7 cm, knit together the 2 stitches in each row of holes and knit together the first and last stitch on the round (= 9-9-9-11-11-11 stitches decreased) = 58-62-72-76-82-86 stitches. Knit over knit and purl over purl; in sizes S and XXL purl the single stitch under the sleeve and knit this stitch in sizes M, L, XL and XXXL. Work until the sleeve measures 19-17-16-14-13-11 cm. On the next round, in sizes M, L and XXXL, purl 2 together on each side of the stitch mid-under the sleeve = 58-60-70-76-82-84 stitches. Change to double pointed needles size 3 mm and work rib (knit 1, purl 1), making sure the rib matches with the stitches above. Work until the sleeve measures 23-21-20-18-17-15 cm. Cast off a little loosely. Work the other sleeve in the same way. ASSEMBLY: Sew the buttons onto the left band. |
|||||||||||||||||||
Diagram explanations |
|||||||||||||||||||
|
|||||||||||||||||||
 |
|||||||||||||||||||
 |
|||||||||||||||||||
 |
|||||||||||||||||||
 |
|||||||||||||||||||
Have you finished this pattern?Tag your pictures with #dropspattern #lostinsummercardigan or submit them to the #dropsfan gallery. Do you need help with this pattern?You'll find 31 tutorial videos, a Comments/Questions area and more by visiting the pattern on garnstudio.com. © 1982-2026 DROPS Design A/S. We reserve all rights. This document, including all its sub-sections, has copyrights. Read more about what you can do with our patterns at the bottom of each pattern on our site. |
|||||||||||||||||||


With over 40 years in knitting and crochet design, DROPS Design offers one of the most extensive collections of free patterns on the internet - translated to 17 languages. As of today we count 324 catalogues and 12290 patterns translated into English (UK/cm).
We work hard to bring you the best knitting and crochet have to offer, inspiration and advice as well as great quality yarns at incredible prices! Would you like to use our patterns for other than personal use? You can read what you are allowed to do in the Copyright text at the bottom of all our patterns. Happy crafting!
Post a comment to pattern DROPS 231-50
We would love to hear what you have to say about this pattern!
If you want to leave a question, please make sure you select the correct category in the form below, to speed up the answering process. Required fields are marked *.