
Popular categories
Looking for a yarn?


Comments / Questions (148)
![]() Jacquelien VAsselt wrote:
Jacquelien VAsselt wrote:
Ik kom niet uit met het steken aantal dus lukt het Patroontje niet om te breien
11.03.2024 - 16:10DROPS Design answered:
Dag Jacquelien,
Misschien kun je aangeven waar je precies bent, welke maat je breit en hoeveel steken je overhoudt of tekort komt, dan kunnen we je wellicht beter helpen.
11.03.2024 - 20:39
![]() Sofi wrote:
Sofi wrote:
Bonjour, je vous remercie pour vos explications, c est la 1ere fois que je m attaque à un projet, plus compliqué, vos explications avec le détail du nombre de mailles m aident bien, est ce possible de les avoir aussi à d autresxetapes que celles notées sur le tuto. De plus quand vous dites après les augmentations des devants et du dos, continuer sur le "point ajouré sans augmenter" ça veut dire qu on ne fait que le diagramme A2? Merci
11.03.2024 - 14:56DROPS Design answered:
Bonjour Sofi, en fait, à chaque fois que vous tricotez les diagrammes en hauteur, vous augmentez 6 mailles soit suffisamment de mailles pour 1 motif de A.2 en plus de chaque côté: vous avez ainsi 11 m dans A.3 et 12 m dans A.4 , au rang suivant = motif suivant en hauteur, vous tricotez 1 x A.2 + A.3 = 5 m au-dessus du A.3 précédent et A.4 = 6 m + 1 x A.2 au-dessus du A.4 précédent. Lorsque les augmentations sont terminées, notez dans le diagramme où vous en êtes et tricotez simplement comme avant, sans les jetés noirs, puis tricotez comme dans le descriptif quand vous avez le bon nombre de mailles. Bon tricot!
11.03.2024 - 15:50
![]() Sofi wrote:
Sofi wrote:
Bonjour, j ai fait la 1ere hauteur du diagramme, au niveau du dos, il est noté ( je fais taille 2ans)1er Rang du diagramme A4 6 fois(6*6mailles), A2 (6mailles), A3 (5 mailles), soit 47 mailles, mais j ai 65 mailles pour le dos qui pour moi correspondent bien au nombre total de la fin du 1er diagramme A4 4 fois (12*4 mailles), A2 6 mailles, A3 11 mailles soit un total de 65 mailles.....je ne comprends donc pas ce que je dois faire.... Merci pour votre retour.
09.03.2024 - 15:50DROPS Design answered:
Bonjour Sofi, Lorsque les diagrammes ont été tricotés 1 fois en hauteur, vous avez avoir 47 mailles pour le dos (12 m de A.-1, 4x6 m de A.2 et 11 m de A.3); notez que c'est A.2 que l'on doit répéter pas A.4, autrement dit tricotez: A.4, répétez 6 fois A.2 et terminez par A.3; quand vous avez tricoté les diagrammes 2 fois en hauteur vous aurez alors 59 mailles (12 m A.1, 36 m A.2 et 11 m A.3). Bon tricot!
11.03.2024 - 08:10
![]() Andrea wrote:
Andrea wrote:
Hola. No se en que me estoy equivocando pero para la talla 9 a 12 meses .no me coinciden los puntos al momento de decorar las partes entre mangas frente y espalda.me sobran 4 puntos. Al principio cuando coloco los marcador cada Delantero 18 . Mangas 16. Espalda 29 con las repetic. ..si sumo no da 93...por favor ayúdeme . No se en que me estoy equivocando..muchas gracias por su tiempo.
16.02.2024 - 02:16DROPS Design answered:
Hola Andrea, los marcapuntos se insertan dentro de puntos. Deberías tener: 18 puntos (delantero), punto con marcapuntos (= 1), 12 puntos en la manga (aumentas 4 puntos para la siguiente fila), punto con marcapuntos (=1), 29 puntos (espalda), punto con marcapuntos (=1), 12 puntos en la manga (aumentas 4 puntos para la siguiente fila), punto con marcapuntos (=1), 18 puntos (delantero). 18+1+12+1+29+1+12+1+18 = 93 puntos, más los 8 aumentos en las mangas = 101 puntos.
18.02.2024 - 20:17
![]() Sif Aegisdottir wrote:
Sif Aegisdottir wrote:
I can not let the pattern fit, you are supposed to stop increasing the masks in the back after 2 or 3 times pattern but I think you should keep on and the photo shows that too.
11.02.2024 - 23:47
![]() Cotswolds Cardigan wrote:
Cotswolds Cardigan wrote:
Jeg kan ikke få maskeantal til at passe str.6-9 mdr. 93 masker: Kantmasker 2•6=12 Forstykke A3=5•2=10 Ærme 2•12=24 Ryg A4,A2=12•3=36+A3=5=41 Det får jeg til 87 masker. Hvad har jeg misforstået?
22.01.2024 - 22:26DROPS Design answered:
Hej, Du har 93 masker og strikker 6 + A1=7 + A3=5 + 1 + 12 + 1 + A4=6 + A2=6x3=18 + A3=5 + 1 + 12 + 1 + A4=6 + A5=6 + 6 = 93m (6+7+5+1+12+1+6+18+5+1+12+1+6+6+6=93) De masker du tager ud på ærmerne 4 x 2 og de masker du tager ud ifølge diagrammerne lægges til de 93 masker så da har du 229 masker :)
31.01.2024 - 10:46
![]() Maren Helland wrote:
Maren Helland wrote:
Viser til tidligere spørsmål. Ser at det samme gjelder i diagram A4: Her dukker det også plutselig opp en ekstra maske i rad 5 som ikke er der i rad 4. Hvordan skal jeg forstå dette? Skulle jeg ha økt noen masker i rad 4 eller er det både i A1 og A4 noen masker som ikke skal strikkes på rad 5?
20.01.2024 - 17:05DROPS Design answered:
Hei Maren. Se vårt svar til deg under ditt 1. spørsmål. mvh DROPS Design
29.01.2024 - 11:28
![]() Maren Helland wrote:
Maren Helland wrote:
Lurer på om det er en feil i diagram A1: Her dukker det plutselig opp en ekstra maske på rad 5 som ikke var der på rad 4?
20.01.2024 - 17:01DROPS Design answered:
Hei Maren. Se vårt svar til deg under ditt 1. spørsmål. mvh DROPS Design
29.01.2024 - 11:28
![]() Maren wrote:
Maren wrote:
Hei, Jeg får, etter gjentatte forsøk, ikke dette mønsteret til å gå opp. Forsøkte nå å telle over og ser at jeg tror det er en feil i A3: På rad 4 er det her 8 masker, men så kun 7 masker på rad 5. Dette gir en følgefeil med en maske mindre i diagrammet ut resten av dette (siste rad er tegnet inn som 9+2 masker, men er i realiteten 10+2). Jeg kan ‘mekke’ dette til, men blir da usikker hvordan mønsteret skal strikkes på andre runde med diagrammet.
20.01.2024 - 16:58DROPS Design answered:
Hei Maren. Diagrammene går over i hverandre, så følg forklaringen på rekkefølgen på hvordan diagrammene skal strikkes og du vil se at der det mangler masker (sort rute i diagrammet), så er det en ekstra maske i diagrammet før/etter. Så da skal det stemme. Om du fremdeles ikke får det til, send oss et nytt spørsmål hvor det stopper opp for deg og oppgi hvilken str. du strikker. Tips: bruk gjerne maskemarkører mellom hvert diagram, da får du en bedre oversikt hvor du mener det mangler/er en ekstra maske. mvh DROPS Design
29.01.2024 - 11:27
![]() Kirsten Merrild wrote:
Kirsten Merrild wrote:
43-2 baby hvor mange m er der på pinden efter 1. p. med mønster og udtagninger?
13.01.2024 - 12:10DROPS Design answered:
Hej Kirsten, efter første pind med udtagninger til raglan har du 8 masker mere :)
16.01.2024 - 12:06
|
||||||||||||||||||||||
Cotswolds Cardigan#cotswoldscardigan |
||||||||||||||||||||||
 |
 |
|||||||||||||||||||||
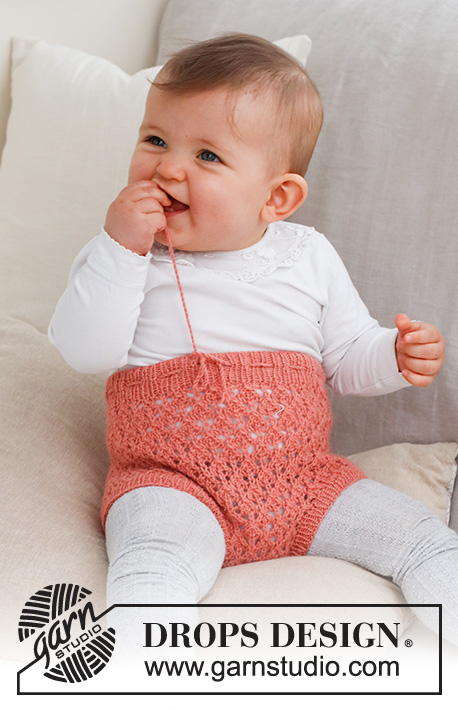
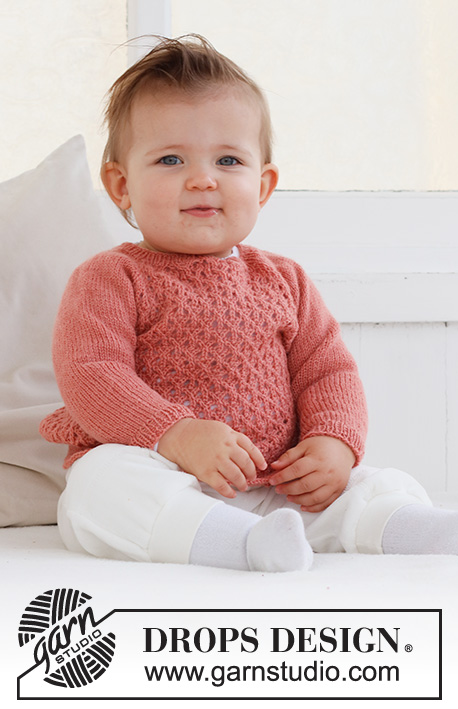
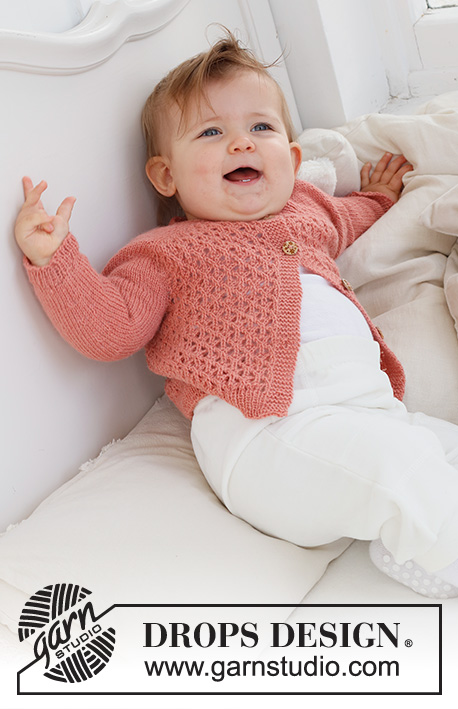
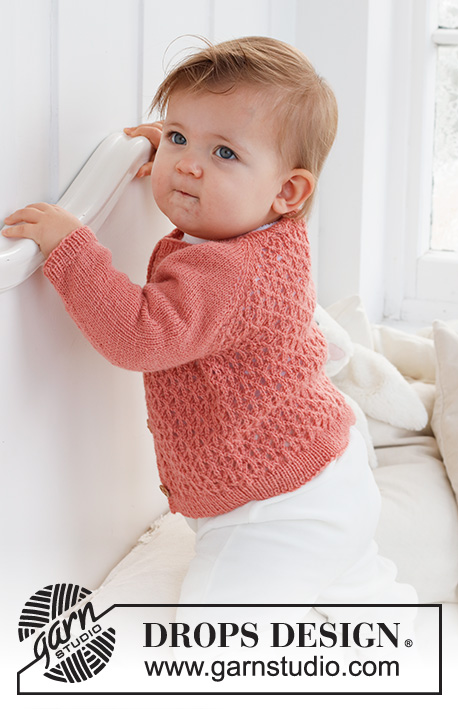
Knitted jacket for baby in DROPS Flora. The piece is worked top down, with raglan and lace pattern. Sizes 0 – 2 years.
DROPS Baby 43-2 |
||||||||||||||||||||||
|
------------------------------------------------------- EXPLANATIONS FOR THE PATTERN: ------------------------------------------------------- RIDGE/GARTER STITCH (worked back and forth): Knit all rows. 1 ridge = knit 2 rows. PATTERN: See diagrams A.1 to A.5. The diagrams show all rows in the pattern from the right side. BUTTONHOLES: Work buttonholes on the right band (when the garment is worn). Work from the right side when there are 4 stitches left on the row as follows: Make 1 yarn over, knit 2 together and knit 2. On the next row (wrong side), knit the yarn over to leave a hole. The first buttonhole is worked right after the neck. Then work the other 4 buttonholes with approx. 4½-4½-5-5½-6 cm between each one. RAGLAN: All increases are worked from the right side! On the front and back pieces the increases are included in the diagram. Increase as follows on the sleeves: Increase 1 stitch after markers 1 and 3. Knit the marker-stitch, make 1 yarn over. Increase 1 stitch before markers 2 and 4. Work as far as the marker-stitch and make 1 yarn over, knit the marker-stitch. On the next row purl the yarn overs twisted to avoid holes! Repeat this increase every row from the right side a total of 10-12-14-16-17 times. DECREASE TIP (for sleeves): Decrease 1 stitch on either side of the marker as follows: Work until there are 3 stitches left before the marker, knit 2 together, knit 2 (marker sits between these 2 stitches), slip 1 stitch as if to knit, knit 1 and pass the slipped stitch over the knitted stitch. ------------------------------------------------------- START THE PIECE HERE: ------------------------------------------------------- JACKET – SHORT OVERVIEW OF THE PIECE. The neck and yoke are worked back and forth with circular needle, top down. The yoke is divided for body and sleeves and the body continued back and forth with circular needle. The sleeves are worked in the round with double pointed needles. NECK: Cast on 93-93-93-111-111 stitches with circular needle size 2.5 mm and DROPS Flora. Purl 1 row from the wrong side with 6 band stitches in GARTER STITCH – read description above, on each side. Then work rib as follows: 6 band stitches in garter stitch, * knit 1, purl 1 *, work from *-* until there are 7 stitches left, knit 1 and 6 band stitches in garter stitch. Work this rib for 2 cm. Change to circular needle size 3 mm. YOKE: Work the BUTTONHOLE on the right band – read description above! On the first row from the right side insert 4 markers and work as follows: Front piece: 6 band stitches in garter stitch, work A.1, then A.2 0-0-0-1-1 time, A.3. Sleeve: Insert marker 1 in the next stitch, work 12 stitches in stocking stitch and increase 4 stitches evenly over these stitches, insert marker 2 in the next stitch. Back piece: Work A.4, A.2 3-3-3-4-4 times, then A.3. Sleeve: Insert marker 3 in the next stitch, work 12 stitches in stocking stitch and increase 4 stitches evenly over these stitches, insert marker 4 in the next stitch. Front piece: Work A.4, A.2 0-0-0-1-1 time, A.5 and 6 band stitches in garter stitch. Continue this pattern on the next row from right side start to increase for sleeve – read description above. REMEMBER THE KNITTING TENSION! When A.1 to A.5 are completed, work the next row from the right side as follows: 6 band stitches in garter stitch, work A.1, A.2 1-1-1-2-2 times, A.3, work stocking stitch and increase as before over the sleeve as far as marker 2, work A.4, A.2 5-5-5-6-6 times, A.3, work stocking stitch and increase as before over the sleeve as far as marker 4, work A.4, A.2 1-1-1-2-2 times, A.5 and 6 band stitches in garter stitch. Repeat this pattern in height. Each time A.3 and A.4 are repeated in height, there is room for 1 more repeat of A.2 on the front pieces and 2 more repeats on the back piece. When A.3 and A.4 have been worked 2-2-3-3-3 times in height, the increases are finished on the front and back pieces; continue increasing only on the sleeves as explained above. Continue the pattern on the front and back pieces, but without further increases. When all the increases are finished there are 189-197-229-255-259 stitches. Now work pattern as follows: 6 band stitches in garter stitch, A.1 over 7 stitches, A.2 3-3-4-5-5 times, work 37-41-45-49-51 stitches in stocking stitch, A.2 9-9-11-12-12 times, work 37-41-45-49-51 stitches in stocking stitch, A.2 3-3-4-5-5 times, A.5 and 6 band stitches in garter stitch. Continue this pattern. When you work round 5 in A.2 on the back piece, knit the first stitch in the first repeat, the last stitch in the last repeat is worked over the first stitch on the sleeve. When the piece measures 12-13-14-15-16 cm from the cast-on edge, divide for the body and sleeves as follows: 6 band stitches in garter stitch, work 25-25-31-37-37 stitches as before, place the next 37-41-45-49-51 stitches on a thread for the sleeve, cast on 6 stitches under the sleeve, work 54-54-66-72-72 stitches, place the next 37-41-45-49-51 stitches on a thread for the sleeve, cast on 6 stitches under the sleeve, work 24-24-30-36-36 stitches as before and 6 band stitches in garter stitch. BODY: = 127-127-151-169-169 stitches. Continue back and forth as follows: 6 band stitches in garter stitch, work A.1, A.2 until there are 12 stitches left, work A.5 and 6 band stitches in garter stitch. When the piece measures 9-12-13-15-17 cm from the division, increase 20-20-22-26-26 stitches evenly spaced on the next row from the right side (do not increase over the bands) = 147-147-173-195-195 stitches. Change to circular needle size 2.5 mm and work rib from the wrong side as follows: 6 band stitches in garter stitch, * purl 1, knit 1 *, work from *-* until there are 7 stitches left, purl 1 and 6 band stitches in garter stitch. Continue this rib for 3 cm. Cast off. The jacket measures approx. 24-28-30-33-36 cm from the shoulder down. SLEEVES: Place the 37-41-45-49-51 stitches from the thread on the one side of the piece on double pointed needles size 3 mm and knit up 1 stitch in each of the 6 stitches cast on under the sleeve = 43-47-51-55-57 stitches. Insert a marker thread in the middle of the new stitches under the sleeve. Start at the marker and work stocking stitch in the round for 1 cm. Now decrease 2 stitches under the sleeve – read DECREASE TIP. Decrease like this every 2½-2-2-2-2½ cm a total of 3-5-6-7-8 times = 37-37-39-41-41 stitches. When the sleeve measures 10-12-15-16-22 cm from the division increase 5 stitches evenly spaced = 42-42-44-46-46 stitches. Change to double pointed needles size 2.5 mm and work rib (knit 1, purl 1) for 3 cm. Cast off with knit over knit and purl over purl. The sleeve measures approx. 13-15-18-19-25 cm from the division. Work the other sleeve in the same way. ASSEMBLY: Sew the buttons onto the left band. |
||||||||||||||||||||||
Diagram explanations |
||||||||||||||||||||||
|
||||||||||||||||||||||
 |
||||||||||||||||||||||
Have you finished this pattern?Tag your pictures with #dropspattern #cotswoldscardigan or submit them to the #dropsfan gallery. Do you need help with this pattern?You'll find 31 tutorial videos, a Comments/Questions area and more by visiting the pattern on garnstudio.com. © 1982-2026 DROPS Design A/S. We reserve all rights. This document, including all its sub-sections, has copyrights. Read more about what you can do with our patterns at the bottom of each pattern on our site. |
||||||||||||||||||||||


With over 40 years in knitting and crochet design, DROPS Design offers one of the most extensive collections of free patterns on the internet - translated to 17 languages. As of today we count 325 catalogues and 12298 patterns translated into English (UK/cm).
We work hard to bring you the best knitting and crochet have to offer, inspiration and advice as well as great quality yarns at incredible prices! Would you like to use our patterns for other than personal use? You can read what you are allowed to do in the Copyright text at the bottom of all our patterns. Happy crafting!
Post a comment to pattern DROPS Baby 43-2
We would love to hear what you have to say about this pattern!
If you want to leave a question, please make sure you select the correct category in the form below, to speed up the answering process. Required fields are marked *.