
Popular categories
Looking for a yarn?


Comments / Questions (63)
![]() Dar wrote:
Dar wrote:
Vorrei lavorare questo modello ma con un capo di alpaca e uno di brushed alpaca silk, come faccio a sapere quanti gomitoli comperare di ognuno? (nella lezione "Cambio di filato" non viene spiegato come convertire un filato in due più piccoli ma soltanto il contrario)
17.01.2024 - 10:51DROPS Design answered:
Buonasera Dar, deve calcolare il metraggio totale necessario per lavorare la sua taglia in DROPS Melody, e poi acquistare lo stesso metraggio per i 2 filati scelti. Buon lavoro!
17.03.2024 - 18:06
![]() Petra Wache wrote:
Petra Wache wrote:
Guten Tag, Ich würde gerne dieses Modell mit 3 Fäden Kidsilk Stricken. Welche Nadelstärken soll ich nehmen und wieviel Gramm KidSilk benötige ich. Ich stricke normalerweise Ihre Anleitungen in Größe M. (Konfektionsgröße 38) Vielen Dank im Voraus für Ihre Hilfe. Mit freundlichen Grüßen Petra Wache
19.11.2023 - 10:33
![]() Susanne Lang wrote:
Susanne Lang wrote:
Hej jeg vil gerne strikke denne trøje men ikke i det garn der er anvist. Jeg har garn Alpakka Soft og det er til pinde 3,5. hvor meget skal jeg øge maskeantal og ud og indtagning for at få samme resultat ? Håber virkelig i kan Hjælpe. hilsen Susanne
19.10.2023 - 14:07DROPS Design answered:
Hej Susanne, vælg et garn hvor du kan få strikkefastheden som står i opskriften, ellers vil størrelserne ikke passe :)
20.10.2023 - 10:57
![]() Torunn Riise-Larsen wrote:
Torunn Riise-Larsen wrote:
Er strikkefastheten 12m på 10 cm med pinne 6 eller pinne 8? Og hva slags økning anbefales på det glattstrikket partiet?
30.08.2023 - 22:37DROPS Design answered:
Hei Torunn, Strikkefastheten er målt med pinnestr. 8. Du øker masker ved å lage kast som er strikket vridd på neste omgang slik at det ikke blir hull (strikk bakløkken i kastet for å strikke vridd). God fornøyelse!
31.08.2023 - 06:48
![]() Lella wrote:
Lella wrote:
Buongiorno,sono giunta al momento di proseguire la schiena. Viene detto di proseguire come per il davanti dopo aver caricato i punti sui ferri n. 8. Il davanti però è stato terminato coi ferri numero 6. Inoltre chiedo se anche per il dietro è necessario, durante il giro di dritto prima delle coste, si devono aumentare i punti indicati per il davanti. Grazie
24.03.2023 - 18:18DROPS Design answered:
Buonasera Lella, deve seguire le istruzioni riportate per il davanti anche per il dietro, compresi gli aumenti e il cambio di ferri. Buon lavoro!
27.03.2023 - 22:17
![]() Carole wrote:
Carole wrote:
Comment trouver la quantité de laine à acheter dans les patrons que vous offrez dans drop designs. J’aimerais acheter dans vos boutiques en ligne.
22.02.2023 - 21:58DROPS Design answered:
Bonjour Carole, vous trouverez la quantité indiquée au poids pour chaque taille dans l'en-tête; il faut par ex 250 g DROPS Melody pour ce modèle en taille S, divisé par 50 g la pelote de Melody = il vous faudra 5 pelotes. Retrouvez la liste des magasins DROPS au Canada (contactez Nordic Yarn) ou livrant au Canada ici. Bon tricot!
23.02.2023 - 13:46
![]() Brunet Françoise wrote:
Brunet Françoise wrote:
Je comprends pas pour le col je suis a 64 mailles et pour l'empiècement augmenter 1maille au début de chaque section 96 mailles tous les combien je dois augmenter je ne comprends pas
07.12.2022 - 06:14DROPS Design answered:
Bonjour Mme Brunet, vous tricotez en côtes 1 m end, 2 m env, et devez augmenter maintenant le nombre de mailles envers des côtes ainsi: (1 m end, 2 m env, 1 jeté) répétez de (à) tout le tour, et, au tour suivant, tricotez en côtes (1 m end, 3 m env) en tricotant le jeté torse à l'envers. Bon tricot!
07.12.2022 - 08:18
![]() Lucie wrote:
Lucie wrote:
Bonjour, Lors de l'étape de séparation du dos et du devant, je ne comprends pas comment faire car mon fil se trouve au milieu des mailles mises en attente ? Vous remerciant par avance pour votre aide :) Lucie
15.11.2022 - 19:37DROPS Design answered:
Bonjour Lucie, tricotez jusqu'à l'un des côtés du pull et mettez les mailles en attente pour ne tricoter que le devant et mettre les mailles du dos en attente. Bon tricot!
16.11.2022 - 09:19
![]() Barbara wrote:
Barbara wrote:
Buongiorno. Vorrei provare questo maglione con 3 capi di Flora (A+A+A), come da vostra tabella sostituiscono un filato del gruppo D. Posso sapere come calcolare la quantita' di gomitoli che mi occorrono? Grazie ♥️
01.11.2022 - 11:47DROPS Design answered:
Buonasera Barbara, può provare e leggere questa lezione per capire come calcolare la quantità di filato necessaria cambiando il filato di riferimento. Buon lavoro!
01.11.2022 - 16:54
![]() Lena wrote:
Lena wrote:
Nydelig genser!! Strikket en ferdig nå - strikkefasthet stemmer. Har dobbelt sjekket at jeg har fulgt mønsteret, men den blir veldig liten…. Noen andre som har opplevd det samme?
30.08.2022 - 23:27DROPS Design answered:
Hej Lena, hvis du har 12 masker på 10 cm, så vil den mindste størrelse måle 112 / 12 = 93 cm i omkreds og det stemmer med målene som du finder i måleskitsen nederst i opskriften.
31.08.2022 - 14:05
|
|
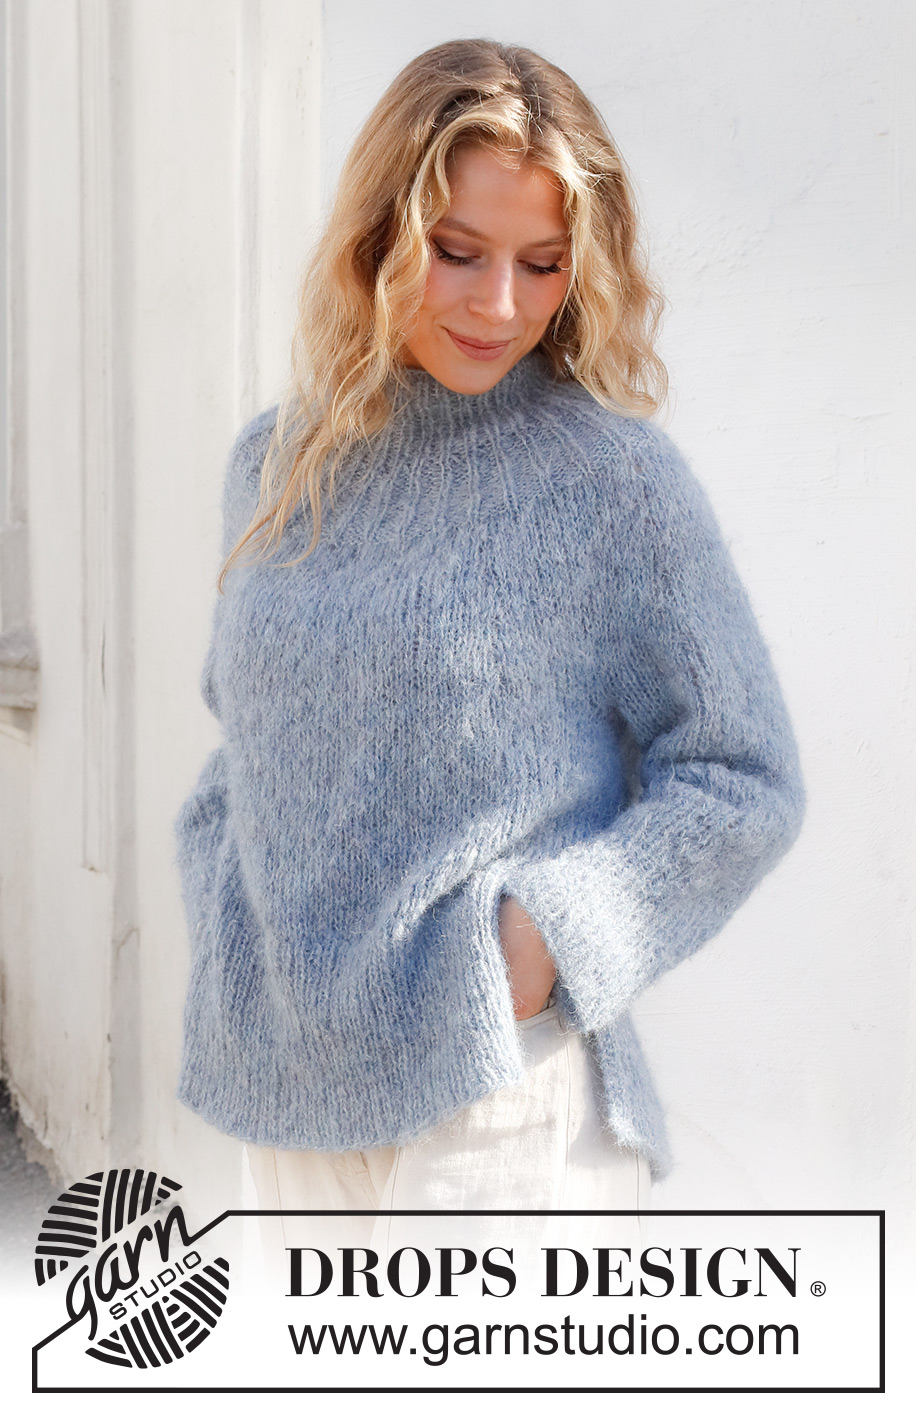
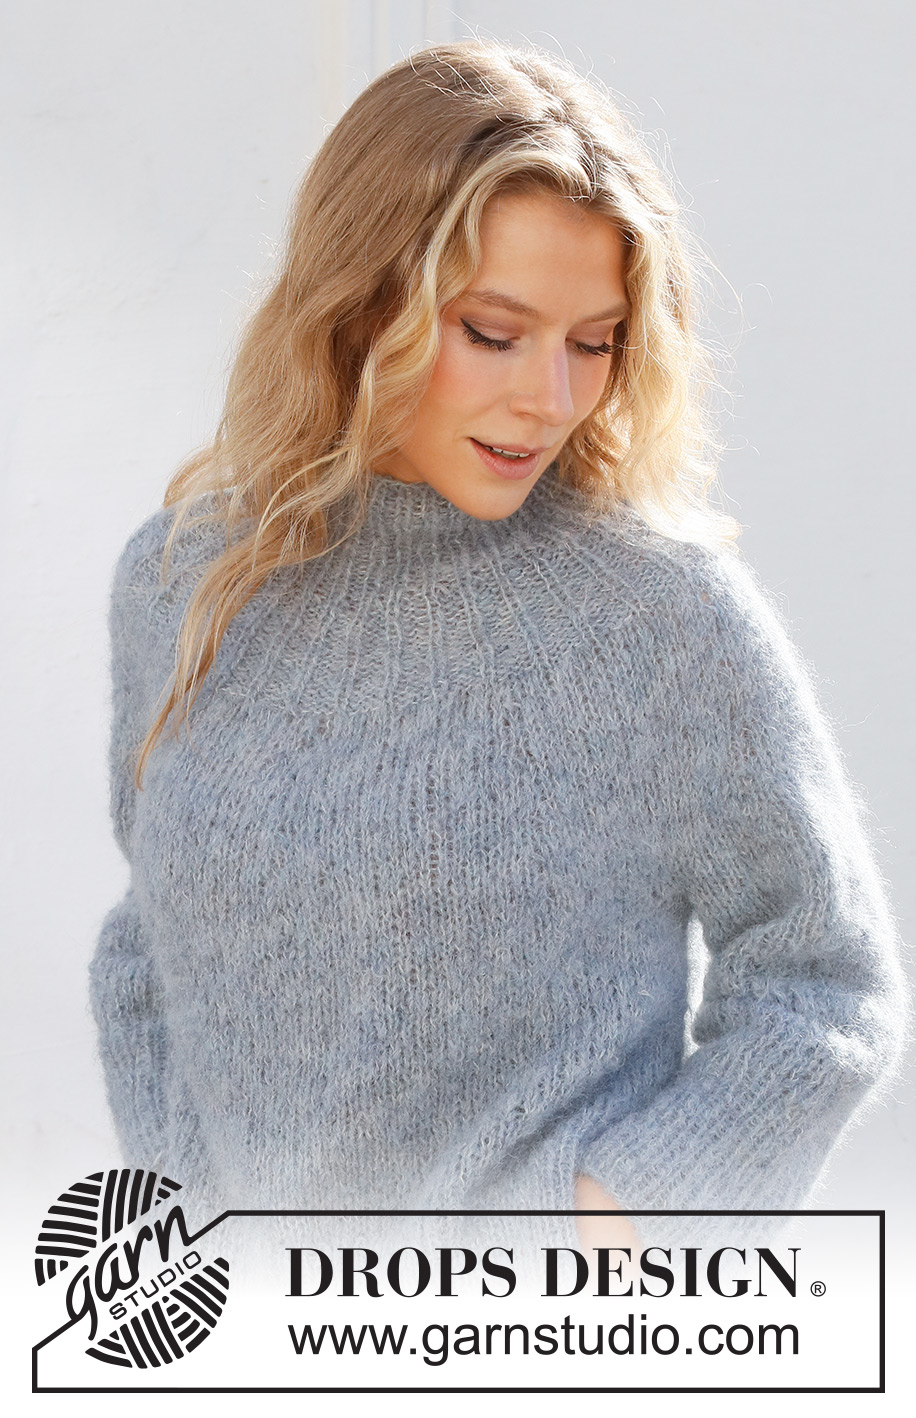
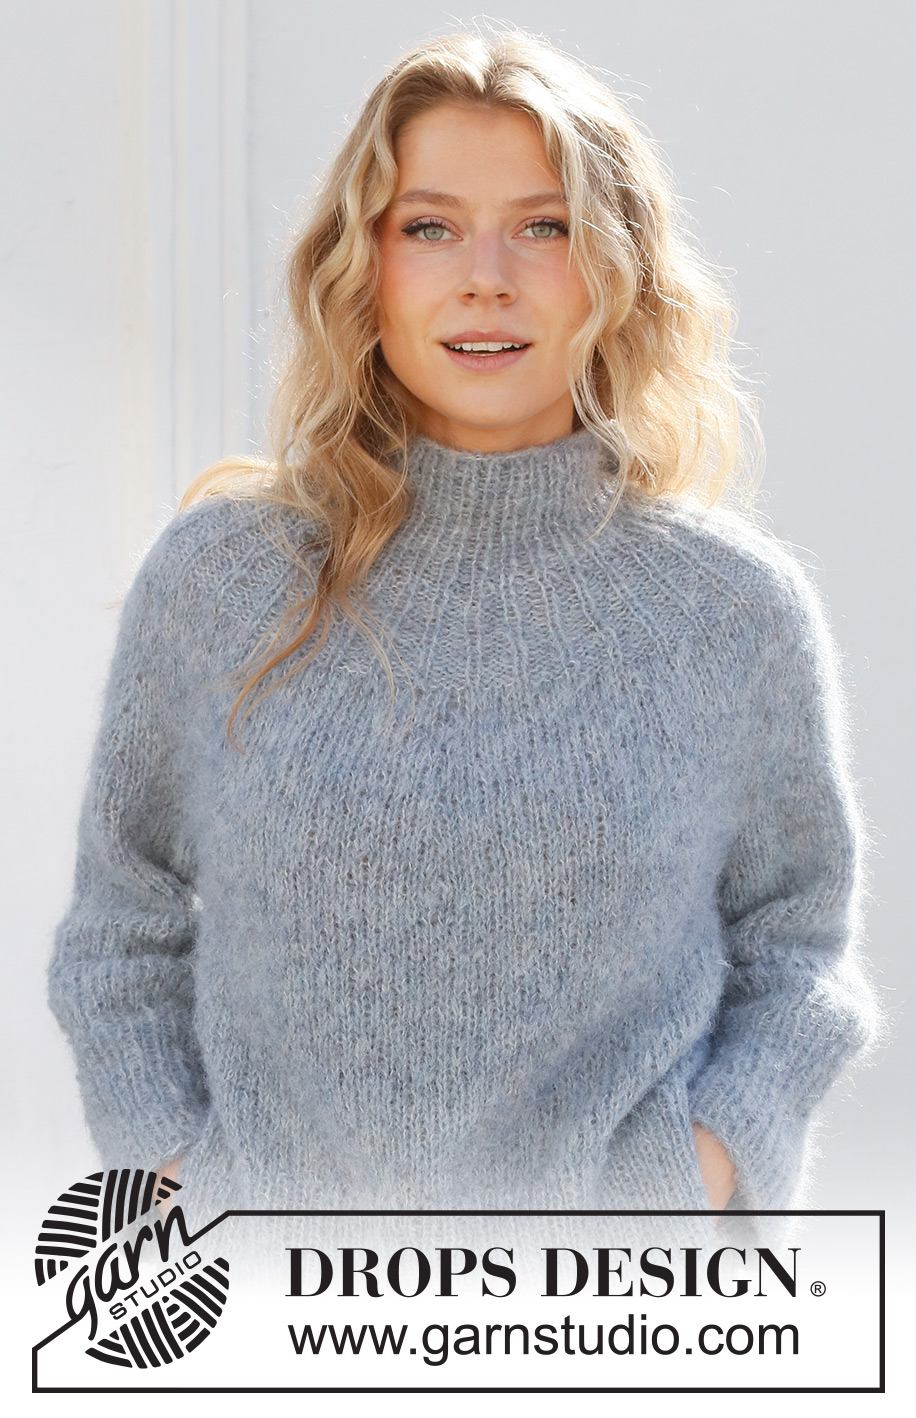
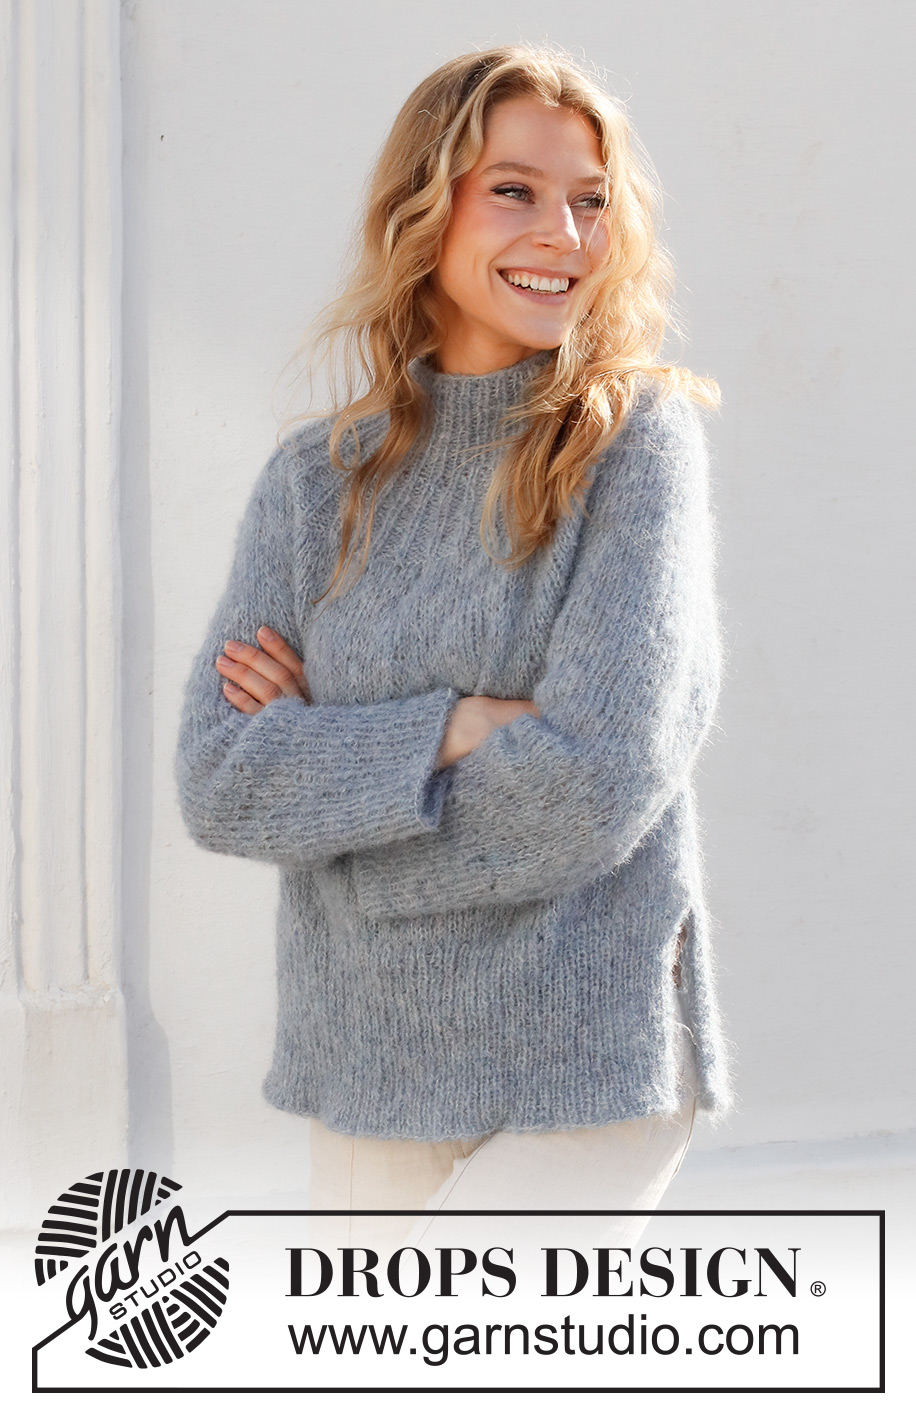
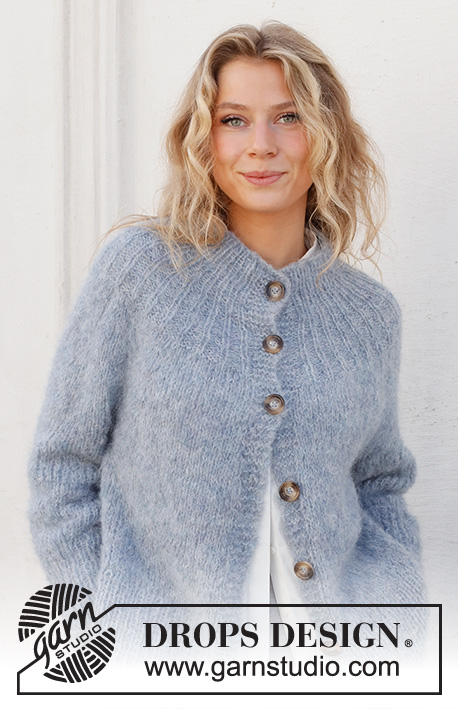
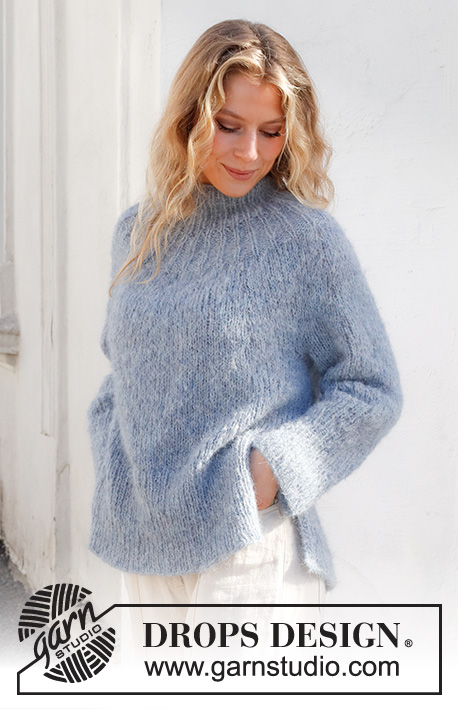
Rhythmic Rain#rhythmicrainsweater |
|
 |
 |
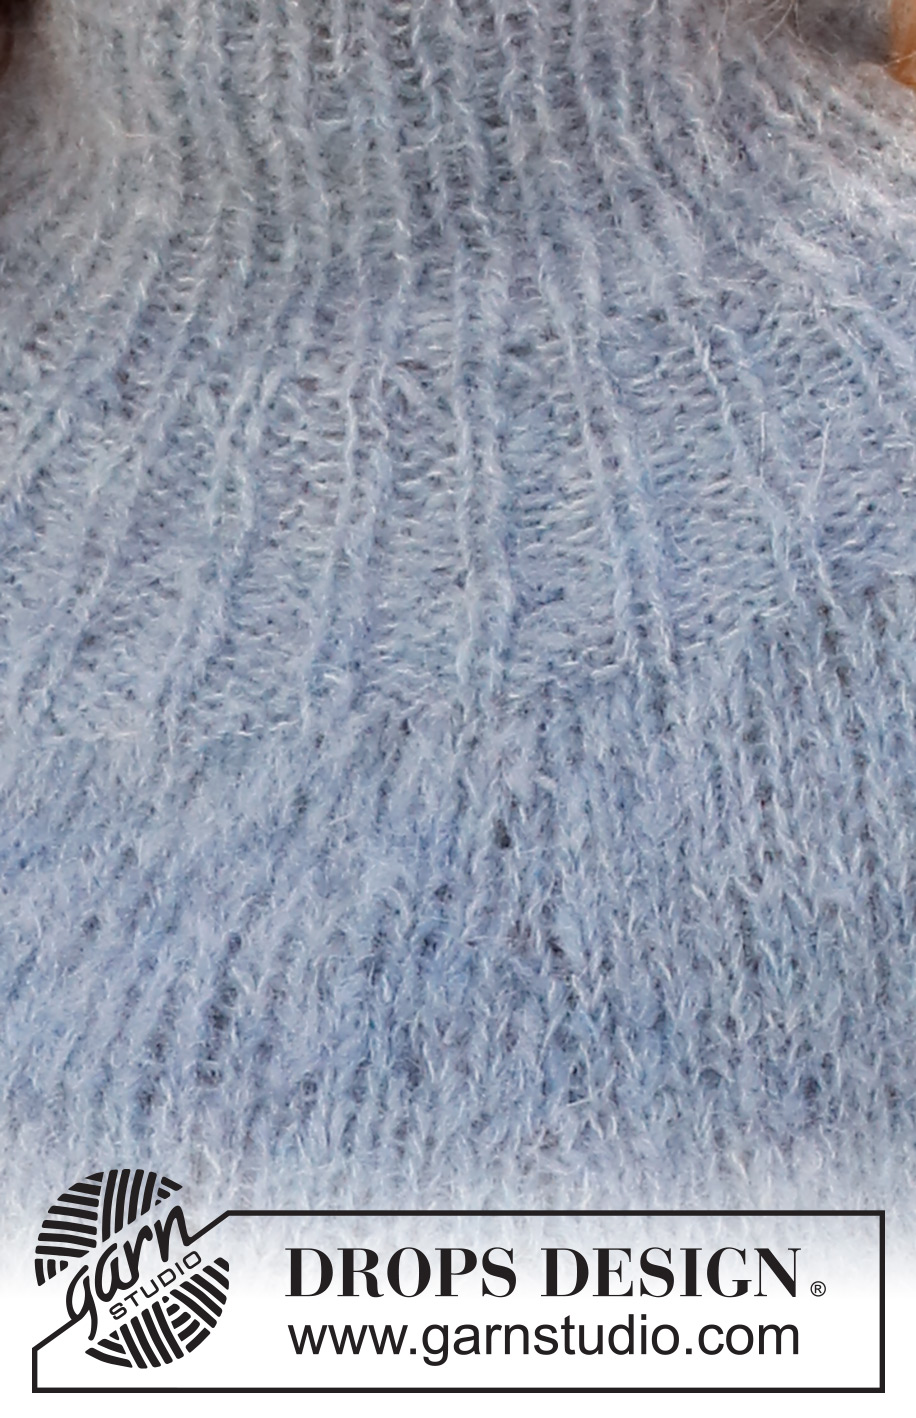
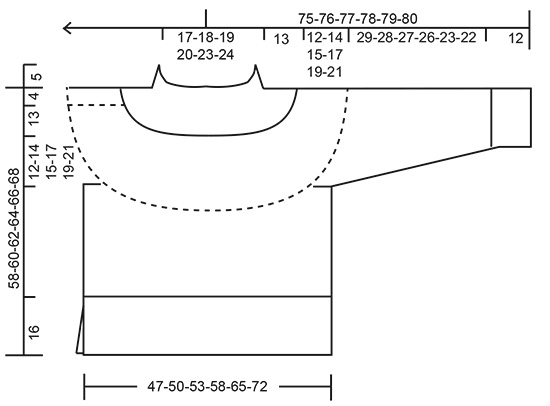
Knitted jumper in DROPS Melody. The piece is worked top down with round yoke, ribbed edges and split in the sides. Sizes S - XXXL.
DROPS 228-42 |
|
|
------------------------------------------------------- EXPLANATIONS FOR THE PATTERN: ------------------------------------------------------- RIDGE/GARTER STITCH (worked back and forth): Knit all rows. 1 ridge = knit 2 rows. INCREASE TIP (evenly spaced): To work out how to increase evenly, count the total number of stitches on the needle (e.g. 120 stitches) and divide by the number of increases to be made (e.g. 12) = 10. In this example, increase by making 1 yarn over after each 10th stitch. On the next round work the yarn overs twisted to avoid holes. DECREASE TIP (sleeves): Decrease 1 stitch on either side of the marker thread as follows: Work until there are 3 stitches left before the marker thread, knit 2 together, knit 2 (marker thread sits between these 2 stitches), slip 1 stitch as if to knit, knit 1 and pass the slipped stitch over the knitted stitch (2 stitches decreased). CASTING-OFF TIP: To avoid the cast-off edge being tight you can cast off with a larger size needle. If the edge is still tight, make 1 yarn over after approx. each 4th stitch at the same time as casting off; the yarn overs are cast off as normal stitches. ------------------------------------------------------- START THE PIECE HERE: ------------------------------------------------------- JUMPER – SHORT OVERVIEW OF THE PIECE: The neck and yoke are worked in the round with circular needle, top down from mid-back. The yoke is divided for the body and sleeves and the body continued in the round as far as the split, when the front and back pieces are finished separately back and forth. The sleeves are worked in the round with short circular needle/double pointed needles, top down. NECK: Cast on 60-62-64-68-74-76 stitches with circular needle size 6 mm and DROPS Melody. Knit 1 round then work rib (knit 1, purl 1) for 5 cm. Insert a marker at the beginning of the round; the yoke is measured from here. YOKE: Continue the rib for another 5 cm, then increase as follows: Increase 1 stitch by making 1 yarn over at the beginning of all purled sections = 90-93-96-102-111-114 stitches. Continue the new rib (knit 1, purl 2); the yarn overs are purled twisted on the first round to avoid holes. When the piece measures 10 cm from the marker, increase 1 stitch by making 1 yarn over at the end of all purled sections = 120-124-128-136-148-152 stitches. Continue the new rib (knit 1, purl 3); the yarn overs are purled twisted on the first round to avoid holes. When the piece measures 13 cm from the marker change to circular needle size 8 mm. Knit 1 round where you increase 12-20-22-24-26-32 stitches evenly spaced – read INCREASE TIP = 132-144-150-160-174-184 stitches. Continue with stocking stitch. When the piece measures 15 cm from the marker increase 10 stitches evenly spaced. Increase like this every 2½-3-2½- 2½-2-2 cm a total of 4-4-5-6-7-8 times = 172-184-200-220-244-264 stitches. REMEMBER THE KNITTING TENSION! Continue with stocking stitch until the piece measures 25-27-28-30-32-34 cm from the marker. Divide for the body and sleeves on the next round as follows: Knit 25-27-29-32-36-40 (= half back piece), place the next 36-38-42-46-50-52 stitches on 1 thread for the sleeve, cast on 6 stitches (= in side under sleeve), knit 50-54-58-64-72-80 (= front piece), place the next 36-38-42-46-50-52 stitches on 1 thread for the sleeve, cast on 6 stitches (= in side under sleeve), knit the last 25-27-29-32-36-40 stitches (= half back piece). The body and sleeves are finished separately. THE PIECE IS NOW MEASURED FROM HERE! BODY: = 112-120-128-140-156-172 stitches. Continue with stocking stitch in the round for 13-13-14-14-14-14 cm (or to desired length; there is approx. 16 cm left to finished length). Now divide the piece for the split as follows: Place the first and last 28-30-32-35-39-43 stitches on a thread = 56-60-64-70-78-86 stitches on the needle (= front piece). FRONT PIECE: To avoid the following rib being tight, knit 1 row from the right side where you increase 23-25-25-27-31-33 stitches evenly spaced = 79-85-89-97-109-119 stitches. Change to circular needle size 6 mm and work the next row from the wrong side as follows: 2 stitches in GARTER STITCH – read description above, * purl 1, knit 1 *, work from *-* until there are 3 stitches left, purl 1 and 2 stitches in garter stitch. Work this rib for 16 cm. Cast off with knit over knit and purl over purl – read CASTING-OFF TIP. BACK PIECE: Place the remaining stitches on circular needle size 8 mm and work as for the front piece. SLEEVES: Place the 36-38-42-46-50-52 stitches from the thread on the one side of the piece on double pointed needles/short circular needle size 8 mm and knit up 1 stitch in each of the 6 stitches cast on under the sleeve = 42-44-48-52-56-58 stitches. Insert a marker thread in the middle of the 6 stitches under the sleeve. Allow the thread to follow your work onwards; it will be used when decreasing under the sleeve. Start at the marker thread and work stocking stitch in the round for 2 cm, then decrease 2 stitches under the sleeve – read DECREASE TIP. Decrease like this every 8-8-4½-3½-2½-2½ cm a total of 4-4-6-7-8-8 times = 34-36-36-38-40-42 stitches. Continue working, without further decreases, until the sleeve measures 29-28-27-26-23-22 cm from the division (there is approx. 12 cm to finished length; try the jumper on and work to desired length). Knit 1 round where you increase 6 stitches evenly spaced = 40-42-42-44-46-48 stitches. Change to double pointed needles size 6 mm and work rib (knit 1, purl 1) for 12 cm. Cast off with knit over knit and purl over purl – remember CASTING-OFF TIP! The sleeve measures approx. 41-40-39-38-35-34 cm from the division. Work the other sleeve in the same way. |
|
 |
|
Have you finished this pattern?Tag your pictures with #dropspattern #rhythmicrainsweater or submit them to the #dropsfan gallery. Do you need help with this pattern?You'll find 31 tutorial videos, a Comments/Questions area and more by visiting the pattern on garnstudio.com. © 1982-2026 DROPS Design A/S. We reserve all rights. This document, including all its sub-sections, has copyrights. Read more about what you can do with our patterns at the bottom of each pattern on our site. |
|


With over 40 years in knitting and crochet design, DROPS Design offers one of the most extensive collections of free patterns on the internet - translated to 17 languages. As of today we count 324 catalogues and 12290 patterns translated into English (UK/cm).
We work hard to bring you the best knitting and crochet have to offer, inspiration and advice as well as great quality yarns at incredible prices! Would you like to use our patterns for other than personal use? You can read what you are allowed to do in the Copyright text at the bottom of all our patterns. Happy crafting!
Post a comment to pattern DROPS 228-42
We would love to hear what you have to say about this pattern!
If you want to leave a question, please make sure you select the correct category in the form below, to speed up the answering process. Required fields are marked *.