
Popular categories
Looking for a yarn?


Comments / Questions (23)
![]() Kiki wrote:
Kiki wrote:
Dit patroon is wat vaag, maar het is gelukt. Helaas is de hals aan de achterkant te laag geworden door het ontbreken van verkorte toeren. Zo jammer!!
14.04.2026 - 09:28
![]() Kiki wrote:
Kiki wrote:
This pattern was quite nice, only I really don't like it without short rows in the back, as the back is low and the sweather doesn't feel right because the front and the back are the same.. I would like more short row patterns as I really love the wool and the descriptions.
03.11.2025 - 11:15
![]() Sylvie wrote:
Sylvie wrote:
Bonjour Dans ce modèle, peut-on remplacer le fil Kid Silk par le fil Brushed Alpaca Silk pour l'association avec la laine Alpaca ? Je vous remercie d'avance pour votre réponse. Cordialement, Sylvie
24.10.2025 - 19:34DROPS Design answered:
Bonjour Sylvie, tout à fait car ces 2 laines appartiennent au groupe de fils A et 2 laines du groupe A = 1 laine du groupe C, comme Brushed Alpaca Silk; retrouvez ici comment calculer la nouvelle quantité. Bon tricot!
29.10.2025 - 14:53
![]() Nina wrote:
Nina wrote:
Hallo! Wenn ich mit dem Raglan und gleichzeitig V-Ausschnitt Zunahmen beginne verstehe ich nicht, in welchen Hin- Reihen ich wieviele Maschen zunehmen muss. 9x Hin- Reihen für Raglan und für Ausschnitt jede 4. Reihe 5x in Höhe? Ich verstehe das leider nicht.
16.10.2025 - 21:27DROPS Design answered:
Liebe Nina, die Raglanzunahmen arbeiten Sie zuerst in jeder 2. Reihe, das machen Sie 9x (also 1 Reihe mit Zunahmen, 1 Reihe ohne Zunahmen, 1 Reihe mit Zunahmen usw, bis Sie in dieser Weise 9 Zunahme-Reihen gestrickt haben). Wenn Sie 2x zugenommen haben, beginnen die V-Ausschnitt-Zunahmen (also wenn Sie die 3. Zunahme-Reihe mit Raglanzunahmen stricken). Sie nehmen dann für den V-Ausschnitt in jeder 4. Reihe zu, das machen Sie 5x. Bei den Raglanzunahmen müssen Sie dann den Wechsel beachten, dass bei den Ärmeln nur noch in jeder 4. Reihe zugenommen wird. Ebenso gibt es den Wechseln bei den V-Ausschnitt-Zunahmen von 4 Reihe zu 2 Reihen. Gutes Gelingen!
21.10.2025 - 11:49
![]() Stella wrote:
Stella wrote:
The design is absolutely gorgeous and i was so excited to start this process. I've knit a few sweaters before and never had problems with instructions but these are all over the place. Not necessarily because of the complexity but just the way they were written. I showed my roommate (who is also a knitter) the instructions and she also had no clue. currently I'm in the process of rewriting so i know what to do.
16.10.2025 - 20:24
![]() AGATA wrote:
AGATA wrote:
Dzień dobry, czy dobrze rozumiem że narzut robię bezpośrednio przed znacznikiem? Między narzutami nie ma żadnego oczka prawego? Pozdrawiam ciepło, Agata
18.07.2025 - 22:00DROPS Design answered:
Witaj Agato, mamy 2 oczka reglanu (4 razy w okrążeniu). Oczka na reglan dodajemy nie przed markerem, tylko przed oczkiem prawym przed markerem, albo za oczkiem prawym za markerem. Czyli są zawsze 2 oczka między nowymi dodanymi oczkami. W części REGLAN powinna być niewielka korekta. Powinno być REGLAN: DODAĆ 1 OCZKO NACHYLONE W PRAWĄ STRONĘ, PRZED 1 OCZKIEM PRAWYM I MARKEREM:... DODAĆ 1 OCZKO NACHYLONE W LEWĄ STRONĘ ZA MARKEREM I 1 OCZKIEM PRAWYM. Pozdrawiamy!
19.07.2025 - 14:54
![]() Caroline Dervout wrote:
Caroline Dervout wrote:
Bonjour Je ne comprends pas tricoteler les jeter à l'envers et ensuite les tricoter en jersey .est-ce que l'on tricote 2 la même maille? Merci
28.05.2025 - 23:46DROPS Design answered:
Bonjour Mme Dervout, dans cette vidéo, nous montrons comment tricoter les jetés sur l'envers, avant/après le marqueur (les mailles du raglan). Tricotez ensuite ces mailles en jersey signifie qu'elles vont être tricotées comme les autres mailles par la suite: à l'endroit sur l'endroit et à l'envers sur l'envers. Bon tricot!
30.05.2025 - 08:29
![]() Kiki wrote:
Kiki wrote:
Ik begrijp her begin al gelijk niet, wat wordt er bedoeld met "Voeg 1 markeerdraad in aan de binnenkant van 2 kantsteken aan een kant; het werk wordt vanaf hier gemeten". Snap er niks van. Je breidt eerst 70 averechtse steken, en dan?? Doe je dan twee kantsteken en voeg je dan een markering daarna? Onduidelijk..
25.04.2025 - 18:40DROPS Design answered:
Dag Kiki,
Naast 2 steken aan de zijkant plaats je 1 markeerdraad. deze laat je hier zitten om het werk straks vanaf die markeerdraad op te meten. Dit doe je nadat je 1 naald averecht hebt gebreid. Na het plaatsen van de markeerdraad ga je verder met de pas.
04.05.2025 - 10:37
![]() Agnieszka wrote:
Agnieszka wrote:
Pytanie dotyczy warkocza przy łączeniu prawego i lewego przodu. Rozumiem, że po przełożeniu czterech ostatnich oczek prawego przodu na drut do warkoczy, wkładamy znacznik i przerabiamy pierwsze cztery oczka lewego przodu a dopiero potem oczka z drutu do warkocza ? Bo niestety jestem fragment źle napisany. Pozdrawiam serdecznie.
02.04.2025 - 23:29DROPS Design answered:
Witaj Agnieszko, powinno być tak: 'Przerabiać na prawo, aż zostaje 4 oczka do końca rzędu, zdjąć te 4 oczka na drut do warkoczy z przodu robótki, przerobić na prawo 4 pierwsze oczka drugiego przodu, włożyć 1 marker (okrążenie zaczyna się tutaj), przerobić na prawo oczka z drutu do warkoczy'. Zgłoszę korektę do wzoru. Pozdrawiamy!
03.04.2025 - 09:02
![]() Toni wrote:
Toni wrote:
Hi! Das Pattern macht mir total viel Spaß, danke! Ich hätte eine Frage bezüglich der Halsblende: wo genau ist die? Ich muss ja (z.B. bei der Größe S) 21cm ab der Halsblende messen, weiß aber leider nicht wo ich genau ansetzen soll. Ich danke euch im Voraus!
07.03.2025 - 15:58DROPS Design answered:
Liebe Toni, diese 21 cm messen Sie ab die Markierung, die Sie am Ende Halsausschnitt eingesetzt haben, also diese hier: 1 Markierer neben den 2 Maschen an einer der beiden Seiten der Arbeit anbringen, die Arbeit wird nun ab diesem Markierer gemessen.. Viel Spaß beim Stricken!
10.03.2025 - 07:48
|
||||||||||||||||
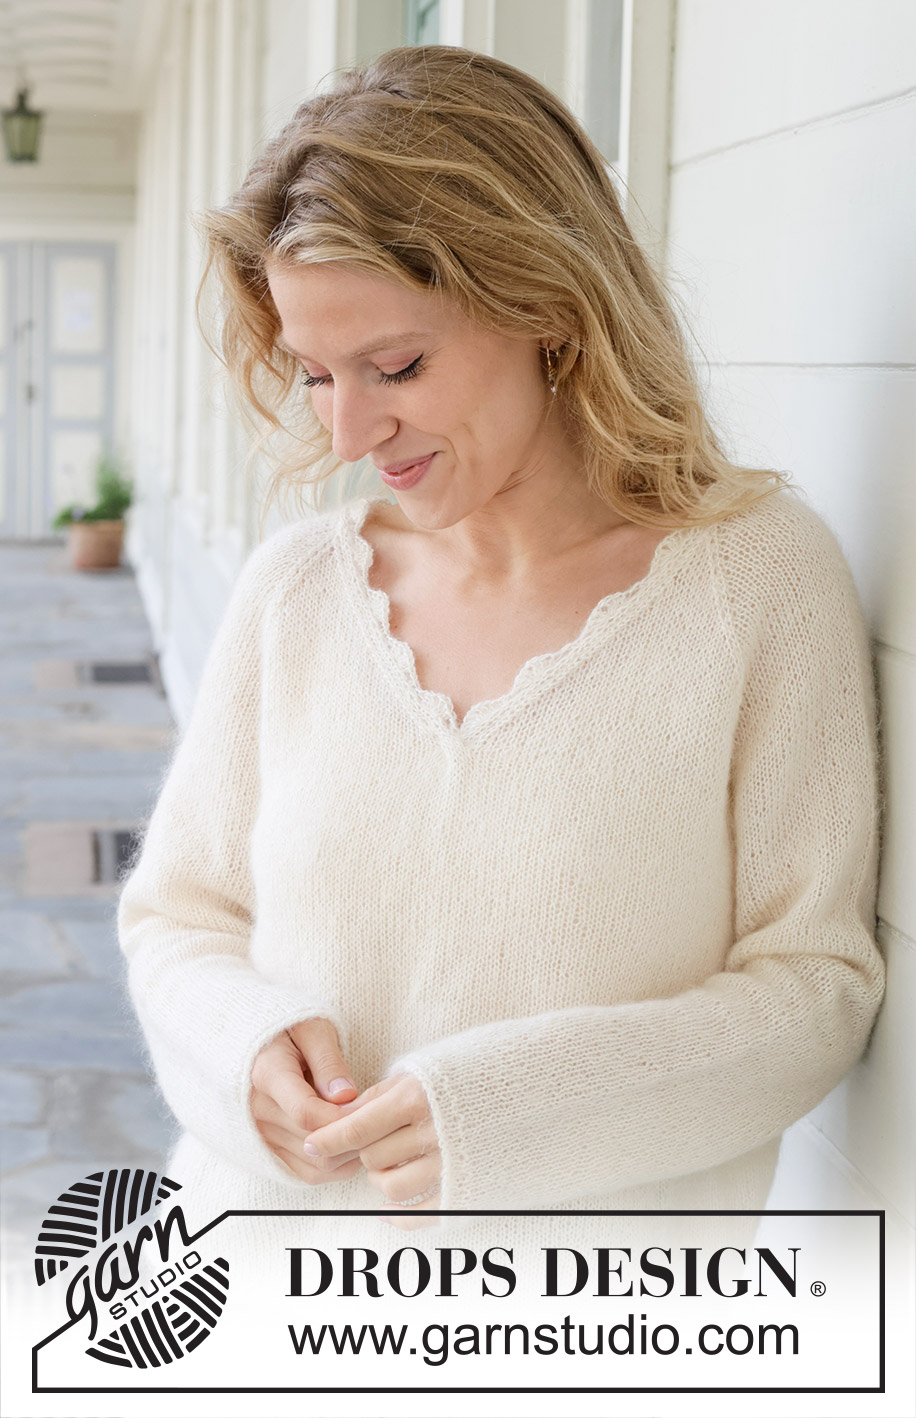
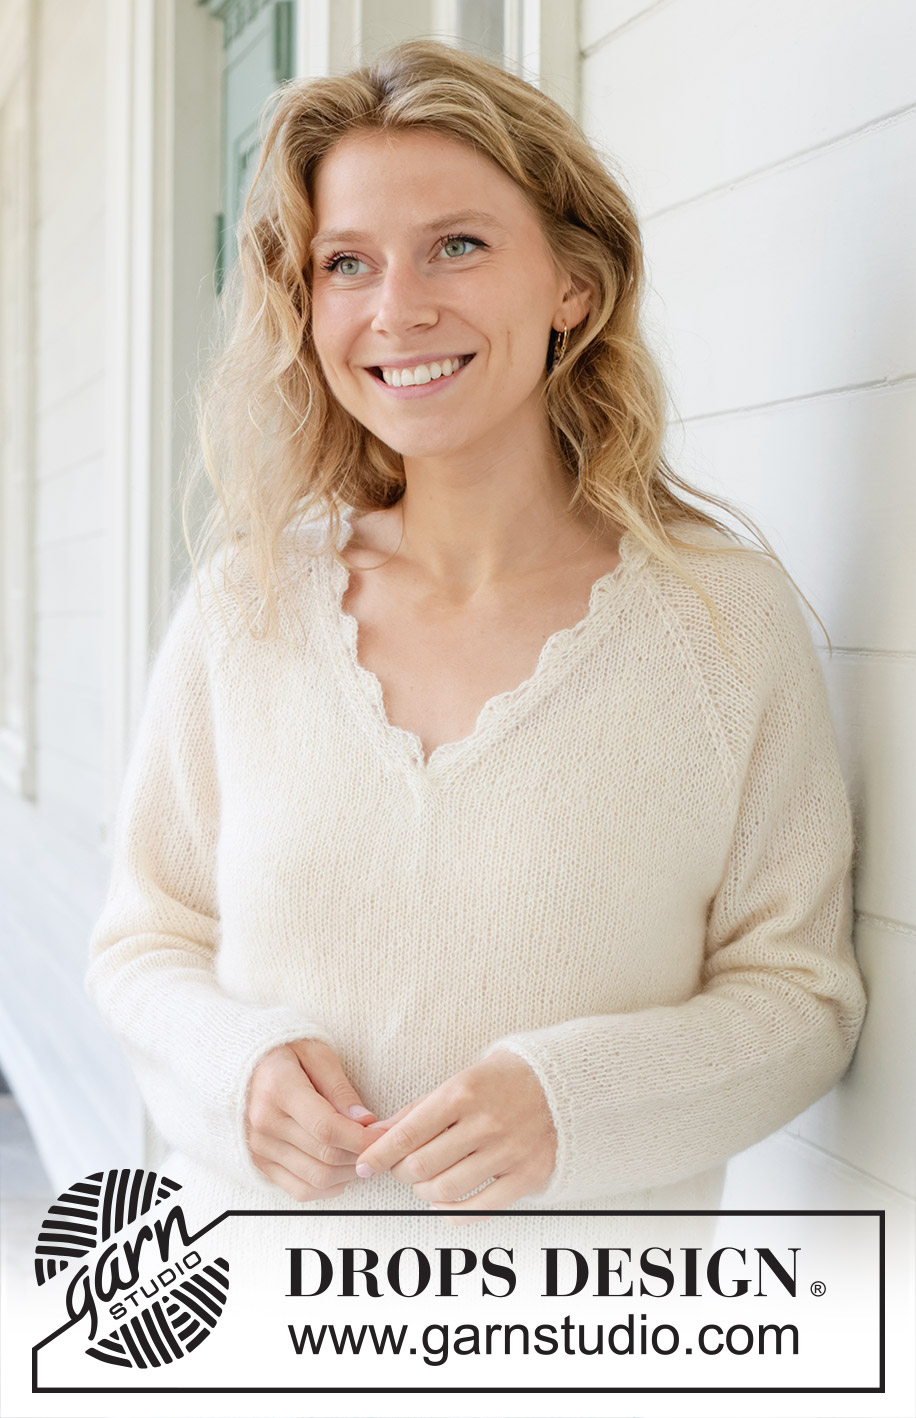
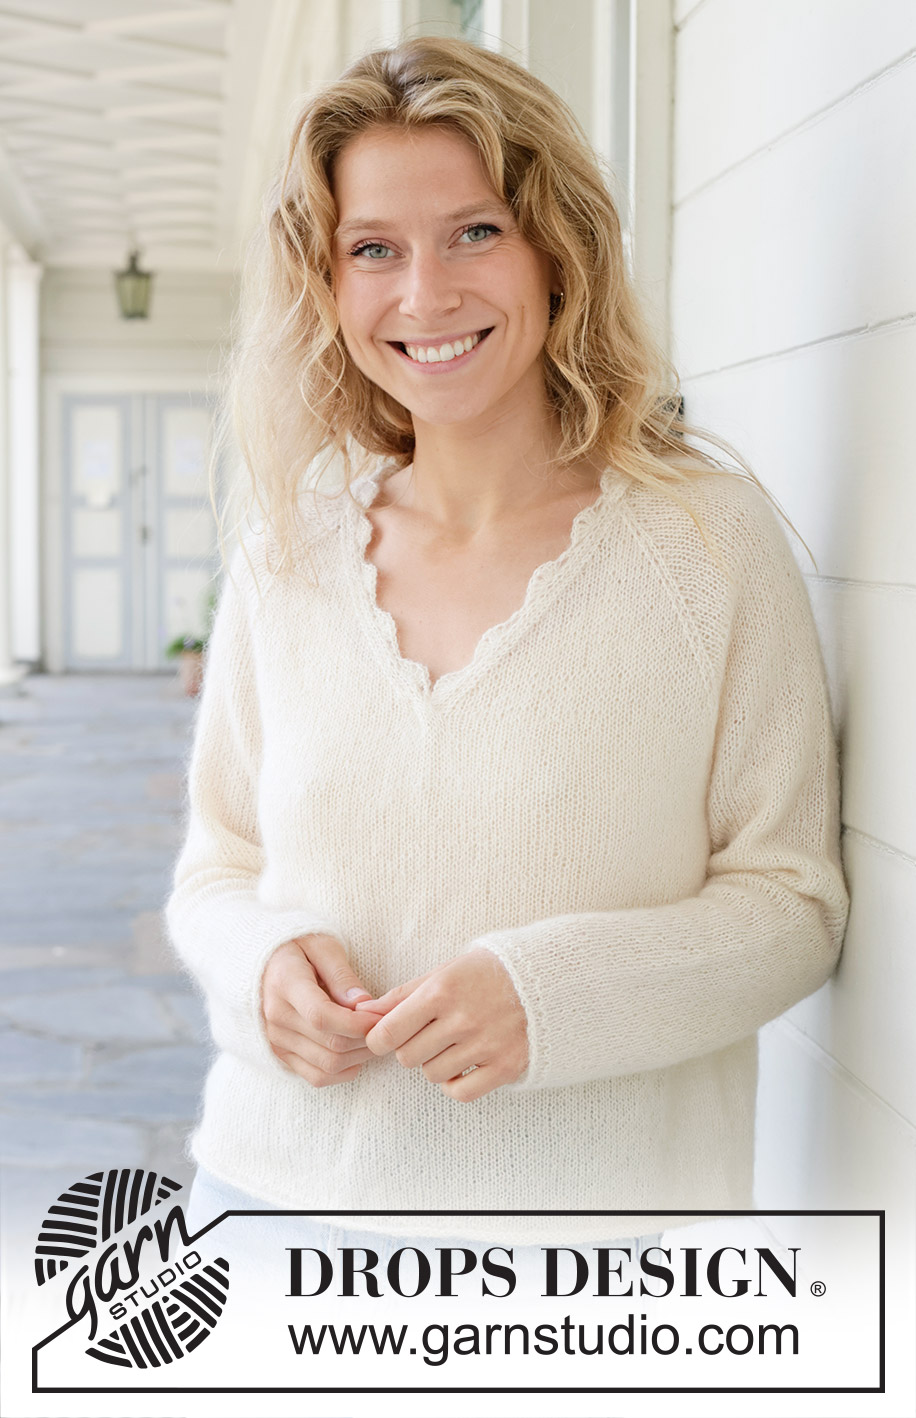
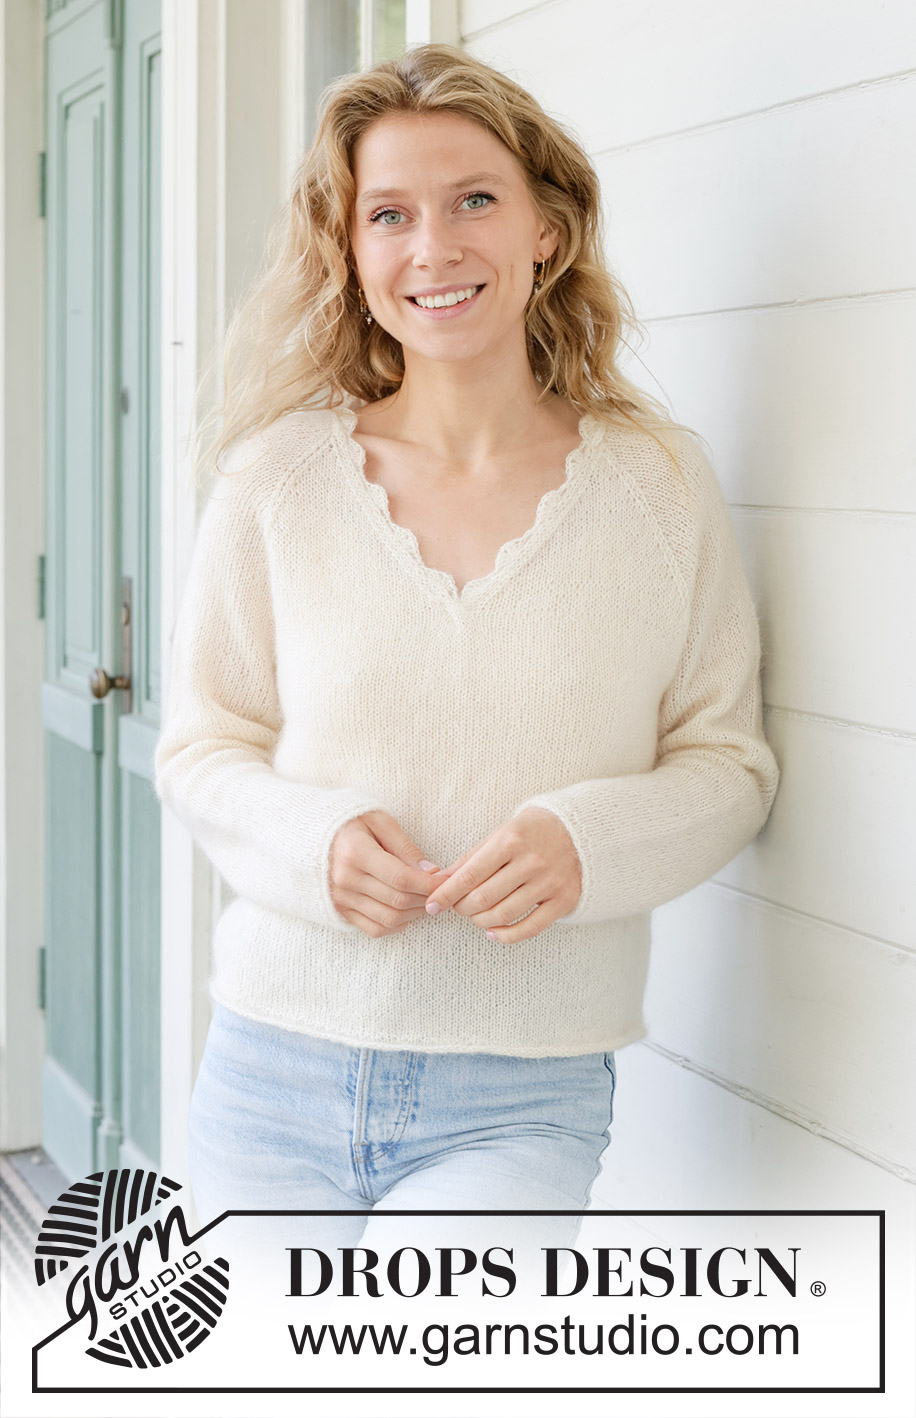
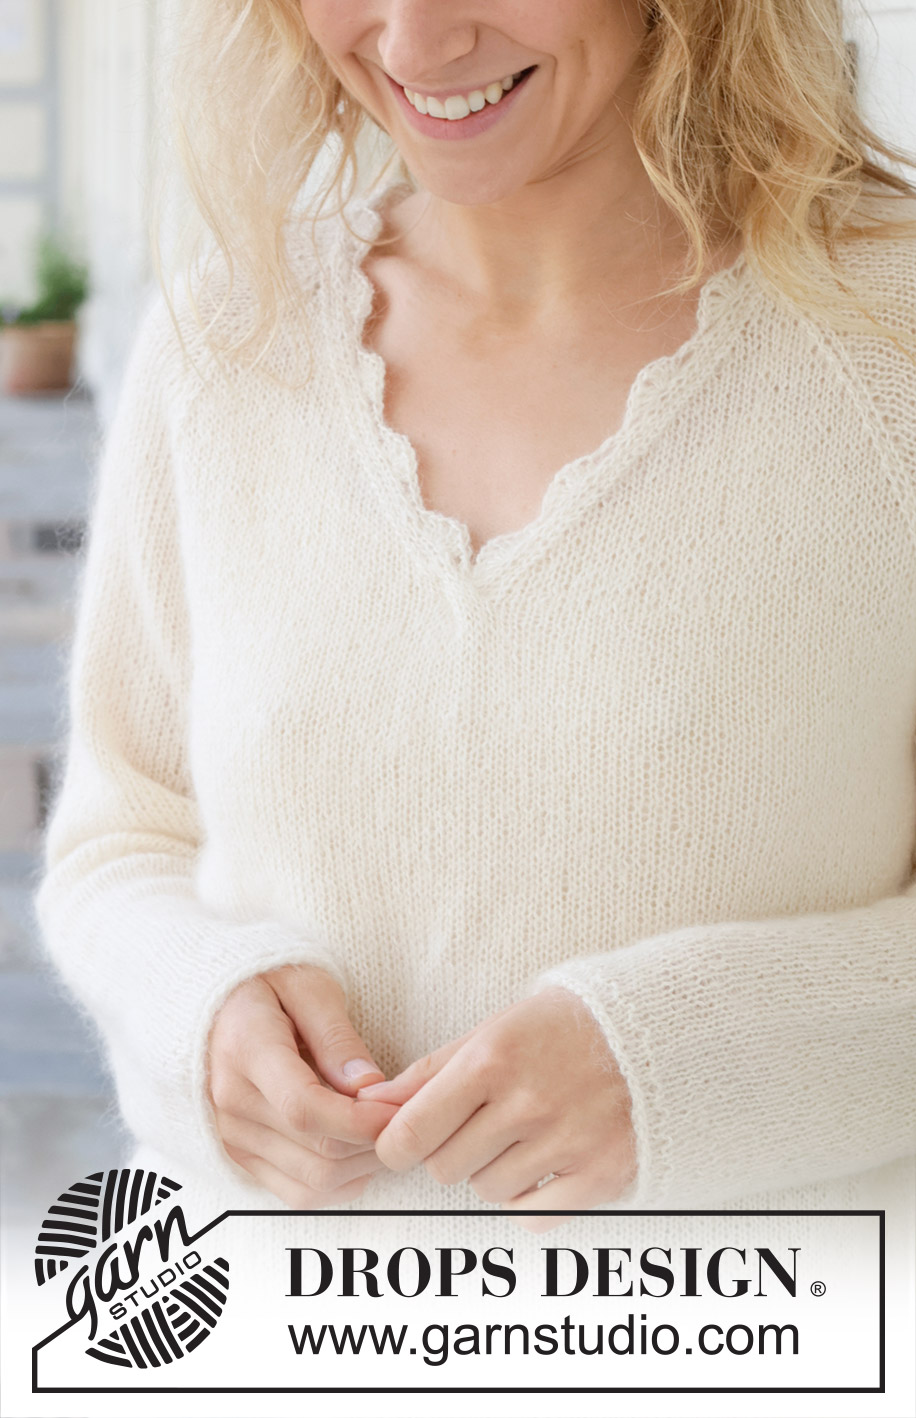
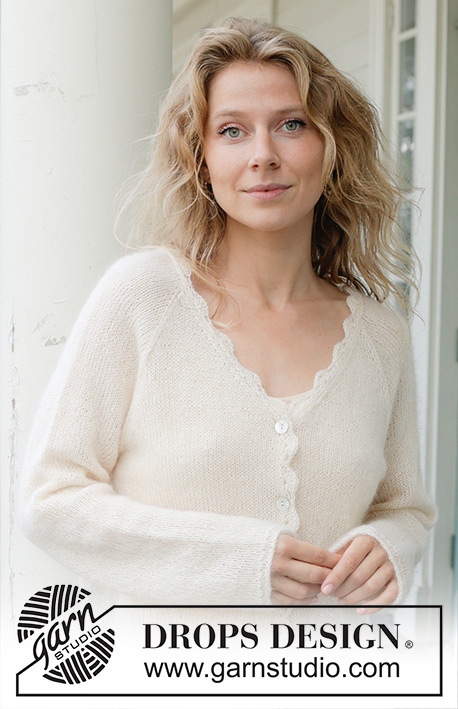
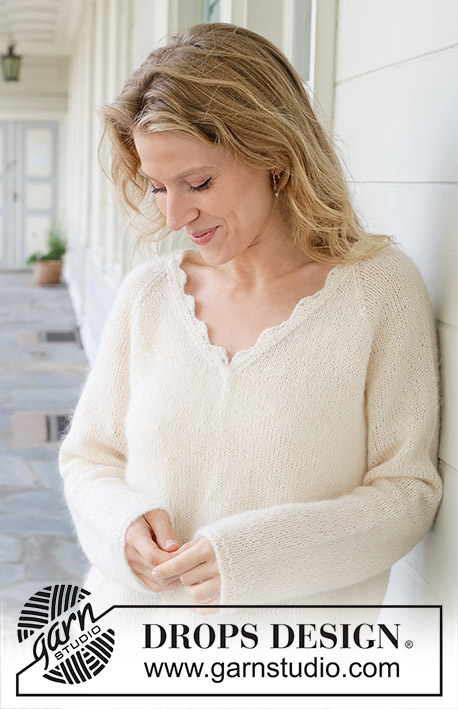
Sweet Harmony#sweetharmonysweater |
||||||||||||||||
 |
 |
|||||||||||||||
Knitted jumper in 1 strand DROPS Flora or DROPS Alpaca and 1 strand DROPS Kid-Silk. The piece is worked top down, with stocking stitch, raglan, V-neck, rolled edges and crocheted edges. Sizes S - XXXL.
DROPS 257-1 |
||||||||||||||||
|
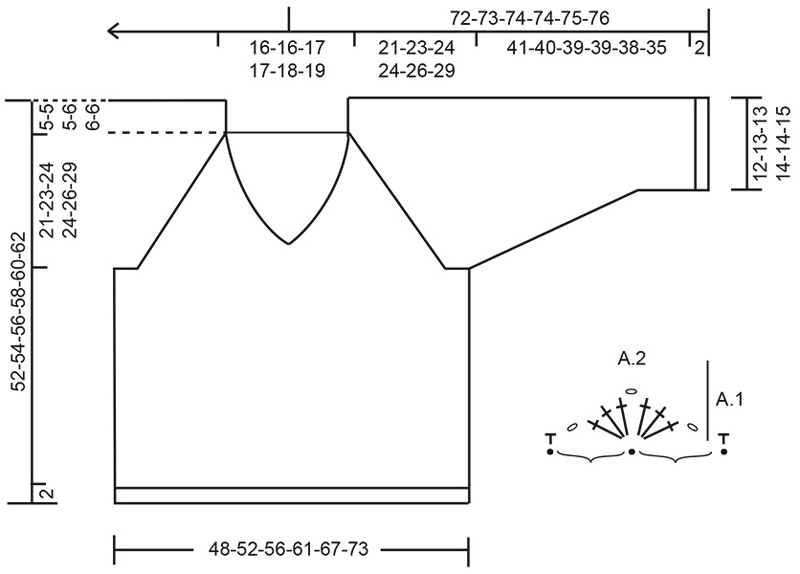
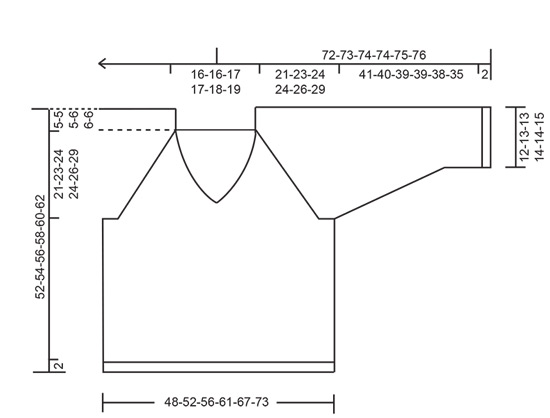
------------------------------------------------------- EXPLANATIONS FOR THE PATTERN: ------------------------------------------------------- 2 EDGE STITCHES: FROM RIGHT SIDE, BEGINNING OF ROW: Slip 1 stitch knit-wise, knit 1. FROM RIGHT SIDE, END OF ROW: Work until there are 2 stitches left on row, knit 2. FROM WRONG SIDE, BEGINNING OF ROW: Slip 1 stitch purl-wise, purl 1. FROM WRONG SIDE, END OF ROW: Work until there are 2 stitches left on row, purl 2. RAGLAN: All increases are worked from the right side! Increase 1 stitch as described below: INCREASE 1 STITCH TOWARDS THE RIGHT BEFORE MARKER: Make 1 yarn over by taking the strand from the back, over the right needle to the front. On the next row, purl the front loop of the yarn over. NOTE: When working in the round, knit the front loop. Then work the new stitches in stocking stitch. INCREASE 1 STITCH TOWARDS THE LEFT AFTER MARKER: Make 1 yarn over by taking the strand in front of the needle, then back. On the next row, purl the back loop of the yarn over, NOTE: When working in the round, knit twisted through the back loop. Then work the new stitches in stocking stitch. V-NECK: All increases are worked from the right side. Increase 1 stitch as described below: LEFT FRONT PIECE: Work 2 edge stitches as before, make 1 yarn over by taking the strand in front of the needle, then back. On the next row, purl the back loop of the yarn over, then work the new stitch in stocking stitch. RIGHT FRONT PIECE: Work until there are 2 stitches left on the row, make 1 yarn over by taking the strand from the back, over the right needle to the front, work the 2 edge stitches. On the next row, purl the front loop of the yarn over, then work the new stitch in stocking stitch. DECREASE TIP: Decrease 1 stitch on each side of the marker-thread as follows: Work until there are 3 stitches left before the marker-thread, knit 2 together, knit 2 (marker-thread sits between these 2 stitches), slip 1 stitch knit-wise, knit 1 and pass the slipped stitch over the knitted stitch (2 stitches decreased). KNITTING TIP: When knitting up stitches under the sleeve, small holes can be left in the transitions between body and sleeve. These holes can be closed by picking up the strand between 2 stitches and working it twisted together with the next stitch. PATTERN: See diagrams A.1 and A.2 (crocheted edge). ------------------------------------------------------- START THE PIECE HERE: ------------------------------------------------------- JUMPER – SHORT OVERVIEW OF THE PIECE: The pattern uses both long and short needles; start with the length which fits the number of stitches and change when necessary. The yoke is worked back and forth from mid-front and top down. When the V-neck is finished the yoke is joined and continued in the round. When the yoke is finished, it is divided for the body and sleeves and the body continued in the round, while the sleeves wait. The sleeves are worked top down, in the round. A crocheted edge is worked around the neckline to finish. NECKLINE: Cast on 70-70-72-80-82-84 stitches with circular needle size 4.5, 1 strand DROPS Flora or 1 strand DROPS Alpaca and 1 strand DROPS Kid-Silk (2 strands). Purl 1 row from the wrong side. Insert 1 marker inside 2 edge stitches on one side; the piece is measured from here. YOKE: Insert 4 marker-threads, without working the stitches, each marker-thread inserted between 2 stitches (these 2 stitches are called raglan-stitches and are worked in stocking stitch): Count 3 stitches (= left front piece), insert marker-thread 1 before the next stitch, count 18-18-18-22-22-22 stitches (= sleeve), insert marker-thread 2 before the next stitch, count 28-28-30-30-32-34 stitches (= back piece), insert marker-thread 3 before the next stitch, count 18-18-18-22-22-22 stitches (= sleeve), insert marker-thread 4 before the next stitch, there are 3 stitches left after the last marker-thread (= right front piece). Change to circular needle size 4.5 mm. You now work stocking stitch back and forth with 2 EDGE STITCHES on each side, increasing AT THE SAME TIME for RAGLAN and V-NECK – read all descriptions above. Read both paragraphs below before continuing. Remember to maintain the knitting tension. RAGLAN: Increase for raglan on each side of the 2 raglan-stitches by each marker-thread (= 8 increased stitches) every 2nd row, 9-8-15-21-23-21 times. Then increase for raglan every 2nd row on the front and back pieces but only every 4th row on the sleeves (alternately 4 and 8 increased stitches). Repeat these increases a total of 16-20-14-8-8-14 times on the front and back pieces (8-10-7-4-4-7 times on the sleeves). You have increased a total of 25-28-29-29-31-35 times on the front and back pieces and 17-18-22-25-27-28 times on the sleeves. V-NECK: After you have increased 2 times for raglan, begin to increase for the V-neck. Increase from the right side on both front pieces, inside the 2 edge stitches (1 stitch increased each side), every 4th row 5-6-6-6-6-6 times, then every 2nd row 6-5-6-6-7-8 times. A total of 11-11-12-12-13-14 increases for the V-neck on each side. When the increases for the V-neck are finished and you have worked back from the wrong side, join the piece mid-front from the right side as follows: Knit until there are 4 stitches left on the row, place these 4 stitches on a cable needle in front of the piece, knit the first 4 stitches from the other front piece, insert 1 marker (round now starts here) knit the stitches from the cable needle. Continue in the round and finish increasing for raglan as described above. After the last increase for raglan, there are 260-276-300-320-340-364 stitches. Continue working without further increases, until the yoke measures 21-23-24-24-26-29 cm, measured straight down from the marker (not along the V-neck). Now divide for the body and sleeves. DIVIDE FOR BODY AND SLEEVES: Start mid-front, knit 40-43-46-49-53-58 (= half front piece), place the next 50-52-58-62-64-66 stitches on 1 thread for the sleeve, cast on 6-8-8-12-14-16 stitches (under sleeve), knit 80-86-92-98-106-116 (= back piece), place the next 50-52-58-62-64-66 stitches on 1 thread for the sleeve, cast on 6-8-8-12-14-16 stitches (under sleeve), knit the last 40-43-46-49-53-58 stitches (= half front piece). The body and sleeves are finished separately. BODY: = 172-188-200-220-240-264 stitches. Insert 1 marker in the middle of the 6-8-8-12-14-16 cast-on stitches under one sleeve Work to the marker; the round now begins here. Work stocking stitch in the round until the piece measures 45-47-49-50-52-54 cm from the marker mid-front. Change to circular needle size 3.5 mm. Work 1 round of rib (knit 1, purl 1), then knit 4 rounds. Change to circular needle size 4.5 mm. Cast off a little loosely with knit. The jumper measures approx. 47-49-51-52-54-56 cm from the marker and 52-54-56-58-60-62 cm from top of shoulder. SLEEVES: Place the 50-52-58-62-64-66 sleeve-stitches from one thread on circular needle size 4.5 mm and knit up 1 stitch in each of the 6-8-8-12-14-16 stitches cast on under the sleeve – read SLEEVE TIP = 56-60-66-74-78-82 stitches. Insert a marker-thread in the middle of the 6-8-8-12-14-16 stitches under the sleeve. Start at the marker-thread and work stocking stitch in the round. When the sleeve measures 3-3-3-2-2-2 cm, decrease 2 stitches under the sleeve – read DECREASE TIP. Decrease like this every 6-5-3½-2½-2½-2 cm a total of 6-7-9-12-13-14 times = 44-46-48-50-52-54 stitches. Continue working until the sleeve measures 41-40-39-39-38-35 cm from the division. Change to double pointed needles size 3.5 mm. Work 1 round of rib (knit 1, purl 1). Then knit 4 rounds. Change to double pointed needles size 4.5 mm and cast off a little loosely with knit. The sleeve measures approx. 43-42-41-41-40-37 cm. CROCHETED EDGE: Use crochet hook size 3.5 mm and 1 strand of each quality (2 strands). Start from the right side at the bottom of the V-neck, mid-front. Work diagram A.1 in the first stitch, then diagram A.2 up the V-neck, around the neckline and down the other side of the V-neck. Finish with 1 slip stitch in the double crochet at the beginning of the round. Cut and fasten the strand. |
||||||||||||||||
Diagram explanations |
||||||||||||||||
|
||||||||||||||||
 |
||||||||||||||||
 |
||||||||||||||||
Have you finished this pattern?Tag your pictures with #dropspattern #sweetharmonysweater or submit them to the #dropsfan gallery. Do you need help with this pattern?You'll find 33 tutorial videos, a Comments/Questions area and more by visiting the pattern on garnstudio.com. © 1982-2026 DROPS Design A/S. We reserve all rights. This document, including all its sub-sections, has copyrights. Read more about what you can do with our patterns at the bottom of each pattern on our site. |
||||||||||||||||


With over 40 years in knitting and crochet design, DROPS Design offers one of the most extensive collections of free patterns on the internet - translated to 17 languages. As of today we count 324 catalogues and 12290 patterns translated into English (UK/cm). 12290
We work hard to bring you the best knitting and crochet have to offer, inspiration and advice as well as great quality yarns at incredible prices! Would you like to use our patterns for other than personal use? You can read what you are allowed to do in the Copyright text at the bottom of all our patterns. Happy crafting!
Post a comment to pattern DROPS 257-1
We would love to hear what you have to say about this pattern!
If you want to leave a question, please make sure you select the correct category in the form below, to speed up the answering process. Required fields are marked *.