
Popular categories
Looking for a yarn?


Comments / Questions (3)
![]() Ria Edam-Dekker wrote:
Ria Edam-Dekker wrote:
Kan dit vest ook in een kleur (uni) gebreid worden, of moet ik dan de hele handleiding eerst herschrijven ?
15.10.2023 - 18:45DROPS Design answered:
Dag Ria,
Je kunt hem inderdaad gewoon met 1 kleur breien. Je vervangt dan alle kleuren in het telpatroon door 1 kleur en je gebruikt het telpatroon dan eigenlijk alleen voor de meerderingen.
18.10.2023 - 19:01
![]() Iris wrote:
Iris wrote:
Gefällt mir
06.08.2023 - 14:15
![]() Flocaeymaex wrote:
Flocaeymaex wrote:
Cherubine
05.08.2023 - 16:55
|
|||||||||||||
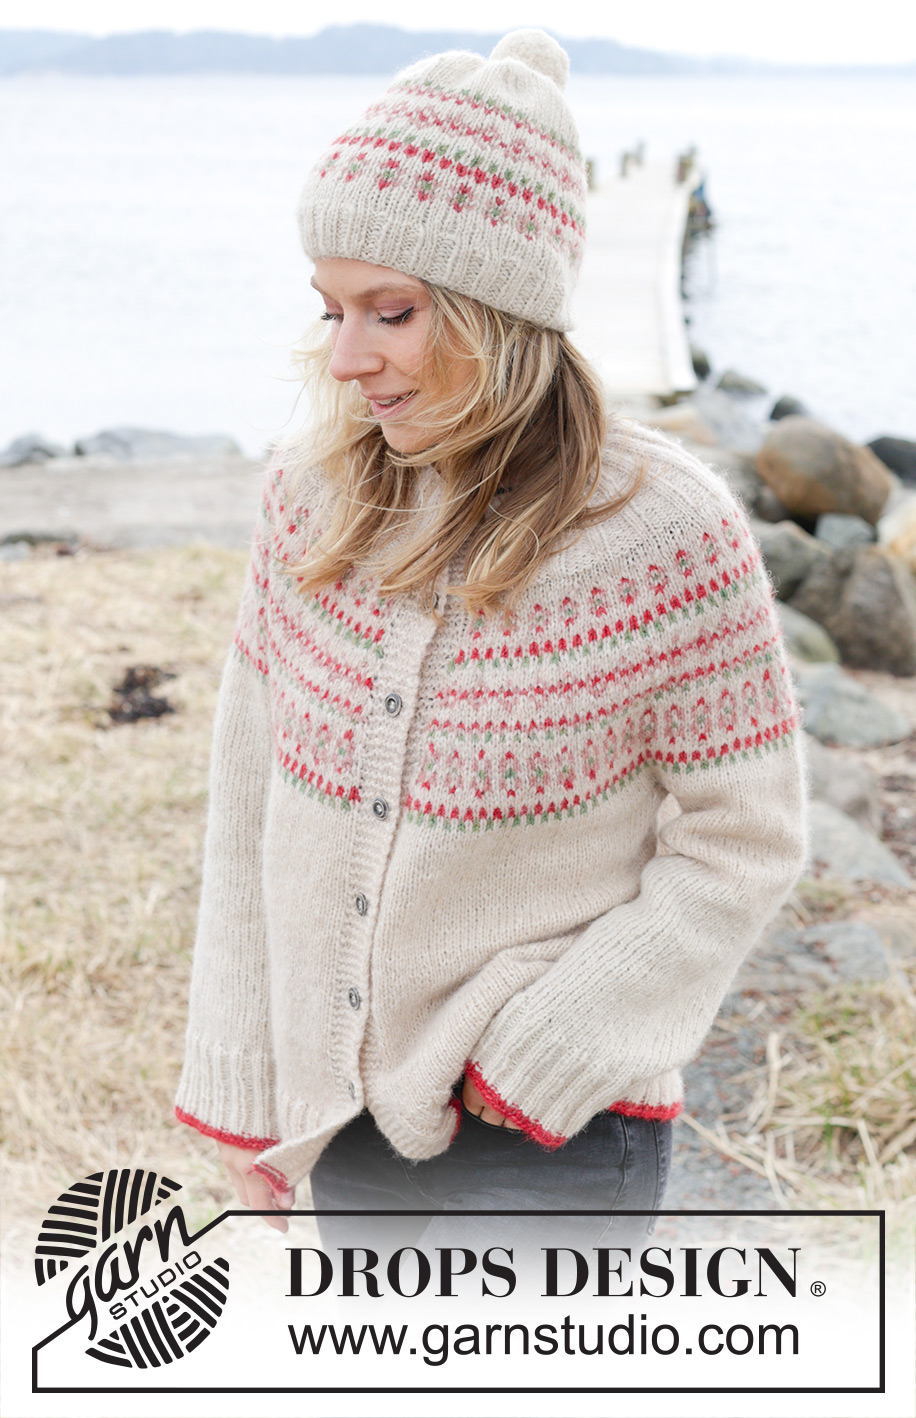
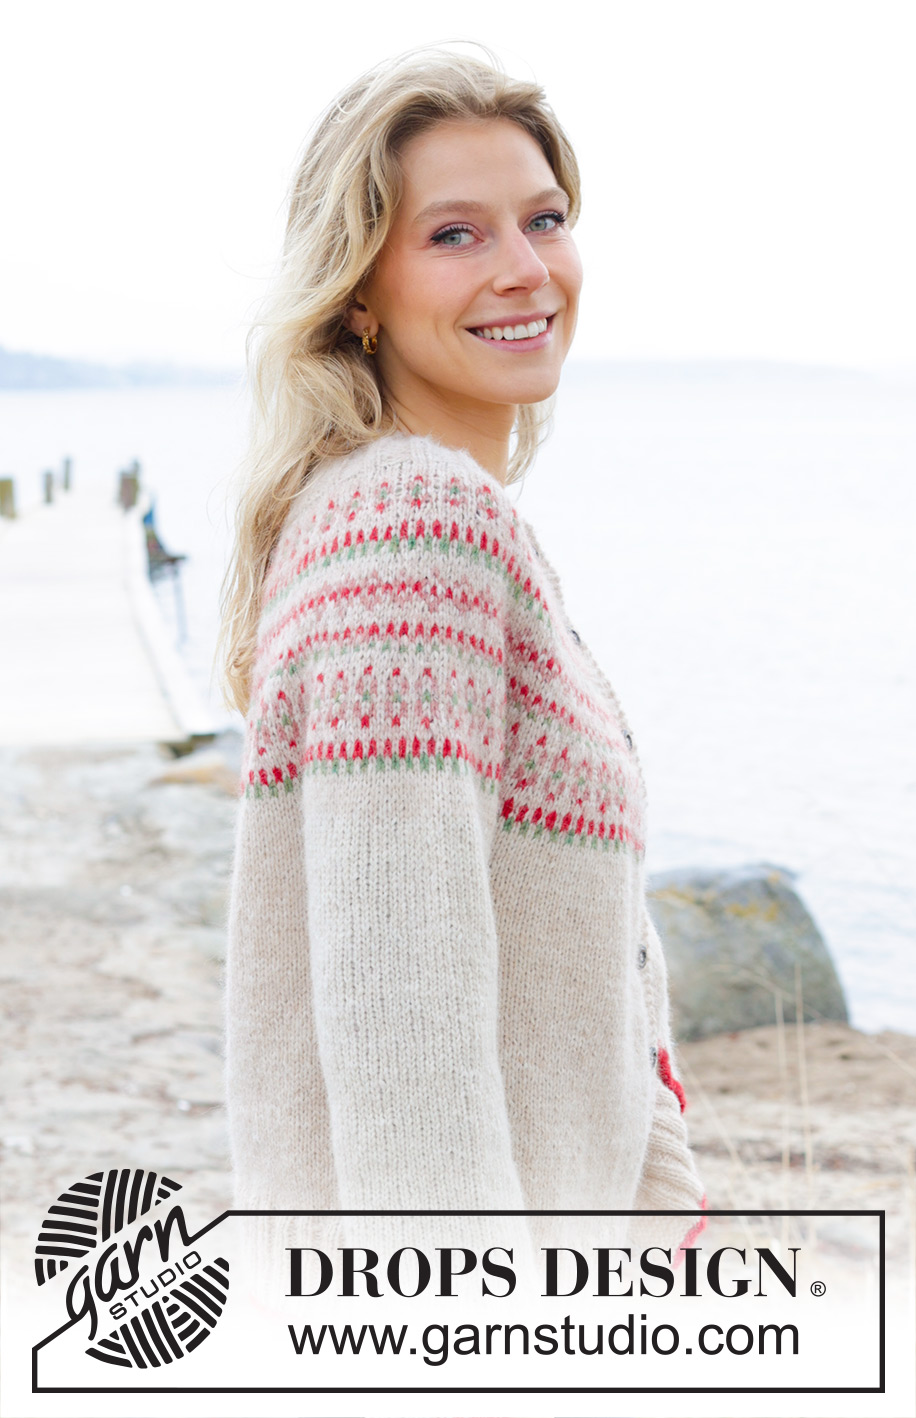
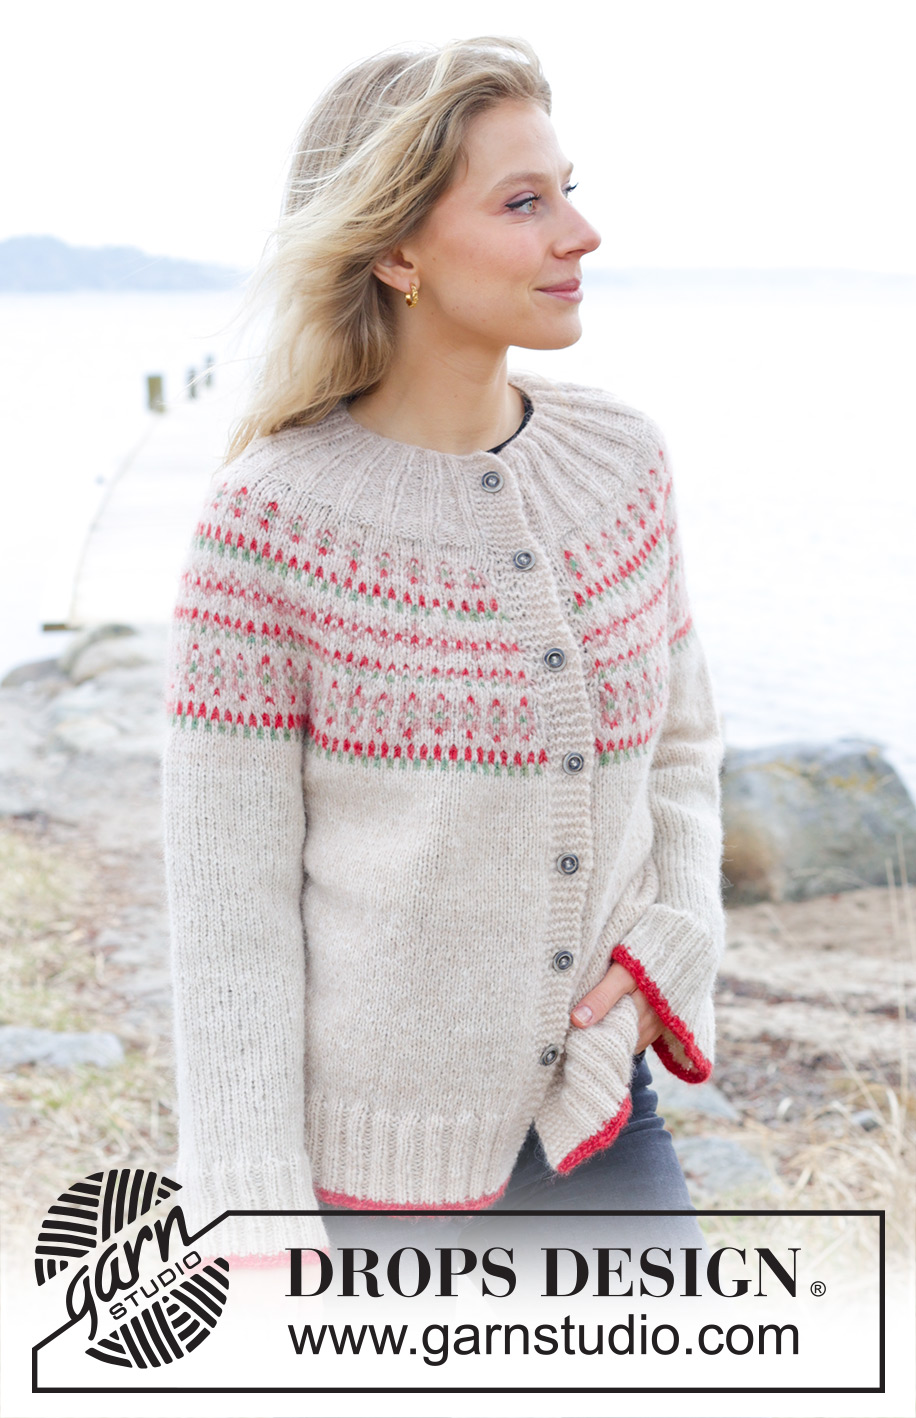
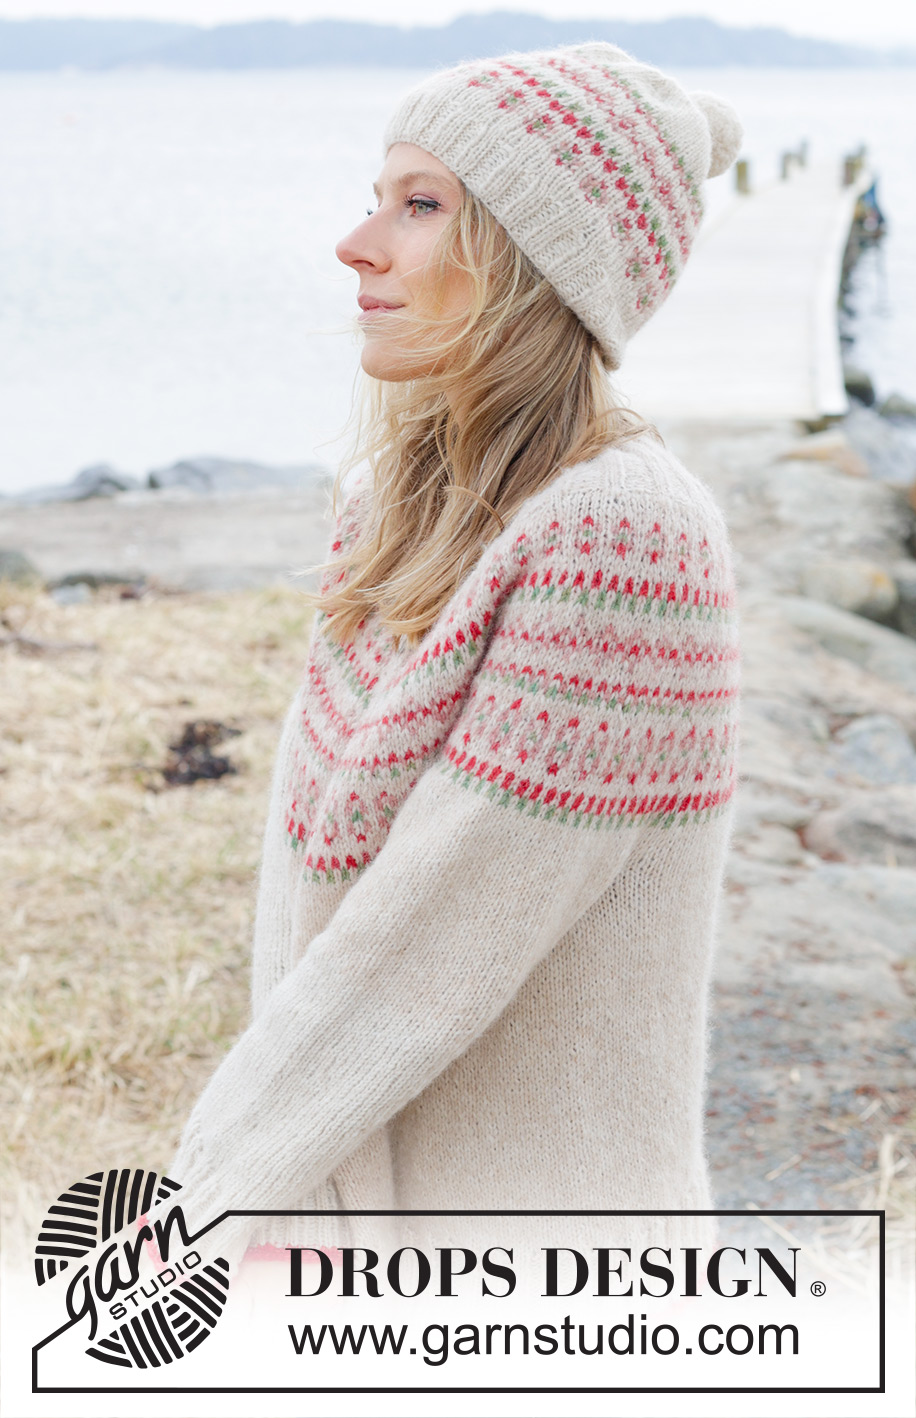
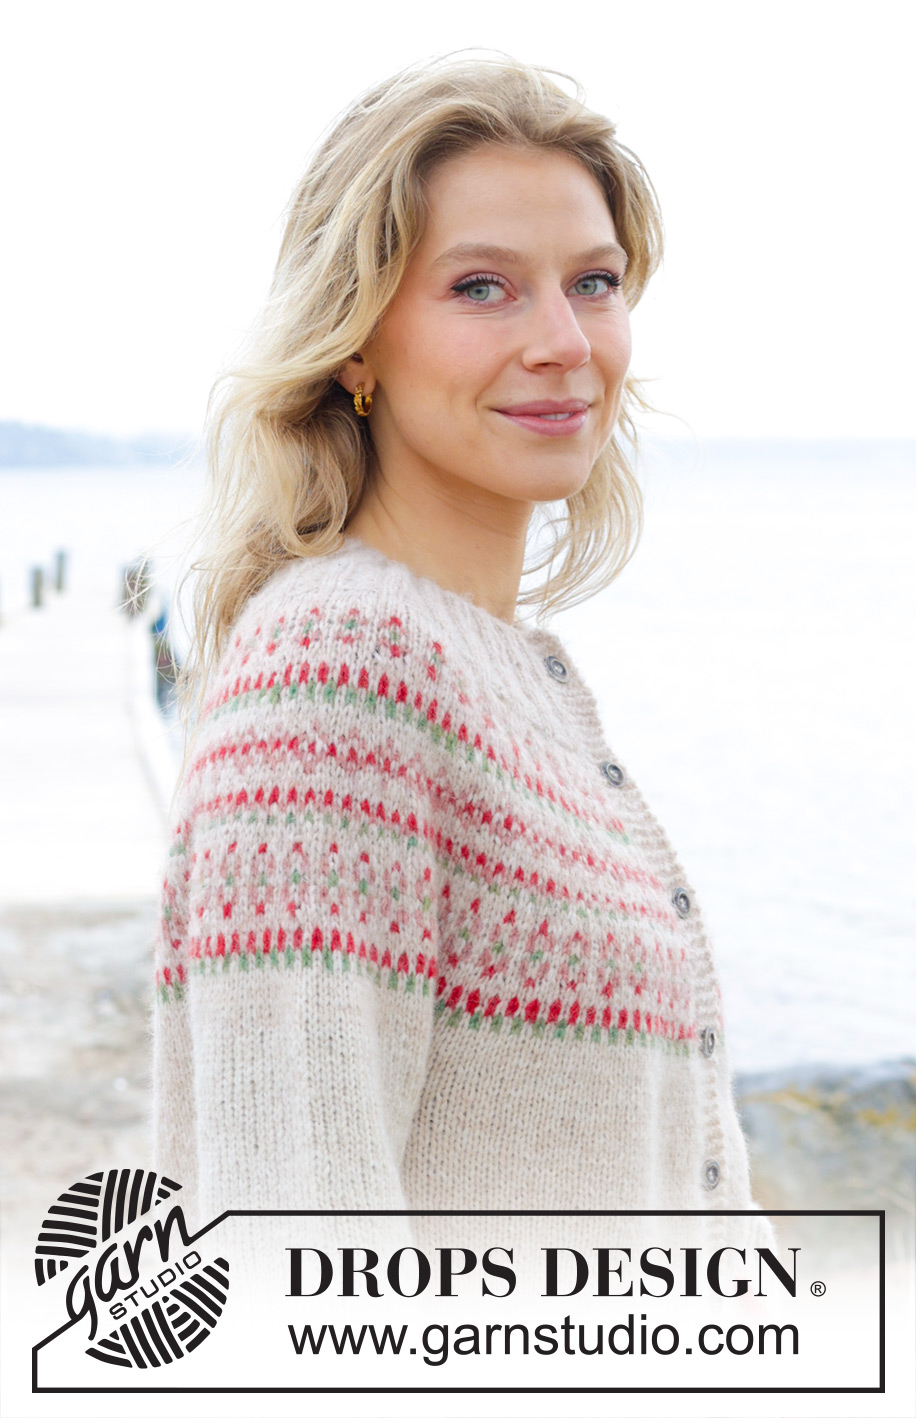
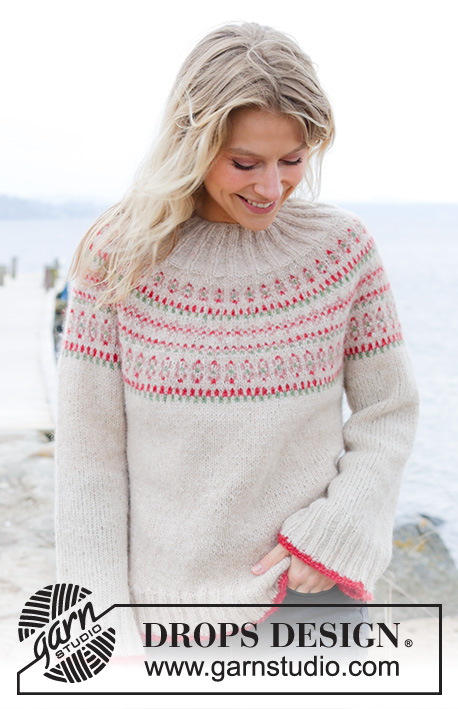
Something About Holly Cardigan#somethingabouthollycardigan |
|||||||||||||
 |
 |
||||||||||||
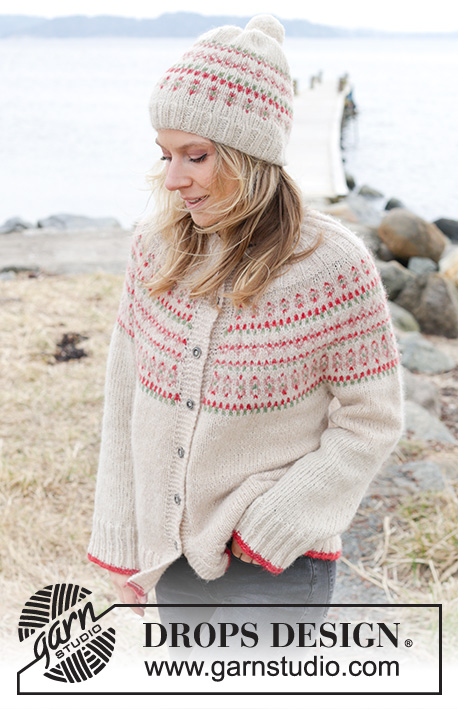
Knitted jacket in DROPS Air. The piece is worked top down with round yoke and multi-coloured pattern. Size S - XXXL.
DROPS 245-18 |
|||||||||||||
|
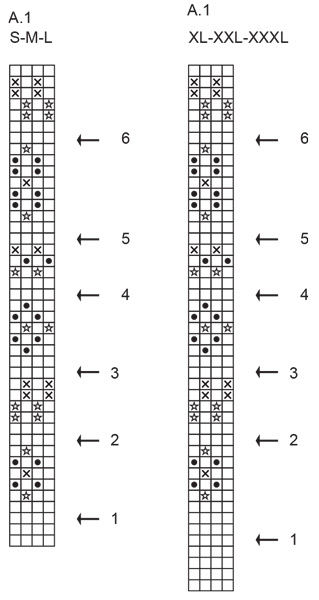
------------------------------------------------------- EXPLANATIONS FOR THE PATTERN: ------------------------------------------------------- GARTER STITCH (worked back and forth): Knit all rows. 1 ridge = knit 2 rows. PATTERN: See diagram A.1. Choose diagram for your size. The whole pattern is worked in stocking stitch. BUTTONHOLES: Work buttonholes on the right band (when the garment is worn). Work until there are 3 stitches left on the row as follows: Make 1 yarn over, knit 2 together and knit 1. On the next row knit the yarn over to leave a hole. The first buttonhole is worked when the piece measures 2 cm. Then work the other 6-6-6-7-7-7 buttonholes with approx. 8-8-9-8-8-8 cm between each one. INCREASE TIP (evenly spaced): To work out how to increase evenly, count the total number of stitches on the needle (e.g.,148 stitches) minus the bands (e.g., 14 stitches) and divide the remaining stitches by the number of increases to be made (e.g., 15) = 8.9. In this example, increase by making 1 yarn over after approx. each 9th stitch. Do not increase over the bands. On the next row work the yarn overs twisted to avoid holes. DECREASE TIP (for sleeves): Decrease 1 stitch on each side of the marker-thread as follows: Work until there are 3 stitches left before the marker-thread, knit 2 together, knit 2 (marker-thread sits between these 2 stitches), slip 1 stitch knit-wise, knit 1 and pass the slipped stitch over the knitted stitch. ------------------------------------------------------- START THE PIECE HERE: ------------------------------------------------------- JACKET – SHORT OVERVIEW OF THE PIECE. The neck and yoke are worked back and forth with circular needle, from mid front and top down. The yoke is divided for body and sleeves and the body continued back and forth with circular needle. The sleeves are worked in the round with double pointed needles/short circular needle, top down. NECK: Cast on 104-112-112-116-120-124 stitches with circular needle size 4 mm and colour wheat DROPS Air. Purl 1 row = wrong side. Work as follows from the right side: 7 band stitches in GARTER STITCH – read description above, * knit 2, purl 2 *, work from *-* until there are 9 stitches left, knit 2 and 7 band stitches in garter stitch. Work this rib for 3 cm. Work the first BUTTONHOLE on the right band – read description above. Insert 1 marker at the beginning of the row; the yoke is measured from this marker! On the next row from the right side increase by making 1 yarn over at the beginning of each purled section = 126-136-136-141-146-151 stitches. On the next row (= wrong side) knit the yarn overs twisted, working the other stitches as before. Continue the new rib (= knit 2, purl 3), working the band stitches as before. When the piece measures 2½ cm from the marker and the next row is from the right side, increase by making 1 yarn over at the end of all purled sections = 148-160-160-166-172-178 stitches. On the next row (= wrong side) knit the yarn overs twisted, working the other stitches as before. Continue the new rib (= knit 2, purl 4), working the band stitches as before, until the piece measures 5-5-5-6-6-6 cm from the marker. Finish after a row from the wrong side. The rib measures 8-8-8-9-9-9 cm from the cast-on edge. YOKE: Change to circular needle size 5 mm. Work as follows from the right side: 7 band stitches in garter stitch, work A.1 until there are 8 stitches left, work the first stitch in A.1 (so the pattern is symmetrical), 7 band stitches in garter stitch. REMEMBER THE KNITTING TENSION! Continue this pattern. On each row in the diagram with an arrow increase as follows: ARROW-1: Increase 15-15-19-25-27-29 stitches evenly spaced = 163-175-179-191-199-207 stitches. ARROW-2: Increase 16-16-20-24-24-28 stitches evenly spaced = 179-191-199-215-223-235 stitches. ARROW-3: Increase 16-20-20-24-24-28 stitches evenly spaced = 195-211-219-239-247-263 stitches. ARROW-4: Increase 16-20-20-24-28-28 stitches evenly spaced = 211-231-239-263-275-291 stitches. ARROW-5: Increase 20-20-24-24-28-28 stitches evenly spaced = 231-251-263-287-303-319 stitches. ARROW-6: Increase 20-20-24-24-28-28 stitches evenly spaced = 251-271-287-311-331-347 stitches. When A.1 is finished, knit 1 row from the right side with colour wheat and increase 19-19-23-27-27-31 stitches evenly spaced = 270-290-310-338-358-378 stitches. Continue with stocking stitch, 7 band stitches in garter stitch on each side and with colour wheat. When the yoke measures 25-26-28-30-32-34 cm from the marker, divide for the body and sleeves as follows: Work 45-48-51-55-59-63 stitches (front piece), place the next 52-56-60-66-68-70 stitches on 1 thread for the sleeve, cast on 6-6-8-8-10-12 stitches (in side under sleeve), work 76-82-88-96-104-112 stitches (back piece), place the next 52-56-60-66-68-70 stitches on 1 thread for the sleeve, cast on 6-6-8-8-10-12 stitches (in side under sleeve), work the last 45-48-51-55-59-63 stitches (front piece). The body and sleeves are finished separately. THE PIECE IS NOW MEASURED FROM HERE! BODY: = 178-190-206-222-242-262 stitches. Continue with stocking stitch and 7 band stitches in garter stitch on each side until the piece measures 21-22-22-22-22-22 cm from the division. There is approx. 8 cm left to finished length. Knit 1 row from the right side and increase 34-34-38-42-46-50 stitches evenly spaced – remember INCREASE TIP = 212-224-244-264-288-312 stitches. Change to circular needle size 4 mm and work as follows from the wrong side: 7 band stitches in garter stitch, * purl 2, knit 2 *, work from *-* until there are 9 stitches left, purl 2 and 7 band stitches in garter stitch. Continue this rib for 7 cm. Work 2 rows with colour crimson red, cast off a little loosely from the right side. The jacket measures approx. 58-60-62-64-66-68 cm from the shoulder. SLEEVES: Place the 52-56-60-66-68-70 stitches from the thread on the one side of the piece on short circular needle/double pointed needles size 5 mm and knit up 1 stitch in each of the new stitches cast on under the sleeve = 58-62-68-74-78-82 stitches. Insert a marker-thread in the middle of the new stitches under the sleeve. Allow the thread to follow your work onwards; it is used when decreasing under the sleeve. Start at the marker-thread and work stocking stitch in the round with colour wheat. When the sleeve measures 3 cm, decrease 2 stitches under the sleeve – read DECREASE TIP. Decrease like this every 8-6-4-2½-2-2 cm a total of 4-5-7-10-10-11 times = 50-52-54-54-58-60 stitches. Continue working until the sleeve measures 32-31-30-28-27-25 cm from the division (or to desired length. There is approx. 8 cm left). Knit 1 round and increase 10-8-10-10-10-8 stitches evenly spaced = 60-60-64-64-68-68 stitches. Change to double pointed needles size 4 mm and work rib (knit 2, purl 2) for 7 cm. Work 2 rounds with colour crimson red. Cast off a little loosely. The sleeve measures approx. 40-39-38-36-35-33 cm from the division. Work the other sleeve in the same way. ASSEMBLY: Sew the buttons onto the left band. |
|||||||||||||
Diagram explanations |
|||||||||||||
|
|||||||||||||
 |
|||||||||||||
 |
|||||||||||||
Have you finished this pattern?Tag your pictures with #dropspattern #somethingabouthollycardigan or submit them to the #dropsfan gallery. Do you need help with this pattern?You'll find 29 tutorial videos, a Comments/Questions area and more by visiting the pattern on garnstudio.com. © 1982-2026 DROPS Design A/S. We reserve all rights. This document, including all its sub-sections, has copyrights. Read more about what you can do with our patterns at the bottom of each pattern on our site. |
|||||||||||||


With over 40 years in knitting and crochet design, DROPS Design offers one of the most extensive collections of free patterns on the internet - translated to 17 languages. As of today we count 324 catalogues and 12290 patterns translated into English (UK/cm). 12290
We work hard to bring you the best knitting and crochet have to offer, inspiration and advice as well as great quality yarns at incredible prices! Would you like to use our patterns for other than personal use? You can read what you are allowed to do in the Copyright text at the bottom of all our patterns. Happy crafting!
Post a comment to pattern DROPS 245-18
We would love to hear what you have to say about this pattern!
If you want to leave a question, please make sure you select the correct category in the form below, to speed up the answering process. Required fields are marked *.