
Popular categories
Looking for a yarn?


Comments / Questions (36)
![]() Dagmar wrote:
Dagmar wrote:
I ordered Drops Safran yarn for Walking on Air women top. When I started knitting I noticed how the mercerized? cotton didn't hold "shape" and turned out way too loose and big. The knitting looked flappy and even when I went down to 2.5 and 3 mm, it still didn't work. In addition I tried to knit very tight, but nothing helped. It is a very nice yarn, but I think I have to use a less silky one. Any help what's wrong with my knitting?
14.03.2026 - 01:21DROPS Design answered:
Dear Dagmar, this pattern uses a quite regular tension for Safran (which is not mercerized, read more in its shadecard - maybe you can ask your store for any guidance they might have advices for you they will share even per mail or telephone. Happy knitting!
16.03.2026 - 11:17
![]() Anaïs wrote:
Anaïs wrote:
Bonjour, je ne comprend pas comment faire 7 diminutions sur le point de riz. Si je fais une double diminution en tricotant 3 mailles ensemble (donc 3 fois double diminution, ce qui fait 6 diminutions), il me restera 1 diminution à faire. Où mettre cette diminution ? Existe-t-il un autre moyen de faire des belles diminutions sur le point de riz? Merci pour votre réponse.
18.08.2025 - 17:35DROPS Design answered:
Bonjour Anaïs, vous devez diminuer ces 7 mailles au 1er rang de A.1, juste après les côtes, autrement dit, vous pouvez diminuer simplement par 2 m ens à l'endroit à intervalles réguliers (aidez-vous de la calculatrice si besoin); le 1er rang de A.1 se tricote à l'endroit sur l'endroit. Sauf si j'ai mal compris votre question ou bien où vous en êtes exactement, dans ce cas, n'hésitez pas à préciser, merci d'avance. Bon tricot!
19.08.2025 - 10:11
![]() Maj Henriksson wrote:
Maj Henriksson wrote:
Jag måste få hjälp med mönster Walking om Air Top. Förstår inte när jag ska börja med vä. framstycke. Behöver få videobeskrivning. Mycket svår beskrivet mönster !
21.06.2025 - 12:59
![]() Sarah wrote:
Sarah wrote:
Hello, I am at currently at the point where I have finished A.2 on the front piece and the instructions now say to divide the piece in the middle of the row. My question is, how do you divide the row? Do you do one more row of 4 outer stitches/middle 6 stitches in moss stitch (with the rest in stockinette) and split the work in this row? Do you just do a row of stockinette? Thank you!
08.06.2025 - 22:51DROPS Design answered:
Hi Sarah, You divide the row and begin working the left front piece at the same time: Cast off the first stitches for the armhole, work 3 moss stitches, stocking stitch for the correct number of stitches for your size and 3 moss stitches. Then continue with stocking stitch and 3 moss stitches on each side at the same time as decreasing for the armhole and V-neck as described in the text. Regards, Drops Team.
09.06.2025 - 06:12
![]() Charlotte wrote:
Charlotte wrote:
Hallo! Wenn ich das linke Vorderteil fertig gestrickt habe, wie verbinde ich das rechte Vorderteil mit dem Garn um da weiterzustricken? Danke!
01.05.2025 - 17:44DROPS Design answered:
Liebe Charlotte, wenn das linke Vorderteil fertig ist, schneiden Sie den Faden ab und stricken Sie das rechte Vorderteil, das mit einer Rückreihe wie beschrieben beginnt. Viel Spaß beim Stricken!
02.05.2025 - 08:29
![]() Cinzia wrote:
Cinzia wrote:
Buongiorno, non mi trovo con le misure. Sto facendo la taglia M che dovrebbe misurare sotto 42 cm. invece me ne ritrovo 39 che è la taglia S ! Eppure non sto lavorando stretto secondo me. Devo seguire la taglia L e poi adattare le altre misure tipo giro petto, lunghezza ecc.?
18.04.2025 - 13:06DROPS Design answered:
Buongiorno Cinzia, il suo campione corrisponde a quello indicato? Buon lavoro!
19.04.2025 - 14:41
![]() Cinzia wrote:
Cinzia wrote:
Buongiorno, ho fatto il campione ma a me viene giusta solo la larghezza, cioè mi viene 24 maglie in 10 cm. Invece in lunghezza ho 34 ferri in 9 cm. Com'e possibile? Non vorrei cambiare il numero dei ferri sennò mi cambiano le spiegazioni per la taglia M . Grazie per la risposta
15.04.2025 - 19:02DROPS Design answered:
Buonasera Cinzia, deve usare il numero di ferri che le permette di ottenere il campione indicato, poi nel modello userà quelli. Buon lavoro!
19.04.2025 - 14:50
![]() Cleide wrote:
Cleide wrote:
Bom dia! É possível relacionar os tamanhos (S,M...) com o tamanho do busto? Como posso saber para qual corpo se refere o tamanho M, por exemplo? Não sei se me expressei claramente. Aguardo resposta. Muito obrigada.
12.04.2025 - 16:33
![]() Mynahcharlie wrote:
Mynahcharlie wrote:
Please explain why I must mark the shoulder but then knit another 5cm. Is it because the join to the back will then not be on top of shoulder but further back?
07.03.2025 - 15:41DROPS Design answered:
Dear Mynahcharlie, correct, the straps are then sewn onto back piece, this means these 5 (or 6 cm) extra worked after marker will come on back piece. Happy knitting!
07.03.2025 - 15:47
![]() Maguy wrote:
Maguy wrote:
Bonjour, j'aimerai savoir si le dos à le même col en V que le devant ou s'il est droit jusqu'en haut? Pouvez vous me donner des précisions. Merci. Cordialement.
28.08.2024 - 05:06DROPS Design answered:
Bonjour Maguy, dans ce modèle, le haut du dos est droit (après diminutions pour les emmanchures de chaque côté). Bon tricot!
29.08.2024 - 09:15
|
||||||||||||||||
Walking on Air Top#walkingonairtop |
||||||||||||||||
 |
 |
|||||||||||||||
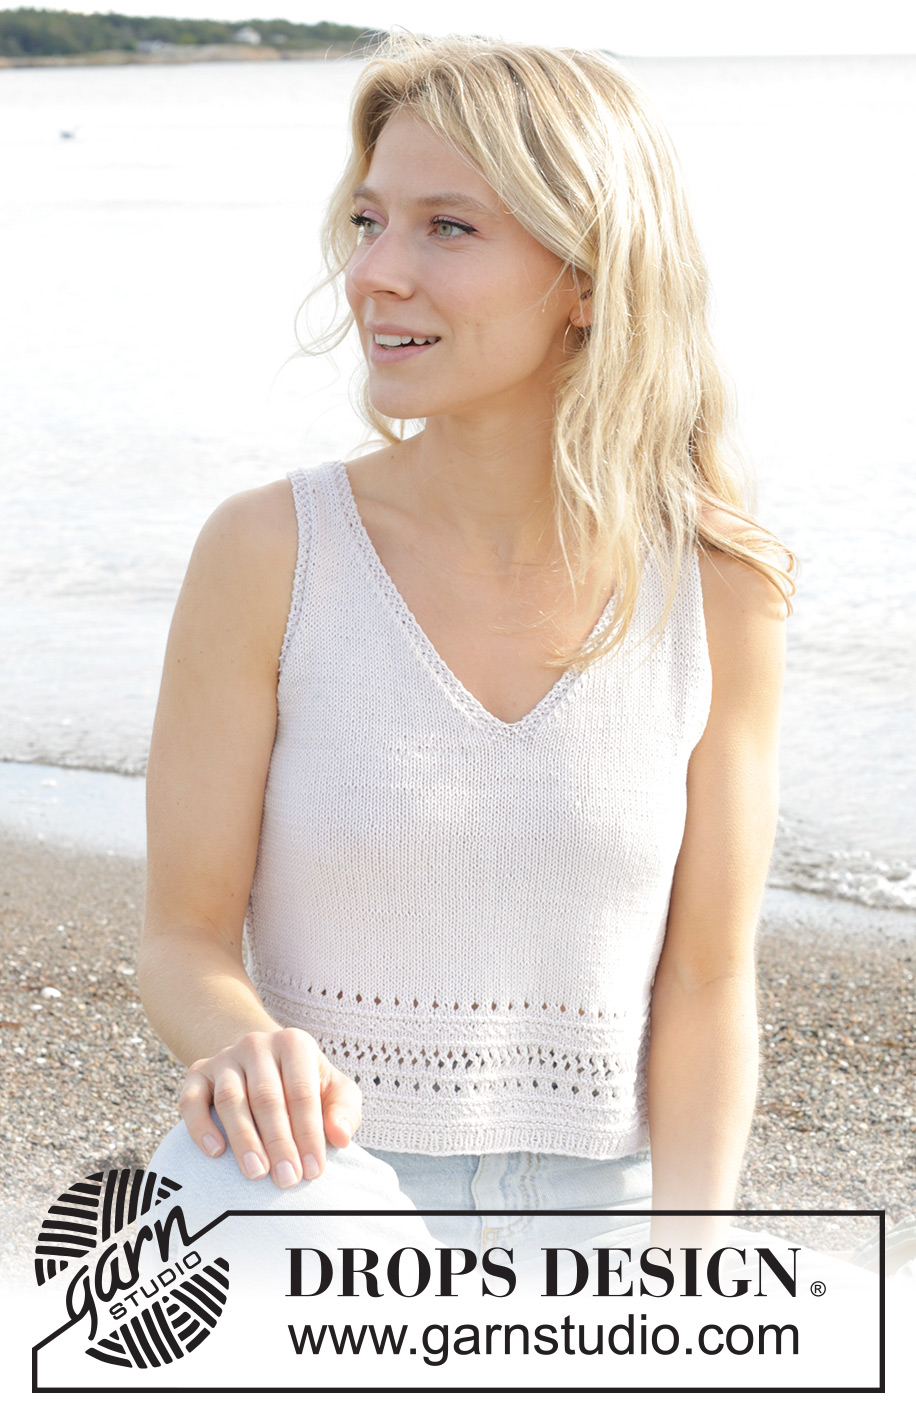
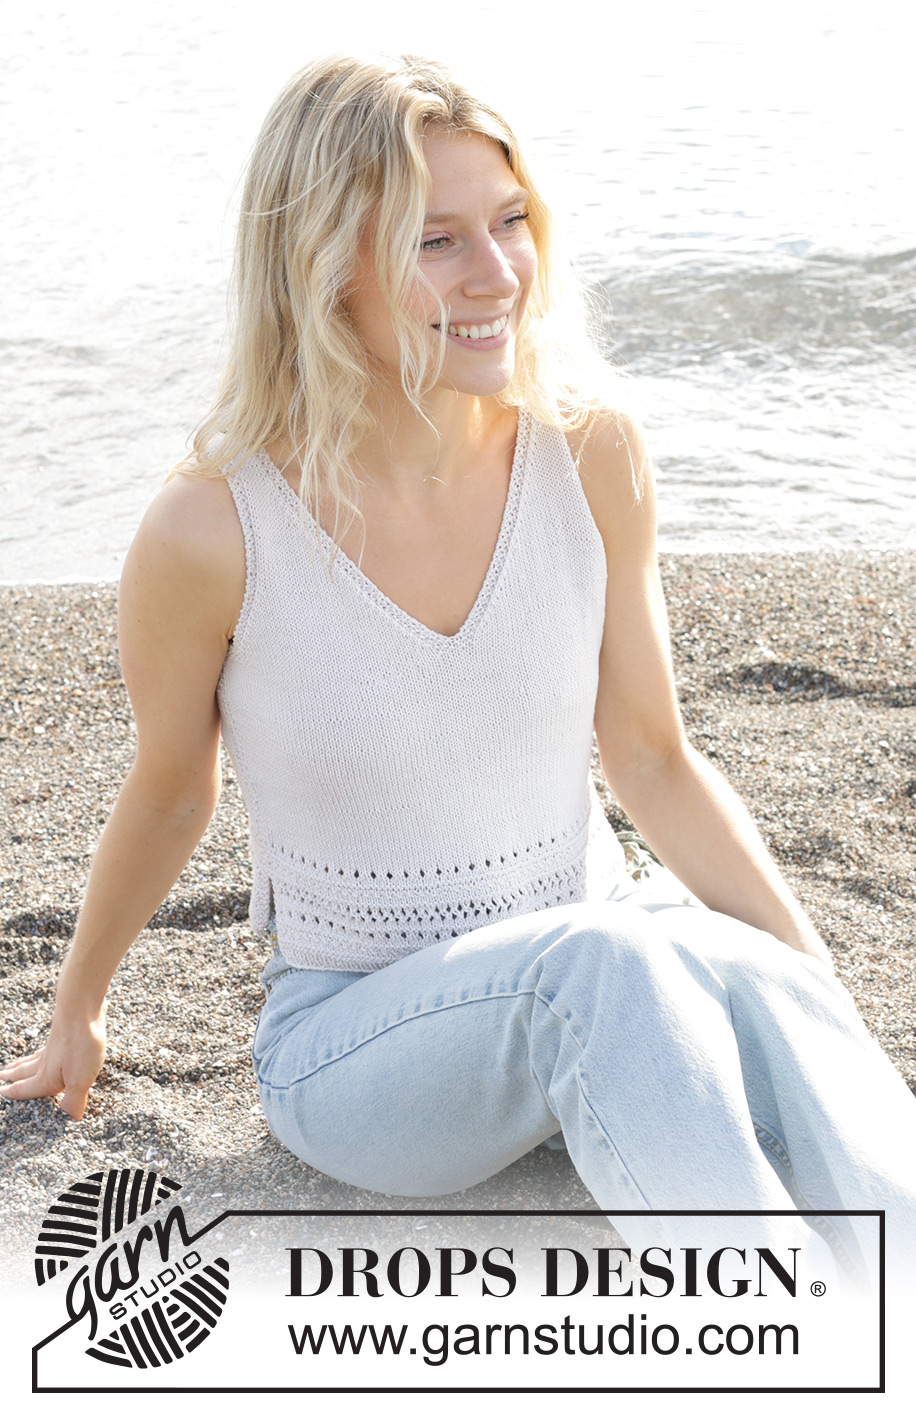
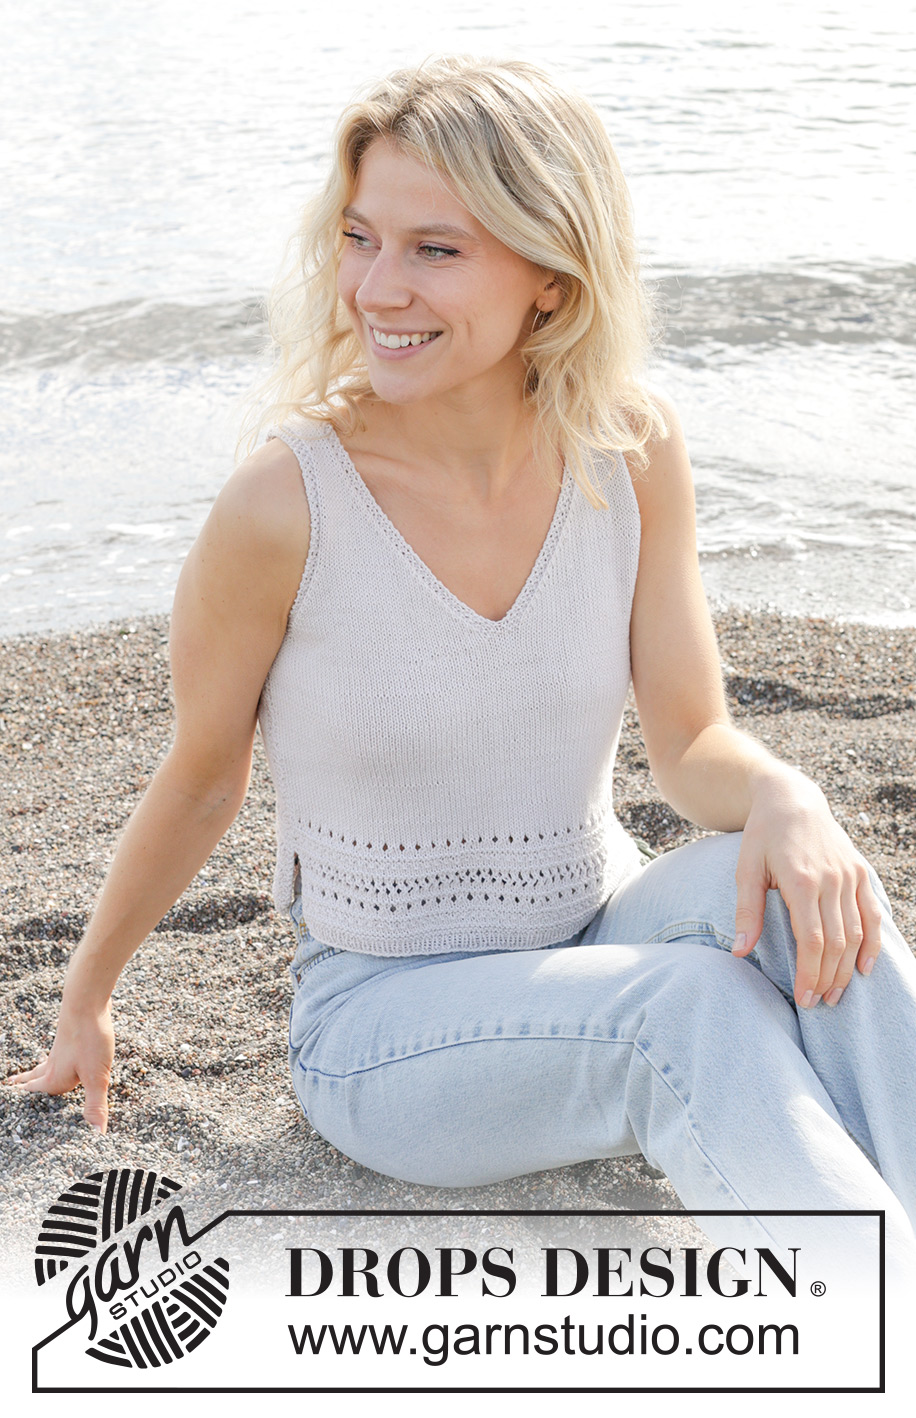
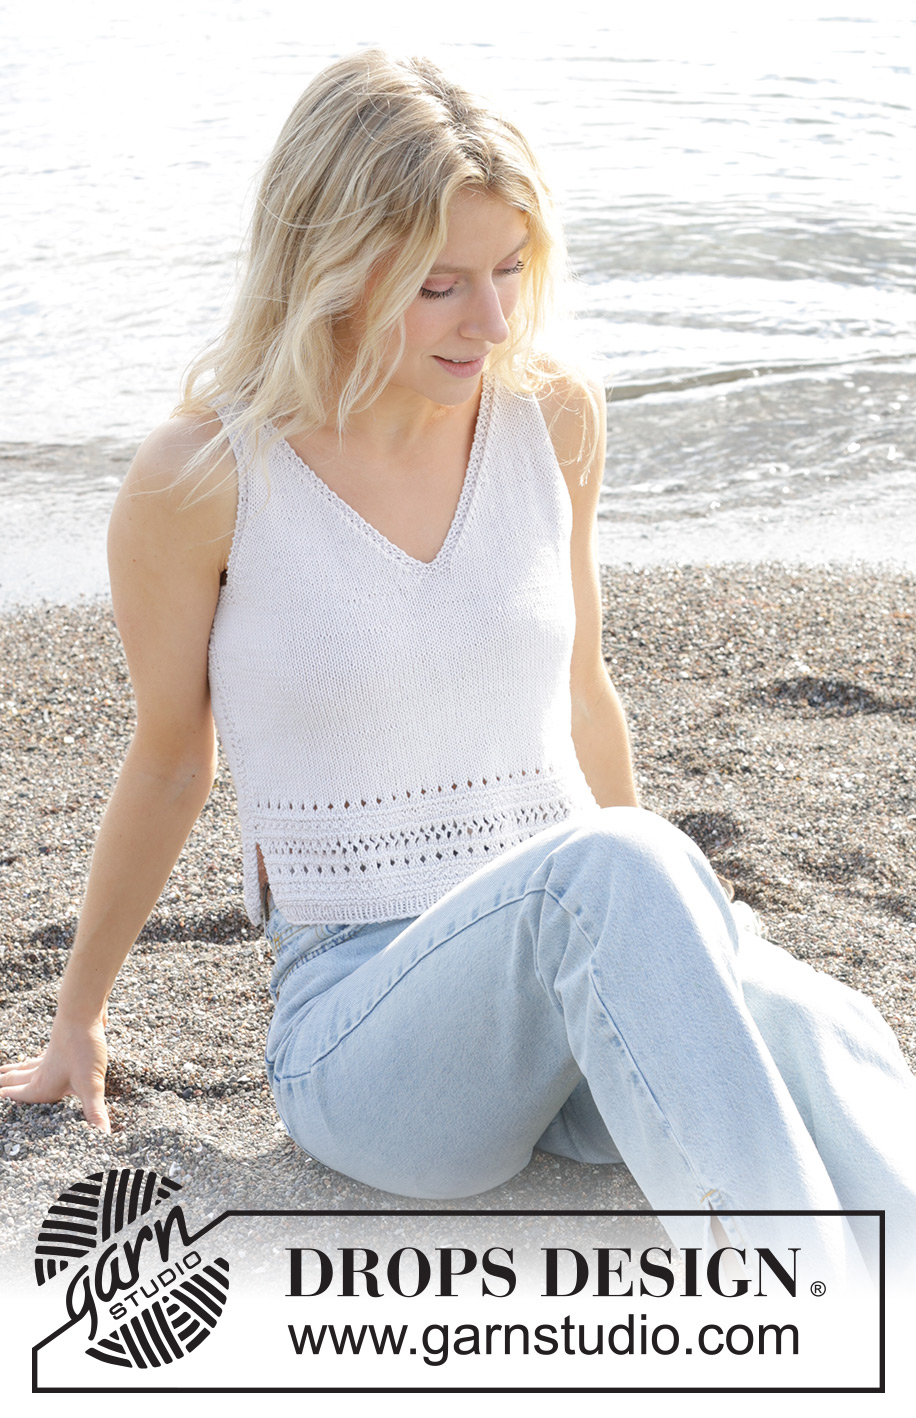
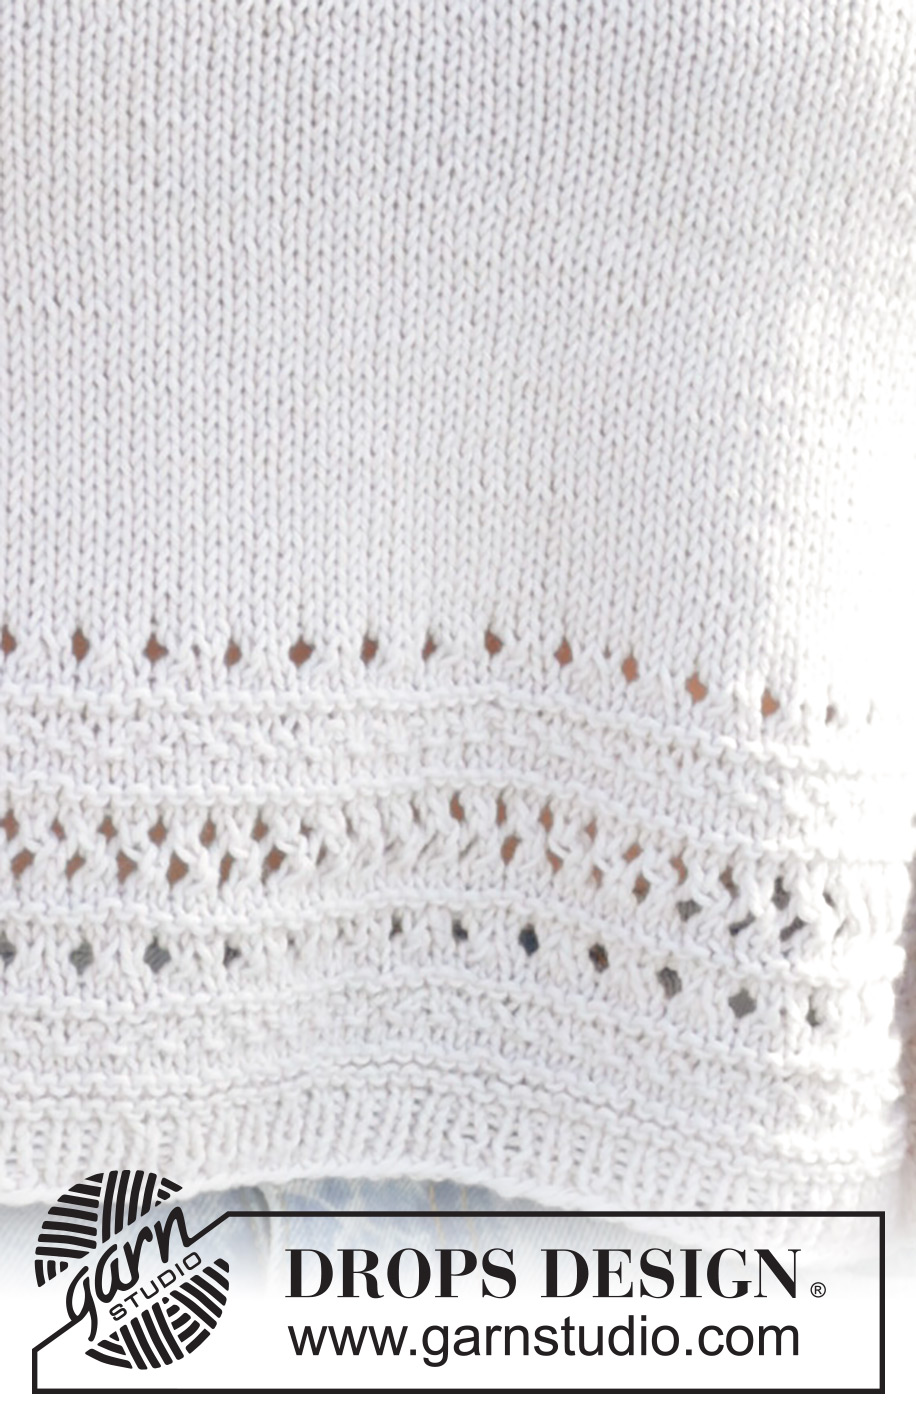
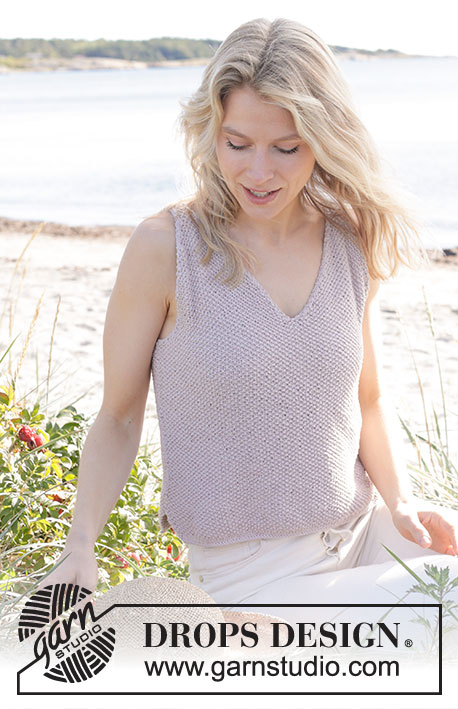
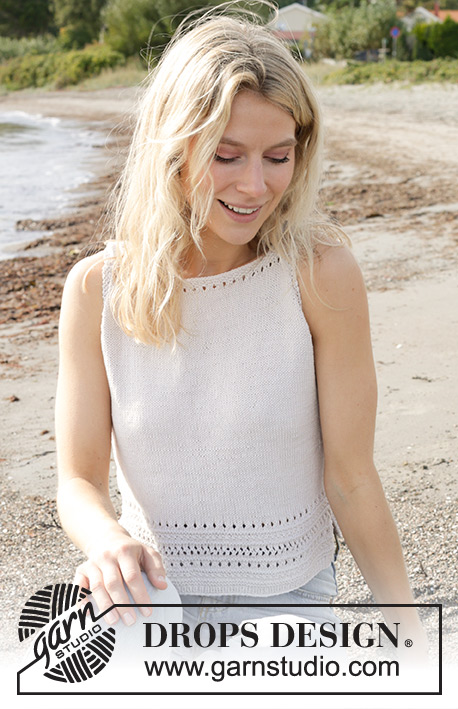
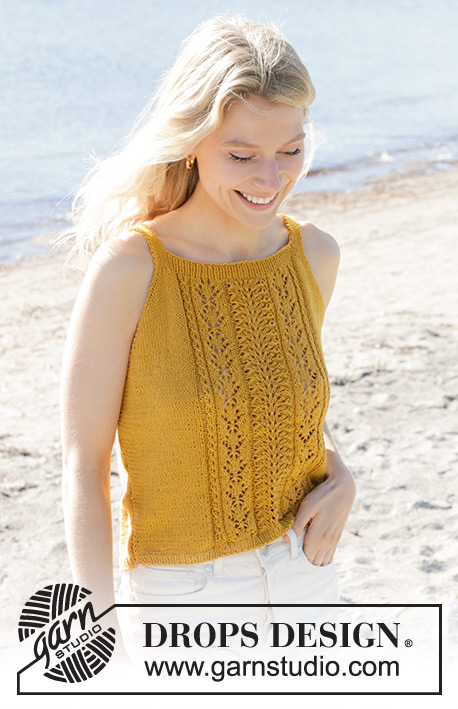
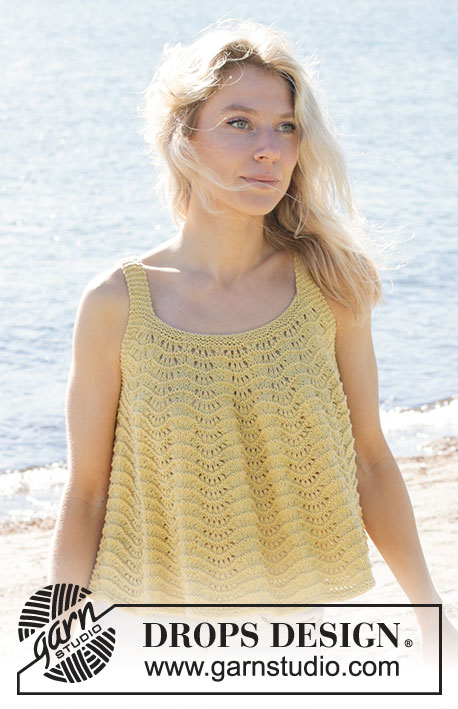
Knitted top top/singlet in DROPS Safran. Piece is knitted bottom up with lace pattern and stocking stitch with V-neck. Size: S - XXXL
DROPS 241-20 |
||||||||||||||||
|
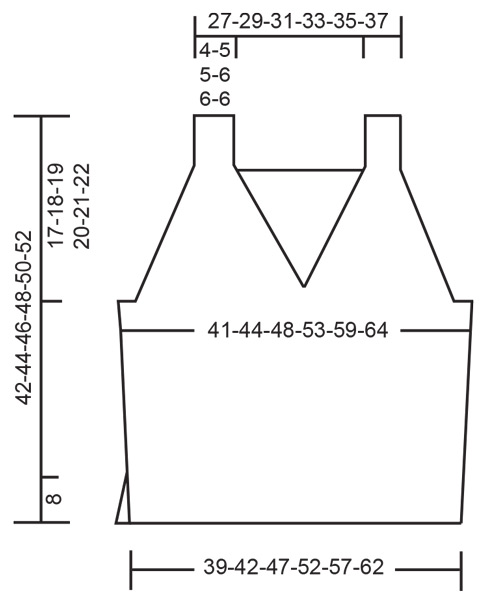
---------------------------------------------------------- EXPLANATION FOR THE PATTERN: ---------------------------------------------------------- GARTER STITCH (back and forth): Knit all rows. 1 ridge vertically = knit 2 rows. PATTERN: See diagrams A.1 and A.2. Diagrams show all rows in pattern seen from the right side. INCREASE TIP (applies in the sides on front and back piece): All increases are done from right side. Increase 1 stitch inside the outermost 4 stitches from the side by making 1 yarn over. On next row purl yarn over twisted to avoid hole. Then work the new stitches in stocking stitch. DECREASE TIP (applies to armholes and V-neck): All increases are done from right side. DECREASE AS FOLLOWS AFTER 3 STITCHES IN MOSS STITCH: Knit 2 together. DECREASE AS FOLLOWS BEFORE 3 STITCHES IN MOSS STITCH: Work until 5 stitches remain on row, slip 1 stitch knitwise, knit 1, pass slipped stitch over stitch worked (1 stitch decreased). ---------------------------------------------------------- START THE PIECE HERE: ---------------------------------------------------------- TOP - SHORT OVERVIEW OF THE PIECE: Work front piece and back piece back and forth on single pointed needle separately, bottom up. Work strap on front piece and sew to back piece. Sew the side seams. FRONT PIECE: Cast on 101-109-123-135-149-161 stitches on single pointed needles size 3 mm with DROPS Safran. Purl 1 row from wrong side. Then work 4 rows rib (knit 1/purl 1) with 2 stitches in GARTER STITCH in each side - read explanation above Switch to single pointed needle size 3.5 mm. Work next row as follows from right side: 2 stitches in garter stitch, A.1 until 2 stitches remain on needle and decrease at the same time 7-9-11-11-13-13 stitches evenly on first row, finish with 2 stitches in garter stitch = 94-100-112-124-136-148 stitches. Continue pattern like this. REMEMBER THE KNITTING TENSION! When A.1 has been worked, work in stocking with 2 stitches in garter stitch in each side. When piece measures 11 cm, increase 1 stitch in each side - read INCREASE TIP. Increase like this every 5 cm 2-3-2-2-3-3 times in total = 98-106-116-128-142-154 stitches. When piece measures 24-25-26-27-28-29 cm, work 4 rows in moss stitch (A.2) over the outermost 11-11-13-13-15-17 stitches in each side and over the middle 6 stitches on needle (work the other stitches as before). After the 4 rows in moss stitch (A.2) divide the piece in the middle of row, and finish each part separately. Begin to work first half seen from right side as explained below. LEFT FRONT PIECE: = 49-53-58-64-71-77 stitches. Cast off the first 8-8-10-10-12-14 stitches on needle for armhole, work 3 stitches in moss stitch, work 35-39-42-48-53-57 stitches in stocking stitch, finish with 3 stitches in moss stitch = 41-45-48-54-59-63 stitches. Work in stocking stitch back and forth with 3 stitches in moss stitch in each side. AT THE SAME TIME on next row from right side, decrease for armholes and V-neck as explained below. Read therefore section ARMHOLE and V-NECK before continuing. ARMHOLES: On first row from right side, decrease 1 stitch for armhole after 3 edge stitches in moss stitches - read DECREASE TIP. Decrease like this every other row (every row from right side) 4-4-4-12-13-17 times in total, then every 4th row (every other row from right side) 5-6-7-3-4-2 times in total. V-NECK: On first row from right side, decrease 1 stitch for V-NECK before 3 edge stitches in moss stitch towards mid front - remember DECREASE TIP. Decrease like this every other row (every row from right side) 22-23-25-25-28-30 times in total. After all decreases for armholes and V-neck, 10-12-12-14-14-14 stitches remain on shoulder. Work in stocking stitch with 3 stitches in moss stitch in each side until piece measures 42-44-46-48-50-52 cm from cast-on edge. Insert 1 marker on row (marks shoulder). Work until piece measures approx. 5-5-5-6-6-6 cm from marker inserted on shoulder. Cast off. RIGHT FRONT PIECE: = 49-53-58-64-71-77 stitches. Begin from wrong side, cast off the first 8-8-10-10-12-14 stitches on needle for armhole, work 3 stitches in moss stitch, work 35-39-42-48-53-57 stitches in stocking stitch, finish with 3 stitches in moss stitch towards mid front = 41-45-48-54-59-63 stitches. Work in stocking stitch back and forth with 3 stitches in moss stitch in each side. AT THE SAME TIME on first row from right side, decrease for V-neck and armhole as explained below. Read therefore section ARMHOLE and V-NECK before continuing. ARMHOLES: On first row from right side, decrease 1 stitch for armhole before 3 edge stitches in moss stitch towards the side - remember DECREASE TIP. Decrease like this every other row (every row from right side) 4-4-4-12-13-17 times in total, then every 4th row (every other row from right side) 5-6-7-3-4-2 times in total. V-NECK: On first row from right side, decrease 1 stitch for V-NECK after 3 edge stitches in moss stitch towards mid front - remember DECREASE TIP. Decrease like this every other row (every row from right side) 22-23-25-25-28-30 times in total. After all decreases for armholes and V-neck, 10-12-12-14-14-14 stitches remain on shoulder. Work in stocking stitch with 3 stitches in moss stitch in each side until piece measures 42-44-46-48-50-52 cm from cast-on edge. Insert 1 marker on row (marks shoulder). Work until piece measures approx. 5-5-5-6-6-6 cm from marker inserted on shoulder. Cast off. BACK PIECE: Cast on 101-109-123-135-149-161 stitches on single pointed needle size 3 mm with DROPS Safran. Purl 1 row from wrong side. Then work 4 rows rib (knit 1/purl 1) with 2 stitches in GARTER STITCH in each side - read explanation above Switch to single pointed needle size 3.5 mm. Work next row as follows from right side: 2 stitches in garter stitch, A.1 until 2 stitches remain on needle and decrease at the same time 7-9-11-11-13-13 stitches evenly, finish with 2 stitches in garter stitch = 94-100-112-124-136-148 stitches. Continue pattern like this. REMEMBER THE KNITTING TENSION! When A.1 has been worked, work in stocking with 2 stitches in garter stitch in each side. When piece measures 11 cm, increase 1 stitch in each side - remember INCREASE TIP. Increase like this every 5 cm 2-3-2-2-3-3 times in total = 98-106-116-128-142-154 stitches. When piece measures 24-25-26-27-28-29 cm, work 4 rows in moss stitch over the outermost 11-11-13-13-15-17 stitches in each side (work the other stitches as before). After the 4 rows in moss stitch cast off 8-8-10-10-12-14 stitches for armholes at the beginning of the next 2 rows = 82-90-96-108-118-126 stitches. Work in stocking stitch with 3 stitches in moss stitch in each side. When 2 rows in stocking stitch have been worked after cast off for armholes, decrease 1 stitch for armholes in each side on next row from right side - remember DECREASE TIP. Decrease like this every other row (every row from right side) 4-4-4-12-13-17 times in total in each side, then every 4th row (every other row from right side) 5-6-7-3-4-2 times in total in each side = 64-70-74-78-84-88 stitches. Work in stocking stitch with 3 stitches in moss stitch in each side until piece measures 35-37-39-40-42-44 cm. Switch to single pointed needle size 3 mm. Work 4 rows in moss stitch back and forth over all stitches. Cast off knitting from right side. ASSEMBLY: Sew straps to back piece - at the edge in each side. Sew the side seams edge to edge in outer loops of edge stitches to get a flat seam - leave an opening of approx. 8 cm at bottom in each side for vents. |
||||||||||||||||
Diagram explanations |
||||||||||||||||
|
||||||||||||||||
 |
||||||||||||||||
 |
||||||||||||||||
Have you finished this pattern?Tag your pictures with #dropspattern #walkingonairtop or submit them to the #dropsfan gallery. Do you need help with this pattern?You'll find 23 tutorial videos, a Comments/Questions area and more by visiting the pattern on garnstudio.com. © 1982-2026 DROPS Design A/S. We reserve all rights. This document, including all its sub-sections, has copyrights. Read more about what you can do with our patterns at the bottom of each pattern on our site. |
||||||||||||||||


With over 40 years in knitting and crochet design, DROPS Design offers one of the most extensive collections of free patterns on the internet - translated to 17 languages. As of today we count 325 catalogues and 12298 patterns translated into English (UK/cm). 12298
We work hard to bring you the best knitting and crochet have to offer, inspiration and advice as well as great quality yarns at incredible prices! Would you like to use our patterns for other than personal use? You can read what you are allowed to do in the Copyright text at the bottom of all our patterns. Happy crafting!
Post a comment to pattern DROPS 241-20
We would love to hear what you have to say about this pattern!
If you want to leave a question, please make sure you select the correct category in the form below, to speed up the answering process. Required fields are marked *.