
Popular categories
Looking for a yarn?


Comments / Questions (128)
![]() Baseerat wrote:
Baseerat wrote:
Knit up 1 new stitch in each of the 6 new stitches on the body (= 50-54-57-59-68 stitches). Insert 1 marker thread in the middle of these 6 stitches. This is shown in the design of the sleeves what does is mean can any one explain it more.
08.02.2026 - 07:03DROPS Design answered:
Hi Baseerat, The marker-thread is inserted between the 3rd and 4th new stitch under the sleeve and will be used when decreasing under the sleeve later. Regards, Drops Team.
09.02.2026 - 06:57
![]() Yvonne Bickel wrote:
Yvonne Bickel wrote:
Habe Problem oder Frage wie strickt man den hintern Halsausschnitt
26.12.2025 - 22:09DROPS Design answered:
Liebe Frau Bickel, hier gibt es keine Erhöhung für den Halsausschnitt hinten, dh der Halsausschnitt ist gleich für beide Vorder- und Rückenteile. Wenn Sie aber eine Erhöhung möchten, dann kann Ihnen dieses Video helfen. Viel Spaß beim Stricken!
02.01.2026 - 12:36
![]() Baseerat wrote:
Baseerat wrote:
Can any one help me in sleeves part
20.12.2025 - 20:12DROPS Design answered:
Hi Mrs Baseerat, please specify your problem with the sleeves.
29.01.2026 - 15:50
![]() Pollet Valerie wrote:
Pollet Valerie wrote:
Pour l empiecement, je ne comprends pas comment passer de 89 mailles à 219 mailles (taille 3 ans ) Manque t il des explications ? Merci pour votre reponse
16.11.2025 - 06:31DROPS Design answered:
Bonjour Mme Pollet, vous allez tricoter les 89 m de l'empiècement ainsi: 5 m de bordure devant, vous tricotez la maille de A.1 puis vous répétez 13 fois les 6 mailles de .A2 et vous terminez par 5 m de bordure devant soit 5+1+(13x6)+5=89. Vous augmentez ensuite dans chaque A.2 comme le montre le diagramme (cf. 5ème symbole), et vous terminez ainsi par 16 m dans chaque A.2 soit: 5+1+(13x16)+5=219m. Bon tricot!
17.11.2025 - 08:08
![]() Rüegg-Funk Barbara wrote:
Rüegg-Funk Barbara wrote:
Wird beim Model Agnes A1 auch 13 mal wiederholt bei der Passe, wie A2?
30.07.2025 - 11:33DROPS Design answered:
Liebe Frau Rüegg-Funk, A.1 wird nur einmal gestrickt und zwar so stricken Sie das Muster (bei den Hin-Reihen): 5 Blenden-Maschen, 1 Mal die Masche A.1, dann wiederholen Sie 13 Mal die 6 Maschen A.2 und mit 5 Blenden-Maschen enden. Viel Spaß beim Stricken!
30.07.2025 - 16:29
![]() Miroslava Bartáková wrote:
Miroslava Bartáková wrote:
Prosím rubové strany podle schématu se pletou jak se jeví? Zkušební vzorek je 28 řad = 10cm ale schéma má 40 řádků to je 80 řad a mám plést do 15 cm tak mi to nevychází? děkuji za odpověď
30.07.2025 - 09:37DROPS Design answered:
Dobrý den, Miroslavo, ve schématu jsou zakresleny všechny řady vzoru, lícové i rubové. Vzor je zobrazen tak, jak vypadá na lícové straně, pro pletení rubových řad viz vysvětlivky k symbolům uvedené nad schématy. Každé schéma čteme zprava doleva a zdola nahoru. Hodně zdaru!
06.08.2025 - 05:47
![]() Laetitia wrote:
Laetitia wrote:
Please do you have a written pattern.
04.05.2025 - 12:21
![]() Lesley wrote:
Lesley wrote:
PLease can you help me with the A1 and A2 instructions - I have no idea what you are referring to Many thanks Lesley
26.04.2025 - 11:42DROPS Design answered:
Dear Lesley, A.1 and A.2 refer both to the diagrams you'll find at the bottom of the page. From the right side you first work A.1 then repeat A.2. From the wrong side, repeat A.2 reading from left towards right and finish with A.1. Read more about diagrams here. Happy knitting!
28.04.2025 - 09:31
![]() Kari Bølling Thorne wrote:
Kari Bølling Thorne wrote:
Strikker str 7/8. Skal A1 mønsteret, den ene masken strikkes gjennom hele omgangen, altså før A2, da 15 ganger? Forstår egentlig ikke hvorfor ikke denne ene masken er lagt inn i A2. Jeg har strikket de to første omgangene med økning/kast, men får ikke rapporten til å bli lik på hver side. Etter disse to omgangene med økninger, hvor mange masker skal det da være på pinnen?
03.04.2025 - 18:41DROPS Design answered:
Hej Kari, du starter med A.1 i den ene side og strikker kun A.1 der :)
08.04.2025 - 14:19
![]() Evi Schrödinger wrote:
Evi Schrödinger wrote:
Vielen Dank. Ich hab's jetzt kapiert. Hatte Probleme mit dem Lesen der Strickschrift. Alle weißen Kästchen müssen auf der Vorderseite rechts gestrickt sein!
01.04.2025 - 15:54
|
||||||||||||||||||||||
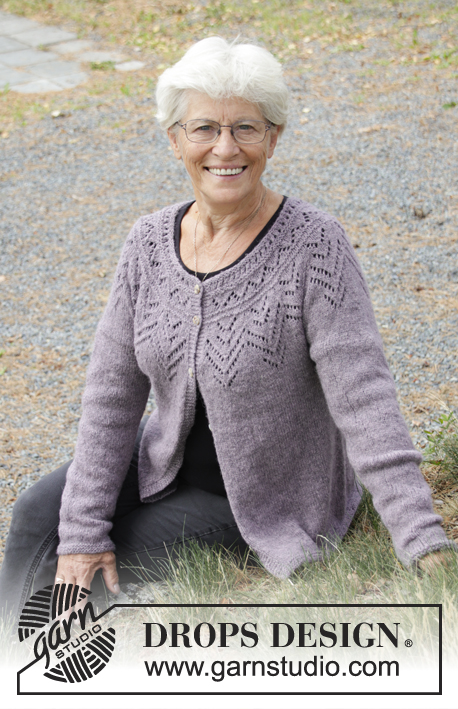
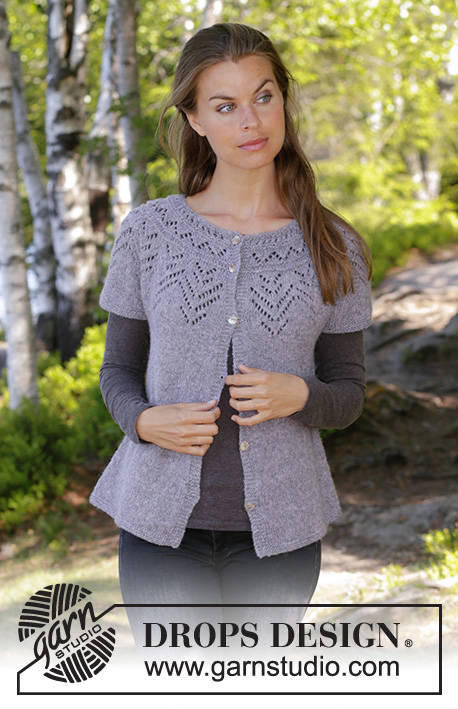
Agnes#agnescardigan |
||||||||||||||||||||||
 |
 |
|||||||||||||||||||||
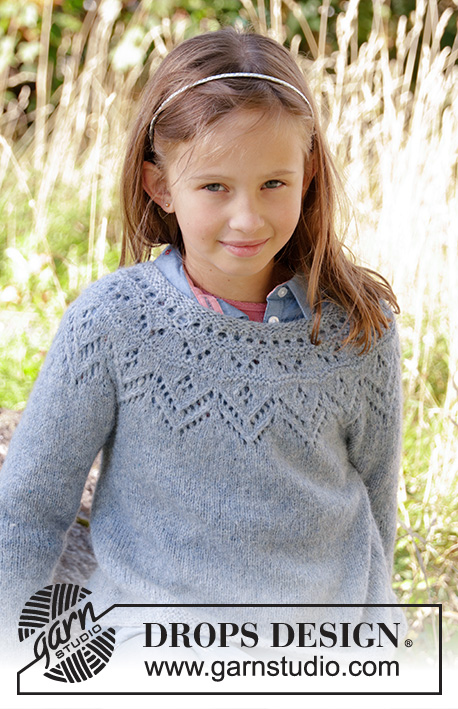
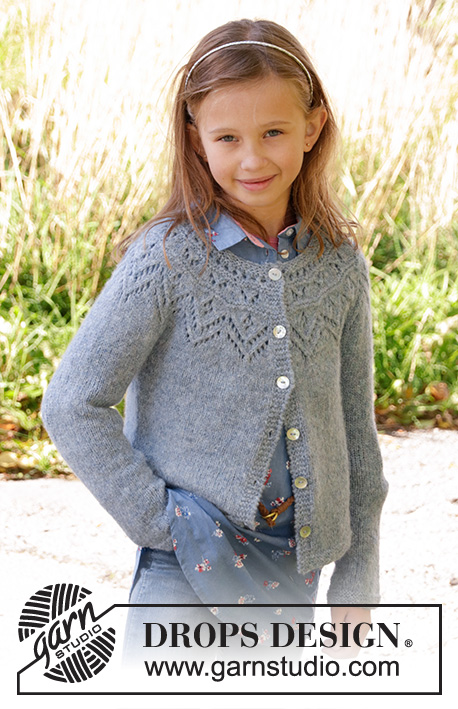
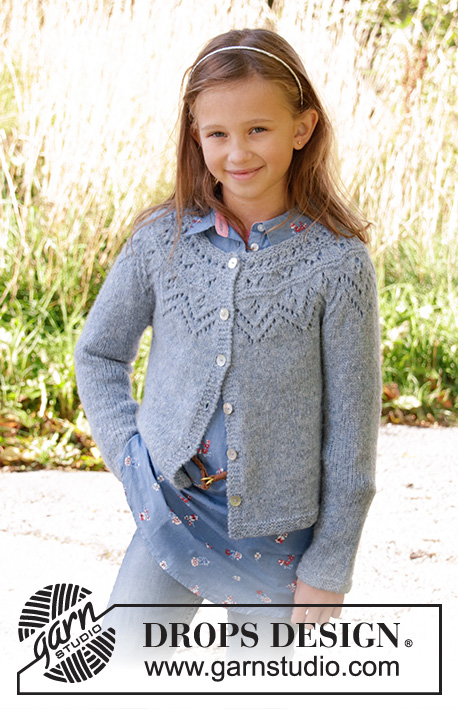
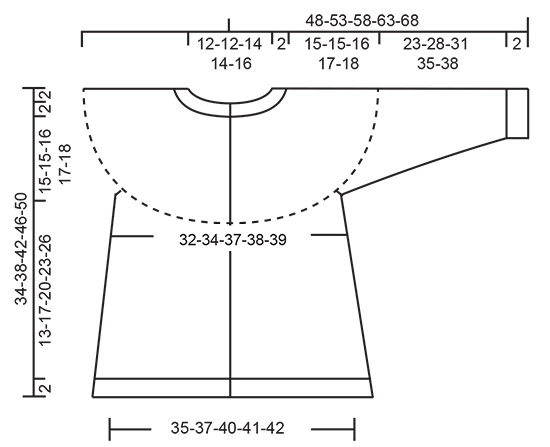
Knitted jacket for children in DROPS Sky. The piece is worked top down with round yoke, lace pattern, stockinette stitch and garter stitch. Sizes 3-12 years.
DROPS Children 34-9 |
||||||||||||||||||||||
|
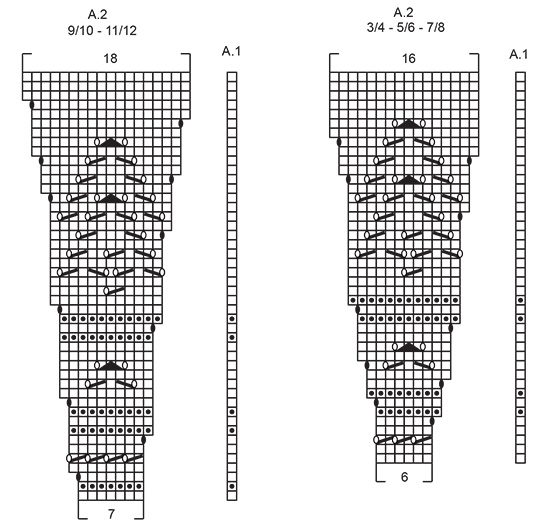
------------------------------------------------------- EXPLANATIONS FOR THE PATTERN: ------------------------------------------------------- RIDGE/GARTER STITCH (worked back and forth): 1 ridge = Knit 2 rows. RIDGE/GARTER STITCH (worked in the round): 1 ridge = 2 rounds. Knit 1 round and purl 1 round PATTERN: See diagrams A.1 and A.2. Choose diagram for your size. The diagrams show all the rows in the pattern seen from the right side. INCREASE TIP-1 (evenly spaced): To work out how to increase evenly, count the total number of stitches on the needle (e.g. 72 stitches) and divide by the number of increases to be made (e.g. 17) = 4.2. In this example, increase by making 1 yarn over after approx. each 4th stitch. On the next row work the yarn overs twisted to avoid holes. INCREASE TIP-2 (for sides of body): Work until there is 1 stitch left before the marker thread, 1 yarn over, knit 2 (the marker thread sits between these 2 stitches), 1 yarn over = 2 stitches increased. On the next row work the yarn overs twisted to avoid holes. Then work the new stitches in stockinette stitch. DECREASE TIP (for sleeves): Decrease 1 stitch on each side of the marker thread as follows: Work until there are 3 stitches left before the marker thread, knit 2 together, knit 2 (the marker thread sits between these 2 stitches), slip 1 stitch as if to knit, knit 1 and pass the slipped stitch over the knitted stitch = 2 stitches decreased. BUTTONHOLE: Work the buttonholes on right band (when the garment is worn). 1 buttonhole = start from the wrong side and knit together the 2nd and 3rd stitch from the edge, make 1 yarn over. On the next row knit the yarn over to leave a hole. The first buttonhole is worked after approx. 1 cm from the neck edge, then the next 5-5-5-6-6 buttonholes every 5-6-6-6-7 cm = 2"-2⅜"-2⅜"-2⅜"-2¾". ------------------------------------------------------- START THE PIECE HERE: ------------------------------------------------------- JACKET - SHORT OVERVIEW OF THE PIECE: The piece is worked back and forth with circular needle, top down. It is divided for body and sleeves. The body is continued back and forth with circular needle. The sleeves are worked in the round with double pointed needles/short circular needle. YOKE: Cast on 72-76-80-86-92 stitches with circular needle size 4 mm = US 6 and Sky. Work 2 RIDGES – see description above – remember BUTTONHOLES on right band – see description above. Knit 1 row where you increase 17-19-21-23-24 stitches evenly on row - READ INCREASE TIP-1! = 89-95-101-109-116 stitches on needle. Knit 1 row from the wrong side. Insert a marker thread on this round and measure from here. Work according to diagrams A.1 and A.2 as follows from the right side: Work 5 band stitches in GARTER STITCH, work A.1 over 1 stitch, A.2 a total of 13-14-15-14-15 times on the row and then 5 band stitches in garter stitch. REMEMBER THE KNITTING GAUGE! When diagrams A.1 and A.2 have been completed in height there are 219-235-251-263-281 stitches on the row. On the next row from the right side adjust stitch count to 219-235-253-261-283 stitches. Continue working stockinette stitch until the piece measures 15-15-16-17-18 cm = 6"-6"-6¼"-6¾"-7" from marker thread. The next row from the right side is worked as follows: Work 5 band stitches in garter stitch, 30-32-35-36-37 stitches in stockinette stitch (= front piece), place the next 44-48-51-53-62 stitches on a thread (= sleeve), cast on 6 new stitches under the sleeve, work 61-65-71-73-75 stitches in stockinette stitch (= back piece), place the next 44-48-51-53-62 stitches on a new thread (= sleeve), cast on 6 new stitches, work 30-32-35-36-37 stitches (= front piece) and 5 band stitches in garter stitch. BODY: There are 143-151-163-167-171 stitches on the needle. THE PIECE IS NOW MEASURED FROM HERE! Insert 1 marker thread in the middle of the 6 new stitches which were cast on in each side. Work stockinette stitch back and forth with 5 band stitches in garter stitch on each side. When the piece measures 3 cm = 1⅛" increase 1 stitch on each side of each marker (= 4 stitches increased) READ INCREASE TIP-2! Repeat this increase every 3-4½-5½-6½-7½ cm = 1⅛"-1¾"-2¼"-2⅝"-3" a total of 3 times = 155-163-175-179-183 stitches on needle. Continue working until the piece measures approx. 15-17-20-23-26 cm = 6"-6¾"-8"-9"-10¼" (or to desired length, there is approx. 2 cm = ¾" until finished measurements). Work garter stitch for 2 cm = ¾". Loosely bind off with knit. Cut and fasten the thread. SLEEVE: Place the stitches from the one thread on short circular needle/double pointed needles size 4 mm = US 6 (= 44-48-51-53-62 stitches) and knit up 1 new stitch in each of the 6 new stitches on the body (= 50-54-57-59-68 stitches). Insert 1 marker thread in the middle of these 6 stitches. Work stockinette stitch in the round until the sleeve measures 3 cm = 1⅛". Now decrease 1 stitch on each side of the marker thread - READ DECREASE TIP. Continue with stockinette stitch and repeat the decrease every 4-4-4-4-3½ cm = 1½"-1½"-1½"-1½"-1¼" until you have decreased a total of 5-6-7-8-10 times = 40-42-43-43-48 stitches on needle. Work stockinette stitch until the sleeve measures 23-28-31-35-38 cm = 9"-11"-12¼"-13¾"-15". Work garter stitch for 2 cm = ¾". Bind off with knit. Cut and fasten the strand. Work the other sleeve in the same way. ASSEMBLY: Sew buttons onto left band. |
||||||||||||||||||||||
Diagram explanations |
||||||||||||||||||||||
|
||||||||||||||||||||||
 |
||||||||||||||||||||||
 |
||||||||||||||||||||||
Have you finished this pattern?Tag your pictures with #dropspattern #agnescardigan or submit them to the #dropsfan gallery. Do you need help with this pattern?You'll find 25 tutorial videos, a Comments/Questions area and more by visiting the pattern on garnstudio.com. © 1982-2026 DROPS Design A/S. We reserve all rights. This document, including all its sub-sections, has copyrights. Read more about what you can do with our patterns at the bottom of each pattern on our site. |
||||||||||||||||||||||


With over 40 years in knitting and crochet design, DROPS Design offers one of the most extensive collections of free patterns on the internet - translated to 17 languages. As of today we count 324 catalogs and 12272 patterns - 12262 of which are translated into English (US/in).
We work hard to bring you the best knitting and crochet have to offer, inspiration and advice as well as great quality yarns at incredible prices! Would you like to use our patterns for other than personal use? You can read what you are allowed to do in the Copyright text at the bottom of all our patterns. Happy crafting!
Post a comment to pattern DROPS Children 34-9
We would love to hear what you have to say about this pattern!
If you want to leave a question, please make sure you select the correct category in the form below, to speed up the answering process. Required fields are marked *.