
Popular categories
Looking for a yarn?


Comments / Questions (51)
![]() SKTG wrote:
SKTG wrote:
I appreciate brevity in instructions a lot, but these seem too short. There is no explanation for what you do with the second thread after casting on (as other people have asked and Drops have answered) or how to handle it between ridges. There is no mention of when to do the ridges., from the pictures I’d guess maybe every third row? I understand my issues are those of a newcomer to knitting, but then that’s who this lovely pattern is aimed at with its simplicity.
04.06.2025 - 17:33DROPS Design answered:
Dear SKTG, two threads are used for casting-on only, so the edge is a bit tighter. After cast-on cut one of the threads and work only with one thread. You knit all the time, right and also wrong rows, so the ridges will apear. Happy knitting!
04.06.2025 - 20:23
![]() Anne Marie Olsen wrote:
Anne Marie Olsen wrote:
Hei. Kan ikke finne fremgangsmåte på hvordan gjøre ferdig i halsutringing og i nakke.? Det er jo masker satt over på pinner midt foran og bak.
12.04.2025 - 19:22DROPS Design answered:
Hei Anne Marie. I denne oppskriften (160-5) er det ingen masker som settes på 1 tråd. På bakstykket felles de midterste maskene til hals, deretter felles det 1 maske i hver side (mot halsen). På forstykket felles de midterste maskene og hver skulder strikkes ferdig for seg, deretter felles det 1 maske 2 ganger (mot halsen). mvh DROPS Design
22.04.2025 - 11:40
![]() Beatriz wrote:
Beatriz wrote:
Bonjour! J'ai des doutes par rapport au points a relever pour les manches: la première maille se relève entre les 2m d'emmanchure du devant et la dernière (44ème pour la taille S) entre les 2m d'emmanchure du dos? Merci!
29.04.2024 - 20:53DROPS Design answered:
Bonjour Beatriz, commencez à relever les mailles le long de l'emmanchure, après les 2 mailles rabattues pour l'emmanchure devant/dos et relevez les mailles jusqu'à l'épaule puis redescendez le long du dos/devant jusqu'aux 2 mailles rabattues pour l'emmanchure. Les 2 premiers cm de la manche (jusqu'aux marqueurs ajoutés de chaque côté) seront ensuite assemblés en bas de l'emmanchure, le long des mailles rabattues pour l'emmanchure dos/devant. Bon tricot!
30.04.2024 - 08:06
![]() Maura Porrati wrote:
Maura Porrati wrote:
Non capisco se si lavora con Bomull Lin a 1 o 2 capi (DIETRO: Si lavora avanti e indietro sui ferri circolari. Avviare, senza stringere troppo il filo, 54-58-64-70-76-82 m sui ferri circolari n° 9 con 2 capi del filato Bomull-Lin oppure del filato Paris. Lavorare a COSTE A LEGACCIO - vedere le spiegazioni sopra, ma lavorare solo con 1 capo del filato.). Mi potete spiegare?
12.03.2024 - 07:41DROPS Design answered:
Buongiorno Maura, come indicato nelle spiegazioni, l'avvio del lavoro è a due capi, poi si prosegue con 1 capo solo. Buon lavoro!
12.03.2024 - 16:04
![]() Sharon Hun wrote:
Sharon Hun wrote:
Hi! Would like to knit this in the round. Should I anticipate any problems?
23.02.2024 - 10:41DROPS Design answered:
Dear Mrs Han, note that the bottom of piece is worked separately for the splitts in the side; You have to adjust garter stitch as it is worked differently when working in the round (see video). And you will then have to work back and forth again after dividing for armholes. Happy knitting!
23.02.2024 - 14:03
![]() Jenny wrote:
Jenny wrote:
Hej! Stämmer det att jag ska sticka rätstickning på fram och bakstycke (räta fram och tillbaka) och slätstickning på armarna (räta på räta och aviga på aviga)? Varför gör jag så? Hälsar en nybörjare! Jenny
08.01.2022 - 10:36DROPS Design answered:
Hej Jenny. Ja det stämmer. Designen är gjord så att det är slätstickning på ärmarna och rätstickning på fram och bakstycke. Mvh DROPS Design
11.01.2022 - 12:09
![]() Maria Claudia wrote:
Maria Claudia wrote:
Buongiorno, devo provare a fare il campioncino per il lavoro e mi chiedevo: 10,5 maglie per 10 cm cosa significa? Che devo avere 21 maglie per 20 cm? O che posso avere in base alla mia tensione 10 o 11 maglie per 10 cm?
16.05.2021 - 08:43DROPS Design answered:
Buonasera Maria, il campione dev'essere di 10,5 maglie per 10 cm oppure 21 maglie in 20 cm. Buon lavoro!
17.05.2021 - 22:09
![]() Karin Van Brakel wrote:
Karin Van Brakel wrote:
Ik begrijp niet wat ik moet doen bij de mouw: begin en eindig naast de 2 st afgekante st voor de armsgaten aan elke kant en neem st op naast de kant st.
22.03.2021 - 19:17DROPS Design answered:
Dag Karin,
Je begint niet gelijk aan het begin met het opnemen van steken, maar je slaat de 2 afgekante steken over. Langs de rand van het pand waar je de steken opneemt, neem je op naast de kantsteek, dus tussen de kantsteek en de eerste steek.
08.04.2021 - 09:46
![]() Lorenza Bertolino wrote:
Lorenza Bertolino wrote:
Perché sul Drops 160-5, si utilizzano i ferri circolari?
11.02.2021 - 08:31DROPS Design answered:
Buongiorno Lorenza, al di fuori dell'Italia, si usano solitamente i ferri circolari. Questo modello è lavorato in piano, può utilizzare i ferri dritti. Buon lavoro!
12.02.2021 - 22:59
![]() Sonia PC wrote:
Sonia PC wrote:
Hola, No entiendo si al levantar los puntos para la manga tengo que coger los puntos de orillo y la duda. Sí es así, para qué sirve el marcapuntos de los 2 cm??? La manga es punto jersey y el cuerpo punto musgo? Gracias
08.10.2019 - 23:49DROPS Design answered:
Hola Sonia. Al insertar el marcapuntos marcamos la parte de la manga que se cose al cuerpo en la parte de la sisa bajo la manga, 2 cm a cada lado. Sí, la manga se trabaja en punto jersey y el cuerpo en punto musgo.
14.10.2019 - 21:10
|
||||
Perly May#perlymaysweater |
||||
 |
 |
|||
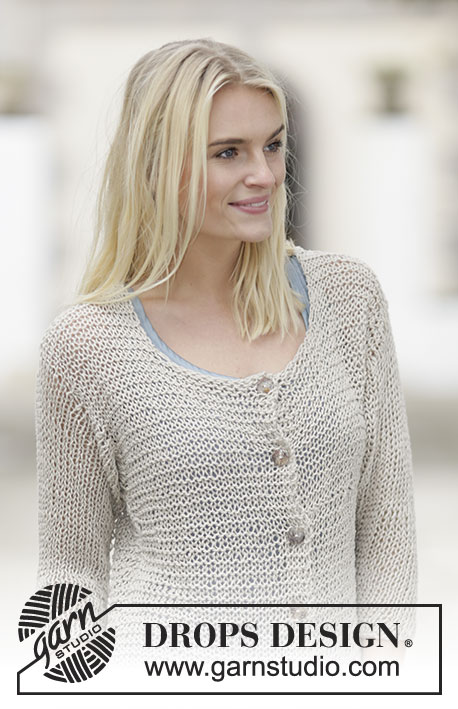
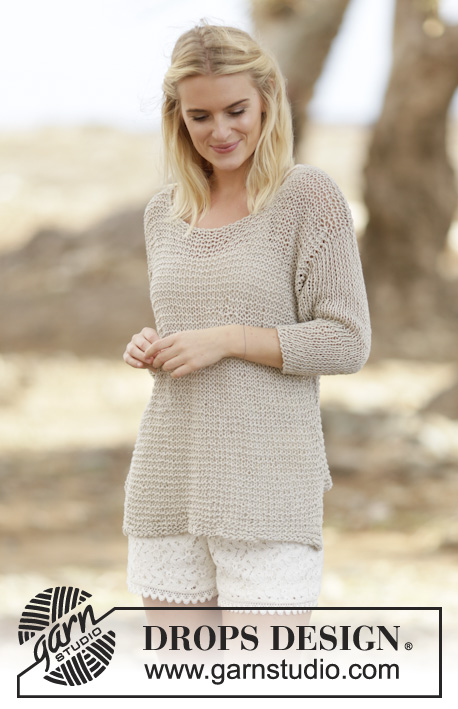
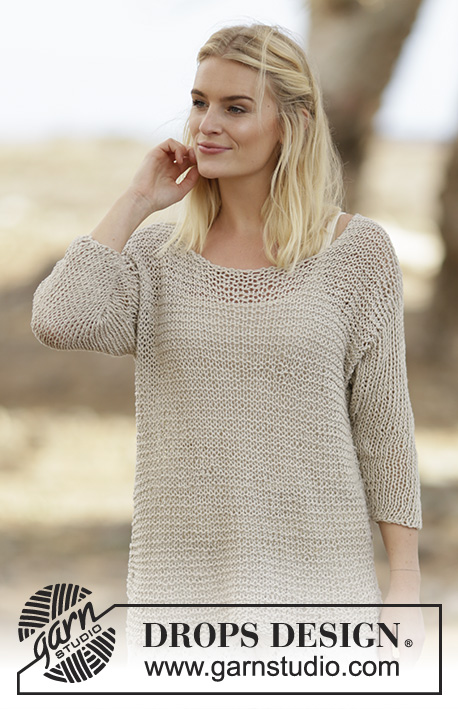
Knitted DROPS jumper in garter st, stockinette st and vent in "Bomull-Lin" or "Paris". Size: S - XXXL.
DROPS 160-5 |
||||
|
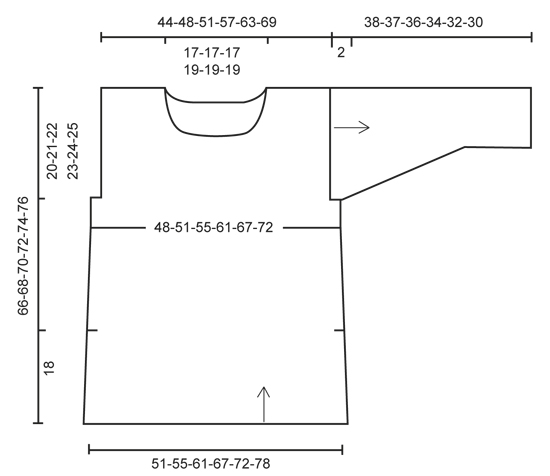
GARTER ST (back and forth): K all rows. 1 ridge = K2 rows. DECREASE TIP: Dec 1 st at beg of row as follows: 1 edge st, slip next st as if to K, K 1, psso. Dec 1 st at end of row as follows: Work until 3 sts remain on needle, K the next 2 sts tog, 1 edge st. MEASURING TIP: Because of the ridges and the weight of the yarn all measurements must be done by holding the piece up otherwise the garment will be too long when worn. ---------------------------------------------------------- BACK PIECE: Worked back and forth on circular needle. LOOSELY cast on 54-58-64-70-76-82 sts on circular needle size 9 mm / US 13 with 2 strands Bomull-Lin or Paris. Then work ridges in GARTER ST - see explanation above, work only with 1 strand. REMEMBER THE KNITTING GAUGE When piece measures 18 cm / 7" - READ MEASURING TIP, insert 1 marker in each side of piece (vent beg here). When piece measures 26 cm / 10¼", dec 1 st in each side of piece - READ DECREASE TIP! Repeat dec in each side every 9 cm / 3½" 1-1-2-2-2-2 more times = 50-54-58-64-70-76 sts. When piece measures 46-47-48-49-50-51 cm / 18"-18½"-19"-19¼"-19¾"-20", bind off for armholes in each side of piece as follows: bind off 2 sts at the beg of the next 2 rows = 46-50-54-60-66-72 sts. When piece measures 62-64-66-68-70-72 cm / 24⅜"-25¼"-26"-26¾"-27½"-28⅜" - REMEMBER MEASURING TIP, bind off the middle 16-16-16-18-18-18 sts for neck and finish each shoulder separately (= 15-17-19-21-24-27 sts remain on each shoulder). Dec 1 st on next row from RS towards the neck = 14-16-18-20-23-26 sts. LOOSELY bind off when piece measures 66-68-70-72-74-76 cm / 26"-26¾"-27½"-28⅜"-29⅛"-30". FRONT PIECE: Cast on and work as back piece. When piece measures 56-58-59-61-62-64 cm / 22"-22¾"-23¼"-24"-24½"-25¼", bind off the middle 14-14-14-16-16-16 sts for neck and finish each shoulder separately (= 16-18-20-22-25-28 sts on each shoulder). Then dec at beg of every row from neck as follows: Dec 1 st 2 times = 14-16-18-20-23-26 sts. LOOSELY bind off when piece measures 66-68-70-72-74-76 cm / 26"-26¾"-27½"-28⅜'-29⅛"-30". ASSEMBLY: Sew the shoulder seams. SLEEVE: Sleeve is worked top down. Pick up 44-46-48-50-52-54 sts (includes 1 edge st in each side) on circular needle size 9 mm / US 13 with Bomull-Lin or Paris - NOTE: Pick up in edge sts inside the 2 sts bind off for armholes in each side. Work stockinette st back and forth on circular needle. When piece measures 2 cm / ¾", insert 1 marker in each side - used for assembly of sleeve. When piece measures 5-4-5-4-5-3 cm / 2"-1½"-2"-1½"-2"-1", dec 1 st in each side of piece inside 1 edge st. Repeat dec every 3 cm / 1" 8-8-7-7-6-6 more times = 26-28-32-34-38-40 sts. LOOSELY bind off sleeve piece measures 38-37-36-34-32-30 cm / 15"-14½"-14¼"-13½"-12½"-11¾" (shorter measurements in the larger sizes because of wider shoulders). ASSEMBLY: Sew the sleeve seams inside 1 edge st - NOTE: The 2 cm / ¾" worked back and forth before marker at the top of sleeve should fit the bind off for armhole. Sew side seam from armhole down to marker for vent, sew in outer loops of edge sts. |
||||
Diagram explanations |
||||
|
||||
 |
||||
Have you finished this pattern?Tag your pictures with #dropspattern #perlymaysweater or submit them to the #dropsfan gallery. Do you need help with this pattern?You'll find 16 tutorial videos, a Comments/Questions area and more by visiting the pattern on garnstudio.com. © 1982-2026 DROPS Design A/S. We reserve all rights. This document, including all its sub-sections, has copyrights. Read more about what you can do with our patterns at the bottom of each pattern on our site. |
||||


With over 40 years in knitting and crochet design, DROPS Design offers one of the most extensive collections of free patterns on the internet - translated to 17 languages. As of today we count 324 catalogs and 12290 patterns - 12280 of which are translated into English (US/in).
We work hard to bring you the best knitting and crochet have to offer, inspiration and advice as well as great quality yarns at incredible prices! Would you like to use our patterns for other than personal use? You can read what you are allowed to do in the Copyright text at the bottom of all our patterns. Happy crafting!
Post a comment to pattern DROPS 160-5
We would love to hear what you have to say about this pattern!
If you want to leave a question, please make sure you select the correct category in the form below, to speed up the answering process. Required fields are marked *.