
Popular categories
Looking for a yarn?


Comments / Questions (59)
![]() Lara wrote:
Lara wrote:
Muss ich den Zopf dann auch erst links und danach rechts sricken? Weil bei mir flicht sich das Muster nicht.
19.01.2013 - 20:44DROPS Design answered:
Hallo Lara, in der Legende zum Diagramm finden Sie beschrieben, wie die Verzopfung entsteht (die M abwechselnd VOR und HINTER die Arbeit legen).
20.01.2013 - 19:08
![]() Saar wrote:
Saar wrote:
Er ontstaat geen gat in het breiwerk zelf maar onderin de kabel ontstaat er een soort van hol
18.01.2013 - 14:38DROPS Design answered:
Dat is ook wat ik bedoelde in mijn vorige antwoord ;o) Ik denk dat jij de kabel wat strakker moet breien. Zie video of ga naar de winkel voor persoonlijke ondersteuning.
18.01.2013 - 16:07
![]() Lara wrote:
Lara wrote:
Hallo! Muss ich während dem Muster auch abwechselnd re. li. stricken oder nur am Ende? LG
17.01.2013 - 18:50DROPS Design answered:
Hallo Lara, es wird in den Hin-R rechts gestrickt und in den Rück-R links. Viel Erfolg!
18.01.2013 - 07:54
![]() Saar wrote:
Saar wrote:
Aan het begin van het patroon als ik een naald heb gemaakt, begin ik met de kabel maar er ontstaat na de eerste naald een gat in het breiwerk.
17.01.2013 - 18:32DROPS Design answered:
Er ontstaat een gat in de kabel zelf? Dan moet je het kabeltje een beetje strakker breien. Zie evt de instructievideo hoe u het kan breien.
18.01.2013 - 13:37
![]() Sofie wrote:
Sofie wrote:
Je n'arrive pas à faire la torsade :( Pourtant je sais les tricoter mais je crois que je ne comprends pas bien les explications. Faut-il d'abord tricoter 5 mailles endroit et ensuite en passer 5 sur aiguilles auxiliaire ??? Merci par avance !
27.11.2012 - 21:05DROPS Design answered:
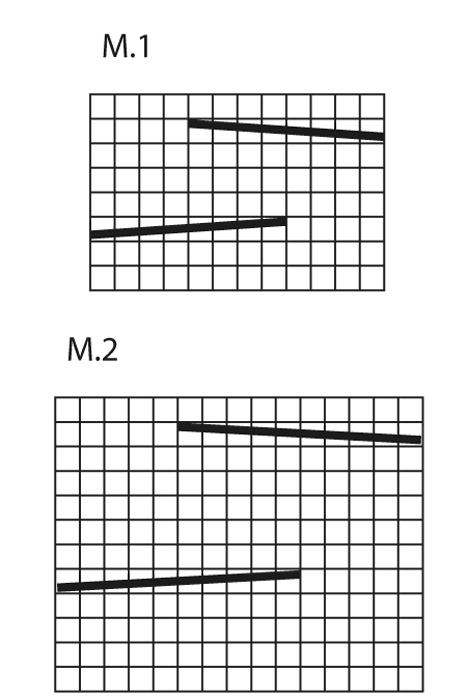
Bonjour Sofie, dans les diagrammes 1 case= 1mx1 rang. Au rang 5 de M.2, vous tricotez : 5 m end, puis la torsade : glissez 5 m sur l'aiguille auxiliaire devant l'ouvrage, tricotez 5 m end, reprenez les 5 m en attente et tricotez les à l'end. Au rang 11, vous commencez par la torsade : glissez 5 m sur l'aiguille auxiliaire derrière l'ouvrage, tricotez 5 m end, reprenez les 5 m en attente et tricotez les à l'end, terminez par 5 m end. Bon tricot !
28.11.2012 - 09:27
![]() Ulla wrote:
Ulla wrote:
Meget flot og smart
22.10.2012 - 10:59
![]() Steffi wrote:
Steffi wrote:
Was für eine Randmasche muss ich denn stricken? vielen dank!
21.06.2012 - 18:03DROPS Design answered:
Am besten sticken Sie die Randmasche immer rechts.
25.06.2012 - 22:11Anastasia wrote:
I wanna knit this lovely scarf , but can't understand how to read the diagram: from what side and what corner? Thanks!
08.06.2012 - 13:55DROPS Design answered:
Dear Anastasia, the diagrams are read begninng in the lower right-hand corner and work towards the left (1st row = RS). On return row, work from the left to the right. Happy Knitting !
06.12.2012 - 11:20
![]() Wallry wrote:
Wallry wrote:
Il est indique sur les explications qu'il faut 300g de laine pour le tour du cou.
02.02.2012 - 12:19
![]() Drops Design France wrote:
Drops Design France wrote:
Bonjour Lange et merci. Cliquez en haut sur "détaillants" puis choisissez votre pays pour accéder à la liste des détaillants. La quantité nécessaire est toujours indiquée au poids, cliquez sur "voir le nuancier" pour voir les couleurs et en savoir plus sur la laine, en l’occurrence, Polaris se présente sous forme de pelote de 100 g. Bon tricot !
03.01.2012 - 09:18
|
||||||||||||||||
Braidy#braidyset |
||||||||||||||||
 |
 |
|||||||||||||||
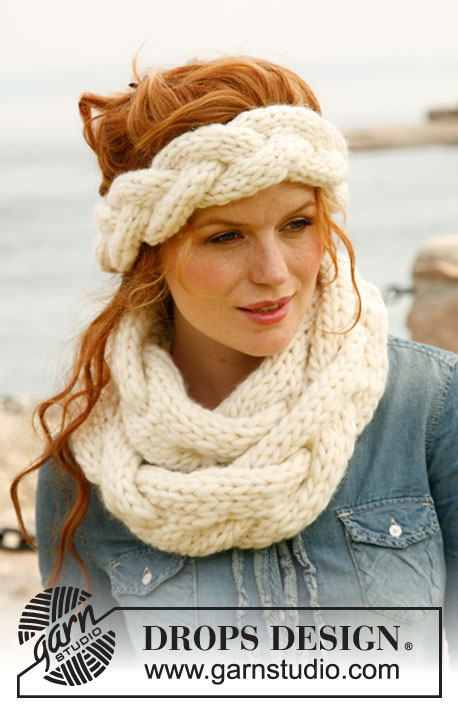
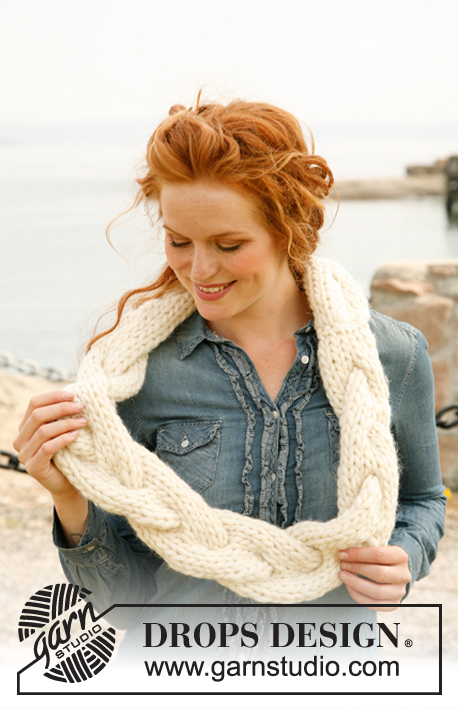
Knitted DROPS head band and neck warmer with large cable in ”Polaris”.
DROPS 134-7 |
||||||||||||||||
|
PATTERN: See diagram M.1 for head band and diagram M.2 for neck warmer. The diagrams show pattern from RS. NEW BALL TIP: When switching ball with Polaris, split the old strand in two on the last 15 cm / 6" – cut off one part, do the same on the new strand. Place the first and last 15 cm / 6" on top of each other so that the yarn is the normal thickness and continue to work – this is done to make the switch invisible. -------------------------------------------------------- -------------------------------------------------------- HEAD BAND: Worked back and forth in one long piece that is sewn tog when finished. Cast on 12 sts on needle size 12 mm / US 17 with Polaris. Work diagram M.1 until piece measures approx 50 cm / 19¾" - finish after 1 full repetition of the diagram. Work 1 row in stockinette st before loosely binding off. Sew tog cast on edge and bind off edge, sew edge to edge to avoid a chunky seam. -------------------------------------------------------- NECK WARMER: Worked back and forth in one long piece that is sewn tog when finished. Cast on 15 sts on needle size 15 mm / US 19 with Polaris. Work diagram M.2 until piece measures approx 120 cm / 47" - finish after 1 full repetition of the diagram. Work 4 rows in stockinette st before loosely binding off. Sew tog cast on edge and bind off edge, sew edge to edge to avoid a chunky seam. Fold the neck warmer double (as-a-figure-of-eight-knot) before wearing it. |
||||||||||||||||
Diagram explanations |
||||||||||||||||
|
||||||||||||||||
 |
||||||||||||||||
Have you finished this pattern?Tag your pictures with #dropspattern #braidyset or submit them to the #dropsfan gallery. Do you need help with this pattern?You'll find 5 tutorial videos, a Comments/Questions area and more by visiting the pattern on garnstudio.com. © 1982-2026 DROPS Design A/S. We reserve all rights. This document, including all its sub-sections, has copyrights. Read more about what you can do with our patterns at the bottom of each pattern on our site. |
||||||||||||||||


With over 40 years in knitting and crochet design, DROPS Design offers one of the most extensive collections of free patterns on the internet - translated to 17 languages. As of today we count 325 catalogs and 12298 patterns - 12288 of which are translated into English (US/in).
We work hard to bring you the best knitting and crochet have to offer, inspiration and advice as well as great quality yarns at incredible prices! Would you like to use our patterns for other than personal use? You can read what you are allowed to do in the Copyright text at the bottom of all our patterns. Happy crafting!
Post a comment to pattern DROPS 134-7
We would love to hear what you have to say about this pattern!
If you want to leave a question, please make sure you select the correct category in the form below, to speed up the answering process. Required fields are marked *.