
Popular categories
Looking for a yarn?


Comments / Questions (105)
![]() Anita wrote:
Anita wrote:
Lorsque j'ai terminé le 2ème rang, je dois faire 3ml pour reprendre le 1er rang? Ça n'est pas dans l'explication mais si je ne les fais pas, ça tire sur le travail.
13.05.2016 - 22:39DROPS Design answered:
Bonjour Anita, après avoir crocheté le 2ème rang, répétez ce 2ème rang jusqu'à la hauteur souhaité: le 2ème rang commence par 3 ml = commencez tous les rangs par 3 ml. Bon crochet!
17.05.2016 - 08:45
![]() Anita wrote:
Anita wrote:
Lorsque j'ai terminé le 2ème rang, je dois faire 3ml pour reprendre le 1er rang? Ça n'est pas dans l'explication mais si je ne les fais pas, ça tire sur le travail.
13.05.2016 - 17:17DROPS Design answered:
Bonjour Anita, au début de chaque rang, on fait 3 ml, quand vous avez crocheté 1 fois le rang 2, répétez ce rang comme indiqué, en commençant à nouveau par 3 ml, 1 B dans la 1ère B, 2 B dans la B suivante, etc. Bon crochet!
13.05.2016 - 18:41
![]() Anita wrote:
Anita wrote:
Bonjour, J'essaie de comprendre l'explication avant de me lancer. Juste une remarque. Á la fin du 2éme rang, on ne devrait pas se retrouver avec le même nombre de bride qu'au début?
13.05.2016 - 13:28
![]() Pauline wrote:
Pauline wrote:
Prøver lige igen :-)) Kan man bruge bomuld istedet og så kun én snor? Alternativerne henviser til pind 3 eller 3,5... Kan man så stadig bruge pind 5 som i opskriften eller skal man finde en tykkere garn?
07.04.2016 - 19:54DROPS Design answered:
Hej Pauline, Ja i stedet for 2 tråde Alpaca (gruppe A) kan du bruge 1 tråd Paris eller DROPS Loves You #5 (gruppe C)(A+A = C) og pinde 5. God fornøjelse!
08.04.2016 - 09:22
![]() Kristina wrote:
Kristina wrote:
Nu spørger jeg nok dumt, men hvad er en rapport? Jeg spurgte tidligere om jeg kunne gange antal masker med 2 for at få dobbelt størrelse.
10.03.2016 - 18:43DROPS Design answered:
Hej Kristina, Du hækler 1 rapport over 24 st. I den mindste størrelse hækler du 7 rapporter og i den største hækler du 8 rapporter ifølge opskriften.
11.03.2016 - 10:25
![]() Kristina wrote:
Kristina wrote:
Jeg tænker og lave tæppet dobbelt så stort, kan jeg så bare gange antal masker med 2?
09.03.2016 - 21:29DROPS Design answered:
Hej, Sørg for at du har 24 masker til hver ny rapport. God fornøjelse!
10.03.2016 - 10:11
![]() Christiane Andriolet wrote:
Christiane Andriolet wrote:
Je voudrais faire ce modèle de couverture au crochet je recherche un fils facile d'entretien que me conseillez vous Merci
08.03.2016 - 18:20DROPS Design answered:
Bonjour Mme Andriolet, vous pouvez la remplacer par un autre fil du groupe A, par ex. Fabel ou Baby Merino pour des laines superwash, ou bien en coton: Safran, DROPS ♥ You 6 ou 7 . Demandez conseil à votre magasin DROPS, il vous répondra par téléphone ou par mail. Bon crochet
09.03.2016 - 08:25
![]() Liliana Bisognin wrote:
Liliana Bisognin wrote:
Coperta realizzata ho applicato anche delle farfalline e dei fiori fatti sempre con l'uncinetto,bellissima grazie
07.01.2016 - 15:00
![]() Hege wrote:
Hege wrote:
Mulig jeg er litt dårlig på både svensk og dansk, men for å få dette inn med teskje spør jeg;) Det blir litt stort å bruke som vognteppe dette, er det noen tips til hvordan jeg kan gjøre det mindre? Eventuelt hvordan blir det om jeg hekler med en tråd? Har hatt lignende problem som nevnt over med at teppet blir buet og ikke beint i kantene, hva gjør jeg galt?
30.12.2015 - 14:17DROPS Design answered:
Hej, Hækler du med en mindre nål, vil tæppet blive mindre. Men følger du hæklefastheden og mønsteret vil du få de mål som står i oppskriften. God fornøjelse!
25.01.2016 - 14:46
![]() Lisette Rahbek wrote:
Lisette Rahbek wrote:
Hvad vil forskellen være hvis man hækler kun med én tråd frem for de to der står i opskriften? Synes det bliver meget kraftig og tykt for et baby tæppe. Hvad hvis man bruger en nål 3 i stedet for nål 5?
12.08.2015 - 22:53DROPS Design answered:
Hej Lisette. Bruger du en mindre naal, saa vil taeppet ogsaa blive mindre. Du kan haekle en pröve og se din haeklefasthed for 10 cm og du kan saa tilpasse dit mönster og lave det större.
13.08.2015 - 14:01
|
|
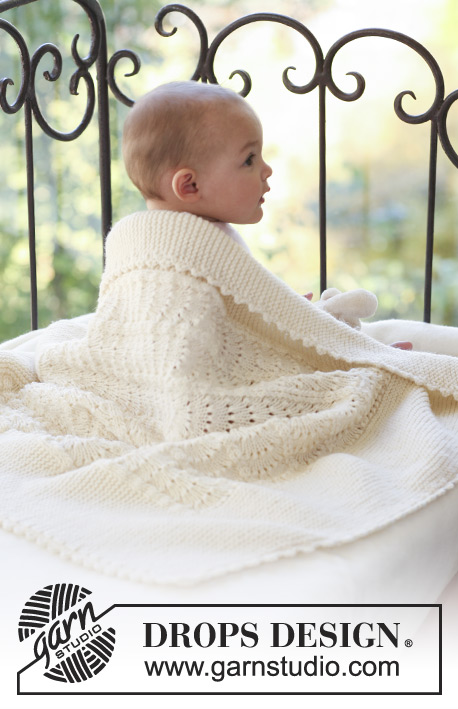
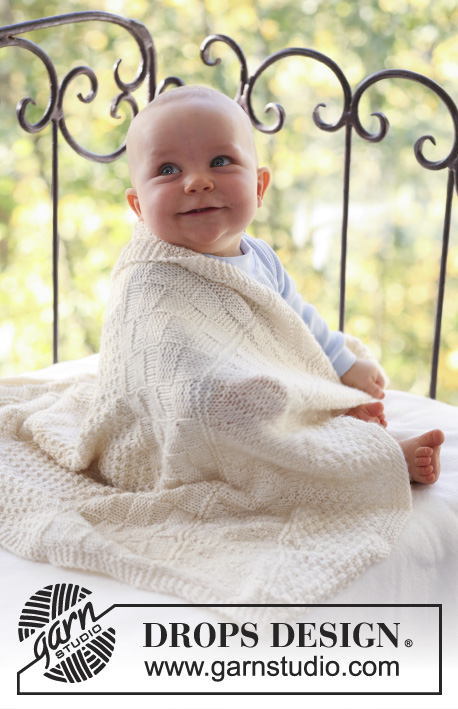
Baby Snug#babysnugblanket |
|
 |
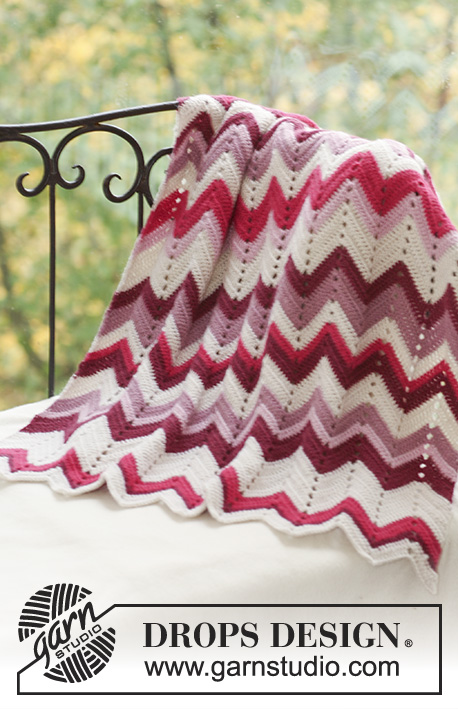 |
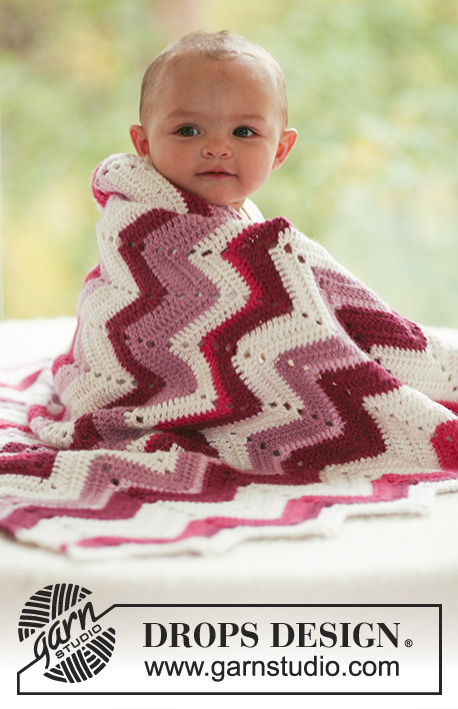
Crochet baby blanket with zigzag pattern in DROPS Alpaca
DROPS Baby 16-24 |
|
|
STRIPES: Crochet the whole blanket with 2 threads as follows: 2 rows violet, 4 rows off-white, 2 rows cerise, 1 row dark fuchsia, 3 rows off-white, 2 rows dark fuchsia, 1 row light pink, 2 rows violet, 3 rows off-white, 3 rows cerise, 2 rows violet, 4 rows off-white, 2 rows dark fuchsia, 3 rows violet, 2 rows off-white, 1 row cerise, 2 rows dark fuchsia, 3 rows off-white, 2 rows violet, 1 row light pink, 3 rows dark fuchsia, 5 rows off-white, 2 rows cerise, 1 row dark fuchsia, 2 rows off-white, = a total of 58 rows. --------------------------------------------------------- --------------------------------------------------------- BLANKET: LOOSELY crochet 198-226 ch (includes 3 ch to turn with) with 2 threads violet and crochet hook size 5 mm [H/8]. ROW 1: 1 dc in 4th ch from hook, 1 dc in each of the next 10 ch, * skip 4 ch, 1 dc in each of the next 12 ch, 3 ch, 1 dc in each of the next 12 ch *, repeat from *-* a total of 6-7 times, skip 4 ch, 1 dc in each of the last 12 ch = 168-192 dc. ROW 2: 3 ch, 1 dc in first dc, 2 dc in next dc, 1 dc in each of the next 8 dc * skip 4 dc, 1 dc in each of the next 10 dc, 2 dc in ch-loop, 3 ch, 2 dc in the same ch-loop, 1 dc in each of the next 10 dc *, repeat from *-* a total of 6-7 times, skip 4 dc and finish with 1 dc in each of the next 8 dc and 2 dc in each of the last 2 dc = 168-192 dc. Repeat row 2 until all stripes have been completed. Blanket measures approx 83 cm [32¾"]. |
|
Have you finished this pattern?Tag your pictures with #dropspattern #babysnugblanket or submit them to the #dropsfan gallery. Do you need help with this pattern?You'll find 6 tutorial videos, a Comments/Questions area and more by visiting the pattern on garnstudio.com. © 1982-2026 DROPS Design A/S. We reserve all rights. This document, including all its sub-sections, has copyrights. Read more about what you can do with our patterns at the bottom of each pattern on our site. |
|


With over 40 years in knitting and crochet design, DROPS Design offers one of the most extensive collections of free patterns on the internet - translated to 17 languages. As of today we count 324 catalogs and 12290 patterns - 12280 of which are translated into English (US/in).
We work hard to bring you the best knitting and crochet have to offer, inspiration and advice as well as great quality yarns at incredible prices! Would you like to use our patterns for other than personal use? You can read what you are allowed to do in the Copyright text at the bottom of all our patterns. Happy crafting!
Post a comment to pattern DROPS Baby 16-24
We would love to hear what you have to say about this pattern!
If you want to leave a question, please make sure you select the correct category in the form below, to speed up the answering process. Required fields are marked *.