
Popular categories
Looking for a yarn?


Comments / Questions (1)
![]() Marjolein wrote:
Marjolein wrote:
Wat is de moeilijkheidsgraad van dit vestje?
25.03.2026 - 10:45DROPS Design answered:
Dag Marjolein,
We werken niet met moeilijkheidsgraden omdat het van persoon tot persoon heel verschillend kan zijn welke technieken je beheerst. Je kunt de video's, lessen en FAQ's bekijken voor hulp en tips. Wat we wel hebben is een categorie eenvoudige patronen. Dit patroon valt daar niet onder.
25.03.2026 - 16:06
|
||||||||||||||||||||||||||||||||||
Blue Country Wrap#bluecountrywrap |
||||||||||||||||||||||||||||||||||
 |
 |
|||||||||||||||||||||||||||||||||
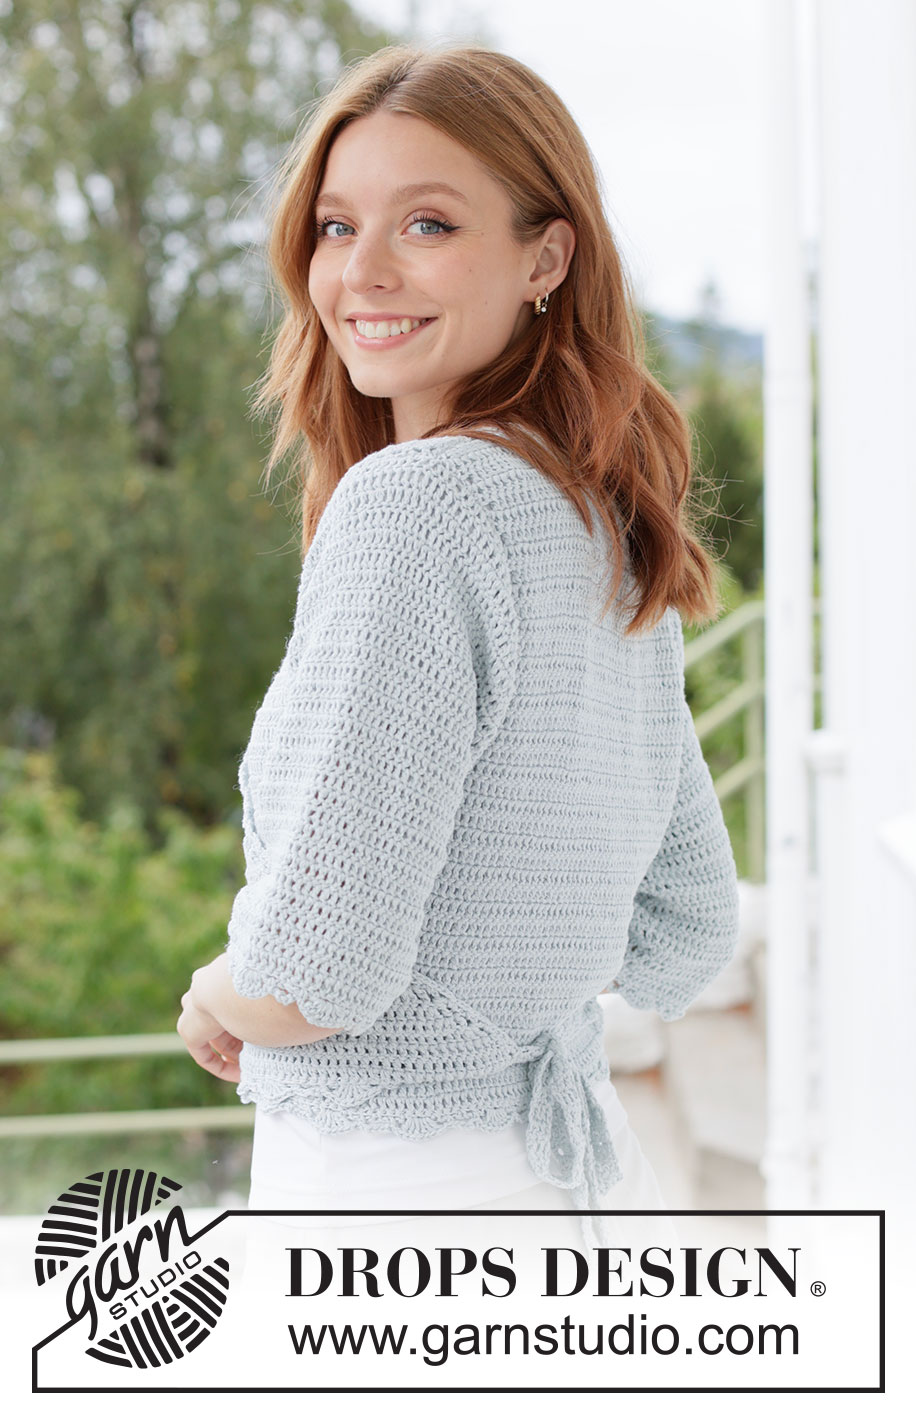
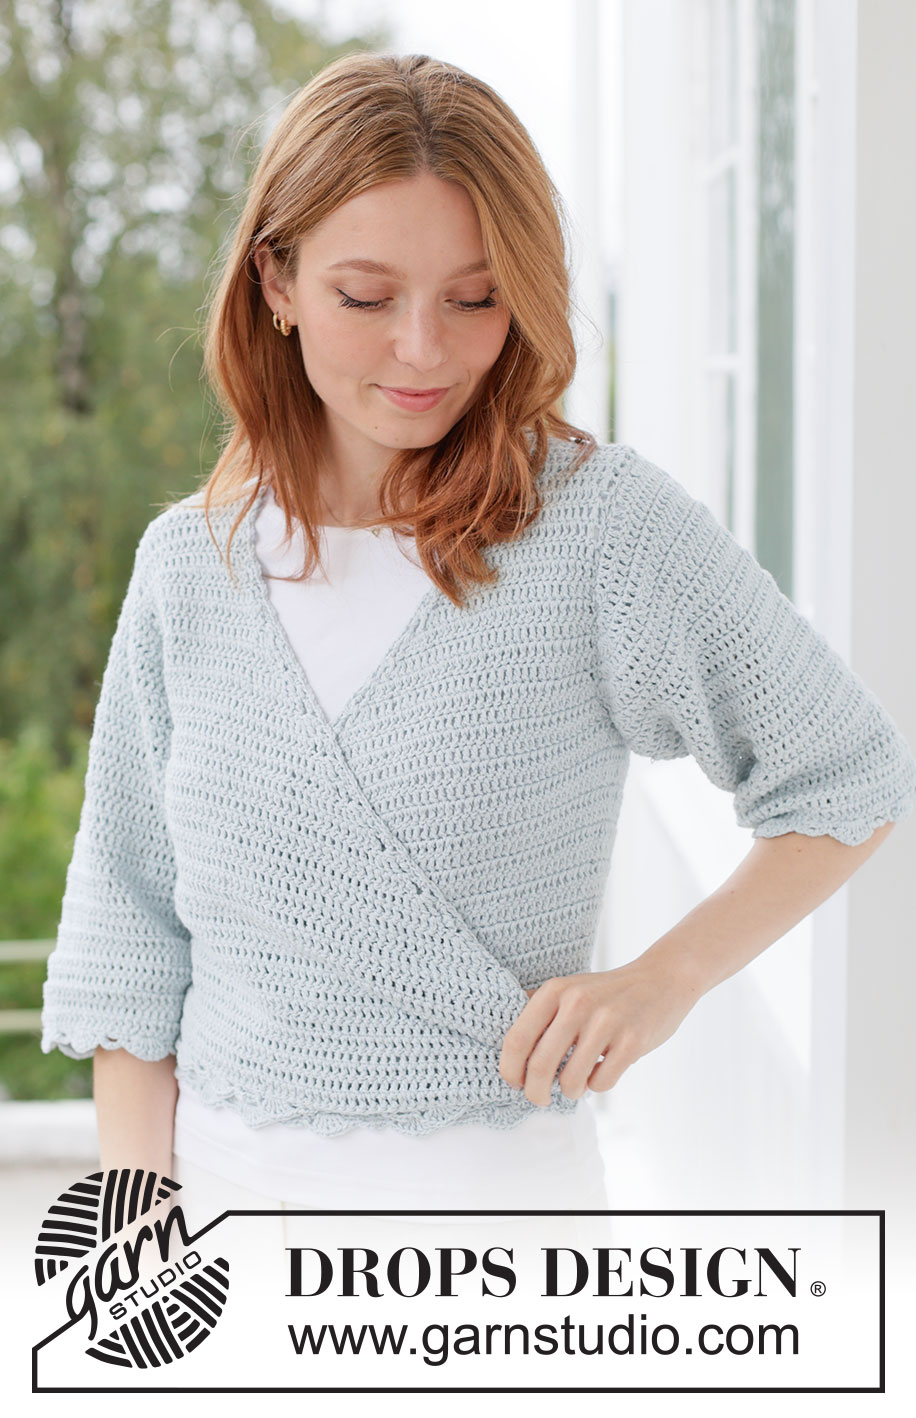
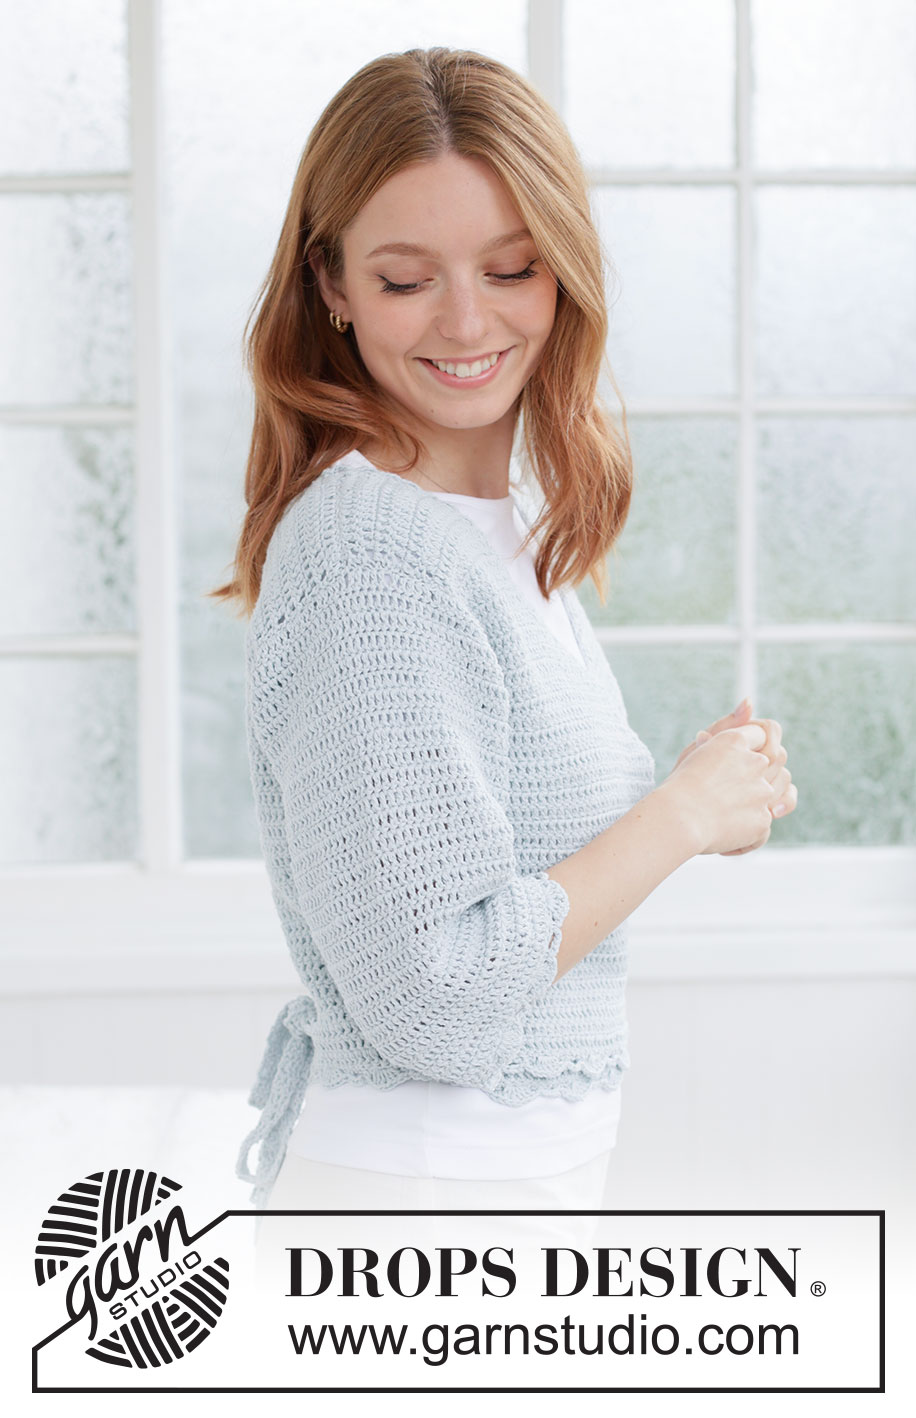
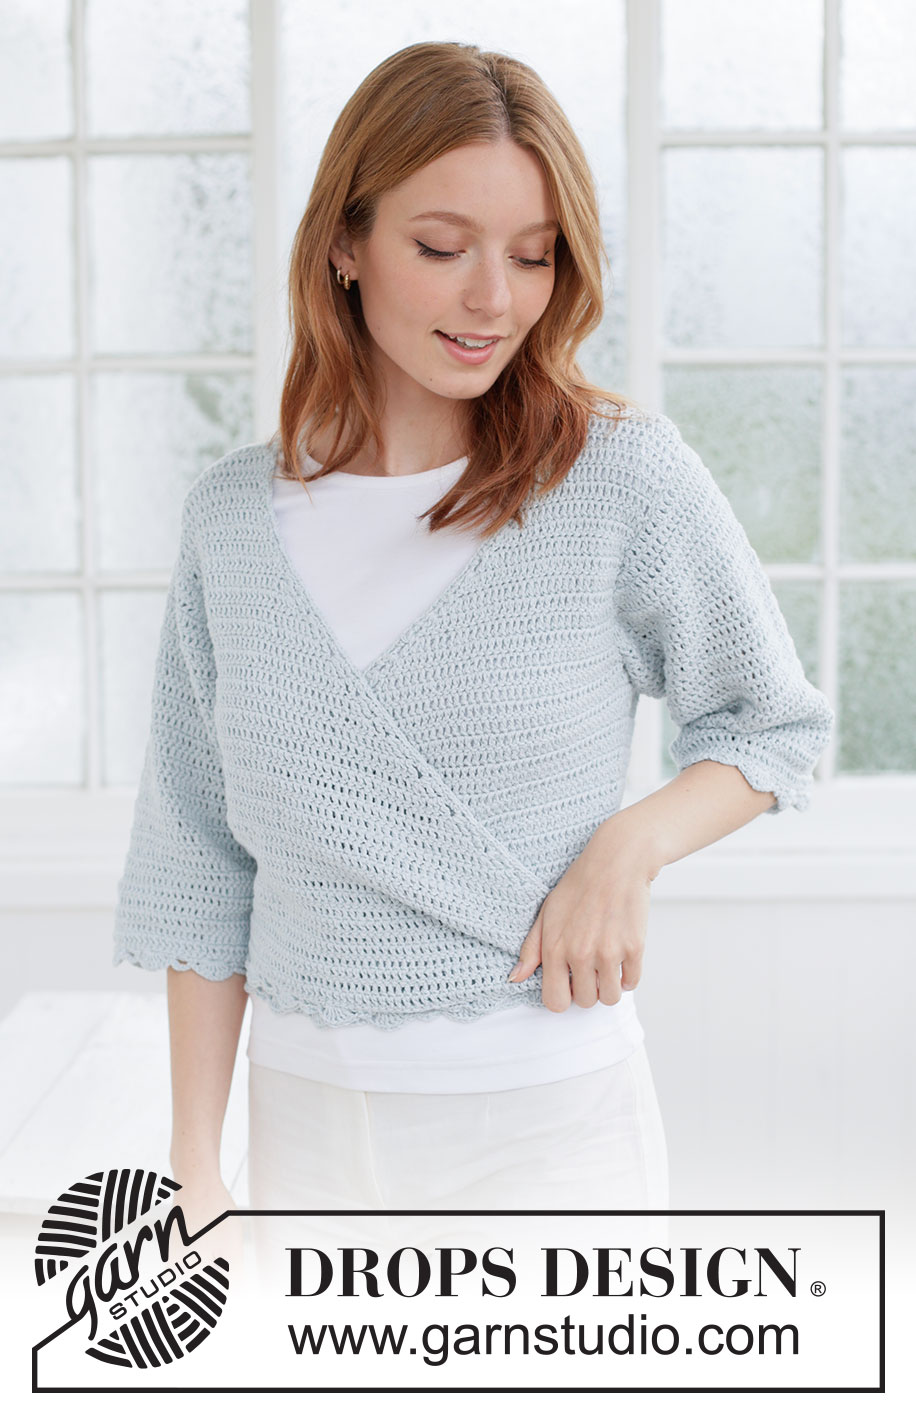
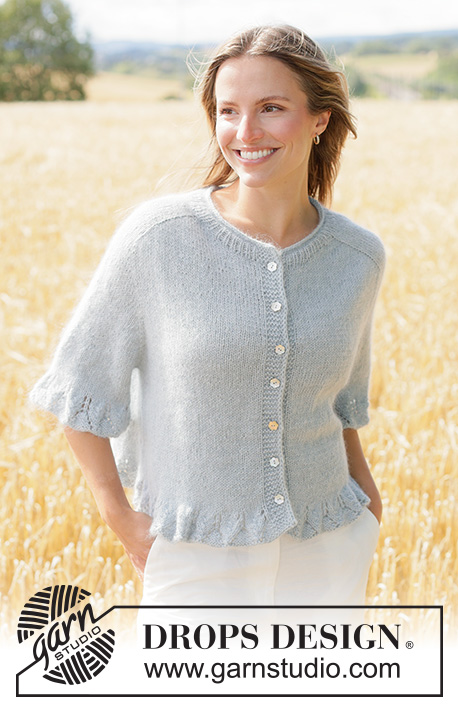
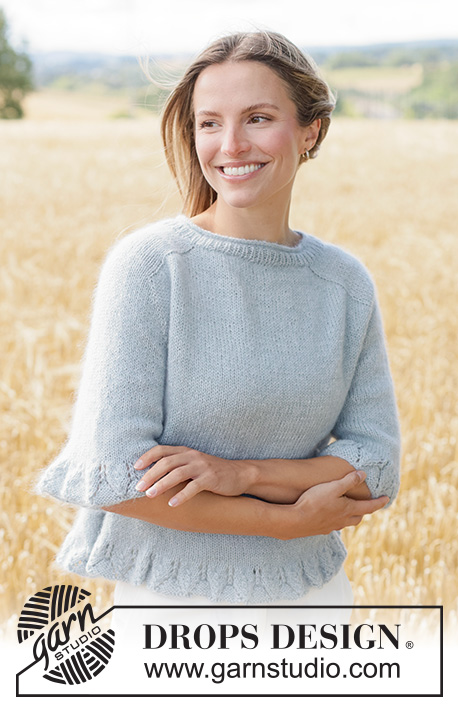
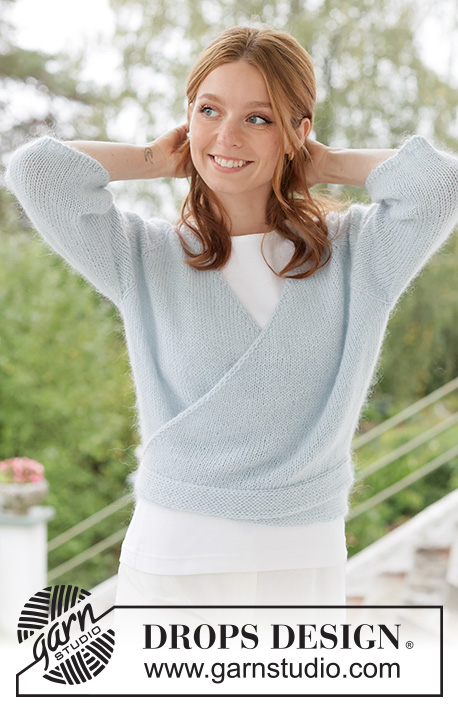
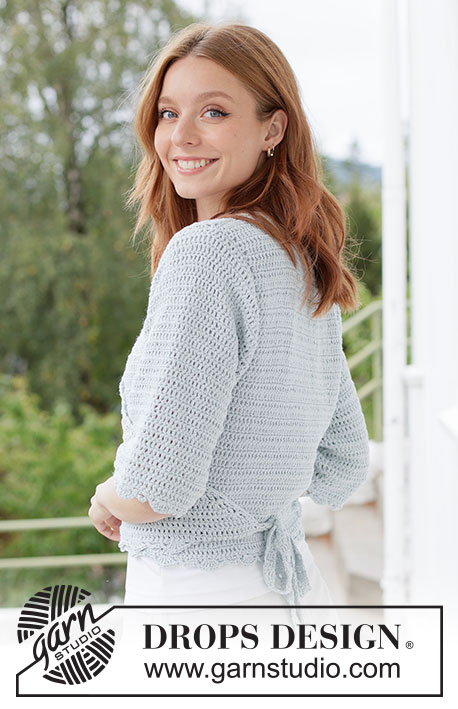
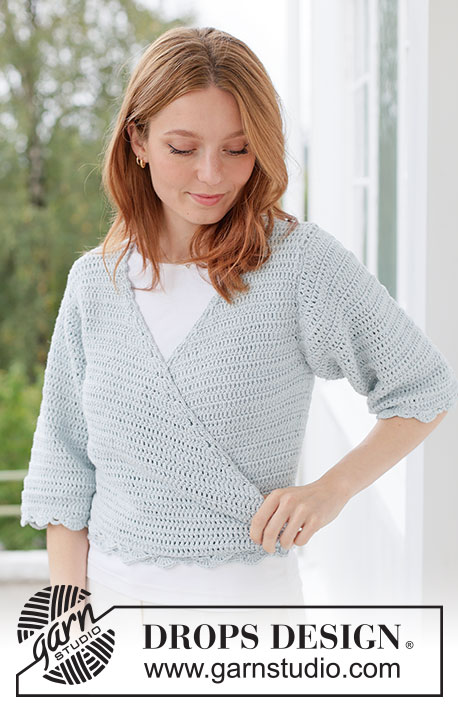
Crocheted jacket with ¾-length sleeves in DROPS Belle. The piece is worked top down with wrap-around, double crochets, fan-edges and tie-bands. Sizes XS - XXXL.
DROPS 266-4 |
||||||||||||||||||||||||||||||||||
|
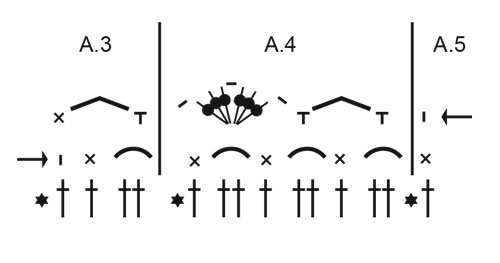
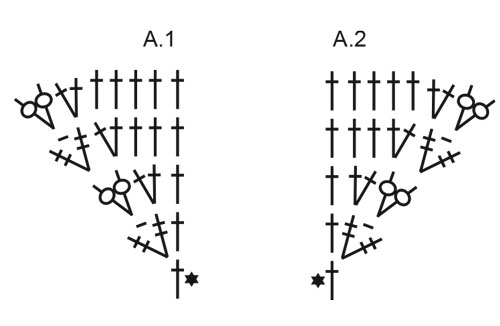
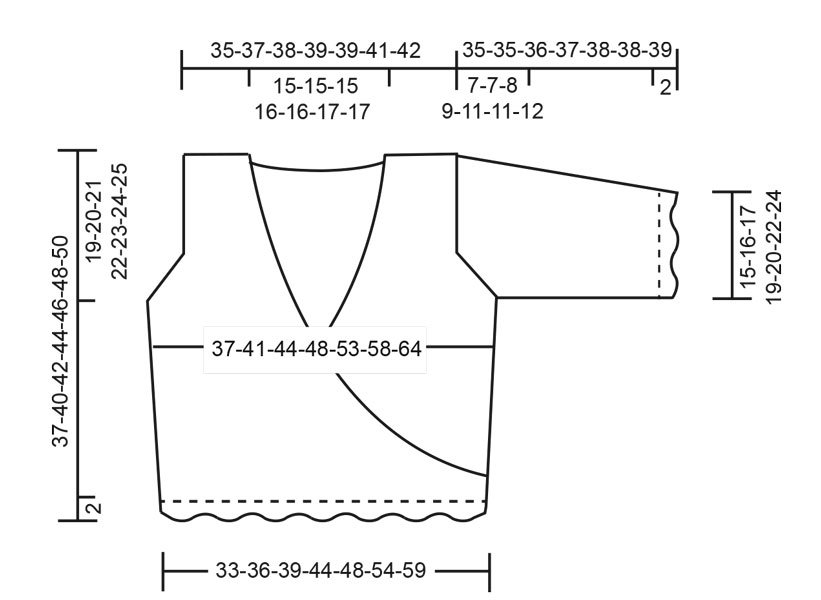
------------------------------------------------------- EXPLANATIONS FOR THE PATTERN: ------------------------------------------------------- CROCHET INFORMATION: The first double crochet on the row is replaced by 3 chain stitches. NOTE: When the first stitch on the row is a treble crochet, this stitch is replaced by 4 chain stitches. When working in the round, begin the round with 3 chain stitches which replace the first double crochet. At the end of the round, work 1 slip stitch in the 3rd of these 3 chain stitches. INCREASE TIP-1: Increase 1 single crochet by working 2 single crochets in the same double crochet. Increase inside the outermost stitch (i.e., work 2 double crochets in the 2nd stitch or the next-to-last stitch on the row). Increase like this from both the right and wrong side. INCREASE TIP-2: Increase 2 stitches as shown in A.1 on the right front piece and as shown in A.2 on the left front piece. NOTE: The first treble crochet on the row is replaced by 4 chain stitches. PATTERN: See diagrams A.1 to A.5. DECREASE TIP-1 (for sides of body): Decrease 1 double crochet by working 2 double crochets together: * Make 1 yarn over, insert the hook through the next stitch, pick up the strand, make 1 yarn over and pull it through the first 2 loops on the hook *, work from *-* 1 more time, make 1 yarn over and pull it through all 3 loops on the hook (1 stitch decreased). Decrease 2 double crochets under the sleeves as follows: Work until there are 3 double crochets left before the marker-thread, work 2 double crochets together, work 1 double crochet in each of the next 2 double crochets (marker-thread sits between these 2 double crochets), work 2 double crochets together. DECREASE TIP-2 (for sleeves): Decrease 2 double crochets mid-under the sleeve as follows: Work 1 double crochet, work 2 double crochets together (1 stitch decreased), work until there are 3 stitches left on the round, work 2 double crochets together (1 stitch decreased), work 1 double crochet in the last stitch. ------------------------------------------------------- START THE PIECE HERE: ------------------------------------------------------- JACKET – SHORT OVERVIEW OF THE PIECE. The front and back pieces are worked separately, back and forth and top down. The pieces are joined and the body is continued back and forth to finished length. The shoulder seams are sewn. An edge is worked along the front pieces and around the neck. The sleeves are worked top down, starting back and forth for the sleeve cap, then finishing in the round, with alternate rounds from the right and wrong side so the texture matches the body. Tie-bands are worked and the jacket is closed with a wrap-around. RIGHT BACK SHOULDER: Work 23-25-26-26-26-26-27 chain stitches with crochet hook size 4 MM = US 6 and DROPS Belle. Turn and work the first row as follows from the wrong side: 1 double crochet in the 4th chain stitch from the hook (= 2 double crochets), then 1 double crochet in each of the next 1-3-4-4-4-4-5 chain stitches, * skip 1 chain stitch, work 1 double crochet in each of the next 5 chain stitches *, work from *-* to end of row = 18-20-21-21-21-21-22 double crochets. Cut the strand, lay the piece to one side. LEFT BACK SHOULDER: Work 23-25-26-26-26-26-27 chain stitches. Turn and work the first row as follows from the wrong side: 1 double crochet in the 4th chain stitch from the hook (= 2 double crochets), then 1 double crochet in each of the next 1-3-4-4-4-4-5 chain stitches, * skip 1 chain stitch, work 1 double crochet in each of the next 5 chain stitches *, work from *-* to end of row = 18-20-21-21-21-21-22 double crochets. Read CROCHET INFORMATION. On the next row from the right side, work 1 double crochet in each double crochet until there is 1 double crochet left, work 2 double crochets in this double crochet (by the neck) = 19-21-22-22-22-22-23 double crochets on the left shoulder. Work 25-25-25-27-27-29-29 chain stitches for the neckline, then, from the right side on the right back shoulder, work 2 double crochets in the first double crochet, 1 double crochet in each of the next 17-19-20-20-20-20-21 double crochets (= 19-21-22-22-22-22-23 double crochets on the right shoulder) = 63-67-69-71-71-73-75 stitches. BACK PIECE: From the wrong side: Work 1 double crochet in each of the 19-21-22-22-22-22-23 double crochets, then 1 double crochet in each of the 25-25-25-27-27-29-29 chain stitches and 1 double crochet in each of the 19-21-22-22-22-22-23 double crochets on the left shoulder = 63-67-69-71-71-73-75 double crochets. Remember to maintain the crochet gauge. Work 1 double crochet in each double crochet until the piece measures 18-18-18-18-16-15-14 cm = 7"-7"-7"-7"-6¼"-6"-5½". Now increase for the armholes (note how many rows you have worked so this is matched on the front pieces). Increase 1 double crochet each side by working 2 double crochets in the 2nd and the next-to-last double crochet on the row – read INCREASE TIP-1 (2 increased stitches). Increase like this every row, 1-2-3-4-6-8-10 times = 65-71-75-79-83-89-95 double crochets. The piece measures approx. 19-20-21-22-23-24-25 cm = 7½"-8"-8¼"-8¾"-9"-9½"-9¾". Cut the strand. RIGHT FRONT PIECE: Work 23-25-26-26-26-26-27 chain stitches. Turn and work the first row as follows from the wrong side: 1 double crochet in the 4th chain stitch from the hook (= 2 double crochets), then 1 double crochet in each of the next 1-3-4-4-4-4-5 chain stitches, * skip 1 chain stitch, work 1 double crochet in each of the next 5 chain stitches *, work from *-* to end of row = 18-20-21-21-21-21-22 double crochets. Work 7 rows with 1 double crochet in each double crochet – remember CROCHET INFORMATION, with the last row from the wrong side. Now increase for the wrap-around as follows – remember INCREASE TIP-1. ROW 1 (right side): Work 1 double crochet in each double crochet until there are 2 stitches left, work 2 double crochets in the next double crochet and 1 double crochet in the last double crochet (1 increased stitch). ROW 2 (wrong side): Work 1 double crochet, then 2 double crochets in the next double crochet and 1 double crochet in each of the remaining double crochets (1 increased stitch). 9 rows worked = 20-22-23-23-23-23-24 stitches. Continue increasing 2 stitches every row as shown in A.1 – read INCREASE TIP-2, increasing for the wrap-around until the body is finished. When the piece measures 18-18-18-18-16-15-14 cm = 7"-7"-7"-7"-6¼"-6"-5½", begin increasing for the armhole – remember INCREASE TIP-1, starting on the same row as on the back piece so the textured pattern matches. Increase 1 double crochet on each row 1-2-3-4-6-8-10 times (i.e., from the wrong side increase in the next-to-last stitch, from the right side in the 2nd stitch) = 1-2-3-4-6-8-10 increased stitches for the armhole. The piece measures approx. 19-20-21-22-23-24-25 cm = 7½"-8"-8¼"-8¾"-9"-9½"-9¾". Cut the strand, lay the piece to one side. Remember to work the same number of rows as on the back piece. LEFT FRONT PIECE: Work 23-25-26-26-26-26-27 chain stitches. Turn and work the first row as follows from the wrong side: 1 double crochet in the 4th chain stitch from the hook (= 2 double crochets), then 1 double crochet in each of the next 1-3-4-4-4-4-5 chain stitches, * skip 1 chain stitch, work 1 double crochet in each of the next 5 chain stitches *, work from *-* to end of row = 18-20-21-21-21-21-22 double crochets. Work 7 rows with 1 double crochet in each double crochet – remember CROCHET INFORMATION, with the last row from the wrong side. Now increase for the wrap-around as follows. ROW 1 (right side): Work 1 double crochet, then 2 double crochets in the next double crochet and 1 double crochet in each of the remaining double crochets (1 increased stitch). ROW 2 (wrong side): Work 1 double crochet in each double crochet until there are 2 stitches left, work 2 double crochets in the next double crochet and 1 double crochet in the last double crochet (1 increased stitch). 9 rows worked = 20-22-23-23-23-23-24 stitches. Continue increasing 2 stitches every row as shown in A.2 – remember INCREASE TIP-2, increasing for the wrap-around until the body is finished. When the piece measures 18-18-18-18-16-15-14 cm = 7"-7"-7"-7"-6¼"-6"-5½", begin increasing for the armhole, starting on the same row as on the back piece. Increase 1 double crochet on each row 1-2-3-4-6-8-10 times (i.e., from the right side increase in the next-to-last stitch, from the wrong side in the 2nd stitch) = 1-2-3-4-6-8-10 increased stitches for the armhole. The piece measures approx. 19-20-21-22-23-24-25 cm = 7½"-8"-8¼"-8¾"-9"-9½"-9¾". Cut the strand, lay the piece to one side. Remember to work the same number of rows as on the back piece. BODY: Make sure all the pieces are worked from the same side when joined on the next row. Work from the right or wrong side depending on whether you finished on the wrong or right side before, so the texture is maintained. Work as before across 1 front piece, remember to begin by increasing for the wrap-around (= A.1/A.2), work 2-2-4-8-12-16-20 chain stitches for the armhole, work across the back piece, then work 2-2-4-8-12-16-20 chain stitches for the armhole, work across the second front piece, remember to increase for the wrap-around at the end of the row (= A.1/A.2). On the next row work 1 double crochet in each chain stitch under both armholes. Insert 1 marker-thread in the middle of the 2-2-4-8-12-16-20 new stitches under each armhole. These are used when decreasing for the body. Continue back and forth with increases for the wrap-around (= A.1/A.2) as before, AT THE SAME TIME decrease 2 double crochets under each arm (4 stitches decreased) every 4 cm = 1½" 4 times (16 decreased stitches) – read DECREASE TIP-1. When the decreases are finished, continue increasing for the wrap-around until the piece measures 34-37-39-41-43-45-47 cm = 13⅜"-14½"-15¼"-16⅛"-17"-17¾"-18½" from the shoulder. Work 1 row of double crochets without increasing for the wrap-around. The tie-bands are worked here later. The piece measures approx. 35-38-40-42-44-46-48 cm = 13¾"-15"-15¾"-16½"-17¼"-18"-19". Now work a fan-edge as follows: Start from the wrong side on the right front piece. work A.3 across the first 4 stitches, then A.4 until there are 4 stitches left (i.e., if A.4 is worked across 9 double crochets, adjust the number of repeats so you finish with 4 stitches), work A.5. Work A.5, A.4 and A.3 back in the same way, from the right side. The jacket measures approx. 37-40-42-44-46-48-50 cm = 14½"-15¾"-16½"-17¼"-18"-19"-19¾" from the shoulder. ASSEMBLY-1: Sew the shoulder seams. EDGE: Work a fan-edge along the front pieces and around the neckline. Start at the bottom of the right front piece from the right side. Fasten the strand with 1 slip stitch in the first stitch, work 1 single crochet around the first row, * 3 chain stitches, 1 single crochet around the next row*, work from *-* along the front piece, around the neck and down the left front piece, finishing at the bottom. Cut and fasten the strand. SLEEVE: The sleeve is worked top down, starting with the sleeve cap back and forth as follows: Work 53-56-56-55-50-54-53 chain stitches with hook size 4 MM = US 6. Turn and work 1 double crochet in the 4th chain stitch from the hook (= 2 double crochets), then 1 double crochet in each of the next 1-4-4-3-4-2-1 chain stitches, * skip 1 chain stitch, work 1 double crochet in each of the next 5 chain stitches *, work from *-* to end of row = 43-46-46-45-41-44-43 double crochets. On the next row increase 2 double crochets on each side by working 3 double crochets in the first and last double crochet on the row (4 increased stitches). Increase like this every row a total of 4-4-5-6-8-8-9 times = 59-62-66-69-73-76-79 double crochets. On the next row increase 3 double crochets on each side by working 4 double crochets in the first and last double crochet on the row (6 increased stitches) = 65-68-72-75-79-82-85 double crochets. Cut the strand. Work 1-1-2-4-6-8-10 chain stitches for the armhole, work 1 double crochet in each double crochet across the sleeve, then 1-1-2-4-6-8-10 chain stitches for the armhole. Join the round with 1 slip stitch in the first chain stitch = 67-70-76-83-91-98-105 stitches. Work double crochets in the round, alternately from the right and wrong side - remember CROCHET INFORMATION, so the texture matches the body. On the next round decrease 2 stitches under the sleeve - read DECREASE TIP-2. Decrease like this a total of 7-6-7-8-9-9-10 times every 3-3-3-2½-2½-2½-2 cm = 1⅛"-1⅛"-1⅛"-1"-1"-1"-¾" = 53-58-62-67-73-80-85 double crochets. When the sleeve measures 33-33-34-35-36-36-37 cm = 13"-13"-13⅜"-13¾"-14¼"-14¼"-14½" from the cast-on edge, with the last round worked from the right side, work a fan-edge from the wrong side as follows: Work A.3 across the first 4 stitches, then A.4 until there are 4 stitches left (i.e., if A.4 is worked across 9 double crochets, adjust the number of repeats so you finish with 4 stitches), work A.5. Work A.5, A.4 and A.3 back in the same way from the right side. ASSEMBLY-2: Sew in the sleeves (beginning of round = mid-under sleeve). TIE-BANDS: Use hook size 4 MM = US 6. Work 4 slip stitches around the outermost double crochet in the last row before the fan-edge. Work back and forth with 1 double crochet in each double crochet for 45-50-55-60-65-70-75 cm = 17¾"-19¾"-21⅝"-23⅝"-25½"-27½"-29½". Repeat on the other side of the body. The bands are tied around the waist. |
||||||||||||||||||||||||||||||||||
Diagram explanations |
||||||||||||||||||||||||||||||||||
|
||||||||||||||||||||||||||||||||||
 |
||||||||||||||||||||||||||||||||||
 |
||||||||||||||||||||||||||||||||||
 |
||||||||||||||||||||||||||||||||||
Have you finished this pattern?Tag your pictures with #dropspattern #bluecountrywrap or submit them to the #dropsfan gallery. Do you need help with this pattern?You'll find 12 tutorial videos, a Comments/Questions area and more by visiting the pattern on garnstudio.com. © 1982-2026 DROPS Design A/S. We reserve all rights. This document, including all its sub-sections, has copyrights. Read more about what you can do with our patterns at the bottom of each pattern on our site. |
||||||||||||||||||||||||||||||||||


With over 40 years in knitting and crochet design, DROPS Design offers one of the most extensive collections of free patterns on the internet - translated to 17 languages. As of today we count 325 catalogs and 12298 patterns - 12288 of which are translated into English (US/in).
We work hard to bring you the best knitting and crochet have to offer, inspiration and advice as well as great quality yarns at incredible prices! Would you like to use our patterns for other than personal use? You can read what you are allowed to do in the Copyright text at the bottom of all our patterns. Happy crafting!
Post a comment to pattern DROPS 266-4
We would love to hear what you have to say about this pattern!
If you want to leave a question, please make sure you select the correct category in the form below, to speed up the answering process. Required fields are marked *.