
Popular categories
Looking for a yarn?


Comments / Questions (24)
![]() Ulrica Hansen wrote:
Ulrica Hansen wrote:
Jag har provvirkat och uppfattat att min virkfasthet stämmer överens med mönstret. Men nu har jag virkat halsringen och jag förstår inte hur den ska gå att gå över huvudet ?? Jag virkar i strl S med 80 luftmaskor. Upplever ni att just luftmaskorna måste stickas väldigt löst? Jag skulle väldigt gärna ha en anvisning på hur många cm 80 luftmaskor bör vara .
15.01.2026 - 20:42DROPS Design answered:
Hej Ulrica, 80 luftmaskor = ca 50 cm - LUFTMASKOR: När du virkar ytterst på virknålen blir luftmaskan ofta för stram. 1 luftmaska ska vara lika lång som 1 stolpe är bred.
28.01.2026 - 14:49
![]() Ulrica wrote:
Ulrica wrote:
Jag har provvirkat och uppfattat att min virkfasthet stämmer överens med mönstret. Men nu har jag virkat halsringen och jag förstår inte hur den ska gå att gå över huvudet ?? Jag virkar i strl S med 80 luftmaskor. Upplever ni att just luftmaskorna måste stickas väldigt löst? Jag skulle väldigt gärna ha en anvisning på hur många cm 80 luftmaskor bör vara .
15.01.2026 - 20:40
![]() Matilda Decker wrote:
Matilda Decker wrote:
Hello ! This seems like a wonderful pattern and I can't wait to try it! I just wanted to ask why and how we can work with 2 strands of different yarns (as it sais at the beginning)? Have a wonderful day ✨
11.01.2026 - 09:26DROPS Design answered:
Hi Matilda, You hold the 2 strands together (1 of each quality)and then work the jumper as normal. You use the 2 strands throughout the project. Regards, Drops Team
12.01.2026 - 06:49
![]() Marina wrote:
Marina wrote:
Non ho compreso come si esegue la parte finale delle maniche: ho 38 cm, ora devo lavorare diminuendo per 16 volte?(taglia XXXL), che vuol dire? Grazie per la risposta
30.10.2025 - 08:02DROPS Design answered:
Buonasera Marina, deve lavorare la parte compresa tra gli asterischi per il numero di volte indicato per la sua taglia. Buon lavoro!
31.10.2025 - 18:12
![]() Laura wrote:
Laura wrote:
I can’t work out how lobster stitch will work left handed. Do I need to reverse the split off for arms and body as well? Thanks.
08.09.2025 - 21:33
![]() Dina wrote:
Dina wrote:
Ik begrijp het steeds niet je hebt 92 lossen als het wer k 5 cm van af de Markeerders moet je 63 stokjes over de toer dit begrijp ik niet
13.03.2025 - 09:17
![]() Dina wrote:
Dina wrote:
Als het negen cm is vanaf demakeerden is meerder 48 St op detoer hoeveel stokjes is dat ik heb maat xl
12.03.2025 - 21:48DROPS Design answered:
Dag Dina,
Na het meerderen van 48 steken zit je dan op (154+48=) 202 stokjes. Bovenaan het patroon (bij instructies voor het patroon) vindt je een knop om uit te rekenen hoe je de meerderingen goed kunt verdelen over de toer..
13.04.2025 - 18:00
![]() Dina wrote:
Dina wrote:
Hoe veel stokjes moeten er tussen zitten tussen de meerderiengen
12.03.2025 - 11:54DROPS Design answered:
Dag Dina,
'Dat hangt af van de maat die je maakt en dus hoeveel stokjes je op een toer hebt en hoeveel meerderingen je moet maken. Er staat inmiddels een meerder/minder calculator op de pagina, bovenaan het patroon waarmee je dit uit kunt rekenen.
13.04.2025 - 10:59
![]() Dina wrote:
Dina wrote:
Ik heb maat xl ik heb 92 lossen
11.03.2025 - 11:59DROPS Design answered:
Dag Dina,
Voor maat XL neem je steeds het 4e getal van de reeks getallen en zet je inderdaad 92 lossenop.
12.03.2025 - 10:04
![]() Dina wrote:
Dina wrote:
Hoe moet ik meerderen
10.03.2025 - 17:00DROPS Design answered:
Dag Dina,
Bovenaan bij 'tip voor het meerderen' staat aangegeven hoe je de meerderingen maakt.
12.03.2025 - 10:20
|
|
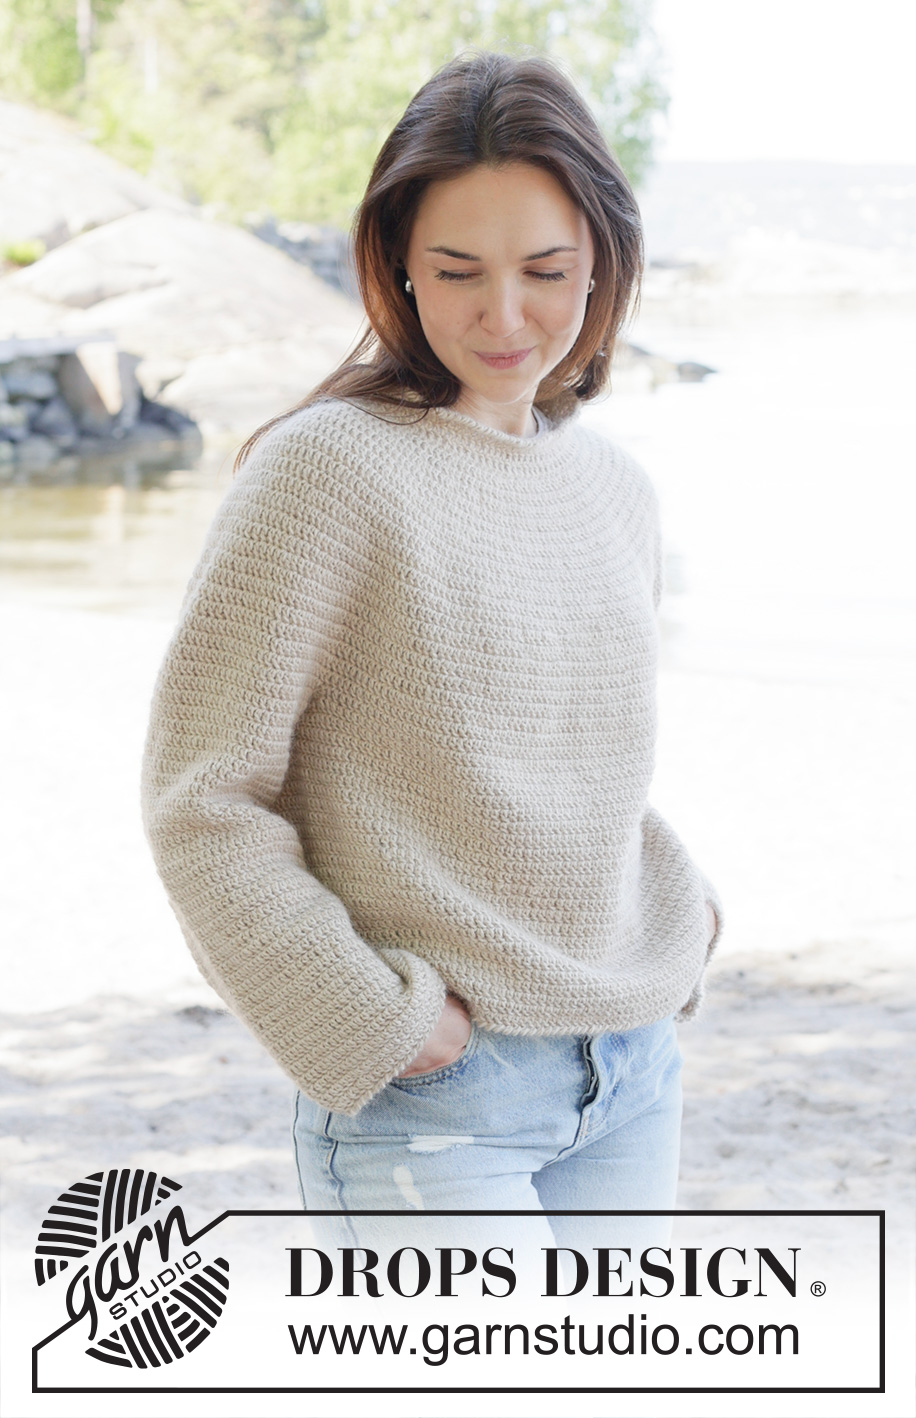
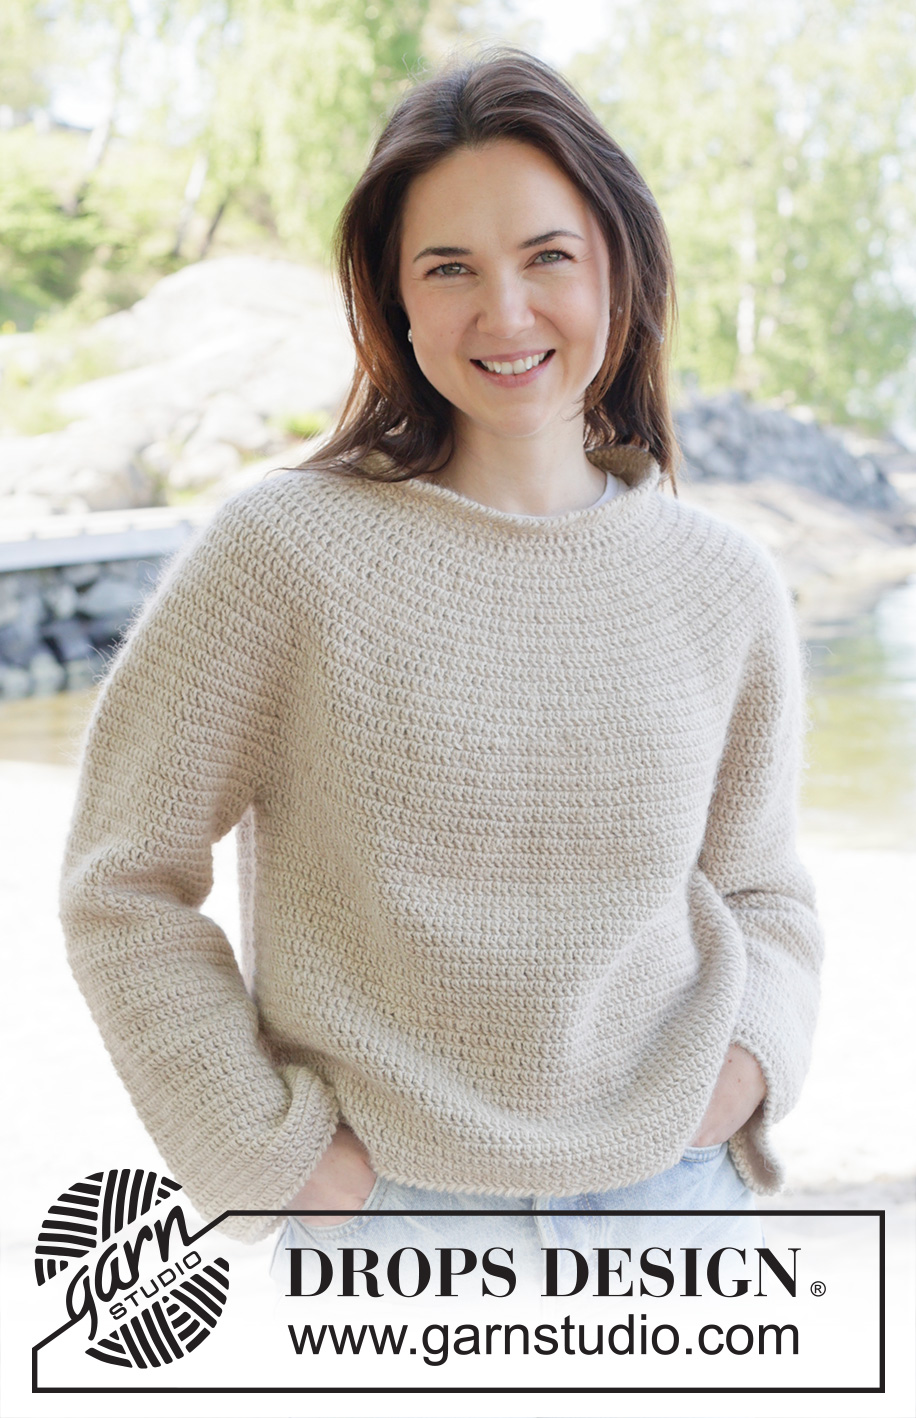
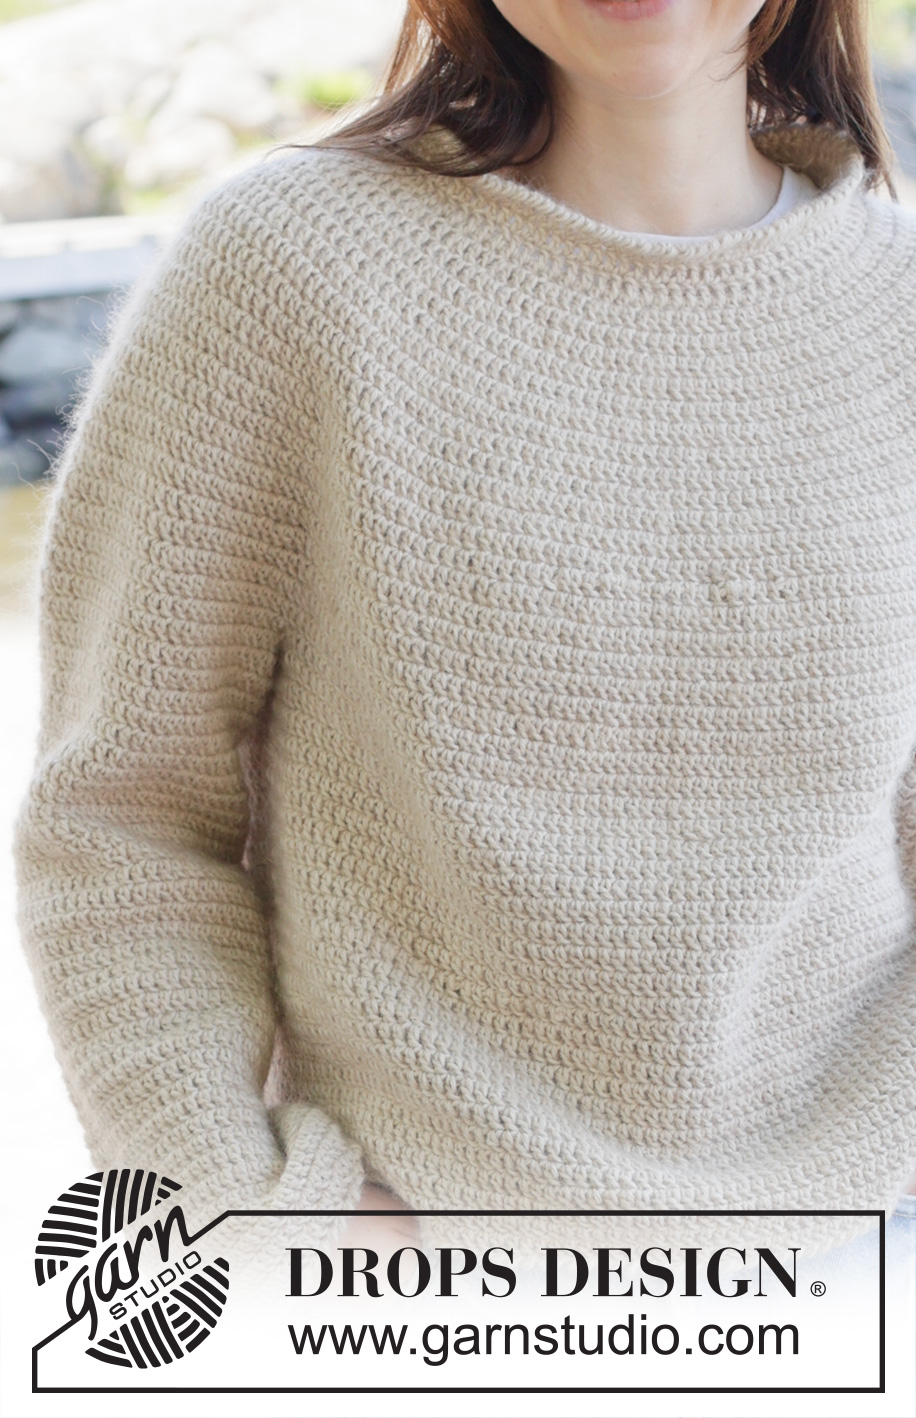
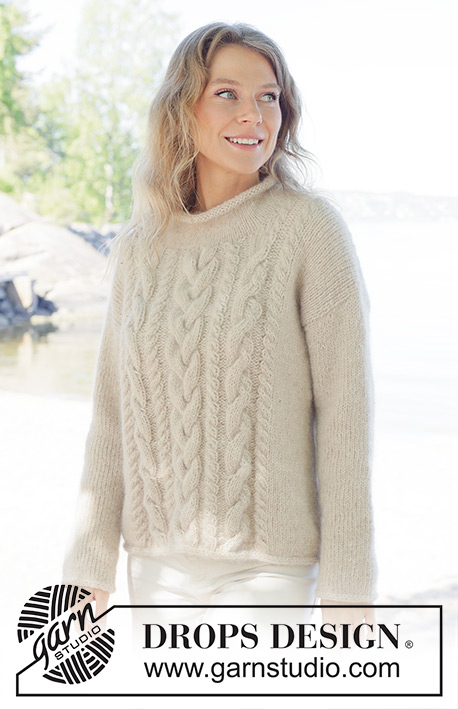
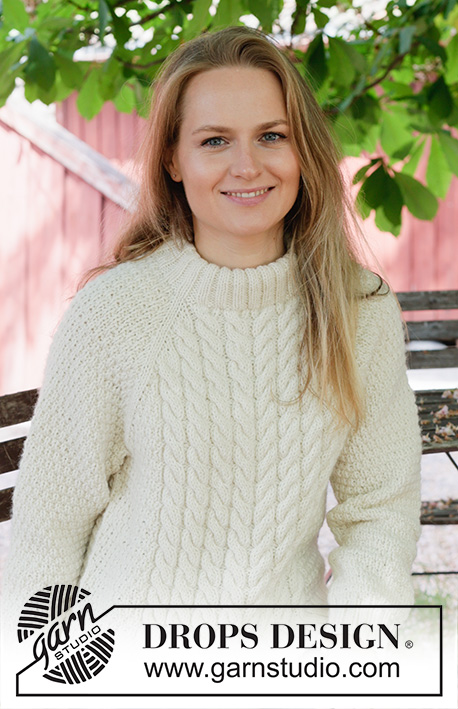
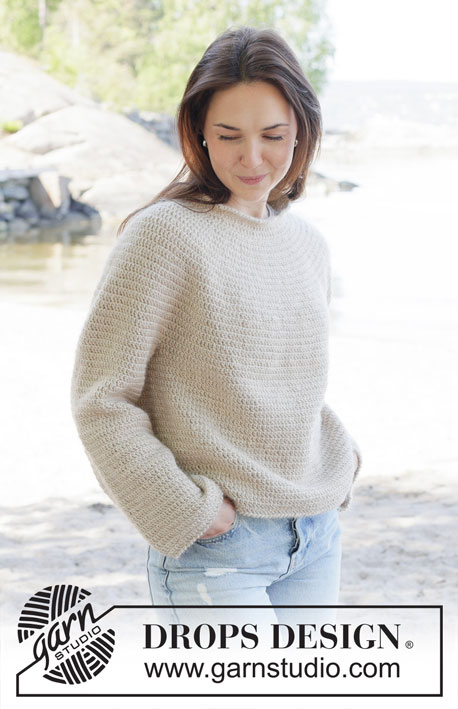
Oatmeal Sweater#oatmealsweater |
|
 |
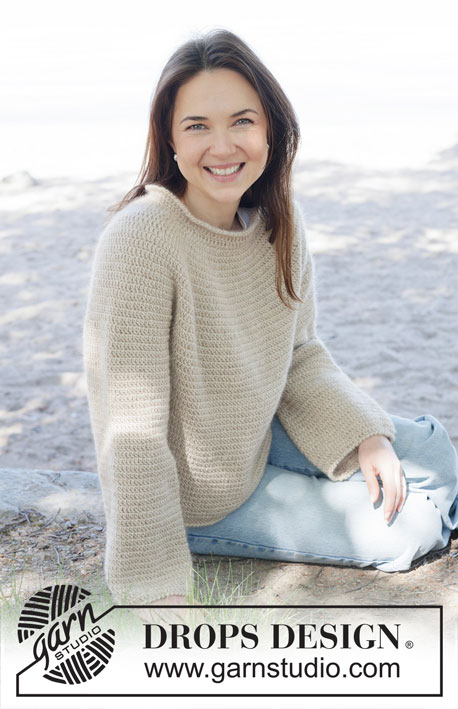 |
Crocheted sweater in DROPS Puna and DROPS Kid-Silk, or in DROPS Daisy and DROPS Kid-Silk. The piece is worked top down with round yoke and lobster stitch. Sizes S - XXXL.
DROPS 254-32 |
|
|
------------------------------------------------------- EXPLANATIONS FOR THE PATTERN: ------------------------------------------------------- CHAIN STITCH: If you work outermost on the hook the chain stitches will often be too tight; 1 chain stitch should be as long as 1 double crochet is wide. CROCHET INFORMATION (double crochets in a spiral): Work in the round in a spiral, without finishing after each round. Insert 1 marker at the beginning of the round to mark where the rounds begin and end. At the end of each round continue with 1 double crochet in the first double crochet from the previous round. On the last round work, to avoid a «jump», work until there are 2 double crochets left on the round, work 1 half-double crochet in the next stitch, 1 single crochet in the last stitch and finish the round with 1 slip stitch in the first double crochet at the beginning of the round. INCREASE TIP (evenly spaced): Increase 1 double crochet by working 2 double crochets in the same stitch. To work out how to increase evenly, count the total number of stitches on the round (e.g., 82 stitches) and divide by the number of increases to be made (e.g., 22) = 3.72. In this example increase by working 2 double crochets in alternatively every 3rd and 4th stitch. LOBSTER STITCH (single crochets): Work single crochets backwards on the round, i.e., working from left to right. DECREASE TIP-1 (for sleeves): When working in the round the beginning of the round will become displaced. Insert 1 marker-thread mid-under the sleeve, between 2 stitches, and allow it to follow your work onwards always mid-under the sleeve. Lay the garment flat to make sure the marker-thread is in the correct position each time before decreasing. Decrease on each side of 2 double crochets by the marker-thread as follows: Work until there are 3 double crochets left before the marker-thread, work 2 double crochets together – read DECREASE TIP-2, work 2 double crochets, work 2 double crochets together (= 2 stitches decreased). DECREASE TIP-2: Decrease 1 double crochet as follows: * Make 1 yarn over, insert the hook through the next stitch, pick up the strand, make 1 yarn over and pull it through the first 2 loops on the hook *, work from *-* 2 more times, make 1 yarn over and pull it through all 3 loops on the hook (1 stitch decreased). ------------------------------------------------------- START THE PIECE HERE: ------------------------------------------------------- SWEATER – SHORT OVERVIEW OF THE PIECE: The yoke is worked in the round from the right back shoulder, top down. The yoke is divided for the body and sleeves which are finished separately in the round. The neck is worked to finish. If there is a «0» in your chosen size, skip the information and go straight to the next instruction. YOKE: Work 80-84-88-92-96-100 CHAIN STITCHES – read explanation above, with hook size 4.5 MM = US 7, 1 strand DROPS Puna and 1 strand DROPS Kid-Silk (= 2 strands), or 1 strand DROPS Daisy and 1 strand DROPS Kid-Silk (= 2 strands). Form the stitches into a ring with 1 slip stitch in the first chain stitch. ROUND 1: Work 2 new chain stitches, 1 half-double crochet in each of the 80-84-88-92-96-100 chain stitches, work 2 half-double crochets around the 2 new chain stitches at the beginning of the round = 82-86-90-94-98-102 half-double crochets. The beginning of the round is the back right shoulder. Insert 1 marker after the first 27-29-30-31-33-34 stitches (approx. mid-front), the piece is measured from here. Read CROCHET INFORMATION and work double crochets in a spiral. Work 1 round with 1 double crochet in each half-double crochet, increasing 22-22-24-24-26-26 double crochets evenly on the round - read INCREASE TIP = 104-108-114-118-124-128 double crochets. Continue in the round with 1 double crochet in each double crochet. Remember the crochet gauge. When the piece measures 4-5-5-5-5-5 cm = 1½"-2"-2"-2"-2"-2" from the marker, increase 26-30-32-36-40-44 double crochets evenly on the round = 130-138-146-154-164-172 double crochets. When the piece measures 7-9-9-9-9-10 cm = 2¾"-3½"-3½"-3½"-3½"-4" from the marker, increase 34-38-42-48-54-58 double crochets evenly on the round = 164-176-188-202-218-230 double crochets. When the piece measures 11-13-13-13-13-15 cm = 4⅜"-5⅛"-5⅛"-5⅛"-5⅛"-6" from the marker, increase 30-34-38-40-44-48 double crochets evenly on the round = 194-210-226-242-262-278 double crochets. When the piece measures 15-17-17-17-18-20 cm = 6"-6¾"-6¾"-6¾"-7"-8" from the marker, increase 16-18-20-22-24-24 double crochets evenly on the round = 210-228-246-264-286-302 double crochets. When the piece measures 19-21-21-21-23-25 cm = 7½"-8¼"-8¼"-8¼"-9"-9¾" from the marker, increase 14-16-18-20-22-22 double crochets evenly on the round = 224-244-264-284-308-324 double crochets. Continue working double crochets in a spiral. When the yoke measures 21-23-23-24-26-28 cm = 8¼"-9"-9"-9½"-10¼"-11" from the marker mid-front, divide for the body and sleeves. DIVIDE FOR BODY AND SLEEVES: Work 10-10-12-14-14-16 new chain stitches (in side mid-under sleeve), skip the first 42-46-52-56-58-58 double crochets (= sleeve), work 1 double crochet in each of the next 70-76-80-86-96-104 double crochets (front piece), work 10-10-12-14-14-16 new chain stitches (in side mid-under sleeve), skip the next 42-46-52-56-58-58 double crochets (= sleeve), work 1 double crochet in each of the last 70-76-80-86-96-104 double crochets (= back piece). The body and sleeves are finished separately. BODY: Continue working in a spiral with 1 double crochet in each double crochet (and on round 1 with 1 double crochet in each of the 10-10-12-14-14-16 new chain stitches under each sleeve) = 160-172-184-200-220-240 double crochets. Work until the piece measures 46-48-49-51-53-55 cm = 18"-19"-19¼"-20"-21"-21⅝" from the marker mid-front – remember CROCHET INFORMATION when finishing the last round. Work 1 round of LOBSTER STITCH – read explanation above. The sweater measures approx. 47-49-50-52-54-56 cm = 18½"-19¼"-19¾"-20½"-21¼"-22" from the marker mid-front and 52-54-56-58-60-62 cm = 20½"-21¼"-22"-22¾"-23⅝"-24⅜" from top of shoulder. SLEEVES: Work the 42-46-52-56-58-58 skipped stitches on one side: Fasten the strand with 1 single crochet in the 6th-6th-7th-8th-8th-9th chain stitch under the sleeve. Work 1 double crochet in each of the next 3-3-4-5-5-6 chain stitches, then work 2 double crochets together as follows: Work 1 double crochet in the last chain stitch but wait with the last yarn over and pull through, work 1 more double crochet around the double crochet in the transition between body and sleeve, make 1 yarn over and pull it through all 3 loops on the hook (this reduces the hole between body and sleeve), work 1 double crochet in each of the 42-46-52-56-58-58 double crochets from the yoke, as far as the chain stitches on the other side, work 2 double crochets together as above in the transition between body and sleeve, then 1 double crochet in each of the last 4-4-5-6-6-7 chain stitches under the sleeve = 52-56-64-70-72-74 stitches. Work double crochets in a spiral, starting the next round by working 1 double crochet in the single crochet from the previous round, then 1 double crochet in each double crochet. AT THE SAME TIME, when the sleeve measures 3 cm = 1⅛" from the division, decrease under the sleeve – read DECREASE TIP-1, decreasing 2 double crochets every 0-0-5-4-3-4 cm = 0"-0"-2"-1½"-1⅛"-1½" a total of 0-0-2-3-4-3 times = 52-56-60-64-64-68 double crochets. Continue working until the sleeve measures 42-41-42-42-40-38 cm = 16½"-16⅛"-16½"-16½"-15¾"-15" from the division. Work 1 round as follows: * 1 double crochet in first/next double crochet, 1 double crochet in the next double crochet, work 2 double crochets together – remember DECREASE TIP-2 * work from *-* a total of 12-13-14-15-15-16 times, until there are 4 double crochets left, work 1 double crochet in each of the next 2 double crochets, 1 half-double crochet in the next double crochet, 1 single crochet in the last double crochet = 41-44-47-50-50-53 stitches, 1 slip stitch in the first double crochet on the round. Work 1 round of LOBSTER STITCH. The sleeve measures approx. 44-43-44-44-42-40 cm = 17¼"-17"-17¼"-17¼"-16½"-15¾" from the division. NECK: Use hook size 4.5 MM = US 7 and 1 strand of each quality (= 2 strands). Work 1 single crochet mid-back, from the right side, then 1 double crochet between each half-double crochet from round 1 = 82-86-90-94-98-102 stitches around the neck. Work 1 double crochet in each double crochet in a spiral for 3-3-3-4-4-4 cm = 1⅛"-1⅛"-1⅛"-1½"-1½"-1½" – remember CROCHET INFORMATION when finishing the last round. Work 1 round of LOBSTER STITCH. |
|
 |
|
Have you finished this pattern?Tag your pictures with #dropspattern #oatmealsweater or submit them to the #dropsfan gallery. Do you need help with this pattern?You'll find 12 tutorial videos, a Comments/Questions area and more by visiting the pattern on garnstudio.com. © 1982-2026 DROPS Design A/S. We reserve all rights. This document, including all its sub-sections, has copyrights. Read more about what you can do with our patterns at the bottom of each pattern on our site. |
|


With over 40 years in knitting and crochet design, DROPS Design offers one of the most extensive collections of free patterns on the internet - translated to 17 languages. As of today we count 324 catalogs and 12290 patterns - 12280 of which are translated into English (US/in).
We work hard to bring you the best knitting and crochet have to offer, inspiration and advice as well as great quality yarns at incredible prices! Would you like to use our patterns for other than personal use? You can read what you are allowed to do in the Copyright text at the bottom of all our patterns. Happy crafting!
Post a comment to pattern DROPS 254-32
We would love to hear what you have to say about this pattern!
If you want to leave a question, please make sure you select the correct category in the form below, to speed up the answering process. Required fields are marked *.