
Popular categories
Looking for a yarn?


Comments / Questions (51)
![]() Carmen wrote:
Carmen wrote:
Hallo, ich bin dabei, das Vorderteil zu stricken und habe soeben die 14 mittleren Maschen abgekettet. so weit, so gut...nun verstehe ich aber die Abnahme am Halsrand nicht :/ "...dabei am Anfang jeder R, die am Halsrand beginnt, wie folgt innerhalb 1 Rand-M abnehmen: 1 M 2 x..." 1 M 2 x Bei jeder Reihe, die am Halsausschnitt beginnt, 2 Maschen abketten? Bitte helft mir weiter, ich möchte den Pulli doch bald tragen können ;) LG Carmen
18.04.2015 - 12:06DROPS Design answered:
Sie nehmen am Halsrand 1 M ab und das in 2 R. Also: 1 Rand-M stricken, 1 M abnehmen, R zu Ende stricken, wenden, Rück-R stricken (dann sind Sie wieder am Halsrand gelandet), wenden, 1 Rand-M, 1 M abnehmen. "2x" bezieht sich also auf die Anzahl der R, in denen die angegebene M-Zahl (= 1 M) abgenommen werden soll.
20.04.2015 - 11:30
![]() Lily wrote:
Lily wrote:
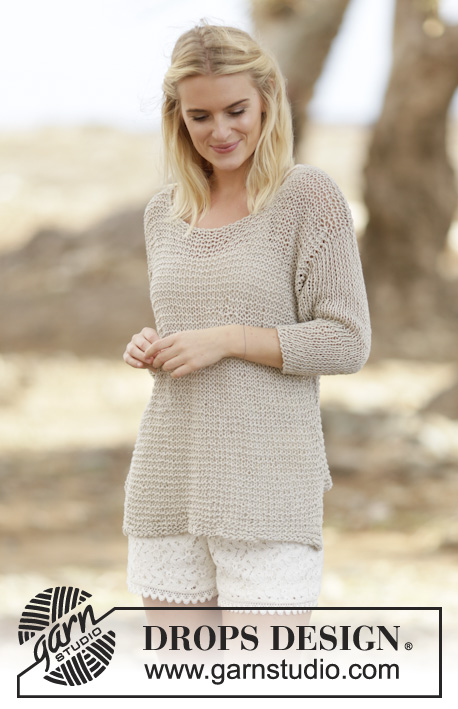
Ist die Rückseite kurzer oder nur ich sehe es so? Weil beide Seiten sind gleich lang, Gesamtlänge von 66-...-76 cm, aber auf dem Bild sieht es nicht so aus. Und noch eine Frage, "das Vorderteil wie das Rückenteil stricken" heißt auch beim Vorderteil wir der Schlitz 18 cm lang sein? Danke im Voraus!
17.03.2015 - 11:53DROPS Design answered:
Liebe Lily, das sieht auf dem Foto tatsächlich so aus, aber ich vermute, da ist das Rückenteil am Schlitz einfach etwas nach hinten gerutscht. Die Teile sind beide gleich lang. Und auch beim Vorderteil bringen Sie nach 18 cm die Markierer für den Schlitz an. Am Ende werden Vorder- und Rückenteil dann so zusammengenäht, dass diese 18 cm an beiden Seiten offen bleiben.
19.03.2015 - 10:58
![]() Andrea H wrote:
Andrea H wrote:
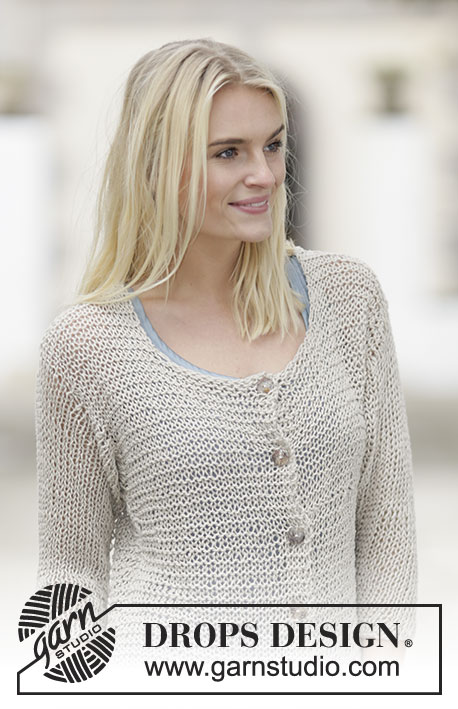
Hallo, ist der Pulli auf dem Foto aus Bomull-Lin oder aus Paris gestrickt?
03.02.2015 - 08:28DROPS Design answered:
Der abgebildete Pulli ist aus Bomull-Lin.
03.02.2015 - 13:50
![]() Rita wrote:
Rita wrote:
Bij, dit patroon staat geen teltekening
29.01.2015 - 18:24DROPS Design answered:
Hoi Rita. De maattekening is toegevoegd. Er is geen teltekening voor dit patroon.
30.01.2015 - 14:00
![]() Tout Simplement wrote:
Tout Simplement wrote:
Puisque ce chandail représente la simplicité, le confort.
25.01.2015 - 21:31
![]() Lisa Lundquist wrote:
Lisa Lundquist wrote:
By the sea shore casual
25.01.2015 - 09:37
![]() Marie France Dandurand wrote:
Marie France Dandurand wrote:
J'ai bien hâté de le faire semblé très confortable
13.01.2015 - 22:54
![]() Monika wrote:
Monika wrote:
Ein schöner und schlichter Pulli, den würde ich gerne stricken! Lässig und bequem...
11.01.2015 - 20:01
![]() Monika wrote:
Monika wrote:
Ein schöner und schlichter Pulli, den würde ich gerne stricken! Lässig und bequem...
11.01.2015 - 20:01
![]() Giuliana wrote:
Giuliana wrote:
Graziosa e comoda
10.01.2015 - 16:07
|
||||
Perly May#perlymaysweater |
||||
 |
 |
|||
Knitted DROPS jumper in garter st, stockinette st and vent in "Bomull-Lin" or "Paris". Size: S - XXXL.
DROPS 160-5 |
||||
|
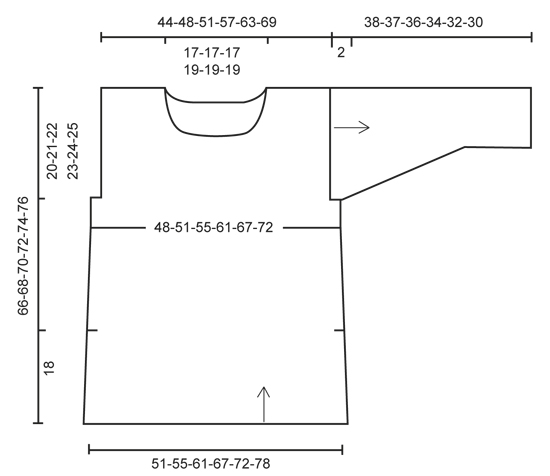
GARTER ST (back and forth): K all rows. 1 ridge = K2 rows. DECREASE TIP: Dec 1 st at beg of row as follows: 1 edge st, slip next st as if to K, K 1, psso. Dec 1 st at end of row as follows: Work until 3 sts remain on needle, K the next 2 sts tog, 1 edge st. MEASURING TIP: Because of the ridges and the weight of the yarn all measurements must be done by holding the piece up otherwise the garment will be too long when worn. ---------------------------------------------------------- BACK PIECE: Worked back and forth on circular needle. LOOSELY cast on 54-58-64-70-76-82 sts on circular needle size 9 mm / US 13 with 2 strands Bomull-Lin or Paris. Then work ridges in GARTER ST - see explanation above, work only with 1 strand. REMEMBER THE KNITTING GAUGE When piece measures 18 cm / 7" - READ MEASURING TIP, insert 1 marker in each side of piece (vent beg here). When piece measures 26 cm / 10¼", dec 1 st in each side of piece - READ DECREASE TIP! Repeat dec in each side every 9 cm / 3½" 1-1-2-2-2-2 more times = 50-54-58-64-70-76 sts. When piece measures 46-47-48-49-50-51 cm / 18"-18½"-19"-19¼"-19¾"-20", bind off for armholes in each side of piece as follows: bind off 2 sts at the beg of the next 2 rows = 46-50-54-60-66-72 sts. When piece measures 62-64-66-68-70-72 cm / 24⅜"-25¼"-26"-26¾"-27½"-28⅜" - REMEMBER MEASURING TIP, bind off the middle 16-16-16-18-18-18 sts for neck and finish each shoulder separately (= 15-17-19-21-24-27 sts remain on each shoulder). Dec 1 st on next row from RS towards the neck = 14-16-18-20-23-26 sts. LOOSELY bind off when piece measures 66-68-70-72-74-76 cm / 26"-26¾"-27½"-28⅜"-29⅛"-30". FRONT PIECE: Cast on and work as back piece. When piece measures 56-58-59-61-62-64 cm / 22"-22¾"-23¼"-24"-24½"-25¼", bind off the middle 14-14-14-16-16-16 sts for neck and finish each shoulder separately (= 16-18-20-22-25-28 sts on each shoulder). Then dec at beg of every row from neck as follows: Dec 1 st 2 times = 14-16-18-20-23-26 sts. LOOSELY bind off when piece measures 66-68-70-72-74-76 cm / 26"-26¾"-27½"-28⅜'-29⅛"-30". ASSEMBLY: Sew the shoulder seams. SLEEVE: Sleeve is worked top down. Pick up 44-46-48-50-52-54 sts (includes 1 edge st in each side) on circular needle size 9 mm / US 13 with Bomull-Lin or Paris - NOTE: Pick up in edge sts inside the 2 sts bind off for armholes in each side. Work stockinette st back and forth on circular needle. When piece measures 2 cm / ¾", insert 1 marker in each side - used for assembly of sleeve. When piece measures 5-4-5-4-5-3 cm / 2"-1½"-2"-1½"-2"-1", dec 1 st in each side of piece inside 1 edge st. Repeat dec every 3 cm / 1" 8-8-7-7-6-6 more times = 26-28-32-34-38-40 sts. LOOSELY bind off sleeve piece measures 38-37-36-34-32-30 cm / 15"-14½"-14¼"-13½"-12½"-11¾" (shorter measurements in the larger sizes because of wider shoulders). ASSEMBLY: Sew the sleeve seams inside 1 edge st - NOTE: The 2 cm / ¾" worked back and forth before marker at the top of sleeve should fit the bind off for armhole. Sew side seam from armhole down to marker for vent, sew in outer loops of edge sts. |
||||
Diagram explanations |
||||
|
||||
 |
||||
Have you finished this pattern?Tag your pictures with #dropspattern #perlymaysweater or submit them to the #dropsfan gallery. Do you need help with this pattern?You'll find 16 tutorial videos, a Comments/Questions area and more by visiting the pattern on garnstudio.com. © 1982-2026 DROPS Design A/S. We reserve all rights. This document, including all its sub-sections, has copyrights. Read more about what you can do with our patterns at the bottom of each pattern on our site. |
||||


With over 40 years in knitting and crochet design, DROPS Design offers one of the most extensive collections of free patterns on the internet - translated to 17 languages. As of today we count 324 catalogs and 12290 patterns - 12280 of which are translated into English (US/in).
We work hard to bring you the best knitting and crochet have to offer, inspiration and advice as well as great quality yarns at incredible prices! Would you like to use our patterns for other than personal use? You can read what you are allowed to do in the Copyright text at the bottom of all our patterns. Happy crafting!
Post a comment to pattern DROPS 160-5
We would love to hear what you have to say about this pattern!
If you want to leave a question, please make sure you select the correct category in the form below, to speed up the answering process. Required fields are marked *.