
Popular categories
Looking for a yarn?


Comments / Questions (77)
![]() Aissela Laudo wrote:
Aissela Laudo wrote:
Finito il lavoro in Melody. Lavoro molto allungato e "lasso già appena finito, forse avrò lavorato morbido. Capo deformato in breve tempo, ottimo x stare in casa...
02.04.2019 - 21:12
![]() Aissela Laudo wrote:
Aissela Laudo wrote:
Scusate, indendevo da quando si è intrecciare 1 m. a ogni lato per lo scalfo . Grazir
02.11.2018 - 16:33
![]() Aissela Laudo wrote:
Aissela Laudo wrote:
Il numero delle maglie della manica ( nella taglia S 38:2 perché mezze x davanti e mezze dietro=19maglie ) deve essere lo stesso delle righe del davanti dietro da quando si è intrecciata una maglia x scollo fino a compresa l ultima? Perché forse ho sbagliato. Qui ho 21 maglie.....
02.11.2018 - 16:00DROPS Design answered:
Buonasera Aissela. Se la tensione del suo lavoro è corretta, seguendo le indicazioni del testo ottiene le misure giuste per la manica. Buon lavoro!
02.11.2018 - 19:20
![]() Aissela Laudo wrote:
Aissela Laudo wrote:
Vi chiedo di indicarmi il metodo migliore (o quello utilizzato da chi ha fatto il modello) per effettuare gli aumenti di 14 maglie sul dietro . Secondo me il gettato crea un buco troppo grande. Ho bisogno di indicazioni precise grazieee
24.05.2018 - 22:36DROPS Design answered:
Buongiorno Aissela, può aumentare lavorando 2 maglie nella stessa maglia. Buon lavoro!
25.05.2018 - 07:32
![]() Manja wrote:
Manja wrote:
Hallo, für die Größe 38/40 reichen da 4 Knäule MELODY aus? Danke
21.05.2017 - 19:29DROPS Design answered:
Liebe Manja, In die Größe S, M und L braucht man je 200 g Melody, dh 4 Knäuel. Viel Spaß beim stricken!
22.05.2017 - 09:08
![]() Gabi Berndsen wrote:
Gabi Berndsen wrote:
Super. Fertig. Habe aber noch viel Wolle über
05.07.2015 - 18:55
![]() Lene Maigaard wrote:
Lene Maigaard wrote:
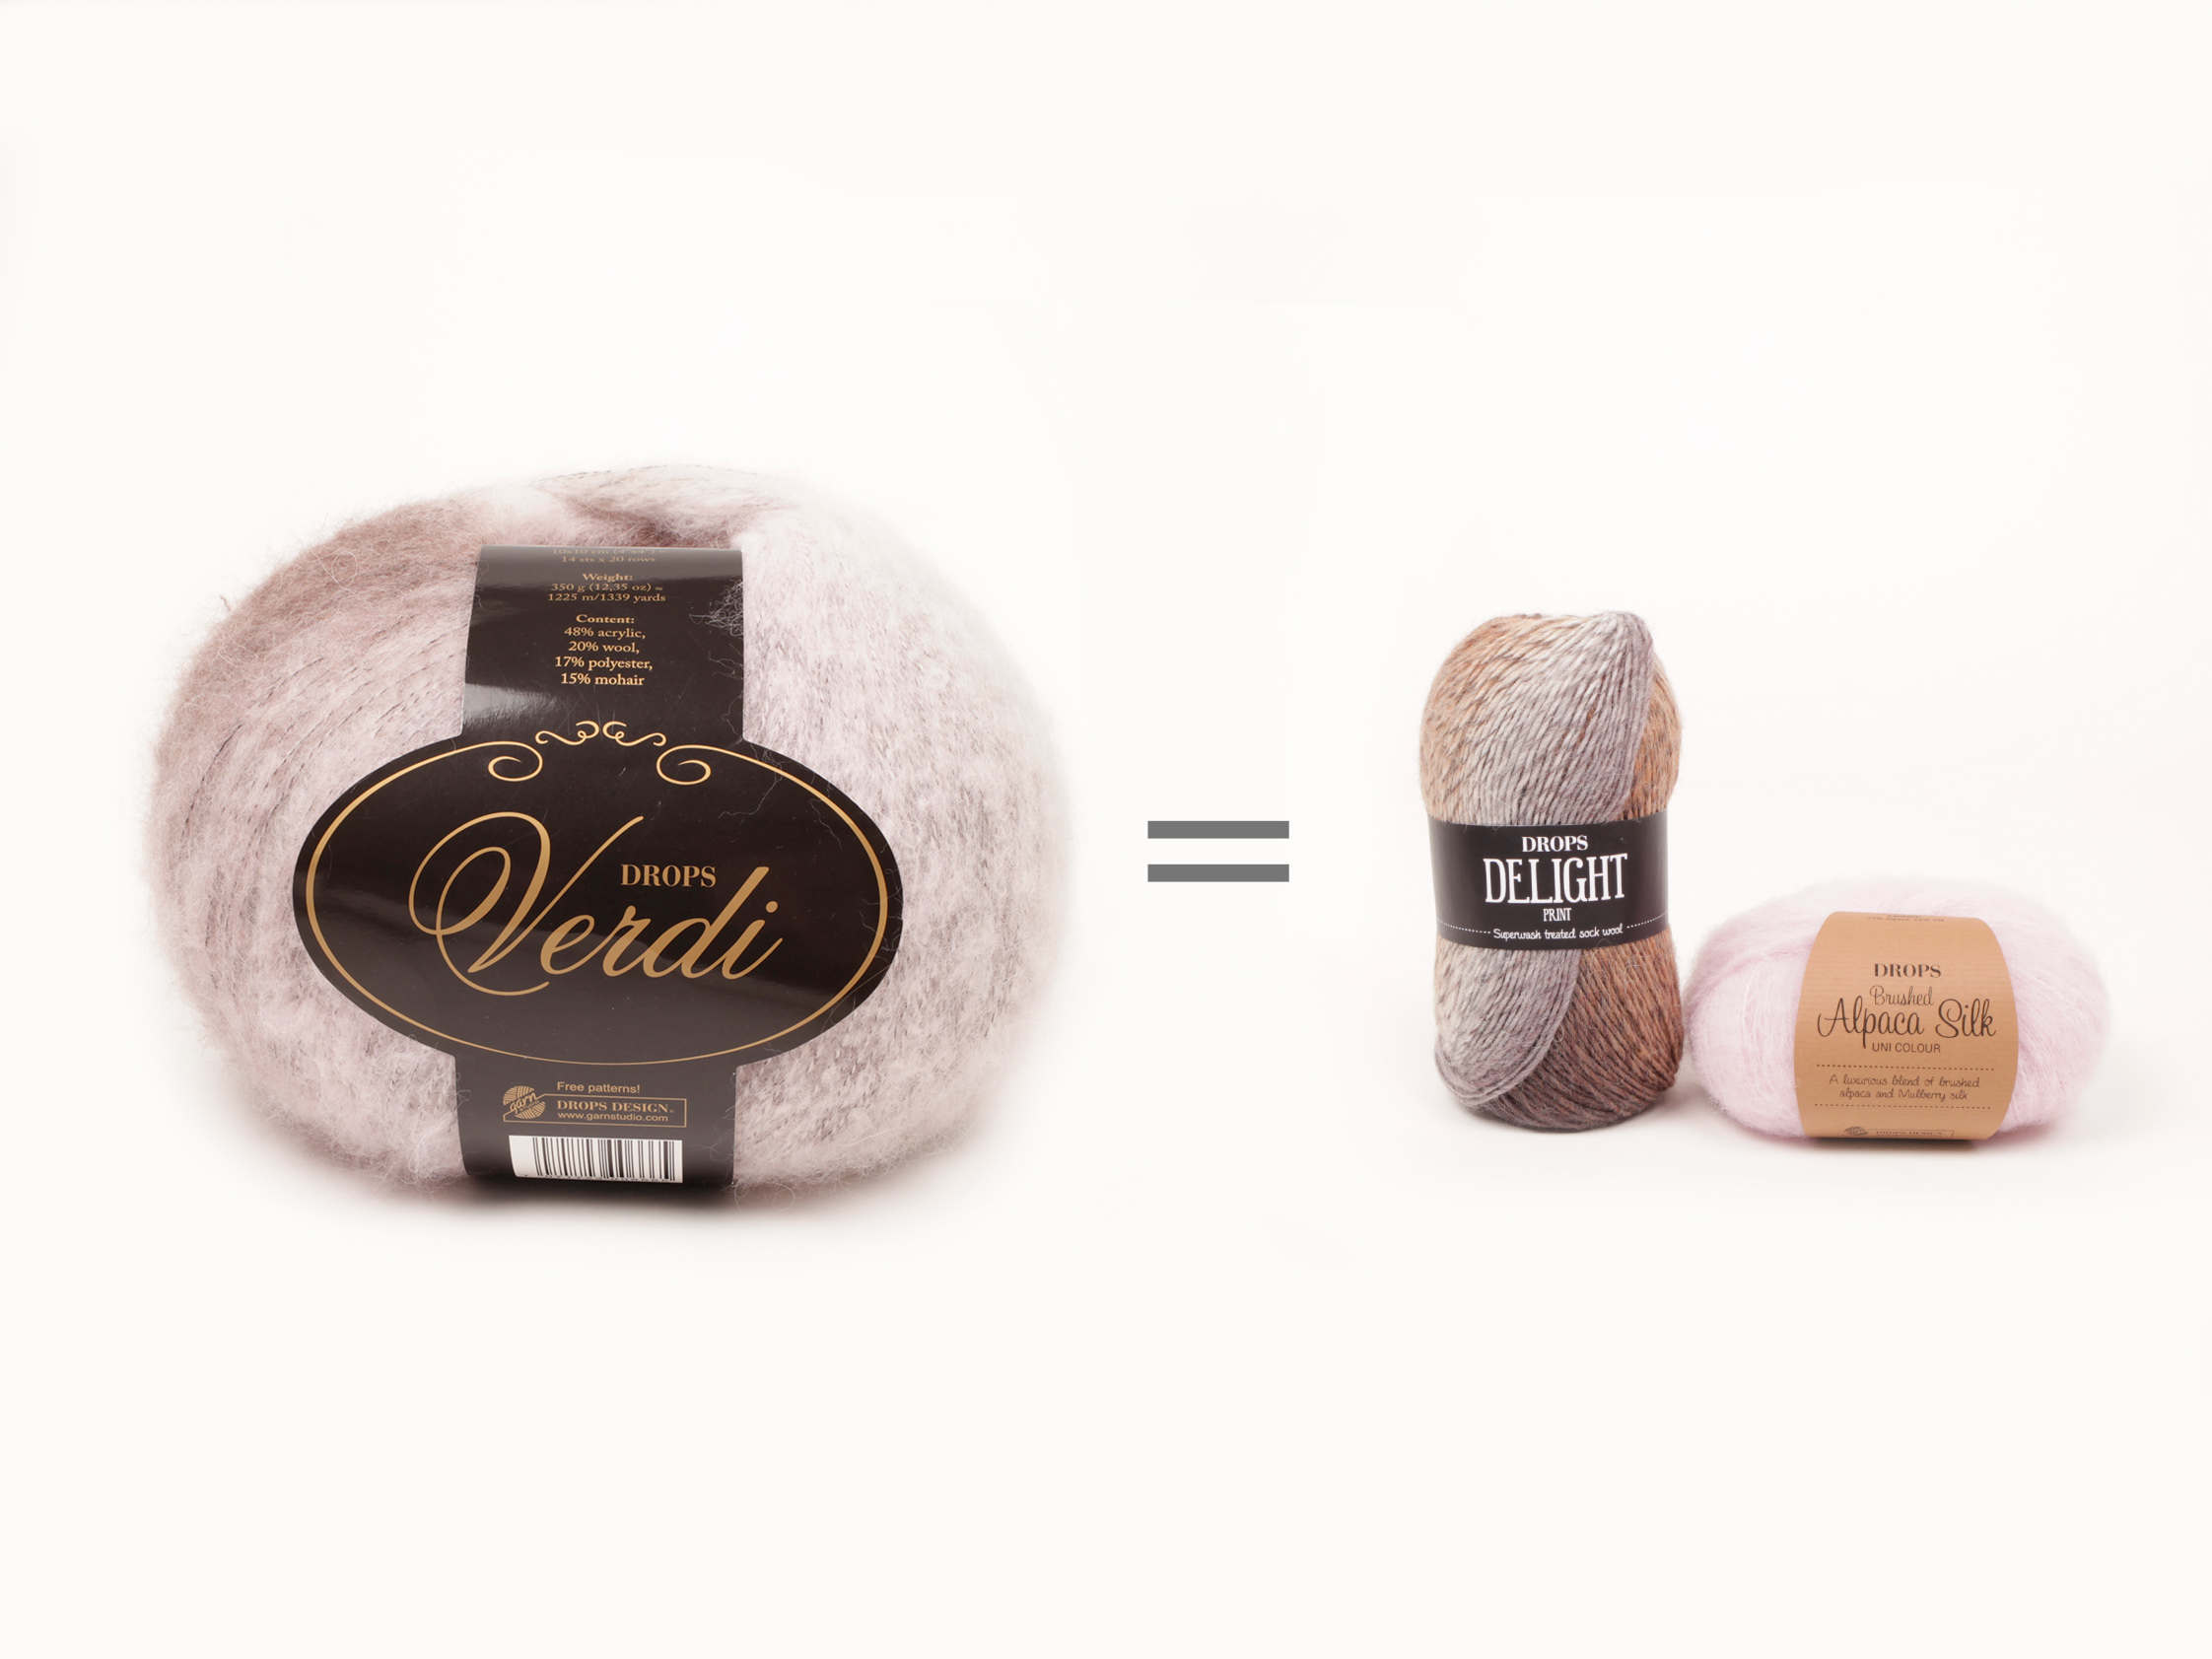
Drops Verdi turkis kan ikke købes mere, hvilken garntype kan der bruges i stedet?
28.01.2015 - 22:02DROPS Design answered:
Hej Lene. Vi har paa nuvaerende tidspunkt ikke noget lignende garn som alternativ til Verdi. Du kan altid pröve dobbelt traad Brushed Alpaca Silk, men saa faar du ikke farveovergangene. Du kan ogsaa kontakte din DROPS butik og faa hjaelp til at finde et alternativ
29.01.2015 - 14:32
![]() Trudy Koster wrote:
Trudy Koster wrote:
Wil graag trui breien,maar kan niet met rond brei nl overweg .kunt u mij een richt lijn geven voor breien op 2 nld Dank Trudy
05.01.2015 - 17:21DROPS Design answered:
Hoi Trudy. Dit model wordt heen en weer gebreid op de nld, u kunt dan ook rechte naalden gebruiken, zonder het patroon aan te passen. Maar let op dat je ruimte hebt voor alle steken.
06.01.2015 - 16:43Nashwaahmed wrote:
What does "vent" mean ?
10.04.2014 - 21:36DROPS Design answered:
Dear Mrs Nashwaahmed, Vents are the side slits, i.e. the parts both side where front & back piece won't be sewn. Happy knitting!
11.04.2014 - 08:48
![]() Fred wrote:
Fred wrote:
Modèle vraiment très très large, qui ne tombe pas bien si on a de la poitrine. Déçue par le rendu......par contre, joli coloris !!!!
06.03.2013 - 16:42
|
||||||||||
North Sea#northseasweater |
||||||||||
|
|
||||||||||
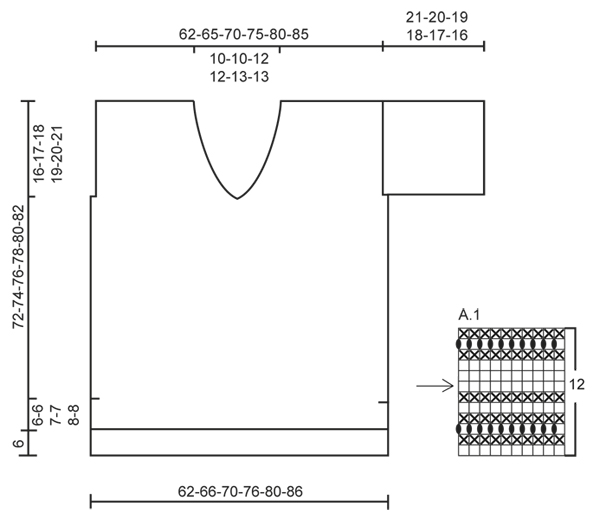
Knitted DROPS jumper in garter st with dropped sts in ”Verdi” or "Melody". Size: S - XXXL.
DROPS 145-10 |
||||||||||
|
GARTER ST (back and forth on circular needle): K all rows. 1 ridge = 2 K rows. PATTERN: See diagram A.1. Diagram shows all rows in pattern seen from RS. NOTE: On 3rd and 11th row in diagram (rows with dropped sts) make 2 YOs on needle after edge st to beg and end with 2 YOs inside edge st in each side (slip all YOs off the needle on next row). On back piece beg pattern on row marked with arrow in diagram. DECREASE TIP (applies to neckline): Dec inside 4 sts in garter st. All dec are done from RS! Dec after 4 sts in garter st as follows: Slip 1 st as if to K, K 1, psso. Dec as follows before 4 sts in garter st: K 2 tog. --------------------------------------------------------- BACK PIECE: The piece is worked back and forth on circular needle because of no of sts. LOOSELY cast on 62-66-70-76-80-86 sts on circular needle size 7 mm / US 10.75 with Verdi and work 2 ridges in GARTER ST - see explanation above (1st row = RS). Switch to circular needle size 8 mm / US 11 and work next row from RS as follows: 3 edge sts in garter st, PATTERN according to diagram A.1 (- see explanation above, on back piece beg pattern on row marked with arrow in diagram) until 3 sts remain and finish with 3 edge sts in garter st. Continue the pattern like this. When piece measures 12-12-13-13-14-14 cm / 4¾"-4¾"-5"-5"-5½"-5½", insert 1 marker in each side (marks height of vent). Continue the pattern with 1 edge st in garter st in each side. When piece measures 50-51-52-53-54-55 cm / 19¾"-20"-20½"-21"-21¼"-21½", work in stockinette st until finished measurements BUT on 1st row from RS inc 14-14-16-16-18-18 sts evenly = 76-80-86-92-98-104 sts. When piece measures 62-63-64-65-66-67 cm / 24½"-24¾"-25¼"-25½"-26"-26½", bind off 1 st in each side for armhole = 74-78-84-90-96-102 sts. When piece measures 74-76-78-80-82-84 cm / 29⅛"-30"-30¾"-31½"-32¼"-33", work 2 ridges over the middle 18-18-20-20-22-22 sts (work the other sts as before). On next row after the 2 ridges, bind off the middle 10-10-12-12-14-14 sts for neck and finish each shoulder separately. Continue to dec 1 st on the next row from neck - READ DECREASE TIP = 31-33-35-38-40-43 sts remain on the shoulder. Work in stockinette st with 4 sts in garter st towards the neck until piece measures 78-80-82-84-86-88 cm / 30¾"-31½"-32¼"-33"-34"-34½" and loosely bind off. Repeat on the other shoulder. FRONT PIECE: Cast on and work as back piece but beg A.1 on 1st row in diagram (not on row marked with arrow in diagram). When piece measures approx. 6-6-7-7-8-8 cm / 2½"-2½"-2 ¾"-2¾"-3"-3", insert 1 marker in each side – make sure that markers are inserted on same row in pattern as on back piece (marker marks height of vent, front piece is shorter than back piece). Continue pattern with 1 edge st in garter st in each side. When piece measures approx. 44-45-46-47-48-49 cm / 17¼"-17¾"-18"-18½"-19"-19¼" - adjust to finish on same row in pattern as on back piece, work in stockinette st until finished measurements BUT on 1st row from RS inc 14-14-16-16-18-18 sts evenly = 76-80-86-92-98-104 sts. Work in stockinette st until piece measures 49-51-51-53-53-55 cm / 19¼"-20"-20"-21"-21"-21½". On next row from RS work in garter st over the middle 8 sts (work the other sts as before). Repeat this on the next 3 rows (= 4 times in total), piece measures approx. 52-54-54-56-56-58 cm / 20½"-21¼"-21¼"-22"-22"-22¾". Now divide for v-neck by slipping the first 38-40-43-46-49-52 sts on a stitch holder. RIGHT SIDE: = 38-40-43-46-49-52 sts. Continue in stockinette st but work the outermost 4 sts towards mid front + edge st in the side in garter st. AT THE SAME TIME on next row from RS beg dec for v-neck and dec as follows – READ DECREASE TIP: Dec 1 st every 4th row (i.e. every other row from RS) a total of 6-6-7-7-8-8 times. AT THE SAME TIME when piece measures 56-57-58-59-60-61 cm / 22"-22½"-22¾"-23¼"-23½"-24", bind off 1 st in the side for armhole. After all dec for armhole and neck, 31-33-35-38-40-43 sts remain on needle for shoulder. Work in stockinette st with 4 sts in garter st towards the neck until piece measures 72-74-76-78-80-82 cm / 28 ⅜"-29⅛"-30"-30¾"-31½"-32¼" and loosely bind off. LEFT SIDE: Slip the stitches on the stitch holder back on circular needle size 8 mm / US 11 and work as right side but reversed. SLEEVE: Cast on 38-40-44-46-48-50 sts on circular needle size 8 mm / US 11 with Verdi and work in garter st back and forth until piece measures 21-20-19-18-17-16 cm / 8¼"-8"-7½"-7"-6¾"-6¼" (shorter measurements in the larger sizes because of wider shoulders), loosely bind off. Knit another sleeve. ASSEMBLY: Sew the shoulder seams. Sew in the sleeves inside 1 edge st. Sew side and underarm seams in one, sew in the outermost sts so that the seam is flat, sew down to marker at the vent. |
||||||||||
Diagram explanations |
||||||||||
|
||||||||||
 |
||||||||||
Have you finished this pattern?Tag your pictures with #dropspattern #northseasweater or submit them to the #dropsfan gallery. Do you need help with this pattern?You'll find 13 tutorial videos, a Comments/Questions area and more by visiting the pattern on garnstudio.com. © 1982-2026 DROPS Design A/S. We reserve all rights. This document, including all its sub-sections, has copyrights. Read more about what you can do with our patterns at the bottom of each pattern on our site. |
||||||||||


With over 40 years in knitting and crochet design, DROPS Design offers one of the most extensive collections of free patterns on the internet - translated to 17 languages. As of today we count 324 catalogs and 12290 patterns - 12280 of which are translated into English (US/in).
We work hard to bring you the best knitting and crochet have to offer, inspiration and advice as well as great quality yarns at incredible prices! Would you like to use our patterns for other than personal use? You can read what you are allowed to do in the Copyright text at the bottom of all our patterns. Happy crafting!
Post a comment to pattern DROPS 145-10
We would love to hear what you have to say about this pattern!
If you want to leave a question, please make sure you select the correct category in the form below, to speed up the answering process. Required fields are marked *.