
Popular categories
Looking for a yarn?


Comments / Questions (190)
![]() Louise wrote:
Louise wrote:
Hello. I am a little confused on this part because after starting the edge piece of this pattern, I am supposed to do the following (I am making a size S/M): Work 1 dc in every dc from back piece, in ch-spaces work (42)-44-46-48 dc = (204)-220-236-248 dc. Now when I started the chain stitches, I did 56 just like what the pattern asked for, but why the 42 dc? Am I missing something? How does that work?
09.11.2025 - 16:47
![]() Anneli Kulju wrote:
Anneli Kulju wrote:
Kiitos, sen ymmärrän. Mutta vielä, kjs kaareen virkataan vaan 46 p, ja kjs on 60, miten siitä tulee hyvä.
13.05.2025 - 17:21DROPS Design answered:
Ketjusilmukat ovat usein tiukemmat kuin pylväät, ja tästä syystä ketjusilmukoita virkataan aluksi enemmän kuin seuraavalla kerroksella virkataan pylväitä.
14.05.2025 - 16:45
![]() Anneli Kulju wrote:
Anneli Kulju wrote:
Kyllä, mutta siinä ohjeessa on myös 46 p =220 p ... Mitä tuo tarkoittaa.
12.05.2025 - 19:22DROPS Design answered:
Nämä 220 pylvästä ovat koko kerroksen silmukkaluku, eli kerroksella virkataan yhteensä 220 pylvästä.
13.05.2025 - 17:02
![]() Anneli Kulju wrote:
Anneli Kulju wrote:
Hei. Kun virkkaan selkäkappaleen ympärille, ja kjs kaareen, mitä tarkoittaa, ensin virkataan 46 p=220 p Tarkoittaako tuo, että kjs ķaareen virkataan 220 p +46 p En ymmärrä.
12.05.2025 - 15:32DROPS Design answered:
Hei, virkkaat 1 pylvään selkäkappaleen jokaiseen pylvääseen ja samalla kerroksella virkkaat kumpaankin ketjusilmukkaketjuun 46 pylvästä.
12.05.2025 - 16:57
![]() Anita Lindskog Jönsson wrote:
Anita Lindskog Jönsson wrote:
Virkar på kantstycket. Virkat varv 1,2 och 3 enligt beskrivning. Mäter 10 cm och skall öka till 310fm. Har ju endast 220 runt om och ökar man med 30blir det 250. Vad gör jag för fel? Står läs ökningstips, där står bara om stolparna ökning.😵💫???
31.05.2024 - 12:51DROPS Design answered:
Hei Anita. Husk at når du har heklet 1.-3. omgang skal alle disse gjentas (ikke bare 3. omgang uten økning). Slik at når du har heklet 3. omgang, starter du på 1. omgang igjen, så 2. omgang, så 3. omgang, så 1. omgang igjen osv. Og når arbeidet måler 5 cm økes det med 30 masker jevnt fordelt (økes på omgangen med bare fastmasker). Så hekles 1. omgang igjen, så 2. omgang, så 3. omgang, så 1. omgang igjen osv. Og når arbeidet måler 10 cm økes det med 30 masker jevnt f. ordelt. mvh DROPS Design
03.06.2024 - 11:48
![]() Sarah wrote:
Sarah wrote:
Hej. När jag ökar efter 5 cm på kantstycket, från 204 till 234 maskor och sen när jag gör stolparna, ska jag fortsätta göra endast en lösmaska emellan trots att de blir fler iom att jag ökat, om man går efter att man vill ha ”stolphålen” under varandra.
08.01.2024 - 16:49DROPS Design answered:
Hei Sarah. Ikke helt sikker på om jeg skjønte spørsmålet ditt, men man gjentar 1. omg der man hekler 1 luftmaske mellom hver stav. Stavene vil ikke komme 100% rett overfor hverandre. Se på nærbildet av jakken og du at de bare kommer sånn ca over hverandre. mvh DROPS Design
15.01.2024 - 09:34
![]() UmmBilal wrote:
UmmBilal wrote:
Hi there! If I want to make the same design but for 5 yr old girl, what changes will i have to make. Or can you suggest a similar pattern written for girls?
10.11.2023 - 05:08DROPS Design answered:
Dear UmmBilal, you will find all our boleros for children here, one of them might inspire you. Happy crocheting!
10.11.2023 - 09:37
![]() Jasmin wrote:
Jasmin wrote:
Hallo, bin in der Anleitung des Ärmels an der Stelle GLEICHZEITIG total 13 Mal bei jeder R. auf beiden Seiten je 1 M. aufnehmen = 78-84-88-94 Stb. Heisst dass 13 Reihen mit 1 Masche je Seite= 2 pro Reihe? Nach 24 cm beidseitig, am Anfang der R. für die Armkugel abk. – 1 Mal 4 Stb , heisst das 1×4 Stb oder 2×1 Stb pro Seite? weiter auf beiden Seiten je 1 Mal 4 Stb abk, heisst das 4 Stb pro Reihe mit jeweils 2 auf jeder Seite oder 8 Stb je Reihe auf jeder Seite 4 Stb?.
16.08.2023 - 23:59DROPS Design answered:
Liebe Jasmin, ja genau dh insgesamt 13 Reihen mit je 1 Zunahmen am Anfang + am Ende jeder dieser Reihen; für die Armkugel sollen Sie am Anfang + am Ende jeder Reihe (Hin- sowie Rück-Reihe) abnehemen bzw abketten damit beide Seite symmetrisch sind, so 4 Stb beidseitig, siehe TIPP ZUM ABNEHMEN: = die 4 Stäbchen beidseitig sind auf 1 Reihe abgenommen. Viel Spaß beim stricken!
17.08.2023 - 09:48
![]() Antonia wrote:
Antonia wrote:
Hallo, wie soll ich 44 Stäbchen in 58 Luftmaschen häkeln (bei den Armlöchern), ohne das dabei riesige Lücken und Löcher entstehen? Vielen Dank für die Hilfe.
15.08.2023 - 21:57DROPS Design answered:
Liebe Antonia, die Luftmaschen sind oft enger als Die Maschen von den nächsten Reihen deshalb wurden mehr Luftmaschen gehäkelt als man Stäbchen danach braucht; sollten Sie Löcher bekommen, wenn Sie Luftmaschen überspringen, dann häkeln Sie lieber Abnahmen (2 Stäbchen zusammen) anstatt. so regelmäßig verteilt abnehmen, damit am Ende nur 44 Stäbchen sind. Viel Spaß beim häkeln!
16.08.2023 - 09:09
![]() Heather wrote:
Heather wrote:
I have started making this project and am stuck on the back piece. I see one reply to Mya on 26.08.2021: We skip chains in the starting chain because some people make their starting chains too tight. But mine are fine to work in all of them and skipping chains makes my work into a curve. Is this correct that the bottom where the foundation chain is creates a turn in the whole work so that it is not straight? Is the bottom of the work supposed to be straight or curved? Thank you.
23.07.2023 - 15:52DROPS Design answered:
Dear Heather, what we mean to say is that we usually work more chain stitches than necessary, to compensate in case that we start working too tightly. Therefore, after casting on chain stitches, we will adjust the number of stitches to the correct amount for the piece, which means that we will skip some chain stitches from the cast-on edge. The piece shouldn't get curved; if the chain stitches were worked too loosely, it could form some arcs and form a slight curve. In that case you can adjust the cast-on chain size with the same needle size, use a smaller needle for the foundation chain or cast on less stitches so that the border will be straight. Happy crocheting!
23.07.2023 - 20:14
|
||||||||||
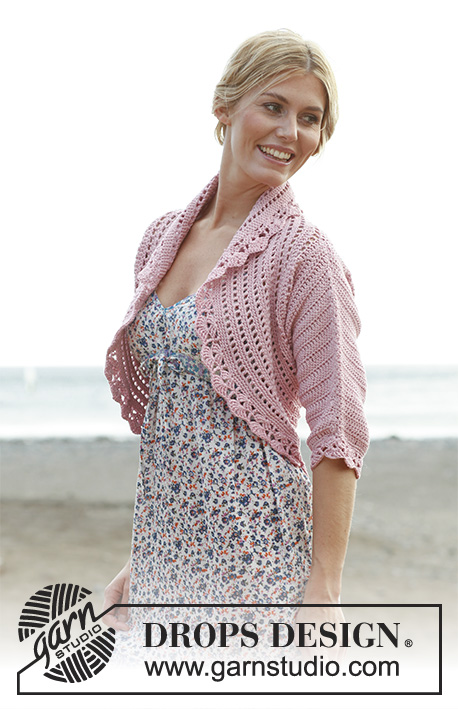
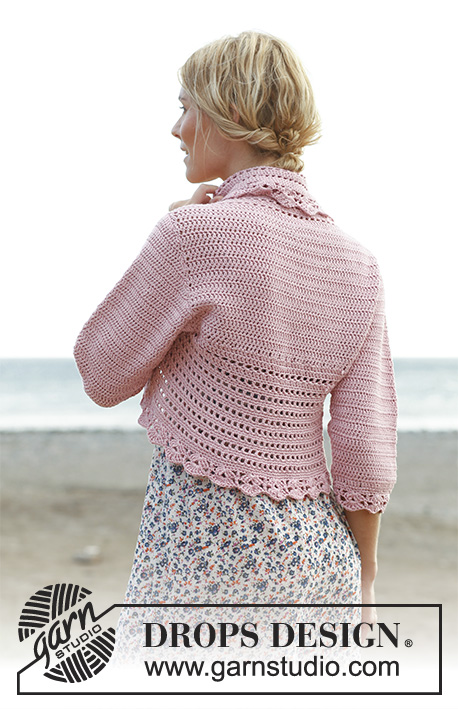
Country Rose#countryrosebolero |
||||||||||
 |
 |
|||||||||
Crochet DROPS jacket in "Cotton Light" and "Glitter". Size S-XXXL.
DROPS 138-6 |
||||||||||
|
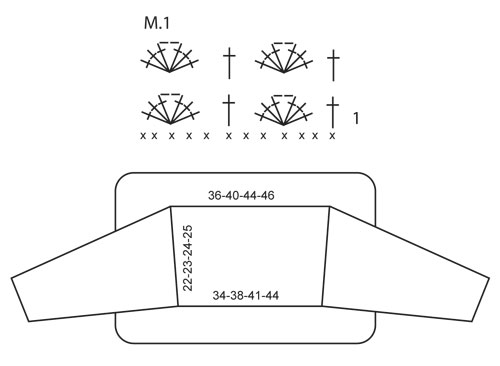
CROCHET INFO: Replace first dc on every row with 3 ch. Replace first sc on every round with 1 ch. Finish every sc round with 1 sl st in 1st ch from beg of round. Replace first dc on every round with 3 ch. Finish every dc round with 1 sl st in 3rd ch from beg of round. INCREASE TIP: Inc by working 2 dc in first and last dc on row. DECREASE TIP: Dec at beg of row as follows: Work sl st over no of dc to be dec. Dec at end of row as follows: When no of dc to be dec remains, turn piece. -------------------------------------------------------- BACK PIECE: Ch 78-86-94-99 loosely on hook size 4 mm / G/6 with 1 strand Cotton Light and 1 strand Glitter (= 2 strands). Work 1 dc in 4th ch from hook, * 1 dc in each of the next ch 3, skip 1 ch *, repeat from *-*, and finish with 1 dc in each of the last 2-2-2-3 ch = 58-64-70-74 dc. Then work 1 dc in every dc - READ CROCHET INFO. When piece measures 7 cm / 2¾", inc 1 dc in each side – READ INCREASE TIP, repeat inc when piece measures 15 cm / 6" = 62-68-74-78 dc. Work until piece measures 22-23-24-25 cm / 8¾"-9"-9½"-9¾". EDGE PIECE: Work 1 dc in every dc on the upper side of back piece, ch 56-58-60-64, 1 dc in every dc from bottom side of back piece, ch 56-58-60-64 and finish with 1 sl st in 1st dc on upper side of back piece. Work 1 dc in every dc from back piece, in ch-spaces work 42-44-46-48 dc = 204-220-236-248 dc. Continue to work in the round as follows: ROUND 1: 1 dc in first dc, * ch 1, skip 1 dc, 1 dc in next dc *, repeat from *-* and finish with ch 1, skip 1 dc and work 1 sl st on beg of round. ROUND 2: 1 sc in every dc and 1 sc in every ch. ROUND 3: 1 sc in every sc. Repeat these 3 rounds, AT THE SAME TIME when edge measures 5, 10 and 15 cm / 2", 4" and 6" (adjust so that this is a round with sc), inc 30-30-30-32 sc evenly on round – READ INCREASE TIP = 294-310-326-344 sc. When edge measures 17-18-19-20 cm / 6¾"-7"-7½"-8" (adjust so that next round is a round with sc), work 1 sc round while AT THE SAME TIME inc 0-2-4-4 sc evenly = 294-312-330-348 sc. Then work diagram M.1. NOTE! Start to work on the row marked with 1 in the diagram. Work diagram M.1 1 time vertically, fasten off SLEEVE: Ch 67-72-72-77 loosely on hook size 4 mm / G/6 with 1 strand Cotton Light and 1 strand Glitter (= 2 strands). Work 1 dc in 4th ch from hook (= 2 dc), * skip ch 1, 1 dc in each of the next 4 ch *, repeat from *-* and finish by skipping ch1 and work 1 dc in each of the last 2 ch = 52-56-56-60 dc. Work 1 dc in every dc back and forth, AT THE SAME TIME inc 1 dc in each side on every row a total of 13-14-16-17 times, read INCREASE TIP = 78-84-88-94 dc. When piece measures 24-24-22-20 cm / 9½"-9½"-8¾"-8" (shorter measurements in the larger sizes because of wider shoulders), dec for sleeve cap in each side on every row - READ DECREASE TIP: 4 dc 1 time, then 3-3-2-2 dc in each side until piece measures 31-33-33-34 cm / 12¼"-13"-13"-13½", now dec 4 dc 1 time in each side. Fasten off. Sew under arm seam with neat little stitches. Work around the bottom of sleeve as follows: Work 1 round with 1 sc in every dc, while at the same time inc 2-4-4-0 sc evenly = 54-60-60-60 sc. Then work diagram M.1 1 time vertically. Fasten off. ASSEMBLY: Sew in sleeves. |
||||||||||
Diagram explanations |
||||||||||
|
||||||||||
 |
||||||||||
Have you finished this pattern?Tag your pictures with #dropspattern #countryrosebolero or submit them to the #dropsfan gallery. Do you need help with this pattern?You'll find 8 tutorial videos, a Comments/Questions area and more by visiting the pattern on garnstudio.com. © 1982-2026 DROPS Design A/S. We reserve all rights. This document, including all its sub-sections, has copyrights. Read more about what you can do with our patterns at the bottom of each pattern on our site. |
||||||||||


With over 40 years in knitting and crochet design, DROPS Design offers one of the most extensive collections of free patterns on the internet - translated to 17 languages. As of today we count 325 catalogs and 12298 patterns - 12288 of which are translated into English (US/in).
We work hard to bring you the best knitting and crochet have to offer, inspiration and advice as well as great quality yarns at incredible prices! Would you like to use our patterns for other than personal use? You can read what you are allowed to do in the Copyright text at the bottom of all our patterns. Happy crafting!
Post a comment to pattern DROPS 138-6
We would love to hear what you have to say about this pattern!
If you want to leave a question, please make sure you select the correct category in the form below, to speed up the answering process. Required fields are marked *.