
Popular categories
Looking for a yarn?


Comments / Questions (21)
![]() D. Wichmann wrote:
D. Wichmann wrote:
Hi, I have two questions and one remark concerning this pattern: 1. it´s really nice to have this comments function but it´s quite useless since I don´t speak Dutch, Finnish or Norwegian. A translation would be brillant! 2. The number of stitches makes no sense, it must be an even amount. If you knit in rounds you will end the same style one on one if you have an uneven amount. 3. in size small: 337 (wrong number of stitches) minus 3 stitches makes 334, not 332.
21.01.2013 - 21:09DROPS Design answered:
Guten Tag Frau Wichmann, wir antworten auf Ihre Fragen, je nach Land aus dem die Frage kommt. Da Sie unter der deutschen Flagge gepostet haben, antworten wir gerne in Deutsch. Die ungerade M-Zahl stimmt: wenn Sie mit einer re M beginnen, enden Sie auch mit einer re M und dann ist die 1. M der nächsten Rd eine li M und das Muster stimmt somit. Auch die angegebene Maschenzahl für S ist richtig, Sie schlagen 337 Maschen an, nehmen 5 M (nicht 3!) ab und haben dann 332 Maschen.
14.02.2013 - 09:23
![]() An Hoek wrote:
An Hoek wrote:
Dit patron wordt opeen rondbreinaald gebreid en de eerste 4cm in dubbelegerstekorrel.je kunt een gestekorrel op eenrondbreinaald alleen op een even aantal steken breien. Er staat dat je na de gerstekorrel 3 steken moet minderen (voor de kleinste maat) ; dit moet 5 steken zijn, anders kom je niet op 332 steken.
07.06.2012 - 13:35DROPS Design answered:
De dubbele gerstekorrelst kunnen prima op een rondbreinld worden gebreid. De steken verspringen. Maar vind je het mooier met een even aantal st, dan is dat prima. Met 336 of 337 st op de nld maakt dat niet zo veel uit. Het aantal te minderen is inderdaad niet goed, maar ik wacht nu op een reactie van Design welk aantal correct moet zijn (3 st minderen of eindigen op 332 st) voordat ik het patroon gaat aanpassen. Ik zal dan het patroon zsm wijzigen.
09.06.2012 - 14:41
![]() Vibeke wrote:
Vibeke wrote:
Utrolig skuffa over denne modellen, kan ikke helt se at bildet er strikken utifra samme modell, den blir altfor kort i ryggen. Selv om hun på bildet har på den aller størst str, og det blir litt villedende, utifra hvor tynn hun er.
07.06.2012 - 09:54
![]() Mirja Meyerhuber wrote:
Mirja Meyerhuber wrote:
Leider ist mein Bolero in Größe M nicht halb so groß geworden wie auf dem Foto. Es wäre schön, wenn Sie angeben würden, in welcher Größe die Modelle auf den Fotos gestrickt wurden.
02.04.2012 - 22:52DROPS Design answered:
Stimmt denn die Arbeit mit der Masskizze überein?
10.04.2012 - 10:00
![]() Betty Holm wrote:
Betty Holm wrote:
Opskriten er ikke i orden. Bliver for kort i ryggen. Jeg syntes at I skal fjerne opskriften.
28.01.2012 - 12:43
![]() Anna wrote:
Anna wrote:
Har stickat klart koftan och anser att den är långt ifrån bilden, tror detta beror på fel i rygglängden på mönstret. Den blir mycket mindre (kortare i ryggen ) i verkligheten och då har jag följt mönstret
28.09.2011 - 11:05
![]() Drops Design wrote:
Drops Design wrote:
Men ryggen vil blive dobbelt så bred når du syr arb sammen.
07.06.2011 - 11:10
![]() Anne Marie Kjeldsen wrote:
Anne Marie Kjeldsen wrote:
Fortsæt til arb måler 15-15-15-15-16-17 cm. I opskriften bliver ryggen for smal, hvis man kun strikker de angivne cm. Der er ligeledes for meget garn.
31.05.2011 - 14:38
![]() DROPS/Gun wrote:
DROPS/Gun wrote:
Kyllä, jakku neulotaan suljettuna neuleena alusta asti. Selkäkappaleiden 80-86-90-96-100-104 s siirretään apulangoille ja silmukoidaan lopuksi yhteen keskeltä takaa. Hihat ovat reunoissa ja ne neulotaan myös suljettuna neuleena. Mikäli tarvitset lisää apua, pyydämme sinua ystävällisesti ottamaan yhteyttä lähimpään DROPS jälleenmyyjääsi, he ovat erikoistuneet ohjeisiimme.
22.03.2011 - 13:26
![]() Leena Valtonen wrote:
Leena Valtonen wrote:
Hei, PYytäisin neuvoa ohjeeseen nro 129-27; 1)neulotaanko jakkua suljettuna alusta asti? , kuva ei mielstäni nätä siltä, jakkua on edestä auki. 2) ohjeessa on neuvottu hihat, nutta jääkö selkäkappale 15 - 17 cm pituiseksi vai jatkuuko se ja miten ?; ohje loppuu tähän. 3) piirroksen mukaan hihat ovat reunassa, ohjeessa (jakku) reuninmmaisena langalle siirretään hiha ja takakppale? Ystävällisesti, Leena Valtonen, Lahti
20.03.2011 - 16:20
|
||||
Agapanthe#agapanthecardigan |
||||
 |
 |
|||
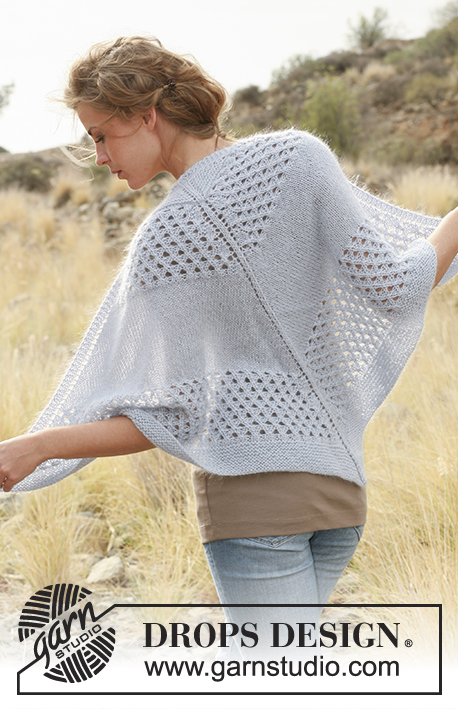
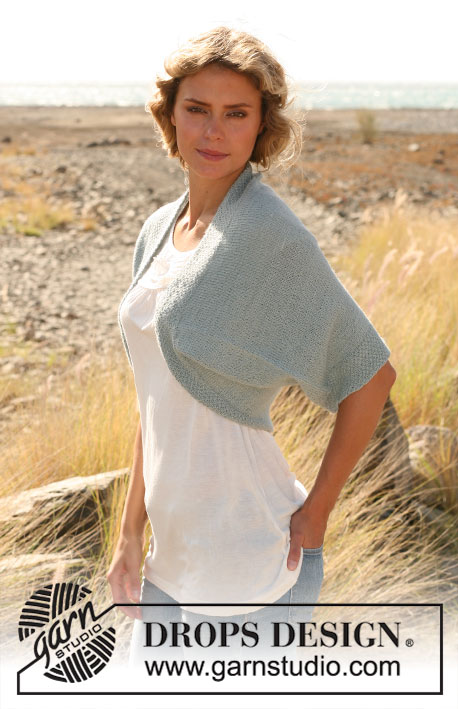
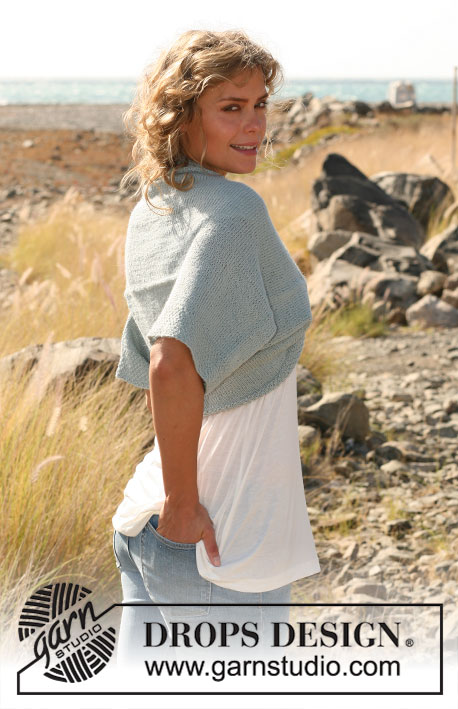
Knitted DROPS jacket in ”Alpaca”. Size: S - XXXL.
DROPS 129-27 |
||||
|
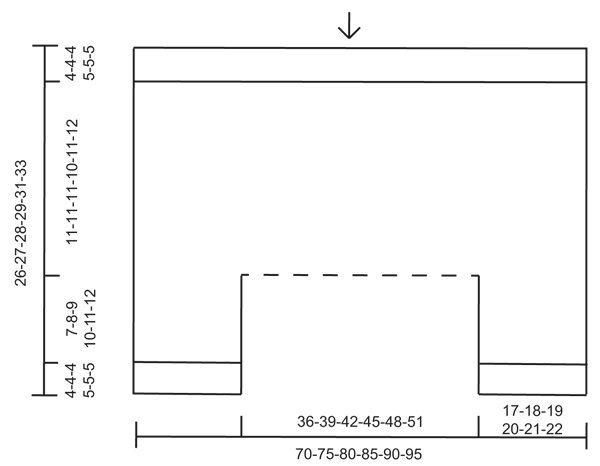
KNITTING TIP: Before starting see chart for knitting direction. SEED ST (double vertically): 1st round: * K 1, P 1 *, repeat from *-*. 2nd round: K over K and P over P. 3rd round: P over K and K over P. Repeat 2nd and 3rd round upwards. --------------------------------------------------------- JACKET: Read KNITTING TIP above. Worked in the round on circular needle. Cast on 337-361-385-409-433-457 sts on circular needle size 3 mm / US 2or3 with Alpaca. Work in SEED ST - see explanation above. When piece measures 4-4-4-5-5-5 cm / 1½"-1½"-1½"-2"-2"-2", continue in stockinette st. AT THE SAME TIME on 1st round, dec 5-3-5-1-3-5 sts evenly = 332-358-380-408-430-452 sts. Continue to work until piece measures 15-15-15-15-16-17 cm / 6"-6"-6"-6"-6¼"-6¾". Now divide as follows: Slip the first 80-86-90-96-100-104 sts on circular needle size 3 mm / US 2or3 (= sleeve), slip the next 86-93-100-108-115-122 sts on a stitch holder (= back), slip the next 80-86-90-96-100-104 sts on another stitch holder (= sleeve) and slip the next 86-93-100-108-115-122 sts on another stitch holder (= back). SLEEVE: = 80-86-90-96-100-104 sts. Insert a marker and measure the piece from here. Work in stockinette st in the round until piece measures 7-8-9-10-11-12 cm / 2¾"-3⅛"-3½"-4"-4⅜"-4¾", now dec 5 sts evenly = 75-81-85-91-95-99 sts. Then work in SEED ST until piece measures 11-12-13-15-16-17 cm / 4⅜"-4¾"-5⅛"-6"-6¼"-6¾". Loosely bind off. Knit another sleeve. ASSEMBLY: Sew the horizontal seam mid back by sewing sts from the 2 last stitch holders tog (= 86-93-100-108-115-122 sts in each side). |
||||
Diagram explanations |
||||
|
||||
 |
||||
Have you finished this pattern?Tag your pictures with #dropspattern #agapanthecardigan or submit them to the #dropsfan gallery. Do you need help with this pattern?You'll find 14 tutorial videos, a Comments/Questions area and more by visiting the pattern on garnstudio.com. © 1982-2026 DROPS Design A/S. We reserve all rights. This document, including all its sub-sections, has copyrights. Read more about what you can do with our patterns at the bottom of each pattern on our site. |
||||


With over 40 years in knitting and crochet design, DROPS Design offers one of the most extensive collections of free patterns on the internet - translated to 17 languages. As of today we count 324 catalogs and 12290 patterns - 12280 of which are translated into English (US/in).
We work hard to bring you the best knitting and crochet have to offer, inspiration and advice as well as great quality yarns at incredible prices! Would you like to use our patterns for other than personal use? You can read what you are allowed to do in the Copyright text at the bottom of all our patterns. Happy crafting!
Post a comment to pattern DROPS 129-27
We would love to hear what you have to say about this pattern!
If you want to leave a question, please make sure you select the correct category in the form below, to speed up the answering process. Required fields are marked *.