
Popular categories
Looking for a yarn?






















Comments / Questions (82)
 Fabienne wrote:
Bonjour, je suis sur le devant droit avec47 mailles. Avec les diminutions je passe à 41 mailles mais quand j arrive aus augmentations c est à dire 7 fois, je me retrouve avec 55m au lieu de 51 comme indiqué. Merci de votre aide
29.08.2020 - 15:33DROPS Design answered:
Bonjour Fabienne, vous devez diminuer sur le côté comme pour le dos (= 3 mailles) et augmenter sur le côté comme pour le dos (= 7 mailles), vous aviez 47 m - 3 + 7 = 51 m. Bon crochet!
31.08.2020 - 10:43
Fabienne wrote:
Bonjour, j ai fais l échantillon qui correspond à mon crochet. Pas de problème mais quand je monte mon travail je mesure la largeur et elle est de 46 cm au lieu de 37. Que dois je faire. Merci
19.08.2020 - 14:24DROPS Design answered:
Bonjour Fabienne, si votre échantillon est juste et que vous crochetez avec la même tension, alors vous devriez avoir les bonnes mesures. Au tout début du dos, on monte 93 ml mais, comme la plupart du temps la chaînette de base est trop serrée, on crochète plus de mailles en l'air que l'on a besoin de mailles serrées et on va sauter des mailles en l'air à intervalles réguliers au 1er rang pour ainsi obtenir 74 ms au 1er rang, autrement dit 37 cm de large si l'échantillon est juste. Bon crochet!
19.08.2020 - 16:01
 Dina wrote:
Ikheb dit topje gehaakt ik heb een probleem het topje is klaar hoe kan ik een beetje wijer maken ik heb bij de voor panden een paar rijen vaste gehaakt kan je tips geven
22.07.2020 - 21:20DROPS Design answered:
Hoi Dina,
Eigenlijk zou je tijdens het haken het topje gelijk wijder moeten maken door meer steken op te zetten of te meerderen in de zijnaden.
18.11.2020 - 22:02
Alveryne wrote:
Bonjour, pour la partie "A 5-5-6-6 cm de hauteur totale, diminuer en sautant la 2ème m à partir du bord 3 fois tous les 3 rangs = 68-76-88-100 m" on doit sauter la maille en début et fin de même rang ? svp. perso j'ai compris R1 1 dim au début / 1 dim fin de rang, R2 R3 normal, et on refait pareil encore 2 fois ??Merci
23.05.2020 - 15:07DROPS Design answered:
Bonjour Aleverine, vous diminuez effectivement en sautant la 2ème maille au début du rang et l'avant-dernière maille à la fin du rang et tout à fait exact: 1 rang de diminutions, 2 rangs sans diminuer (= tous les 3 rangs). Bon crochet!
25.05.2020 - 08:38
 Kayla wrote:
Could you guys update this with plus sizes? (Looking for 2X). Or just tips to a beginner for how to increase the size. I really love this piece.
20.05.2020 - 06:58DROPS Design answered:
Dear Kayla, we are unfortunately unable to adjust every pattern to every single request. Please contact your store or any crochet forum for any individual assistance. Thanks for your comprehension. Happy crocheting!
20.05.2020 - 07:21
Wils Hedwig wrote:
Beste Er staat bij het rechter voorpand voor de hals op een hoogte van 33 cm de hals afkanten , is dat juist want de armsgaten worden pas op 35 cm afgekant . Mvg
26.03.2020 - 16:14DROPS Design answered:
Wils Hedwig,
Dat klopt, de hals zit lager dan het armsgat. Zoals aangegeven in het patroon kan je er ook voor kiezen om nog een paar cm door te haken als je de hals wat hoger wilt hebben.
27.03.2020 - 13:03
Wils Hedwig wrote:
Ik heb een vraag is het normaal bij het minderen voor de armsgaten dat het aan beide zijde niet echt het zelfde uitkomt
19.03.2020 - 21:02DROPS Design answered:
Dag Wils Hedwig,
Het kan een beetje verschillend eruit zien omdat je met stokjes en vasten werkt, als je maar het zelfde aantal steken meerdert . Als je op het eind het waaierpatroon haakt valt dit wel weg.
25.03.2020 - 10:28
Terri wrote:
Questioned answered...took three of us to figure it out...key word is SIDE do side for decreases and increases...meaning outside side and not inside. Not really very explanatory for beginners.
26.02.2020 - 01:45
Terri wrote:
In this pattern I got confused with right fron piece. There are 41 stitches before you crochet like back piece with decreases and increases. You are to decrease 6 in total and increase 16 which gives a 51 total stitches as in the large. But that actually would be the medium. Not possible to get 46 for the medium or am I missing something.
26.02.2020 - 01:37DROPS Design answered:
Dear Terri, on right front piece you willdecrease and increase only on one side (=on the side that will be sewn to back piece), ie you will decrease 3 sts and increase 8 sts = 41-3+8=46 sts. Happy crocheting!
26.02.2020 - 09:49
 Åse wrote:
Det giver stadig ikke mening for mig. Er det 3 m i samme maske? eller er det 3 separate masker, og skal de lukkes med kædemasker? Jeg er stadig nybegynder, måske derfor det skal skæres ud i pap. Jeg har læst lukketips
02.08.2019 - 10:11DROPS Design answered:
Hej igen, du hækler kædemasker over de 3 masker (1 kædemaske i hver af de 3 masker) som skal lukkes. God fornøjelse!
02.08.2019 - 11:46
|
|
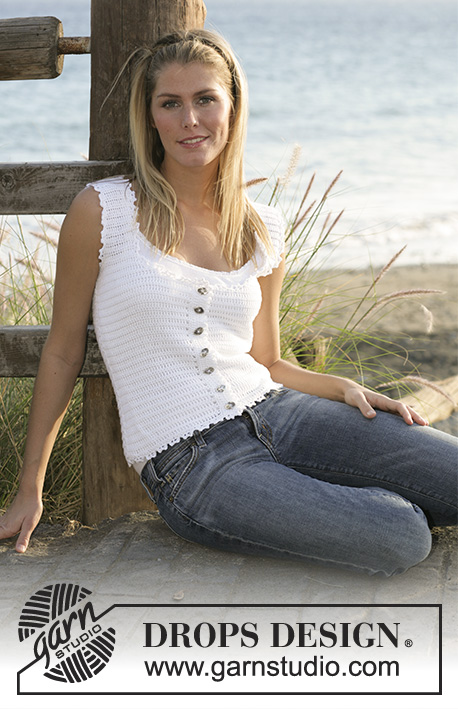
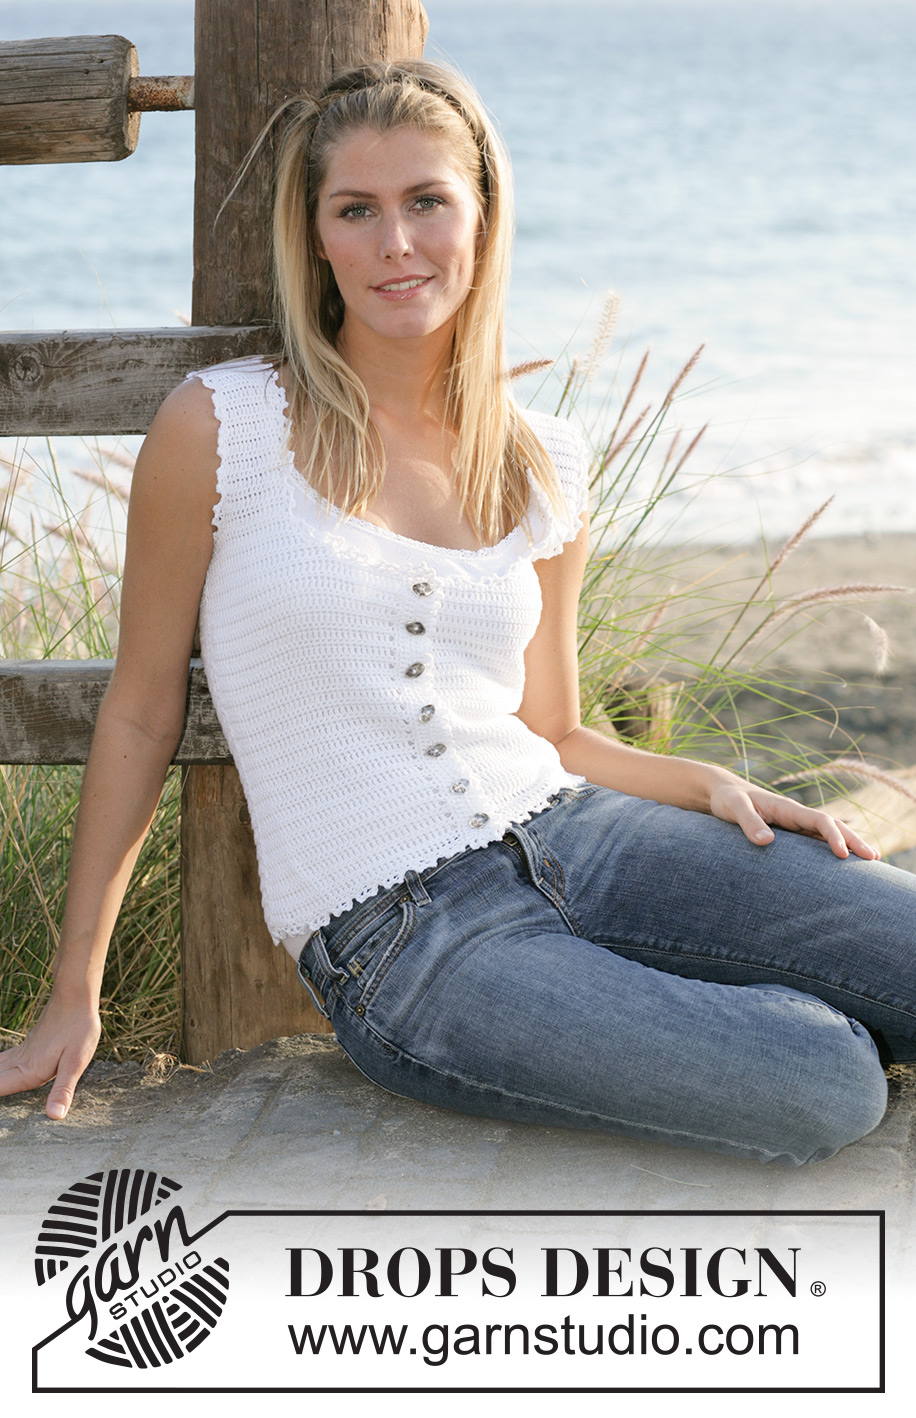
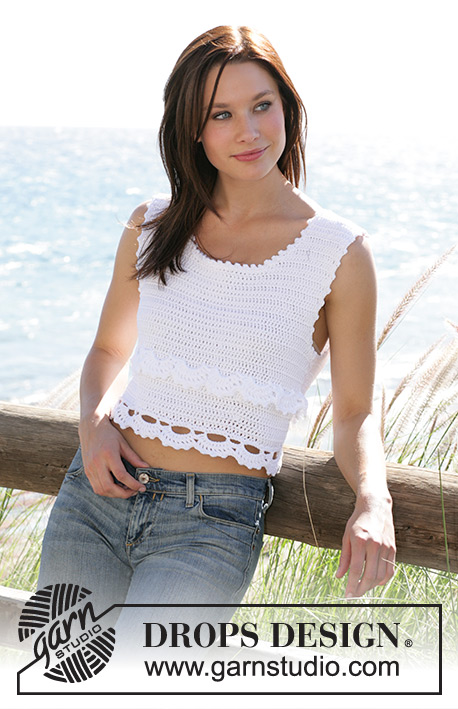
Dainty Miss#daintymisstop |
|
|
|
|
DROPS Crochet corset top in ”Safran”
DROPS 99-11 |
|
|
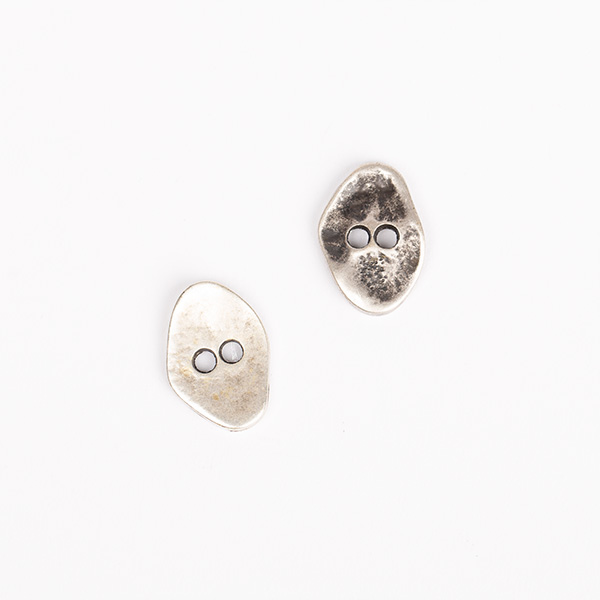
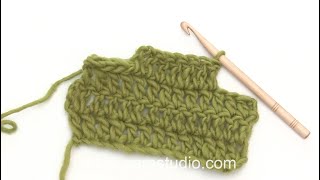
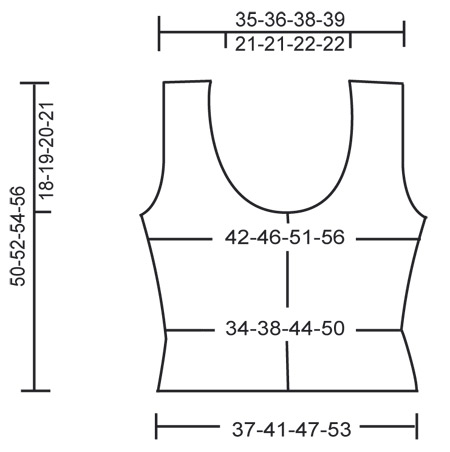
Crochet gauge; 20 dc/sc in width and 13 rows pattern in height using hook size 3.5 mm [US 4] = 10 x 10 cm [4" x 4"] Pattern: 1st row (= RS): Crochet 1 dc in each stitch, finish row with 1 ch to turn with. 2nd row: Crochet 1 sc in each stitch, finish row with 3 ch to turn with. Repeat 1st and 2nd rows. Bind off tip (applies to armhole and neck): Bind off at beginning of row as follows: Crochet sl st over number of sts to be bound off. Bind off at end of row as follows: Crochet until number of sts left = number of sts to be bound off, turn piece. BACK PIECE Crochet 93-103-118-133 ch (includes 1 ch to turn with). Work 1st row as follows: 1 sc in 2nd ch from hook, 1 sc in next ch, * skip 1 ch, 1 sc in each of next 4 ch *, repeat from *-* until end of row = 74-82-94-106 sc. Continue with Pattern – see explanation above, until complete measurement. When piece measures 5-5-6-6 cm [2"-2"-2⅜"-2⅜"] dec by skipping over second sts from edge on each side on every 3rd row 3 times in total = 68-76-88-100 sts (i.e in the start of row crochet into first stitch and skip second stitch. At end of row skip 2nd last stitch and crochet into last stitch). When piece measures 15-16-17-18 cm [6"-6¼"-6¾"-7"] inc 1 st on each side by crocheting 2 sts in second sts from edge on each side on every other row 8-8-7-6 times on total = 84-92-102-112 sts. When piece measures 32-33-34-35 cm [12½"-13"-13⅜"-13¾"] bind off for armholes on each side on each row – see bind off tip: 3 sts 1-1-2-2 times, 2 sts 1-2-2-4 times and 1 st 2-3-3-3 times = 70-72-76-78 sts. When piece measures 47-49-51-53 cm [18½"-19¼"-20"-21"] continue crocheting over 18-19-20-21 sts on one side for shoulder. Continuing bind off at neckline on every row: 2 sts 1 time and 1 st 2 times = 14-15-16-17 sts left on shoulder. Cut thread when piece measures 50-52-54-56 cm [19¾"-20½"-21¼"-22"]. Crochet other shoulder similarly. RIGHT FRONT PIECE Crochet 46-51-58-66 ch (includes 1 ch to turn with). Work 1st row as follows: 1 sc in 2nd ch from hook, 1 sc in each of next 4-4-6-4 ch, * skip 1 ch, 1 sc in each of next 4 ch *, repeat from *-* til end of row = 37-41-47-53 sc. Now crochet Pattern like on back piece. Dec and inc in side like back piece = 42-46-51-56 sts, When piece measures 30-31-32-33 cm [11¾"-12¼"-12½"-13"] bind off for neckline (if neckline should not be so deep, wait with bind off for 3-3-4-4 cm [1"-1"-1½"-1½"]). Size S and M: bind off on each row. Size L and XL: bind off on every other row. Bind off 12-12-13-13 sts mid front for neck, then bind off to shape neckline 2 sts 2 times and 1 st 5 times. At the same time when piece measures 32-33-34-35 cm [12½"-13"-13⅜"-13¾"] bind off for armhole like back piece. After completing all bind offs for armhole and neck 14-15-16-17 sts are left on shoulder. Cut thread when piece measures 50-52-54-56 cm [19¾"-20½"-21¼"-22"]. LEFT FRONT PIECE Crochet like right but with dec, inc and bind offs at reverse sides. ASSEMBLY Sew side seams in outermost edge with 1 stitch in each stitch. Sew shoulder seams the same way. Left front edge: Crochet approx 60-62-64-66 sc along left front piece – ensure sts are not too tight or too wavy but lying flat along edge. Now crochet 1 row dc, 1 row sc and 1 row dc. Crochet next row as follows: In first dc crochet: 1 sc, 1 picot (= 3 ch, 1 sc in first ch) and 1 sc, * skip 1 st, 1 sc in next stitch, skip 1 stitch, in next stitch crochet: 1 sc, 1 picot and 1 sc *, repeat from *-*. Right front edge: Crochet as left front edge but on 3rd row (= sc) make 7 buttonholes evenly as follows: 2 ch, skip 2 dc, on next row crochet 2 dc in ch loop – place upper most and bottom most buttonhole 1 cm [½"] from edges. Fan pattern: Crochet fan pattern around armholes, at bottom edge and neckline like this: Crochet in first stitch: 1 dc, 1 picot (= 3 ch, 1 sc in first ch), 1 dc, 1 picot and 1 dc, * skip 2 sts, 1 sl st in next st, skip 2 sts (in loops at neck and armholes skip 3 sts to ensure neat edge), crochet in next st: 1 dc, 1 picot, 1 dc, 1 picot, 1 dc *, repeat from *-*. Sew in buttons. |
|
 |
|
Have you finished this pattern?Tag your pictures with #dropspattern #daintymisstop or submit them to the #dropsfan gallery. Do you need help with this pattern?You'll find 5 tutorial videos, a Comments/Questions area and more by visiting the pattern on garnstudio.com. © 1982-2026 DROPS Design A/S. We reserve all rights. This document, including all its sub-sections, has copyrights. Read more about what you can do with our patterns at the bottom of each pattern on our site. |






With over 40 years in knitting and crochet design, DROPS Design offers one of the most extensive collections of free patterns on the internet - translated to 17 languages. As of today we count 333 catalogs and 12525 patterns - 12515 of which are translated into English (US/in).
We work hard to bring you the best knitting and crochet have to offer, inspiration and advice as well as great quality yarns at incredible prices! Would you like to use our patterns for other than personal use? You can read what you are allowed to do in the Copyright text at the bottom of all our patterns. Happy crafting!
Post a comment to pattern DROPS 99-11
We would love to hear what you have to say about this pattern!
If you want to leave a question, please make sure you select the correct category in the form below, to speed up the answering process. Required fields are marked *.