
Popular categories
Looking for a yarn?


Comments / Questions (11)
![]() Nathalie wrote:
Nathalie wrote:
Oups c'est pour un XS
18.01.2026 - 22:11
![]() Nathalie wrote:
Nathalie wrote:
Je suis en train de faire les manches pour un xl et c'est beaucoup trop serré. Y a-il un problème dans le patron? J'avais 36 mailles j'ai fait la 1ere diminution et j'ai maintenant 34 mailles il est vraiment serré. Pouvez-vous m'aider?
18.01.2026 - 22:02DROPS Design answered:
Bonjour Nathalie, pensez à bien vérifier votre tension, vous devez avoir 11 m = 10 cm - vérifiez également si les mesures du schéma en XS correspondent bien à la personne qui va porter le pull (cf ici. Bon tricot!
19.01.2026 - 11:07
![]() Paulina wrote:
Paulina wrote:
I previously asked a question on the 28/11 regarding the start of the yoke, however I am still stuck. The video shared was for a different pattern so I am unable to understand how to apply it to this pattern. I have been to see someone at a local knitting shop for help but they did not understand either. Would it be possible to submit an image through email to receive further assistance?
10.01.2026 - 15:32DROPS Design answered:
Dear Paulina, the videos are showing the standard technique, so the number of stitches will vary from a pattern to another but the way you will work each piece is the same, ie you first work back piece increasing on each side, then pick up sts for left shoulder front piece along left shoulder back piece then same on right shoulder, join front and back pieces together picking up stitches for sleeves. Use the videos for techniques and follow the pattern for the number of stitches. Happy knitting!
12.01.2026 - 10:08
![]() Daniela wrote:
Daniela wrote:
Salve. Dopo aver lavorato il primo “GIRO 1” dello sprone con i due aumenti sulle maglie di entrambe le maniche, bisogna lavorare un giro a dritto su tutte le maglie senza aumenti o si deve subito cominciare con il successivo “GIRO 1” come è scritto nel vostro modello? Spero sia chiara la mia domanda, anche numerare diversamente i giri potrebbe aiutare
08.01.2026 - 23:39DROPS Design answered:
Buongiorno Daniela, per le taglie indicate può partire subito con il GIRO 1 con gli aumenti. Buon lavoro!
11.01.2026 - 13:49
![]() Lotta wrote:
Lotta wrote:
The instructions for the neck edge state: "Begin at one shoulder line and pick up approx. 54-58-62-66-70-74-78 stitches – number of stitches must be divisible by 4." None of the counts for all of the sizes is divisible by 4 :)
27.12.2025 - 22:18
![]() Paulina wrote:
Paulina wrote:
Right before starting on the yoke where it says to "pick up 12-18 stitches along the side on left front piece (= stitches for sleeve - pick up stitches inside outermost stitch)" I am unsure of how to proceed. I have completed the step before, however, if I now pick up (in my case for an M - 14 stitches) on the side of the front piece and then continue knitting the back piece, it leaves a very small armhole around 10cm in diameter. Am I doing something wrong?
29.11.2025 - 00:36DROPS Design answered:
Dear Paulina, look at this video, we show how to work this step, the armhole is not finished yet, that's just the beginning of sleeves, so it might look small but you will then increase first for sleeves then for both sleeves and yoke (front + back pieces) to shape the sleeve cap. Happy knitting!
01.12.2025 - 07:31
![]() Alice wrote:
Alice wrote:
Do the videos for the European Raglan increases correspond to this pattern ? specifically the 3/4 video when I watch the video versus when I reach the pattern I am confused as they are not written the same way.
25.11.2025 - 20:52DROPS Design answered:
Dear Alice, the technique is the same but there might be some changes between both, so remember to always follow the instructions for the pattern you are working on, if you wonder about a specific instruction, please free to ask your question here, we'll check together to help you. Happy knitting!
26.11.2025 - 09:08
![]() Iona wrote:
Iona wrote:
When working the front piece size small it states measuring 12cm from marker - am I working 12cm worth of stitches before joining to the back, or am I joining immediately. I see someone else has asked a similar question. Also, if I am working a right side row for this join, surely it is not possible to be picking up stitches from the left hand side at the front first, due to being at the right hand side of the front piece.
18.11.2025 - 16:22DROPS Design answered:
Hi Iona, You work both the front shoulders, leaving the left shoulder stitches on a stitch holder while working the right shoulder. When both front pieces are 12 cm, they are joined mid front for the front piece. You do not join the front piece to the back piece until you have finished the armholes on the front piece. So when joining the 2 front shoulders, you work back across the right front piece, then cast on stitches for the neckline and work across the left front piece. Work the front piece back and forth until you have finished the armholes, then join this to the back piece. Regards, Drops Team.
19.11.2025 - 07:13
![]() WENDY wrote:
WENDY wrote:
Hi I'm also confused by the measurements from the markers. Before you cast on centre front the measurements for XL is 15cm. After casting on the centre sts do I go straight into joining the back or do I need to work some rows first? There are only 16 sts to pick up.
25.10.2025 - 16:47
![]() Magdalena wrote:
Magdalena wrote:
W opisanie przodu nie jest napisane gdzie ma być umiejscowiony marker. Czy dalej robótka jest liczona od połączenia ramion ?
23.10.2025 - 23:21DROPS Design answered:
Witaj Magdaleno, lewe ramię - przód: 'Umieścić 1 marker od strony dekoltu. Dalej będziemy mierzyć długość przodu od tego markera'. Marker jest umieszczony od strony dekoltu (ma pozostać na miejscu, nie przesuwać go), bezpośrednio po nabraniu oczek na lewe ramię przodu, dalej długość przodu będzie mierzona od tego markera. Pozdrawiamy!
24.10.2025 - 12:13
|
|
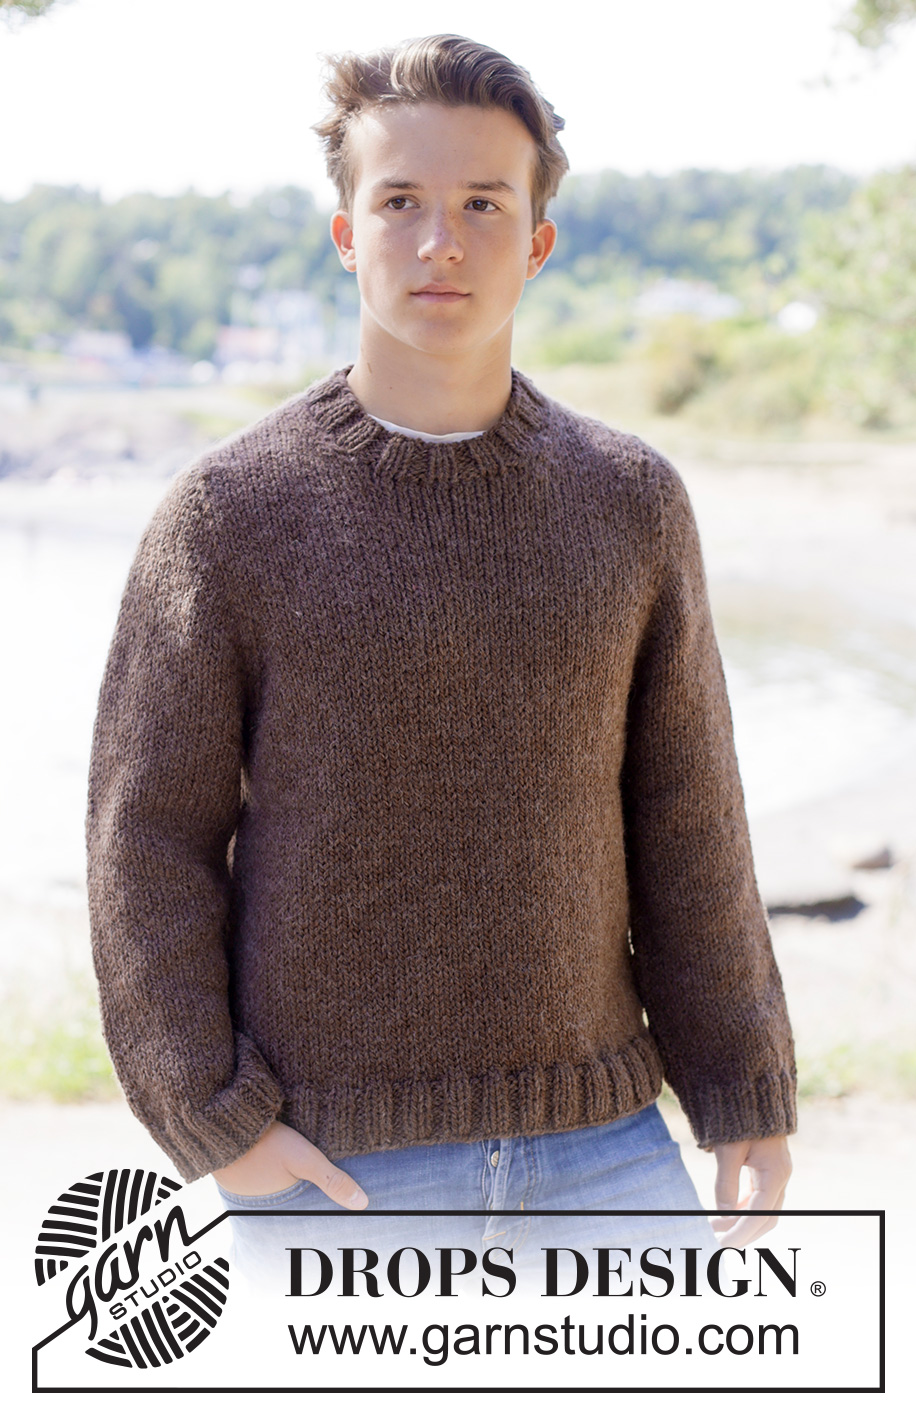
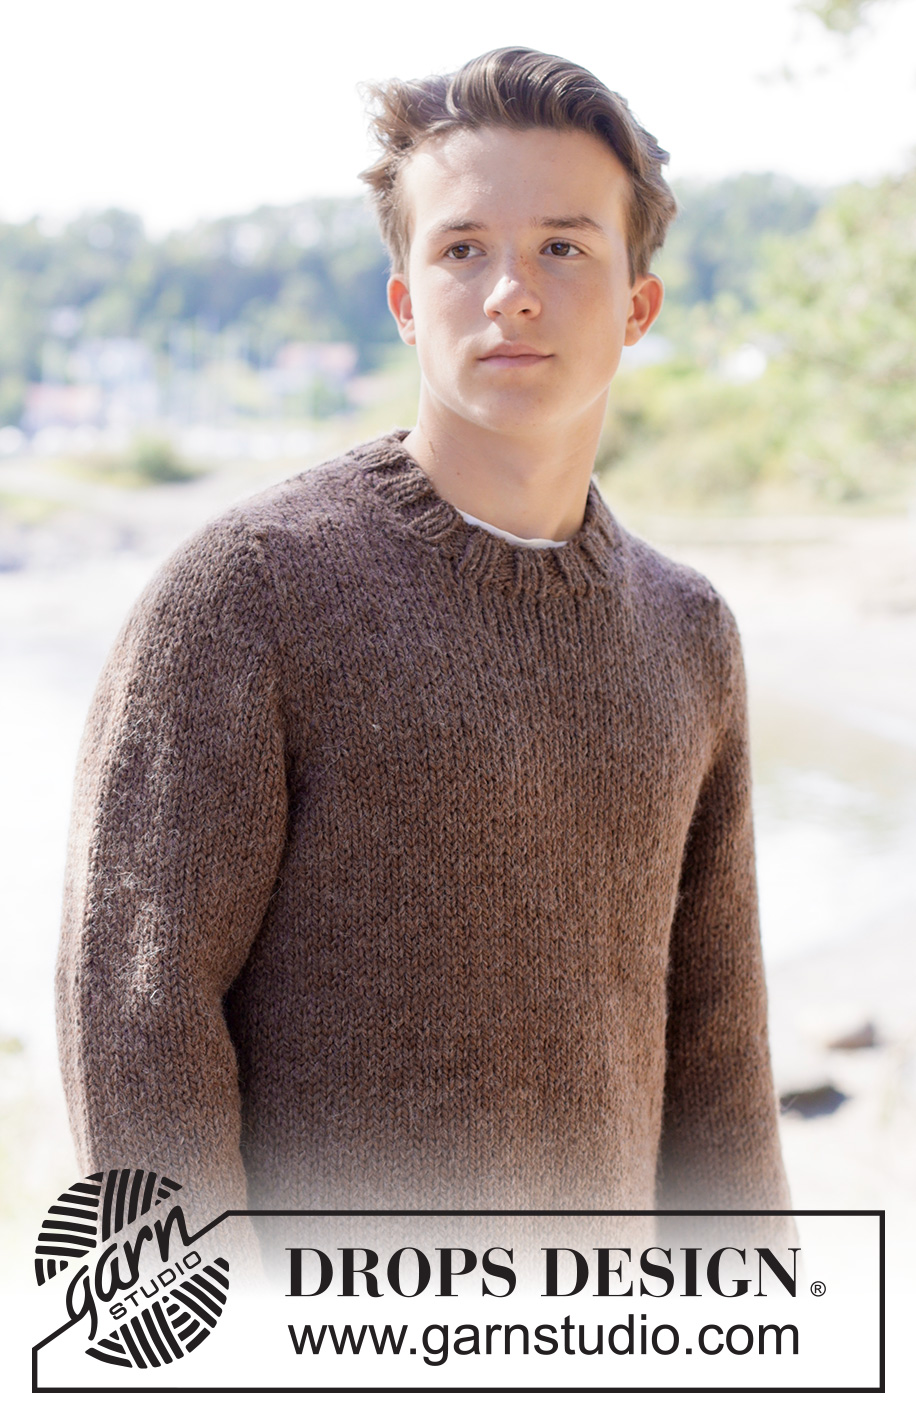
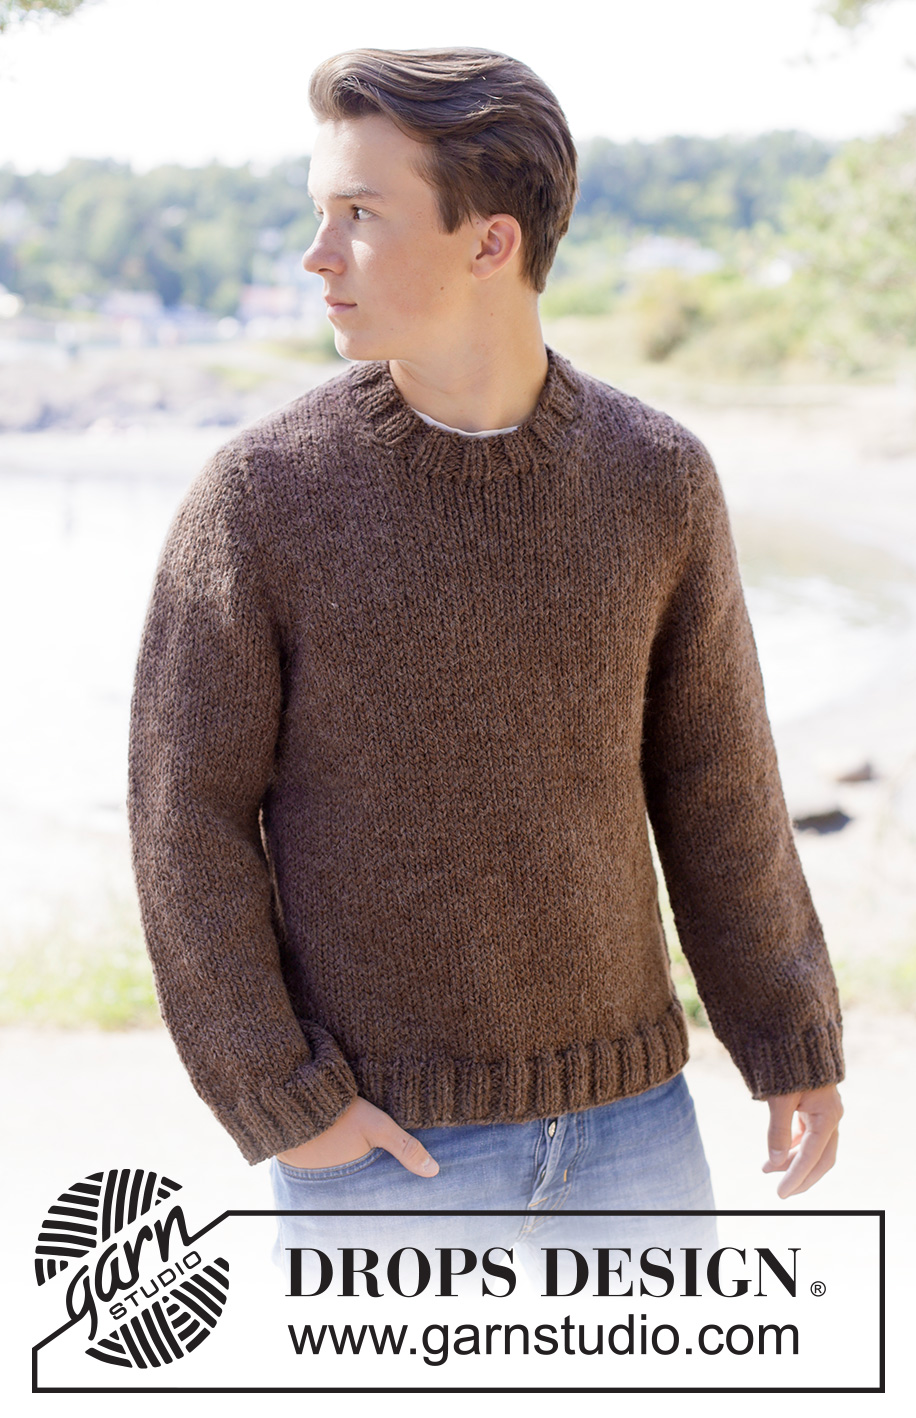
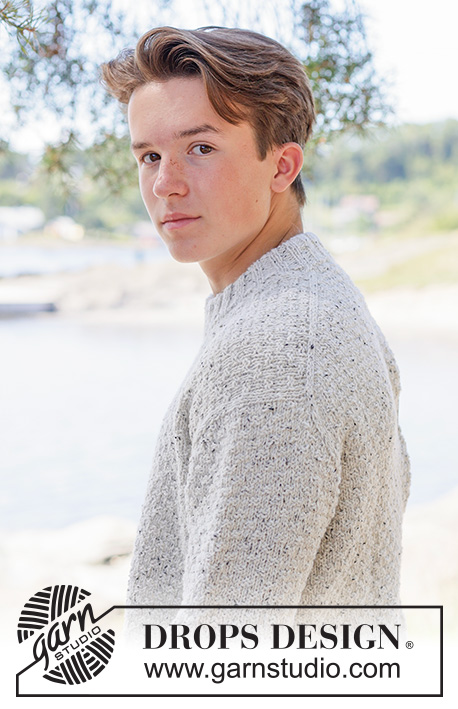
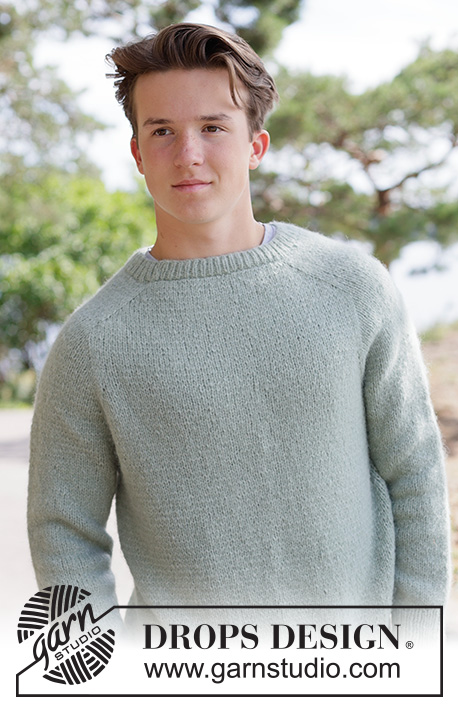
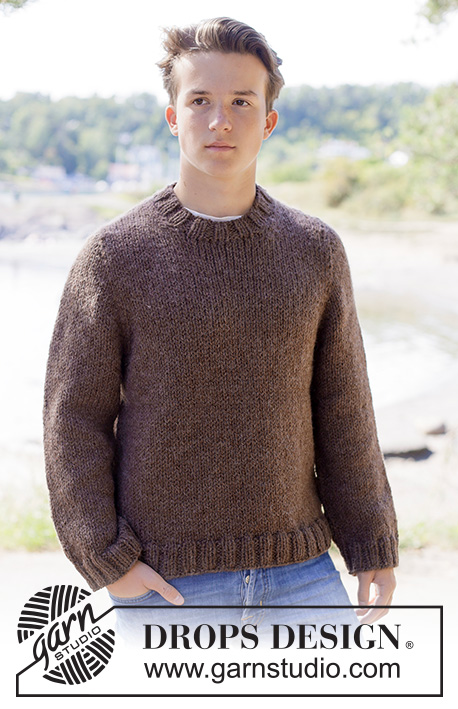
Earthbound Sweater#earthboundsweater |
|
 |
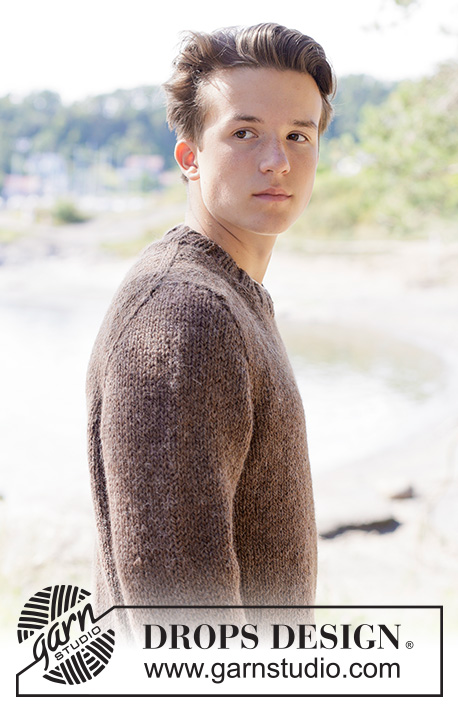 |
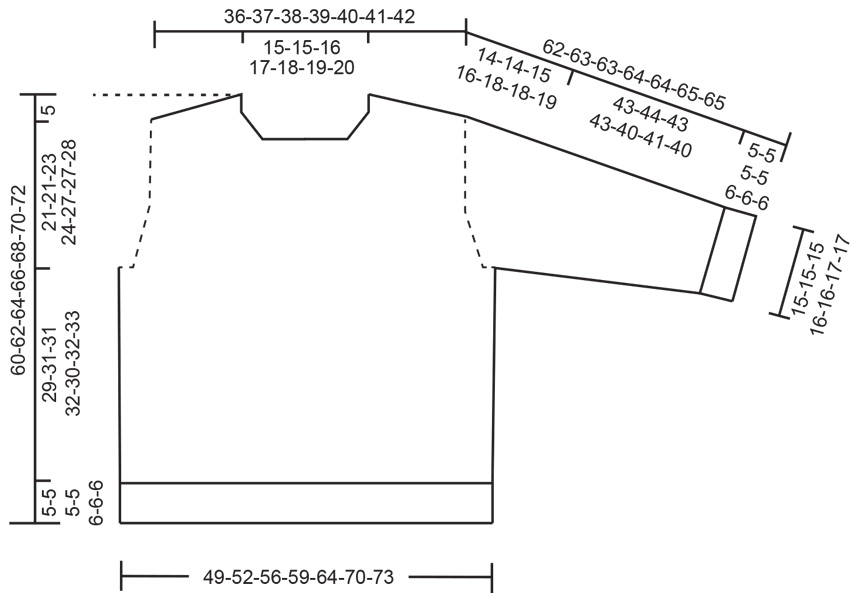
Knitted sweater for men in DROPS Andes or DROPS Snow. Piece is knitted top down in stockinette stitch with European yoke. Size XS – XXXL.
DROPS 260-11 |
|
|
---------------------------------------------------------- EXPLANATION FOR THE PATTERN: ---------------------------------------------------------- INCREASE TIP-1: INCREASE 1 STITCH TOWARDS THE LEFT - from RIGHT SIDE: Use left needle to pick up yarn between 2 stitches from row below, pick up yarn from the front and knit in the stitch loop that is on the back of the needle. INCREASE 1 STITCH TOWARDS THE RIGHT - from RIGHT SIDE: Use left needle to pick up yarn between 2 stitches from row below, pick up yarn from the back and knit in the stitch loop that is on the front side of the needle. INCREASE TIP-2: INCREASE 1 STITCH TOWARDS THE RIGHT - from WRONG SIDE: Use left needle to pick up yarn between 2 stitches from row below, pick up yarn from the back and purl in the stitch loop that is on the front side of the needle. INCREASE 1 STITCH TOWARDS THE LEFT - from WRONG SIDE: Use left needle to pick up yarn between 2 stitches from row below, pick up yarn from the front and purl in the stitch loop that is on the back side of the needle. SLEEVE TIP: When picking up stitches mid under sleeve, there will be a small hole in the transition between stitches on body and sleeves. The holes can be closed by picking up the strand between two stitches - work this strand twisted together with the first stitch between body and sleeve to close the hole. DECREASE TIP: Decrease 1 stitch on each side of marker thread as follows: Work until 3 stitches remain before marker thread, knit 2 together, knit 2 (marker thread is between these 2 stitches), slip 1 stitch knitwise, knit 1, pass slipped stitch over stitch worked (= 2 stitches decreased). ---------------------------------------------------------- START THE PIECE HERE: ---------------------------------------------------------- SWEATER - SHORT OVERVIEW OF THE PIECE: In this pattern needles of different length have been used, begin with fitting length for number of stitches and switch as needed. Garment is worked as point 1 - 5. 1 BACK PIECE: Cast on stitches in the back of neck and work back piece back and forth downwards while at the same time increasing in each side of piece until number of stitches for shoulder width is reached. Back piece has a slight diagonal shoulder. 2 FRONT PIECE: Worked in 2 parts (= each side of neck). Begin by picking up stitches along one shoulder from back piece, work front piece downwards while increasing towards the neck. Repeat on the other shoulder, then cast on new stitches for neck mid front = put front pieces together into one part. Work front piece back and forth until given measurements. 3 YOKE: On next round work all stitches on to same circular needle - work as follows: Work stitches on front piece, pick up stitches for sleeve along the side of front piece, work back piece, pick up stitches for sleeve along the other side of front piece = then work yoke in the round over all stitches. 4 INCREASES FOR BODY AND SLEEVES: When working the yoke, increase stitches for body and sleeves, first increase for sleeves and then increase for both body and sleeves. 5 BODY AND SLEEVES: When all stitches have been increased and yoke is knitted to desired measurements, divide the piece for body and sleeves and finish each part separately. If 0 is given for the chosen size, it means that you skip the information until next information. BACK PIECE: Work piece back and forth on circular needle. Cast on 18-19-20-21-22-23-24 stitches on circular needle size 8 MM = US 11 with DROPS Andes or DROPS Snow. ROW 1 (= wrong side): Purl all stitches. ROW 2 (= right side): Read INCREASE TIP-1 and knit 3, increase 1 stitch towards the left, knit until 3 stitches remain, increase 1 stitch towards the right, knit 3. ROW 3 (= wrong side): Read INCREASE TIP-2 and purl 3, increase 1 stitch towards the right, purl until 3 stitches remain, increase 1 stitch towards the left, purl 3. AFTER 3RD ROW: Work 2nd and 3rd ROW 6-6-6-6-6-6-6 times in total (= 12-12-12-12-12-12-12 rows have been worked), after increase there are = 42-43-44-45-46-47-48 stitches on needle. Remember to follow the knitting gauge! Cut the yarn, slip stitches on a thread or an stitch holder. LEFT SHOULDER: Find left shoulder on back piece as follows: Place back piece flat with right side up, place back piece so that stitches on thread/stitch holder is towards you, left side of piece = left shoulder. Now pick up stitches along left diagonal shoulder on back piece – begin from right side at the neck and pick up stitches out towards the armhole as follows: Pick up 1 stitch in every row worked inside edge stitch (= 12-12-12-12-12-12-12 stitches), finish by picking up 1 stitch at the outermost corner of the shoulder = 13-13-13-13-13-13-13 stitches. Insert 1 marker in piece in towards the neck. All length measurements are done from this marker, measured in stitch direction. Work in stockinette stitch (work first row from wrong side). When piece measures 7-8-9-10-9-9-10 cm = 2¾"-3⅛"-3½"-4"-3½"-3½"-4", increase stitches towards the neck as follows: ROW 1 (= right side): Remember INCREASE TIP-1 and knit 3, increase 1 stitch towards the left, knit the rest of row. ROW 2 (= wrong side): Purl all stitches. Work 1st and 2nd ROW 3-3-3-3-4-4-4 times (= 6-6-6-6-8-8-8 rows have been worked) = 16-16-16-16-17-17-17 stitches. Increases for neck are now done. Piece now measures approx. 11-12-13-14-15-15-16 cm = 4⅜"-4¾"-5⅛"-5½"-6"-6"-6¼" from marker. Some of the neck depth will be over on back piece. Neck depth at the front = 10-10-11-11-12-12-12 cm = 4"-4"-4⅜"-4⅜"-4¾"-4¾"-4¾". Neck depth at the back = 1-2-2-3-3-3-4 cm = ⅜"-¾"-¾"-1⅛"-1⅛"-1⅛"-1½". Slip stitches on a thread or stitch holder, now work right shoulder along the right diagonal shoulder on back piece as explained below. RIGHT SHOULDER: Now pick up stitches along right diagonal shoulder on back piece - begin from right side at the armhole and pick up stitches in towards the neck as follows: Begin by picking up 1 stitch at the outermost corner of shoulder (= edge stitch), then pick up 1 stitch in every row worked inside edge stitch (= 12-12-12-12-12-12-12 stitches) = 13-13-13-13-13-13-13 stitches. Insert 1 marker in piece in towards the neck. All length measurements are done from this marker, measured in stitch direction. Work in stockinette stitch ( work first row as follows from wrong side). When piece measures 7-8-9-10-9-9-10 cm = 2¾"-3⅛"-3½"-4"-3½"-3½"-4", increase stitches towards the neck as follows: ROW 1 (= right side): Knit until 3 stitches remain, increase 1 stitch towards the right, knit 3 – remember INCREASE TIP-1. ROW 2 (= wrong side): Purl all stitches. Work 1st and 2nd ROW 3-3-3-3-4-4-4 times (= 6-6-6-6-8-8-8 rows have been worked) = 16-16-16-16-17-17-17 stitches. Increases for neck are now done. Piece now measures approx. 11-12-13-14-15-15-16 cm = 4⅜"-4¾"-5⅛"-5½"-6"-6"-6¼" from marker. Some of the neck depth will be over on back piece. Neck depth at the front = 10-10-11-11-12-12-12 cm = 4"-4"-4⅜"-4⅜"-4¾"-4¾"-4¾". Neck depth at the back = 1-2-2-3-3-3-4 cm = ⅜"-¾"-¾"-1⅛"-1⅛"-1⅛"-1½". FRONT PIECE: On next row (= right side) put shoulders together for front piece as follows: Knit the 16-16-16-16-17-17-17 stitches from right shoulder, cast on 10-11-12-13-12-13-14 stitches for neck at the end of this row, knit the 16-16-16-16-17-17-17 stitches from left shoulder = 42-43-44-45-46-47-48 stitches. Work in stockinette stitch back and forth until piece measures 11-12-13-14-15-15-16 cm = 4⅜"-4¾"-5⅛"-5½"-6"-6"-6¼" from marker – work last row from wrong side. Then slip front piece and back piece together, and pick up stitches for sleeves, work as explained below. ROW 1 (= right side): Knit the first 2 stitches from front piece together (= 1 stitch decreased), knit until 2 stitches remain on front piece, slip 1 stitch, knit 1, pass slipped stitch over (= 1 stitch decreased), insert 1 marker, pick up 12-13-14-15-16-17-18 stitches along the side on left front piece (= stitches for sleeve - pick up stitches inside outermost stitch), insert 1 marker, knit the first 2 stitches from back piece together (= 1 stitch decreased), work until 2 stitches remain on back piece, slip 1 stitch, knit 1, pass slipped stitch over (= 1 stitch decreased), insert 1 marker, pick up 12-13-14-15-16-17-18 stitches along the side on right piece (= stitches for sleeve - pick up stitches inside outermost stitch), insert 1 marker = 104-108-112-116-120-124-128 stitches. YOKE: Then work piece in the round. ROUND 1: Knit over all stitches and increase 1 stitch in each side on each sleeve - remember INCREASE TIP-1 - increase 1 stitch towards the left at the beginning of sleeve, increase 1 stitch towards the right at the end of sleeve, number of stitches on front piece and back piece is the same = 14-15-16-17-18-19-20 stitches on each sleeve and 40-41-42-43-44-45-46 stitches on front piece/back piece) = 108-112-116-120-124-128-132 stitches. Then work in the round in sizes XS to XL (continue XXL and XXXL from All sizes): ROUND 1: Knit all stitches and increase 1 stitch in each side on each sleeve as before – remember INCREASE TIP-1, number of stitches on each sleeve increases, number of stitches on front piece and back piece stays the same. ROUND 2: Knit 1 round over all stitches without increase. Work 1st and 2nd ROUND 4-4-3-3-2-0-0 times (= 8-8-6-6-4-0-0 rounds worked. 5-5-4-4-3-1-1 increase has been done in total on sleeves = 22-23-22-23-22-19-20 stitches on each sleeve and 40-41-42-43-44-45-46 stitches on front piece/back piece) = 124-128-128-132-132-128-132 stitches. ALL SIZES: Work next round as follows: ROUND 1: Knit 2, increase 1 stitch towards the left, knit until 2 stitches remain on front piece before first marker, increase 1 stitch towards the right, knit 2, move marker on to right needle, increase 1 stitch towards the left, knit until next marker (= sleeve), increase 1 stitch towards the right, move the marker on to right needle, knit 2, increase 1 stitch towards the left, knit until 2 stitches on back piece remain before marker, increase 1 stitch towards the right, knit 2, move marker on to right needle, increase 1 stitch towards the left, knit until next marker (= sleeve), increase 1 stitch towards the right, move marker on to right needle (= 8 stitches increased), i.e. increase has been done on each side of 2 stitches in every transition between body and sleeve). ROUND 2: Knit all stitches without increase. Work 1st and 2nd ROUND 5-5-7-8-10-12-13 times (= 10-10-14-16-20-24-26 rounds worked. 10-10-11-12-13-13-14 increases have been done in total for sleeve and 5-5-7-8-10-12-13 increases on body = 32-33-36-39-42-43-46 stitches on each sleeve and 50-51-56-59-64-69-72 stitches stitches on front piece/back piece) = 164-168-184-196-212-224-236 stitches. Piece now measures approx. 14-14-15-16-18-18-19 cm = 5½"-5½"-6"-6¼"-7"-7"-7½" measured in the middle of sleeve from where stitches were picked up. When the sweater is folded double at the shoulder, piece measures approx. 20-20-22-23-26-26-27 cm = 8"-8"-8¾"-9"-10¼"-10¼"-10⅝" at the edge along the armhole, measured down on yoke. Work without increasing until piece measures 21-21-23-24-27-27-28 cm = 8¼"-8¼"-9"-9½"-10⅝"-10⅝"-11" along the edge of armhole, measured down on yoke. Now divide yoke for body and sleeves. DIVIDING FOR BODY AND SLEEVES: AT THE SAME TIME as next round is worked divide yoke for body and sleeves as follows: Work the first 50-51-56-59-64-69-72 stitches (= front piece), slip the next 32-33-36-39-42-43-46 stitches on a thread for sleeve, cast on 4-6-6-6-6-8-8 new stitches on needle (= in the side mid under sleeve), work the next 50-51-56-59-64-69-72 stitches (= back piece), slip the next 32-33-36-39-42-43-46 stitches on a thread for sleeve, cast on 4-6-6-6-6-8-8 new stitch on needle (= in the side mid under sleeve). Finish body and sleeves separately. BODY: = 108-114-124-130-140-154-160 stitches. Work in stockinette stitch in the round until piece measures 29-31-31-32-30-32-33 cm = 11⅜"-12¼"-12¼"-12½"-11¾"-12½"-13", measured from where new stitches were cast on under sleeve. Switch to circular needles size 6 MM = US 10, work rib (= knit 2/purl 2) while AT THE SAME TIME increasing 32-34-36-38-44-42-48 stitches evenly on 1st round = 140-148-160-168-184-196-208 stitches. When rib measures 5-5-5-5-6-6-6 cm = 2"-2"-2"-2"-2⅜"-2⅜"-2⅜", bind off with knit over knit and purl over purl. Sweater measures approx. 60-62-64-66-68-70-72 cm = 23⅝"-24⅜"-25¼"-26"-26¾"-27½"-28⅜". SLEEVES: Slip 32-33-36-39-42-43-46 sleeve stitches from one thread on to circular needle size 8 MM = US 11 and pick in addition up 1 stitch in each of the 4-6-6-6-6-8-8 stitches cast on under sleeve - read SLEEVE TIP = 36-39-42-45-48-51-54 stitches. Insert 1 marker in the middle of the 4-6-6-6-6-8-8 new stitches under sleeve - round begins at the marker thread. Work in stockinette stitch in the round on needle - AT THE SAME TIME when sleeve measures 1 cm = ⅜" mid under sleeve, decrease 2 stitches every other round 1-1-1-1-2-2-3 times, read DECREASE TIP, then decrease 2 stitches every 12-12-10-7-7-5-5 cm = 4¾"-4¾"-4"-2¾"-2¾"-2"-2" 1-2-3-4-4-5-5 times in total = 32-33-34-35-36-37-38 stitches on needle. Work until sleeve measures 43-44-43-43-40-41-40 cm = 17"-17¼"-17"-17"-15¾"-16⅛"-15¾" from division. Switch to double pointed needles size 6 MM = US 10 and work rib (= knit 2/purl 2) while AT THE SAME TIME increasing 8-11-10-9-12-11-14 stitches evenly on 1st round = 40-44-44-44-48-48-52 stitches. When rib measures 5-5-5-5-6-6-6 cm = 2"-2"-2"-2"-2⅜"-2⅜"-2⅜", bind off with knit over knit and purl over purl. Sleeve measures approx. 48-49-48-48-46-47-46 cm = 19"-19¼"-19"-19"-18"-18½"-18" from division. NECK EDGE: Use circular needle size 6 MM = US 10, pick up stitches around the neck from right side as follows: Begin at one shoulder line and pick up approx. 54-58-62-66-70-74-78 stitches – number of stitches must be divisible by 4. Work rib (= knit 2/purl 2) in the round for 4-4-4-4-5-5-5 cm = 1½"-1½"-1½"-1½"-2"-2"-2". Bind off somewhat loosely with knit over knit and purl over purl. |
|
 |
|
Have you finished this pattern?Tag your pictures with #dropspattern #earthboundsweater or submit them to the #dropsfan gallery. Do you need help with this pattern?You'll find 30 tutorial videos, a Comments/Questions area and more by visiting the pattern on garnstudio.com. © 1982-2026 DROPS Design A/S. We reserve all rights. This document, including all its sub-sections, has copyrights. Read more about what you can do with our patterns at the bottom of each pattern on our site. |
|


With over 40 years in knitting and crochet design, DROPS Design offers one of the most extensive collections of free patterns on the internet - translated to 17 languages. As of today we count 324 catalogs and 12290 patterns - 12280 of which are translated into English (US/in).
We work hard to bring you the best knitting and crochet have to offer, inspiration and advice as well as great quality yarns at incredible prices! Would you like to use our patterns for other than personal use? You can read what you are allowed to do in the Copyright text at the bottom of all our patterns. Happy crafting!
Post a comment to pattern DROPS 260-11
We would love to hear what you have to say about this pattern!
If you want to leave a question, please make sure you select the correct category in the form below, to speed up the answering process. Required fields are marked *.