
Looking for a yarn?


Comments / Questions (6)
![]() Florence wrote:
Florence wrote:
Bonjour. Comment tricote-t-on le jeté sur le rang retour ? Sur les explications de ce modèle, il est dit 2 choses contradictoires : Paragraphe "raglan" : tricoter les jetés à l'envers pour qu'ils forment des trous Sur le diagramme : tricoter le jeté à l'endroit pour former un trou. Du coup, au rang retour, doit-on les tricoter à l'endroit ou à l'envers pour former les trous ? Merci !
28.12.2022 - 14:11DROPS Design answered:
Bonjour Florence, les jetés que l'on fait pour augmenter (= pour le raglan, avant et après chaque A.1) se tricotent torse au rang suivant pour éviter des trous, mais les jetés du diagramme (= point ajouré) se tricotent normalement (à l'endroit), eux doivent former des trous. Bon tricot!
02.01.2023 - 11:18
![]() Marita wrote:
Marita wrote:
Nydelig genser til en flott, eldre dame. Flere av deres oppskrifter kunne med hell ogsaa ha blitt vist med eldre modeller og ikke bare unge og slanke.
22.07.2021 - 00:12
![]() Joelle Mandrillon wrote:
Joelle Mandrillon wrote:
Bonjour, je souhaite tricoter ce pull, je voudrais savoir si l'encolure dos est plus haute que le devant, sur le schéma, on la voit plus haute mais dans les explications, il n'est pas proposé de tricoter de rehausse. Bien cordialement, J. M
19.08.2019 - 14:08DROPS Design answered:
Bonjour Mme Mandrillon, le schéma est standard, dans ce modèle, l'encolure devant et dos seront identiques. Si vous voulez tricoter une réhausse, vous pouvez vous inspirer d'un modèle avec la même tension qui en propose une. Bon tricot!
19.08.2019 - 14:31
![]() Kari wrote:
Kari wrote:
Hvilken størrelse er det på genseren som den yngste modellen har på bildene her? Jeg får ikke antall masker på halsen i mønsteret til å stemme, er genseren på bildet strikket litt annerledes? Jeg vil helst ha samme hals som på bildet.
20.06.2019 - 21:28DROPS Design answered:
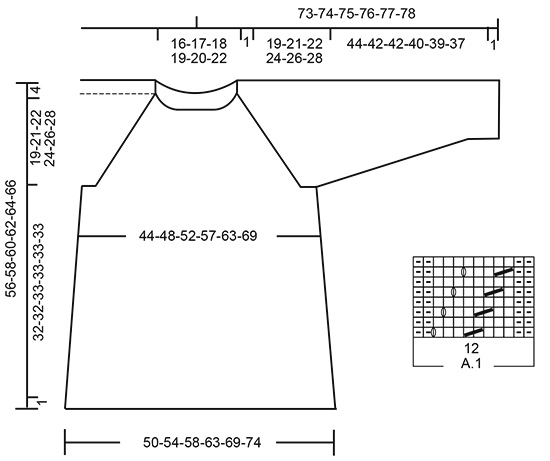
Hei Kari. Du legger opp 101-105-109-113-118-126 masker, og strikker 3 riller (=halskanten). Videre strikkes 2 pinner glattstrikk der du øker 21-21-25-29-32-32 masker jevnt fordelt på 1. pinnen. Så fortsetter du med glattstrikk og A.1 i hver overgang mellom bol og ermer, samtidig som du øker til raglan. Om du ser på målskissen nederst på siden vil du se hvor stor åpningen til halskanten skal være i de ulike størrelsene. God fornøyelse
24.06.2019 - 08:47
![]() Una wrote:
Una wrote:
A really encouraged firsttime reward awaits fresh participants, as the site is updated frequently using campaigns which should appease any returning person.
04.01.2018 - 19:51
![]() Mireille wrote:
Mireille wrote:
Mooie trui die door de raglijn heel netjes lijkt.
23.12.2017 - 08:46
|
|||||||||||||
Peonia#peoniasweater |
|||||||||||||
 |
 |
||||||||||||
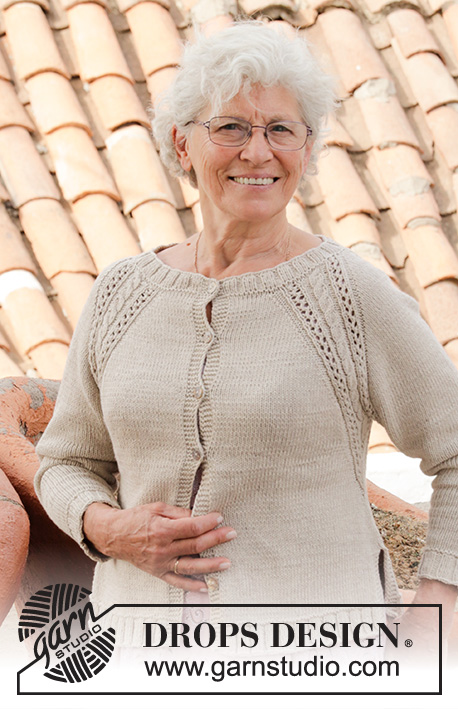
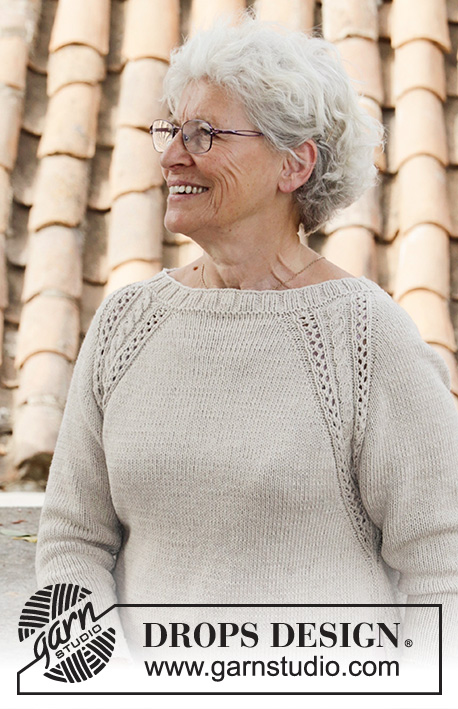
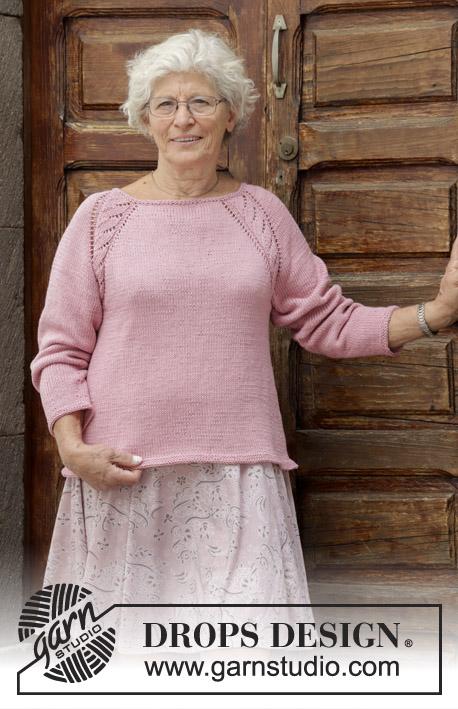
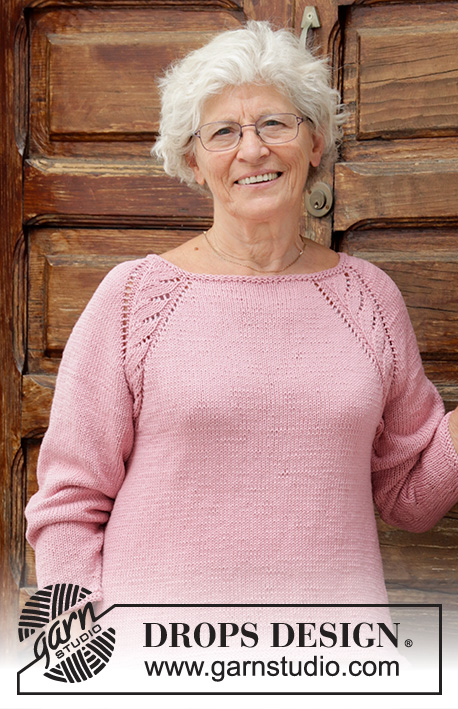
Knitted jumper with lace pattern, raglan and A-shape, worked in the round, top down. Sizes S - XXXL. The piece is worked in DROPS Muskat or Sky.
DROPS 188-34 |
|||||||||||||
|
INFORMATION FOR THE PATTERN: RIDGE/GARTER STITCH (worked in the round): 1 ridge = 2 rounds. Knit 1 round and purl 1 round. PATTERN: Se diagram A.1. The diagram shows all the rows in the pattern seen from the right side. INCREASE/DECREASE TIP (evenly spaced): To work out how to increase/decrease evenly, count the number of stitches you are increasing/decreasing over (e.g. 90 stitches) and divide by the number of increases/decreases to be made (e.g. 32) = 2.8. In this example, increase 1 stitch by making 1 yarn over after approx. every 3rd stitch. On the next round knit the yarn overs twisted to avoid holes. When decreasing, knit approx. every 2nd and 3rd stitch together. RAGLAN: Increase on each side of each repeat of A.1 (= 8 increases on the round). Increase 1 stitch by making 1 yarn over. On the next round purl the yarn overs to leave holes. INCREASE TIP (for sides of body): Start 2 stitches before the marker thread, make 1 yarn over, knit 4 (the marker thread sits in the middle of these 4 stitches), make 1 yarn over (= 2 stitches increased). On the next round knit the yarn overs twisted to avoid holes. DECREASE TIP (for mid under sleeve): Start 3 stitches before the marker thread, knit 2 together, knit 2 (the marker thread sits in the middle of these 2 stitches), slip 1 stitch as if to knit, knit 1, pass the slipped stitch over the knitted stitch (= 2 stitches decreased). ---------------------------------------------------------- JUMPER: The piece is worked in the round with circular needle, top down. The sleeves are worked in the round with double pointed needles. The round begins mid back. YOKE: Cast on 101-105-109-113-118-126 stitches with circular needle size 3.5 mm and Muskat or Sky. Work 3 RIDGES – see description above. Knit 1 round where you increase 21-21-25-29-32-32 stitches evenly on round – read INCREASE/DECREASE TIP = 122-126-134-142-150-158 stitches. Change to circular needle size 4 mm and knit 1 round. Now work pattern as follows: Knit 13-14-16-18-20-22 stitches (= half back piece), make 1 yarn over, A.1 (= 12 stitches), make 1 yarn over, knit 11 stitches (= sleeve), make 1 yarn over, A.1, make 1 yarn over, knit 26-28-32-36-40-44 stitches (= front piece), make 1 yarn over, A.1, make 1 yarn over, knit 11 stitches (= sleeve), make 1 yarn over, A.1, make 1 yarn over, knit 13-14-16-18-20-22 stitches (= half back piece). The first increase to raglan is now finished (= 8 stitches increased on round). REMEMBER THE KNITTING TENSION! Continue the pattern and increase to RAGLAN - see description above, every 2nd round a total of 22-25-27-30-33-36 times (including the first increase) = 298-326-350-382-414-446 stitches. Continue with stocking stitch and pattern A.1 in each transition between body and sleeves until the piece measures 20-22-23-25-27-29 cm from the cast-on edge mid front. The next round is worked as follows: Work the first 41-45-49-54-59-64 stitches (= half back piece), place the next 67-73-77-83-89-95 stitches on a thread (= sleeve), cast on 10-10-12-12-14-16 new stitches under the sleeve, work the next 82-90-98-108-118-128 stitches (= front piece), place the next 67-73-77-83-89-95 stitches on a thread (= sleeve), cast on 10-10-12-12-14-16 new stitches under the sleeve, work the remaining 41-45-49-54-59-64 stitches (= half back piece). Body and sleeves are finished separately. Insert a marker thread here. THE PIECE IS NOW MEASURED FROM HERE! BODY: = 184-200-220-240-264-288 stitches Insert 1 marker thread in each side (i.e. in the middle of the10-10-12-12-14-16 new stitches cast on under the sleeve in each side). Continue in the round with stocking stitch. When the piece measures 4 cm from the separation, increase 2 stitches in each side – read INCREASE TIP (= 4 stitches increased). Increase like this every 12th-12th-14th-14th-14th-14th round a total of 7-7-6-6-6-6 times = 212-228-244-264-288-312 stitches. Continue working until the piece measures 32-32-33-33-33-33 cm from the separation. Change to circular needle size 3.5 mm. Work 3 ridges. Cast off with knit. To avoid a tight cast-off edge you can cast off with a larger needle. The jumper measures approx. 56-58-60-62-64-66 cm from the shoulder down. SLEEVE: Place the 67-73-77-83-89-95 stitches from the thread on the one side of the piece on double pointed needles size 4 mm and, in addition, knit up 1 stitch in each of the 10-10-12-12-14-16 new stitches cast on under the sleeve = 77-83-89-95-103-111 stitches. Insert 1 marker thread in the middle of the 10-10-12-12-14-16 new stitches knitted up (= mid under the sleeve/side of the jumper). Work stocking stitch in the round. When the piece measures 4 cm from the separation decrease 2 stitches mid under the sleeve – read DECREASE TIP. Decrease like this every 6th-5th-4th-4th-3rd-3rd round a total of 15-18-20-22-26-29 times = 47-47-49-51-51-53 stitches. Continue working until the piece measures 44-42-42-40-39-37 cm from the separation. Change to double pointed needles size 3.5 mm. Work 3 ridges. Cast off with knit. To avoid a tight cast-off edge you can cast off with a larger needle. Work the other sleeve in the same way. |
|||||||||||||
Diagram explanations |
|||||||||||||
|
|||||||||||||
 |
|||||||||||||
Have you finished this pattern?Tag your pictures with #dropspattern #peoniasweater or submit them to the #dropsfan gallery. Do you need help with this pattern?You'll find 25 tutorial videos, a Comments/Questions area and more by visiting the pattern on garnstudio.com. © 1982-2025 DROPS Design A/S. We reserve all rights. This document, including all its sub-sections, has copyrights. Read more about what you can do with our patterns at the bottom of each pattern on our site. |
|||||||||||||


With over 40 years in knitting and crochet design, DROPS Design offers one of the most extensive collections of free patterns on the internet - translated to 17 languages. As of today we count 320 catalogues and 12094 patterns translated into English (UK/cm). 12094
We work hard to bring you the best knitting and crochet have to offer, inspiration and advice as well as great quality yarns at incredible prices! Would you like to use our patterns for other than personal use? You can read what you are allowed to do in the Copyright text at the bottom of all our patterns. Happy crafting!
Post a comment to pattern DROPS 188-34
We would love to hear what you have to say about this pattern!
If you want to leave a question, please make sure you select the correct category in the form below, to speed up the answering process. Required fields are marked *.