
Looking for a yarn?


Comments / Questions (36)
![]() Elise Petersen wrote:
Elise Petersen wrote:
Kan man ikke indstille opskrift, så man kan udskrive uden kommentarer. Kommentarer kunne være valgfri. Vh Elise Peyersen
31.07.2019 - 10:13
![]() Ola wrote:
Ola wrote:
Dzień dobry, mam jeszcze pytanie odnośnie rękawów. Nie do końca rozumiem polecenie, że schemat A.2 powinien być w jednej linii nad A.1. Czy to znaczy, że zanim zacznę schemat A.2 powinnam jeszcze przerobić pierwsze oczka rzędu w jakiś inny sposób, tzn. sugerować się jeszcze schematem A.1?
26.06.2019 - 12:23DROPS Design answered:
Witaj Olu! Musisz przerobić 1 oczko prawe ponad schematem A.1, a następnie zacząć wykonywać schemat A.2. Przerabiaj dżersejem oczka na środku pod rękawem, które nie mogą być przerabiane ściegiem fantazyjnym. Powodzenia!
27.06.2019 - 11:22
![]() Ola wrote:
Ola wrote:
Wydaje mi się, że jest błąd w opisie dodawania oczek. Jeśli zostawię 2 oczka przed nitką markerem, a następnie zrobię narzut i 2 oczka prawe, to nitka marker nie znajdzie się między tymi oczkami, tylko za nimi. Czy powinnam w takim razie przerabiać aż zostaje jedno oczko przed markerem, narzut i wtedy oczko prawe, marker, znowu oczko prawe i narzut? Tak by było analogicznie z opisem zamykania oczek.
25.06.2019 - 14:26DROPS Design answered:
Witaj Olu, masz rację tutaj znajduje się błąd, już została zgłoszona korekta. Tutaj dodawaj oczka następująco: Przerabiać aż zostaje 2 oczka przed nitką markerem z boku, wykonać 1 narzut, przerobić 4 oczka prawe (nitka marker znajduje się na środku tych oczek) i wykonać 1 narzut. Pozdrawiamy!
26.06.2019 - 09:17
![]() Ola wrote:
Ola wrote:
Dziękuję za wskazówki. Mam nadzieję, że dobrze zrozumiałam: rękawy robię po prostu zgodnie ze schematem, a jeśli chodzi o tył i przód, to w co drugim okrążeniu, tam gdzie dodaję oczka, muszę przerabiać odpowiednio więcej oczek prawych, czyli (dla rozmiaru S) najpierw mam 24 oczka prawe z tyłu/przodu, później rząd oczek prawych, a później w tym miejscu muszę przerobić 26 o. prawych, 28, 30 itd.. ?
07.06.2019 - 19:47DROPS Design answered:
Witaj Olu, jest dokładnie tak jak piszesz. Na tyle i przodzie liczba oczek będzie się stopniowo zwiększać, tzn. będzie o 2 o. na tyle i 2 o. na przodzie więcej co 2 okrążenia. Oczka na całym swetrze są dodawane zawsze w tym samym okrążeniu, tzn. na rękawach i na przodzie i tyle. Kolejne okrążenie jest już bez dodawania oczek, kolejne z dodawaniem itd. Powodzenia!
07.06.2019 - 21:28
![]() Ola wrote:
Ola wrote:
Zrobiłam 2 ściągacze francuskie na początku i rząd z dodawaniem 8 oczek. Mam 90 oczek zgodnie z opisem. I nie do końca rozumiem co powinnam robić dalej, mam napisane tylko, że rękawy przerabiać schematem A.1 i dodawać oczka. A przód i tył powinnam robić dżersejem? Nie jest to do końca jasne.
01.06.2019 - 18:35DROPS Design answered:
Witaj Olu! Musisz dodawać oczka na reglany tak samo jak w tym okrążeniu, w którym uzyskałaś 90 o. jeszcze 20 razy co 2 okrążenia, aż będziesz miała na drutach 250 o. (rozmiar S). Jak dodawać oczka: dodajesz co 2 okr. 4 oczka na przodzie i tyle (wykonując 1 narzut przed/za 2 o. prawymi z każdej strony schematu A.1) oraz 4 oczka na rękawach (te 4 dodawane o. na rękawach figurują w schemacie A.1, są to te skrajne narzuty). Powodzenia!
03.06.2019 - 11:18
![]() Laura wrote:
Laura wrote:
Ich habe eine Frage zur Zunahme an den Nähten. Gehören der erste und letzte Umschlag von A1 zu der beidseitigen Zunahme oder muss man 2 Umschläge hintereinander stricken? Danke!
16.04.2019 - 12:46DROPS Design answered:
Liebe Laura, die Maschen, die an den Ärmeln für den Raglan zugenommen werden, sind in A.1 eingezeichnet, dh keine zusätlichen Umschläge für den Ärmel stricken, nur fur Rumpfteil. Viel Spaß beim stricken!
23.04.2019 - 10:29
![]() Maria wrote:
Maria wrote:
Hola buen día ! les agradecería me indiquen cómo se trabaja la manga a partir que se toman los puntos del gancho auxiliar y se tiene que agregar el patrón A.2. Se tiene que agregar a esos puntos que se levantan en el centro de la manga. No entiendo como me aseguro que el patrón A.2 esté alineado con el patrón A.1.
23.03.2019 - 15:50DROPS Design answered:
Hola María. La manga se trabaja sobre los puntos que estaban apartados en un gancho auxiliar y los puntos recogidos bajo la manga. Todos los puntos pasan a una misma aguja circular. Para ajustar el diagrama A.2 para continuar, hay que empezar en la fila siguiente desde la que se terminó la parte de la manga en el canesú. Los puntos que no entren en el diagrama A.2 se trabajan en punto jersey en el centro bajo la manga.
24.03.2019 - 20:31
![]() Dilou wrote:
Dilou wrote:
Bonjour ,je trouve ce modele tres joli mais je voudrais l adapter en laine du groupe B style coton pour mi saison , est ce faisable ? Merci
13.04.2018 - 08:10DROPS Design answered:
Bonjour Dilou, ce modèle se tricote avec 2 fils du groupe A (= ou 1 fil du groupe C), si vous souhaitez le tricoter avec 1 fil du groupe B, il vous faudra tout recalculer en fonction de votre échantillon, vous pourrez probablement vous aider d'un modèle similaire dans un fil du groupe B. Bon tricot!
13.04.2018 - 08:29
![]() Mie wrote:
Mie wrote:
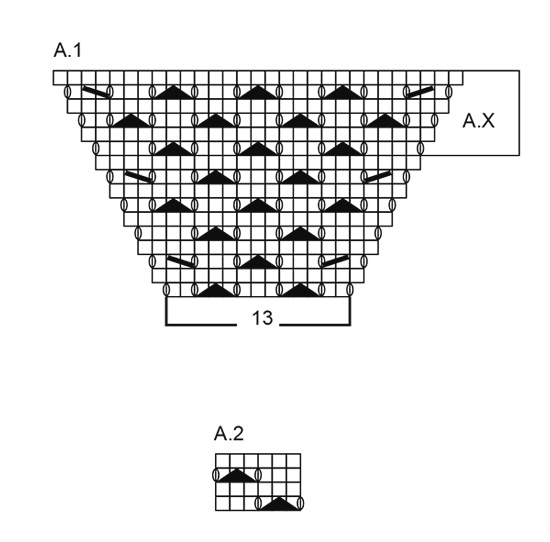
Andet symbol i forklaringen til diagram A1 ligner på skærmen en firkant med smal kant og når man udskriver står der blot “symbol”. Er det mon den trekant der strækker sig over 3 masker/firkanter på selve diagrammet ? (Sådan virker det ud fra forklaringen = tag 1 maske løs af pinden, strik 2 masker ret sammen, løft den løse maske over maskerne som blev strikket sammen)
08.04.2018 - 23:33DROPS Design answered:
Hei Mie. Ja det stemmer at andre symbol er trekanten som går over 3 masker. God fornøyelse
09.04.2018 - 10:36
![]() Fauchet wrote:
Fauchet wrote:
Bonjour, je ne comprends pas où mettre les marqueurs et où faire les augmentations dos/devant et manches. De plus quand vous dites d’augmenter tous les 2 rangs 8 mailles, que faire avec A1? Augmenter tous les rangs ou tous les 2 rangs? Merci pour votre réponse ! Et bravo pour ce site merveilleux!
28.03.2018 - 13:16DROPS Design answered:
Bonjour Mme Fauchet, on va augmenter pour le raglan de chaque côté des 2 m jersey (à la transition entre chaque pièce). Les augmentations des manches figurent dans le diagramme, il faut simplement faire celles du dos/devant en faisant 1 jeté après 2 m end au début du dos/devant et avant les 2 m end à la fin du dos/devant, on va ainsi augmenter 8 m par tour d'augmentations soit tous les 2 tours. Bon tricot!
28.03.2018 - 16:02
|
||||||||||||||||
Bejeweled#bejeweledsweater |
||||||||||||||||
 |
 |
|||||||||||||||
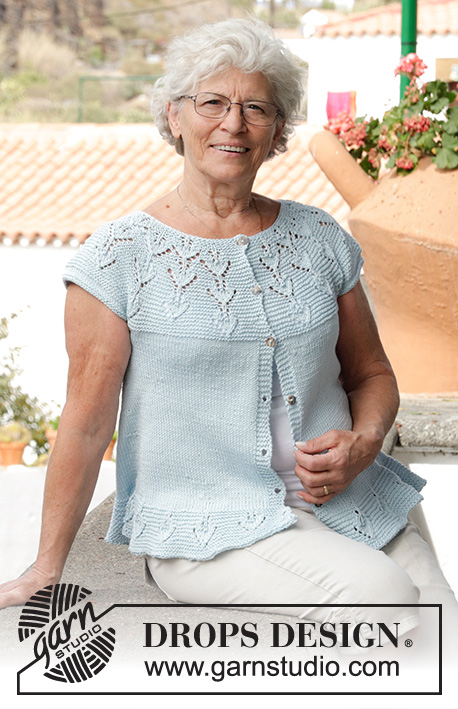
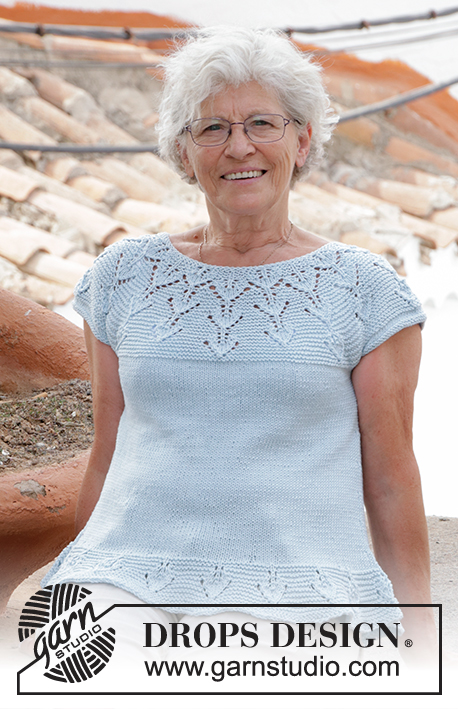
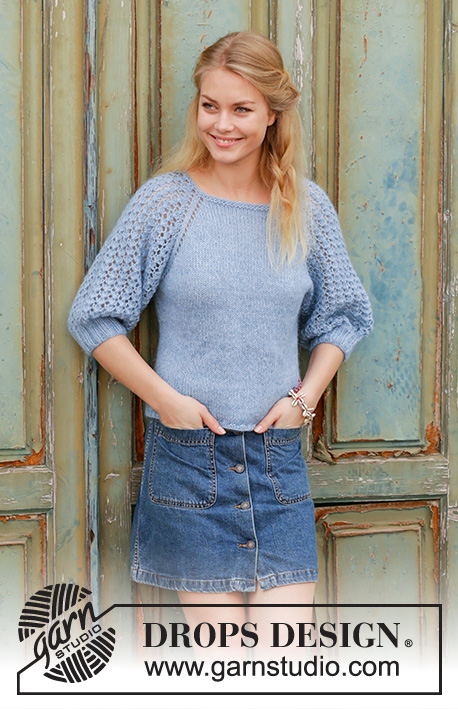
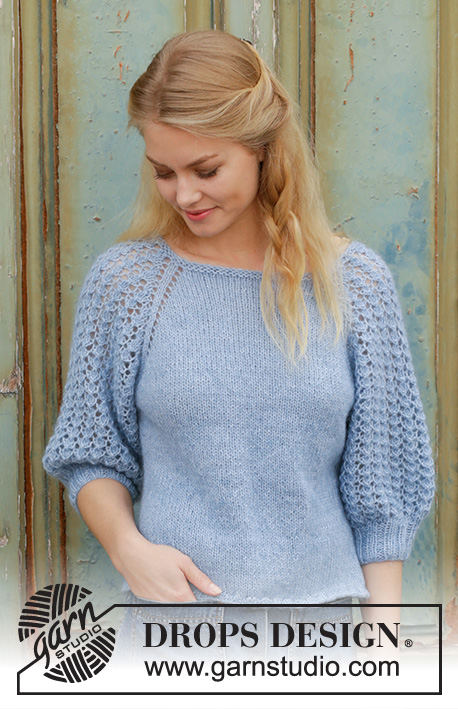
Jumper with raglan and lace pattern on sleeves, worked top down. Sizes S - XXXL. The piece is worked in DROPS Alpaca and DROPS Kid-Silk.
DROPS 186-35 |
||||||||||||||||
|
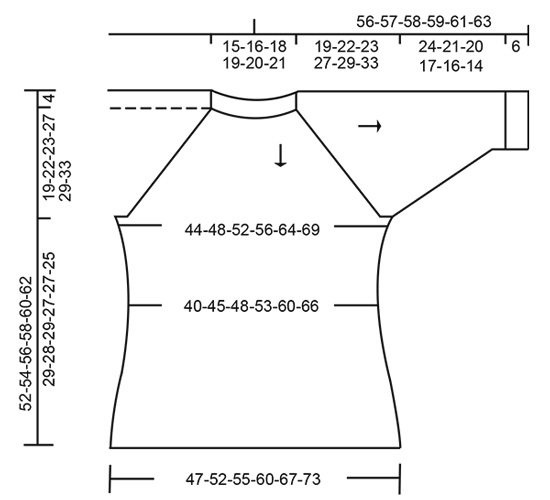
INFORMATION FOR THE PATTERN: RIDGE/GARTER STITCH (worked in the round): 1 ridge = 2 rounds. Knit 1 round and purl 1 round. INCREASE TIP (for sides): Work until there are 2 stitches left before the marker thread in the side. Make 1 yarn over, knit 4 stitches (the marker thread sits in the middle of these 4 stitches) and make 1 yarn over. On the next round purl the yarn overs twisted to avoid holes. DECREASE TIP: Decrease 1 stitch on each side of the marker thread as follows: Work until there are 3 stitches left before the marker thread, slip 1 stitch as if to knit, knit 1, pass the slipped stitch over, knit 2 stitches (the marker thread sits in the middle of these 2 stitches), knit the next 2 stitches together. ---------------------------------------------------------- The jumper is worked in the round with circular needle, top down. The start of the round = mid back. The sleeves are worked in the round with double pointed needles/short circular needle. JUMPER: Cast on 82-86-90-94-98-102 stitches with circular needle size 5 mm and 1 strand Alpaca and 1 strand Kid-Silk. Work 2 RIDGES – see description above. Then work as follows; the round starts mid back: Knit 12-13-14-15-16-17, 1 yarn over, knit 2, A.1 (= 13 stitches = sleeve), knit 2, 1 yarn over, knit 24-26-28-30-32-34, 1 yarn over, knit 2, A.1 (= sleeve), knit 2, 1 yarn over, knit 12-13-14-15-16-17. You have now increased 8 stitches = 90-94-98-102-106-110 stitches. Continue A.1 on the sleeves and increase 1 stitch on each side of the 2 stitches in stocking stitch – the stitches which are increased on the sleeves are drawn in A.1, towards back/front piece you increase with 1 yarn over as described above. The yarn overs are knitted on the next round to leave holes. Increase 8 stitches every 2nd round, increase a total of 21-24-25-28-32-36 times = 250-278-290-318-354-390 stitches. When A.1 has been worked 1 time in height, continue the pattern in the same way upwards, A.X shows how the outermost stitches in A.1 are worked, these 6 rounds are repeated upwards. When the increases are completed, work as follows: Work 34-38-40-44-49-54 stitches (= half the back piece), place the next 57-63-65-71-79-87 stitches on 1 thread (= sleeve), cast on 6-6-8-8-10-10 new stitches on the needle (= under the sleeve), work 68-76-80-88-98-108 stitches (= front piece), place the next 57-63-65-71-79-87 stitches on 1 thread (= sleeve), cast on 6-6-8-8-10-10 new stitches on the needle (= under the sleeve) and work the remaining 34-38-40-44-49-54 stitches (= half the back piece). BODY: = 148-164-176-192-216-236 stitches. THE PIECE IS NOW MEASURED FROM HERE! Insert 1 marker thread in each side, in the middle of the new stitches cast on. Continue in the round with stocking stitch. When the piece measures 3 cm decrease 1 stitch on each side of the marker threads – READ DECREASE TIP! Decrease every 4-4-4-3-3-2½ cm a total of 3 times = 136-152-164-180-204-224 stitches. When the piece measures 15-14-15-13-13-11 cm increase 1 stitch on each side of the marker threads – READ INCREASE TIP! Increase every 2 cm a total of 6 times = 160-176-188-204-228-248 stitches. When the piece measures 28-27-28-26-26-24 cm, work 2 rounds rib: Knit 2 /purl 2. Then cast off with knit over knit and purl over purl. SLEEVE: The piece is worked in the round with short circular needle/double pointed needles. THE PIECE IS NOW MEASURED FROM HERE! Place the 57-63-65-71-79-87 stitches from the thread on the one side of the piece on short circular needle size 5 mm and in addition knit up 1 stitch in each of the 6-6-8-8-10-10 stitches mid under sleeve = 63-69-73-79-89-97 stitches. Work A.2, the stitches which do not fit into the pattern mid under sleeve are worked in stocking stitch. Make sure pattern A.2 is in line with pattern A.1. When the sleeve measures 24-21-20-17-16-14 cm knit 1 round where you decrease 15-21-21-27-33-41 stitches evenly on round = 48-48-52-52-56-56 stitches. Work rib: Knit 2/purl 2 for 6 cm. Then cast off with knit over knit and purl over purl, the sleeve measures 30-27-26-23-22-20 cm from the separation. Work the other sleeve in the same way. |
||||||||||||||||
Diagram explanations |
||||||||||||||||
|
||||||||||||||||
 |
||||||||||||||||
 |
||||||||||||||||
Have you finished this pattern?Tag your pictures with #dropspattern #bejeweledsweater or submit them to the #dropsfan gallery. Do you need help with this pattern?You'll find 28 tutorial videos, a Comments/Questions area and more by visiting the pattern on garnstudio.com. © 1982-2025 DROPS Design A/S. We reserve all rights. This document, including all its sub-sections, has copyrights. Read more about what you can do with our patterns at the bottom of each pattern on our site. |
||||||||||||||||


With over 40 years in knitting and crochet design, DROPS Design offers one of the most extensive collections of free patterns on the internet - translated to 17 languages. As of today we count 320 catalogues and 12093 patterns translated into English (UK/cm). 12093
We work hard to bring you the best knitting and crochet have to offer, inspiration and advice as well as great quality yarns at incredible prices! Would you like to use our patterns for other than personal use? You can read what you are allowed to do in the Copyright text at the bottom of all our patterns. Happy crafting!
Post a comment to pattern DROPS 186-35
We would love to hear what you have to say about this pattern!
If you want to leave a question, please make sure you select the correct category in the form below, to speed up the answering process. Required fields are marked *.