Comments / Questions (48)
![]() Leentje wrote:
Leentje wrote:
Hallo, Kan iemand me helpen ik snap niets van de uitleg voor de meerderingen voor de raglan en de mouwen .alvast bedankt
12.03.2024 - 21:49DROPS Design answered:
Dag Leentje,
Kan je aangeven welke maat je aan het breien bent en wat je precies niet begrijpt? Er staat per maat (reeks getallen) aangegeven hoe vaak je moet meerderen. Soms moet je eerst een aantal keren op iedere naald meerderen en dan een aantal keren op iedere 4e naald. Daarnaast kunnen de meerderingen op de panden anders verdeeld zijn dan op de mouwen. Het kan soms helpen om dit even uit te schrijven op ruitjespapier.
14.03.2024 - 22:14
![]() Mia wrote:
Mia wrote:
Hallo! Betreff Rumpfteil: Habe nun 160 Maschen.Soll nun 36 Masch gleichmäßig verteilt zunehmen. 160 : 36 =4,44444. Habe probiert nach jeder 4.M zuzunehmen,dadurch sind zu viele Maschen auf der Nadel,dann habe ich es mit nach jeder 4. und 5. Masche probiert, paßt auch nicht,dann nach jeder 3. und 4.Masche geht nicht auf,nach jeder 5.Masche fehlen 5 Maschen,damit es dann insgesamt 196 Maschen sein sollen. Nach welcher Masche soll ich zunehmen? VG Mia
07.02.2022 - 17:54DROPS Design answered:
Liebe Mia, Sie sollen abwechlslungsweise nach ca jeder 5. und nach jeder 4. Masche zunehmen, hier lesen Sie mehr. Viel Spaß beim stricken!
08.02.2022 - 08:41
![]() Mia wrote:
Mia wrote:
Hallo ! Betreff: Rumpfteil: "Bei einer Länge von 17 cm ab dem Markierer je 1 Masche beidseitig Rippenmusters an beiden Seiten zunehmen " - Ist der seitliche Markierer von "Bei einer Länge von 2 cm ab dem Markierer je 1 Masche beidseitig des Rippenmusters an beiden Seiten abnehmen " gemeint? Danke
06.02.2022 - 11:20DROPS Design answered:
Liebe Mia, davor haben beidseitig Rippenmuster an beiden Seiten abgenommen, jetzt wird es beidseiting Rippenmuster an beiden Seiten zugenommen - so wird das Top tailiert. Viel Spaß beim stricken!
07.02.2022 - 10:20
![]() Mia wrote:
Mia wrote:
Hi ! Ich habe jetzt für Größe M nach allen Raglanzunahmen 232 Maschen auf der Nadel,meine Arbeit mißt aber nur 16cm statt 18cm. Soll ich die nächsten 2cm über alle Maschen rechts stricken,sodaß ich auf auf das Maß von 18cm komme oder soll ich gleich weiter verfahren mit "Die nächste Runde wie folgt stricken: Die ersten 33-36-37-43-48-53 Maschen wie zuvor stricken (= ½ Rückenteil) ....?
02.02.2022 - 17:10DROPS Design answered:
Liebe Mia, wenn Sie genau in der Mitte vorne messen, und trotzdem 2 cm fehlen, ist sicher Ihre Maschenprobe in der Höhe nicht richtig, dann stricken Sie diese 2 cm weiter genauso wie zuvor, aber nun ohne Zunahmen. Viel Spaß beim stricken!
03.02.2022 - 08:32
![]() Mia wrote:
Mia wrote:
Hallo Drops Team ! Habe nun alle Raglan Zunahmen ( 19x 4M ) und für den Ärmelzunahemn ( 14x 4m + 3x in jeder 4.Rd = 12M ) gearbeitet. Nun sind 224 M insgesamt auf der Nadel. Ich schreibe mir jede gestrickte Runde auf und zähle immer wieder und es werden keine 232 M in der Größe M? Woran kann das liegen? Vielen lieben Dnak für die Hilfe!
28.01.2022 - 15:47Mia answered:
Habe den Fehler gefunden.Gür Größe M : \"VORDER- UND RÜCKENTEIL: In jeder Runde insgesamt 2 x zunehmen,...\r\nDanke euch trotzdem für die bisherige Hilfe.
30.01.2022 - 12:03
![]() Mia wrote:
Mia wrote:
Hi ! Muss die Erhöhung unbedingt gestrickt werden? VG Mia
26.01.2022 - 11:42DROPS Design answered:
Liebe Mia, dank der Erhöhung wird der Halsausschnitt höher beim Rücken als beim Vorderteil, wenn Sie aber keine Erhöhung stricken, dann sind Halsausschnitt am Rücken- und Vorderteil gleich. Viel Spaß beim stricken!
26.01.2022 - 13:26
![]() Mia wrote:
Mia wrote:
Hallo! .In der ersten Runde,beidseitig an A.1, je 1 Masche zunehmen.Nach A.1 kommen gleich die Maschen für den Ärmel, Diese zugenommen Maschen soll man zu den Ärmel- und Vorder-/Rückenteil hinzufügen.So würde ich gleich in der ersten Runde je Ärmelseite je 1 M (Zunahmen vom Raglan) schon mehr haben.In der zweiten Runde ist erst die Ärmelzunahme,so hätte ich nochmal 2 M mehr also = 8M? Ist das richtig so?
17.01.2022 - 20:31DROPS Design answered:
Liebe Mia, die Raglanzunahmen entstehen an einem unterschiedlichen Rythmus, dh es wird zurest in jeder Runde beim Vorder- + Rückentil zugenommen aber zuerst in jeder 2. Runde bei den Ärmeln zugenommen, dh es wird entweder 4 Maschen (= nur Vorder- + Rückenteil) oder 8 Maschen (Vorder-, Rückenteil und Ärmel) zugenommen. Viel Spaß beim stricken!
18.01.2022 - 10:53
![]() Mia wrote:
Mia wrote:
Hi! Bin beim Text Kragen/ Vorder- und Rückenteil : In jeder Runde insgesamt 2 Maschen zunehmen. Wo soll ich die jeweils 1M beim Rücken- und Vorderteil zunehmen? Am Anfang, mittig oder am Ende des Vorder- bzw. Rückenteils?Ist diese Zunahme immer 1 Umschlag oder eine verschränkte Masche aus dem Querfaden?Diese Anleitung liest sich für mich etwas schwierig,ist aber nicht die erste Raglananleitung die ich nacharbeite. Danke für eure Hilfe.
26.11.2021 - 19:56DROPS Design answered:
Liebe Mia, dies sind die Raglanzunhamen, die beim Vorder- + Rückenteil und bei den Ärmeln gestrickt werden - siehe RAGLANZUNAHMEN, dh Sie werden vor A.1 oder/und nach A.1 mit 1 Umschlag zunehmen - wie oft ist es je nach der Größe (siehe vorrige Antwort) - Diese Lektion zeigt, wie mann einen Raglanpullover von oben nach unten strickt, aber beachten Sie nur, daß beim dem Top hier werden die Zunahmen immer je 8 M sein aber sie kann sicher Ihnen helfen, um zu sehen, wie man so einen Modell strickt. Viel Spaß beim stricken!
29.11.2021 - 07:32
![]() Mia wrote:
Mia wrote:
Hallo!Ich stricke die Größe: M,da ich etwas fest stricke."VORDER- UND RÜCKENTEIL:In jeder Runde insgesamt 2 x zunehmen,dann in jeder 2. Runde insgesamt 19 x.\"Ist damit gemeint,daß ich diese Zunahmen mittig beim Rumpf- und Vorderteil einarbeiten soll?Da ja schon vor und nach A.1 ein Umschlag gearbeitet wurde,sonst hätte man beim Vorder- und Rumpfteil 2 Umschläge nebeneinander,was mir sehr merkwürdig vorkommt.Danke.
25.11.2021 - 16:48DROPS Design answered:
Liebe Mia, die Raglanzunahmen werden an einem unterschiedlichen Rythmus beim Vorder- & Rückenteil und bei den Ärmeln gestrickt; in M sollen Sie beim Vorder- + Rückenteil in jeder Rd 2 x + in jeder 2. Rd19 x und gleichzeitig bei den Ärmeln in jeder 2. Rd 14 x dann in jeder 4. Rd 3 x - so werden Sie entweder 8 Maschen pro Rd zunehmen oder nur 4 (z.B. beim Vorder- + Rückenteil in jeder Rd wenn nur in 2. Rd bei den Ärmeln zugenommen wird). Viel Spaß beim stricken!
26.11.2021 - 07:12
![]() Mia wrote:
Mia wrote:
Hi ! Habe nun den Kragen mit der Erhöhung fertig. Und zur kurzen Nadel 5.00mm gewechselt. Dann geht es wie folgt weiter:"Die nächste Runde wie folgt stricken: 12-12-13-13-14-14 Maschen glatt rechts (= ½ Rückenteil)."Meine Frage: Sollte da nicht das "Vorderteil gemeint sein? Da "Rückenteil in dem o.g. Absatz zweimal vorkommt. Danke euch im voraus. Mia
18.11.2021 - 21:07DROPS Design answered:
Liebe Mia, die Runden beginnen in der Mitte vom Rückenteil, deshalb stricken Sie zuerst die Hälfte von der Maschen (= Ende vom Rückenteil) und am Ende der Runde stricken Sie die andere Hälfte der Maschen (= Anfang vom Rückenteil), dh z.B. je 12 M für jede Hälfte in 1. + 2. Größe = 24 M für das Rückenteil ound zwischen beiden A.1 haben Sie 24 M für das Vorderteil. Viel Spaß beim stricken!
19.11.2021 - 07:22
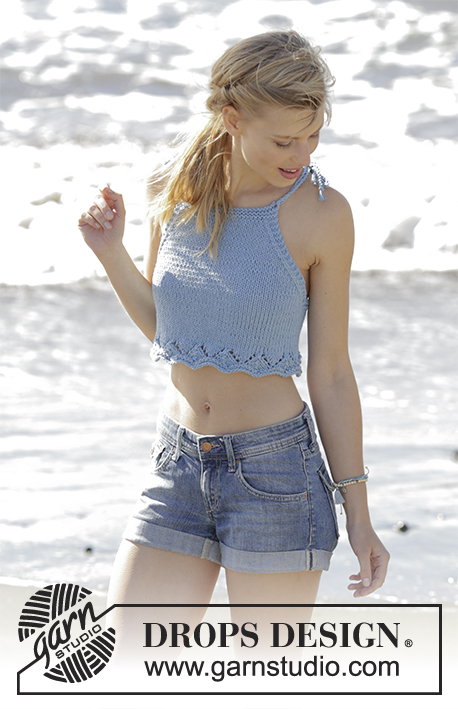
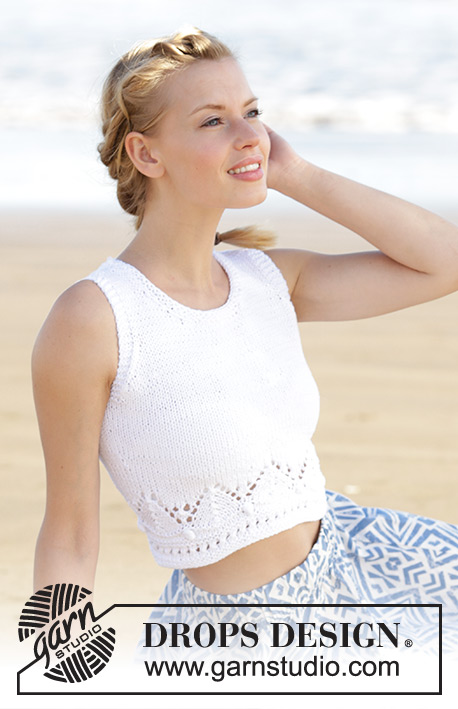
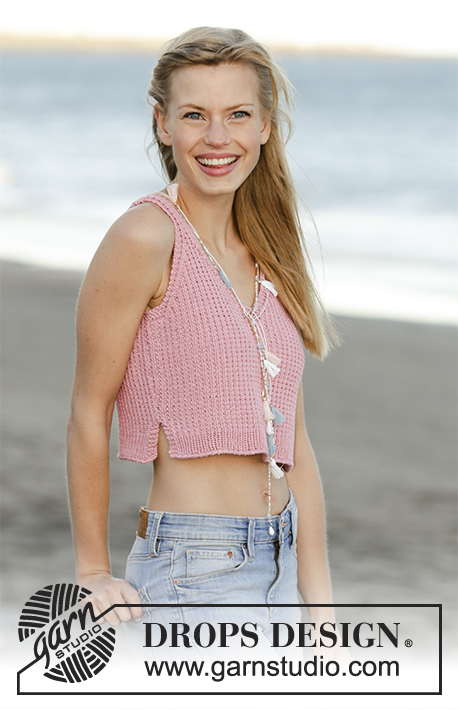
Summer Foam#summerfoamtop |
|||||||||||||
 |
 |
||||||||||||
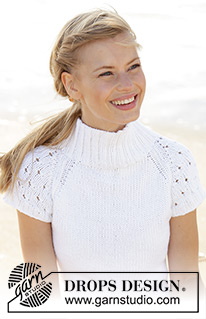
Fitted top with high neck, raglan and lace pattern on the sleeves, worked top down in DROPS Paris. Sizes S - XXXL.
DROPS 178-46 |
|||||||||||||
|
RIDGE/GARTER STITCH (worked in the round): 1 ridge = 2 rounds. Knit 1 round and purl 1 round. ELEVATION: Start from the right side and work rib until you have worked 7-7-11-11-11-11 stitches past the marker, turn, tighten the strand and work 14-14-22-22-22-22 stitches rib back again. Turn, tighten the strand and work 22-22-30-30-30-30 stitches rib, turn, tighten the strand and work 30-30-38-38-38-38 stitches rib back again. Turn, tighten the strand and work 38-38-46-46-46-46 stitches rib, turn, tighten the strand and work 46-46-54-54-54-54 stitches rib back again. Turn and work rib towards mid back. PATTERN: See diagrams A.1 to A.3. The diagrams show all the rows in the pattern seen from the right side. A.2 is shown in size S – A.2 is worked in the same way in the other sizes, i.e. the holes continue outwards in the same way, but make sure you do not make a hole close into the raglan line. 1 repeat with holes in width and height is shown in A.2A. DECREASE/INCREASE TIP (evenly spaced): To work out how to decrease/increase evenly, count the total number of stitches on the needle (e.g. 112 stitches) and divide by the number of decreases/increases to be made (e.g. 32) = 3.5. In this example, you work alternately approx. every 2nd and 3rd stitch together and every 3rd and 4th stitch together (if you are increasing make 1 yarn over after alternately approx. every 3rd and 4th stitch). RAGLAN: Increase to raglan on each side of A.1 in each transition between body and sleeves. Increase 1 stitch by making 1 yarn over, on the next round, knit the yarn overs twisted to prevent holes. The increased stitches are worked in stocking stitch on the body and in A.2 on the sleeves. NOTE: Increases are different on body and sleeves as explained in the text. DECREASE TIP (for the sides of the body): Decrease 1 stitch on each side of the 6-6-10-10-10-10 rib stitches in each side. Decrease as follows before the 6-6-10-10-10-10 rib stitches: Knit 2 together (= 1 stitch decreased). Decrease as follows after the 6-6-10-10-10-10 rib stitches: Slip 1 stitch as if to knit, knit 1, pass the slipped stitch over the knitted stitch (= 1 stitch decreased). INCREASE TIP (for the sides of the body): Increase 1 stitch on each side of the 6-6-10-10-10-10 rib stitches in each side. Increase 1 stitch by making 1 yarn over, on the next round knit the yarn overs twisted to prevent holes. ---------------------------------------------------------- TOP: The piece is worked in the round with circular needle and worked top down. NECK: Cast on 112-112-120-120-128-128 stitches on short circular needle size 4 mm and Paris. Knit 1 round. Insert 1 marker at the beginning of the round = mid back. The next round is worked as follows: * Knit 1, purl 2, knit 1 *, repeat from *-* the whole round. Continue with rib in this way for 8 cm. For a better fit you can now work an ELEVATION in the back of the neck – see description above. After the elevation knit 1 round where you decrease 32-32-36-36-40-40 stitches evenly spaced along the round – READ DECREASE/INCREASE TIP = 80-80-84-84-88-88 stitches. Change to short circular needle size 5 mm and work the next round as follows: 12-12-13-13-14-14 stitches stocking stitch (= ½ the back piece), A.1 (= 6 stitches in the raglan line), A.2 (= 4 stitches on the sleeve), A.1 (= 6 stitches in the raglan line), 24-24-26-26-28-28 stitches stocking stitch (= front piece), A.1 (= 6 stitches in the raglan line), A.2 (= 4 stitches on the sleeve), A.1 (= 6 stitches in the raglan line) and 12-12-13-13-14-14 stitches stocking stitch (= ½ the back piece). READ THE WHOLE OF THE NEXT SECTION BEFORE CONTINUING! Continue with stocking stitch on the front and back pieces, A.1 in each transition between body and sleeves and A.2 on each sleeve (see the description of A.2 under PATTERN). REMEMBER THE KNITTING TENSION! AT THE SAME TIME on the first round start the increases to RAGLAN – see description above. The increases are different on the front/back pieces and the sleeves - NOTE: In size L start the increases for the sleeves on the first round, but for the front and back pieces, work 2 rounds before starting the increases: FRONT AND BACK PIECE: Increase every round a total of 0-2-0-5-9-14 times, then every 2nd round a total of 18-19-21-22-22-22 times. SLEEVES: Increase every 2nd round a total of 12-14-16-20-26-29 times and then every 4th round a total of 3-3-3-2-0-0 times. After all the increases to raglan, there are 212-232-244-280-316-348 stitches on the needle and the piece measures approx. 16-18-20-22-24-26 cm (measured mid front after the rib in the neck). The next round is worked as follows: Work the first 33-36-37-43-48-53 stitches as before (= ½ the back piece), place the next 40-44-48-54-62-68 stitches on 1 thread (= left sleeve), cast on 6-6-10-10-10-10 new stitches on the needle (= in the side mid under sleeve), work the next 66-72-74-86-96-106 stitches as before (= front piece), place the next 40-44-48-54-62-68 stitches on 1 thread (= right sleeve), cast on 6-6-10-10-10-10 new stitches on the needle (= in the side under the sleeve) and work the remaining 33-36-37-43-48-53 stitches as before (= ½ the back piece). BODY: = 144-156-168-192-212-232 stitches. Insert 1 marker in the side – THE PIECE IS NOW MEASURED FROM HERE! Work stocking stitch in the round, but over the 6-6-10-10-10-10 stitches in each side work 2 RIDGES – see description above. When2 ridges have been worked in each side work rib over these 6-6-10-10-10-10 stitches in each side as follows: S + M: Work A.1 (= 6 stitches), L + XL + XXL + XXXL: Work A.3 (= 10 stitches) – the other stitches are continued in stocking stitch. When the piece measures 2 cm from the marker decrease 1 stitch on each side of the rib section in each side – READ DECREASE TIP (= 4 stitches decreased). Decrease in this way every 6th round a total of 4 times in each side = 128-140-152-176-196-216 stitches. When the piece measures 17 cm from the marker increase 1 stitch on each side of the rib section in each side – READ INCREASE TIP (= 4 stitches increased). Increase in this way every 6th-6th-6th-5th-5th-5th round a total of 5-5-5-6-6-6 times in each side = 148-160-172-200-220-240 stitches. When the piece measures 29 cm from the marker, knit 1 round where you increase 36-36-36-40-44-48 stitches evenly along the round – READ DECREASE/INCREASE TIP = 184-196-208-240-264-288 stitches. Change to circular needle size 4 mm and work rib in the round (= knit 2 / purl 2). When the rib measures 5 cm (or desired length) change back to circular needle size 5 mm before casting off with knit over knit and purl over purl. SLEEVE EDGE: Place the 40-44-48-54-62-68 stitches from the one thread in one side of the piece on double pointed needles size 4 mm, in addition, knit up 1 stitch in each of the 6-6-10-10-10-10 stitches mid under the sleeve = 46-50-58-64-72-78 stitches on the needles. Knit 1 round where you increase 10-10-10-12-12-14 stitches evenly along the round = 56-60-68-76-84-92 stitches. Continue by working rib (= knit 2 / purl 2). When the sleeve edge measures 2 cm, LOOSELY cast off with knit over knit and purl over purl. Work sleeve edge around the other armhole in the same way. |
|||||||||||||
Diagram explanations |
|||||||||||||
|
|||||||||||||
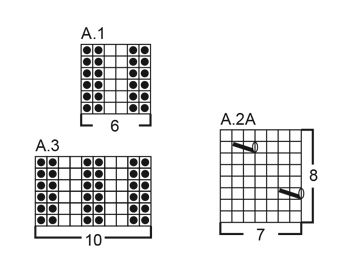 |
|||||||||||||
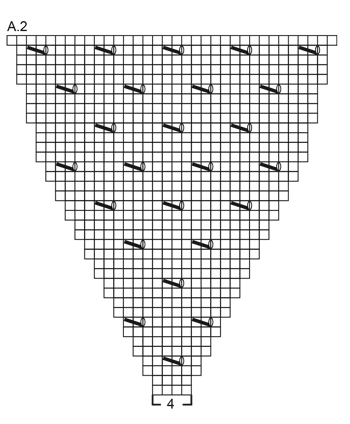 |
|||||||||||||
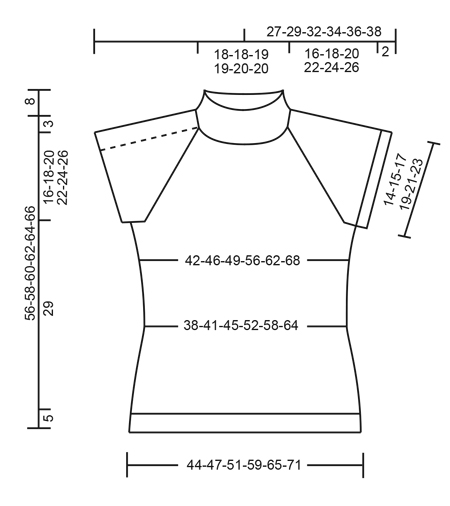 |
|||||||||||||
Have you finished this pattern?Tag your pictures with #dropspattern #summerfoamtop or submit them to the #dropsfan gallery. Do you need help with this pattern?You'll find 28 tutorial videos, a Comments/Questions area and more by visiting the pattern on garnstudio.com. © 1982-2025 DROPS Design A/S. We reserve all rights. This document, including all its sub-sections, has copyrights. Read more about what you can do with our patterns at the bottom of each pattern on our site. |
|||||||||||||






Post a comment to pattern DROPS 178-46
We would love to hear what you have to say about this pattern!
If you want to leave a question, please make sure you select the correct category in the form below, to speed up the answering process. Required fields are marked *.